Leaderboard


Popular Content
Showing content with the highest reputation since 10/01/2021 in all areas
-
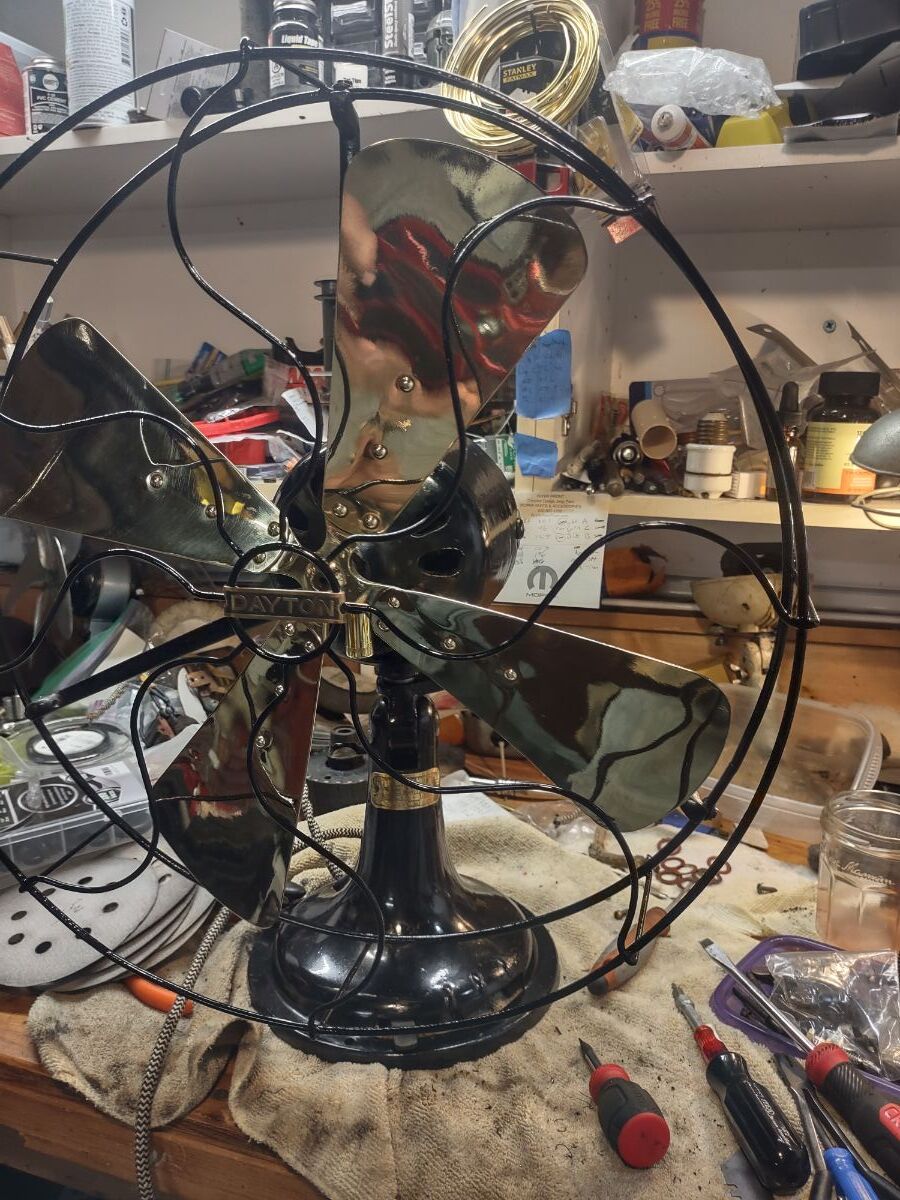
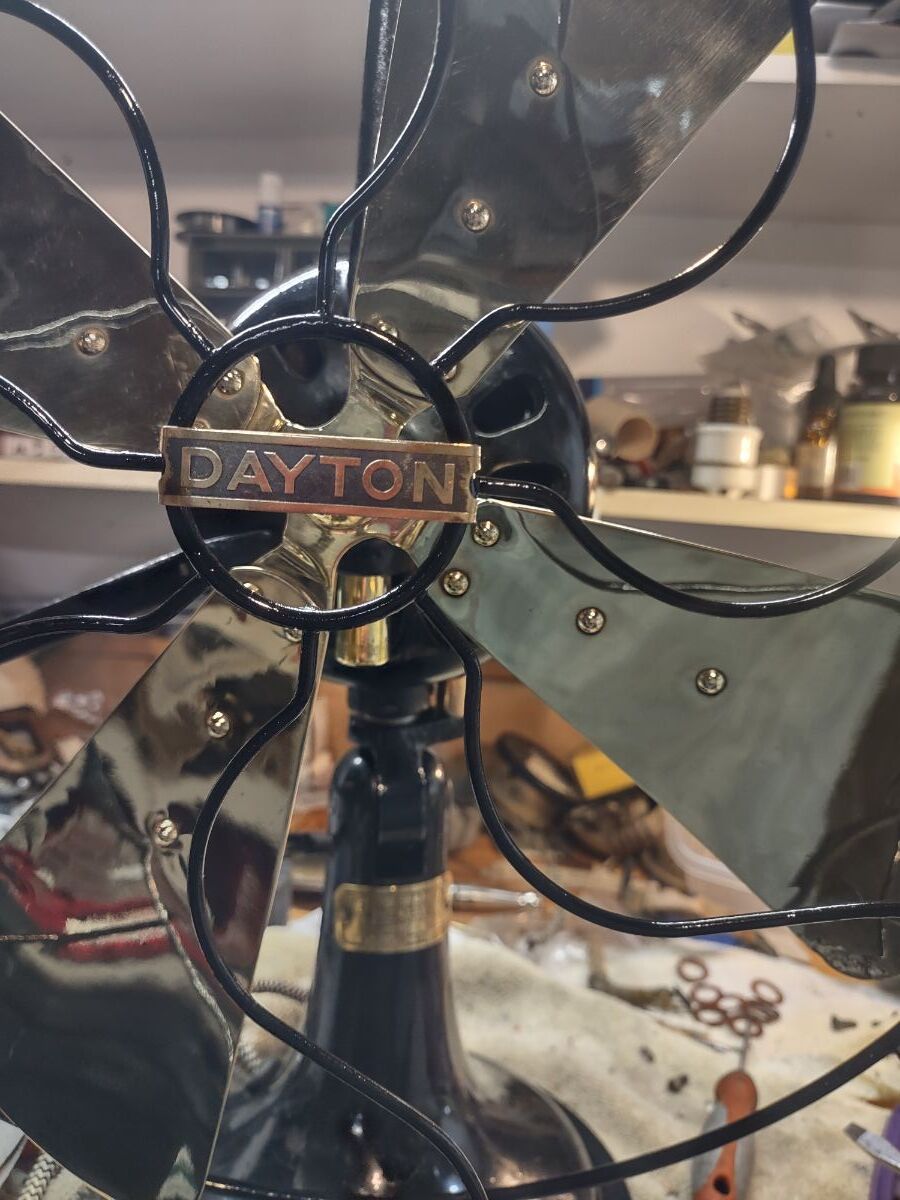
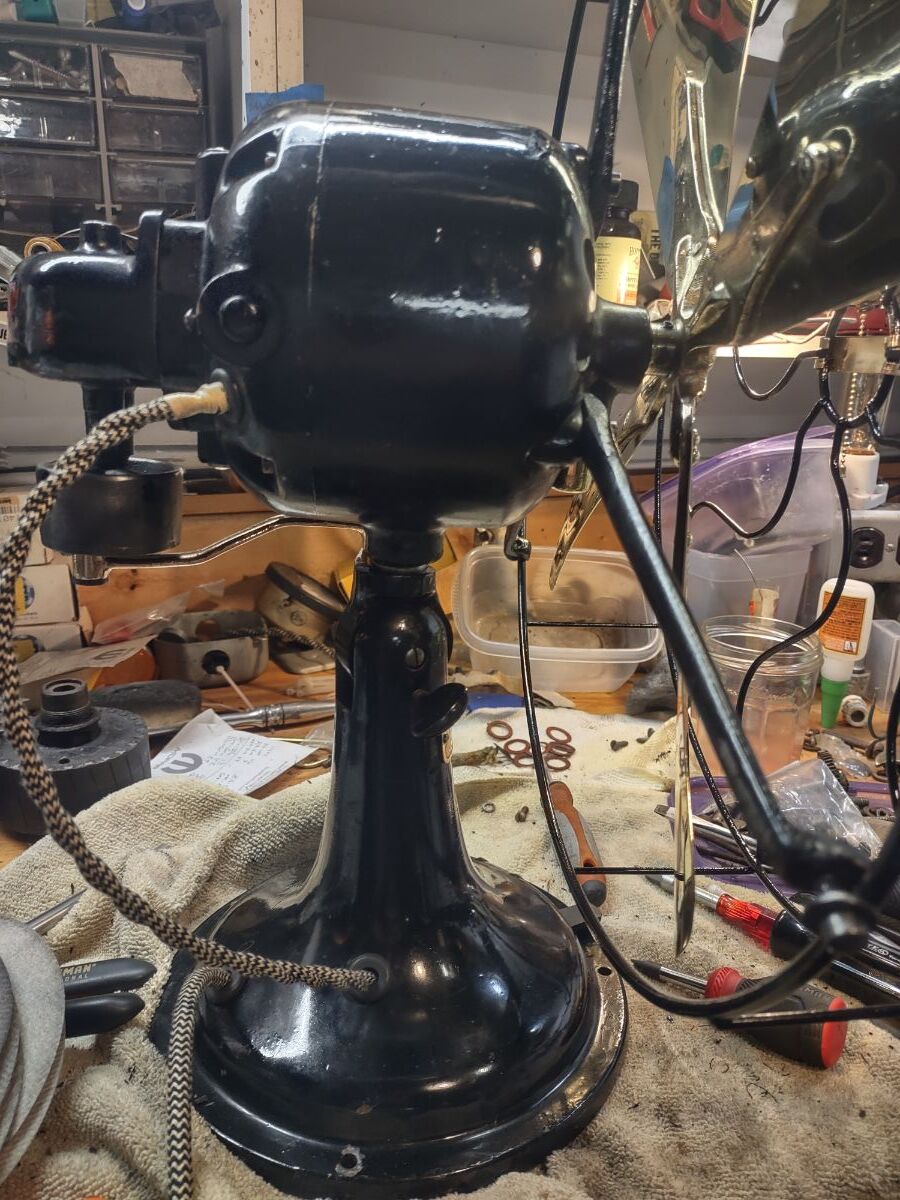
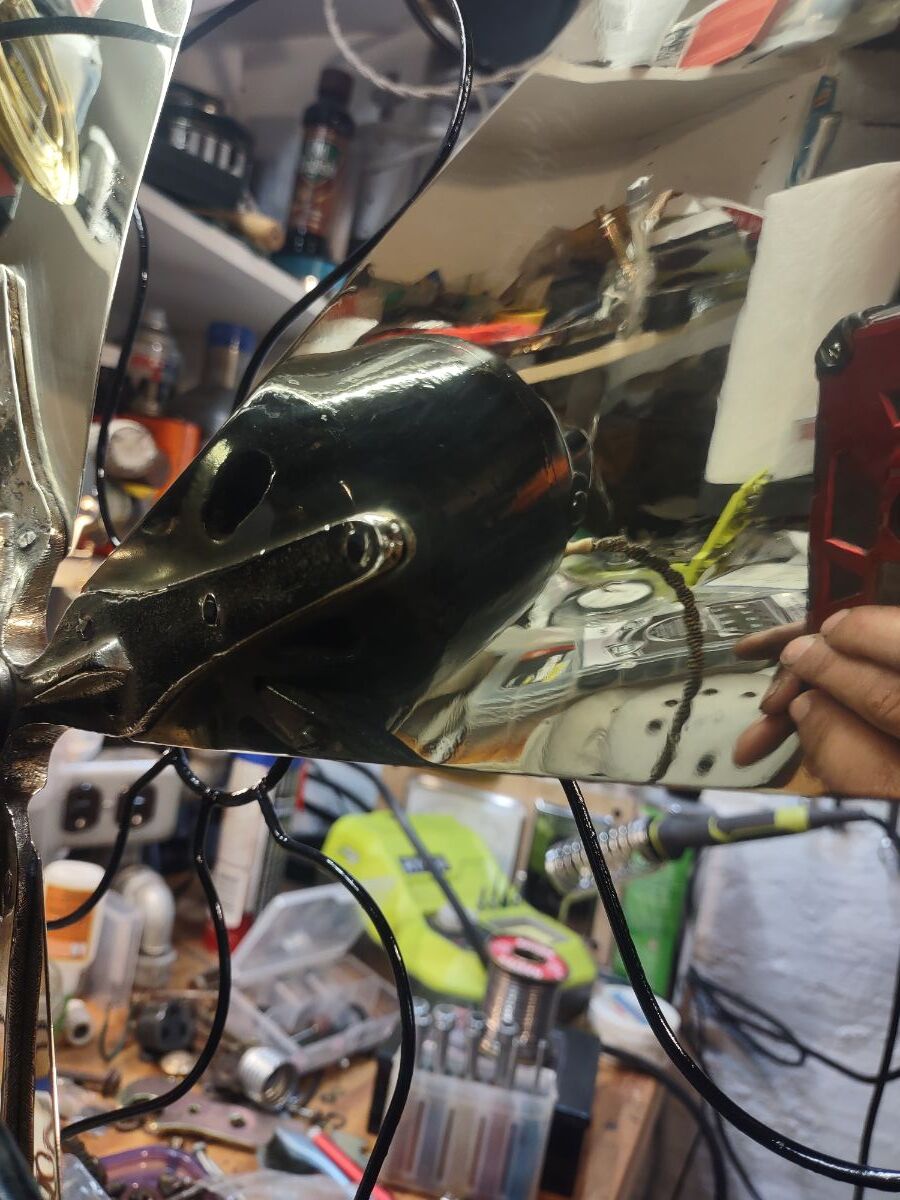
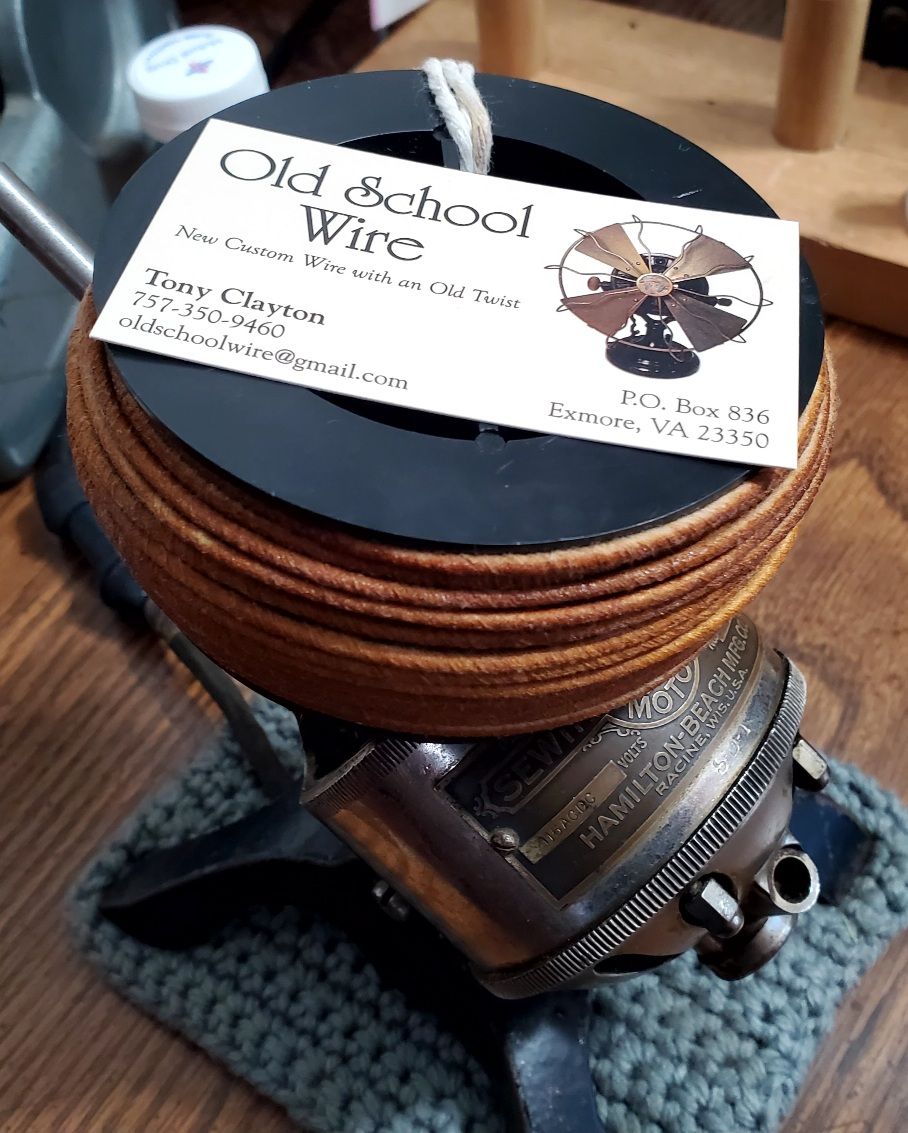
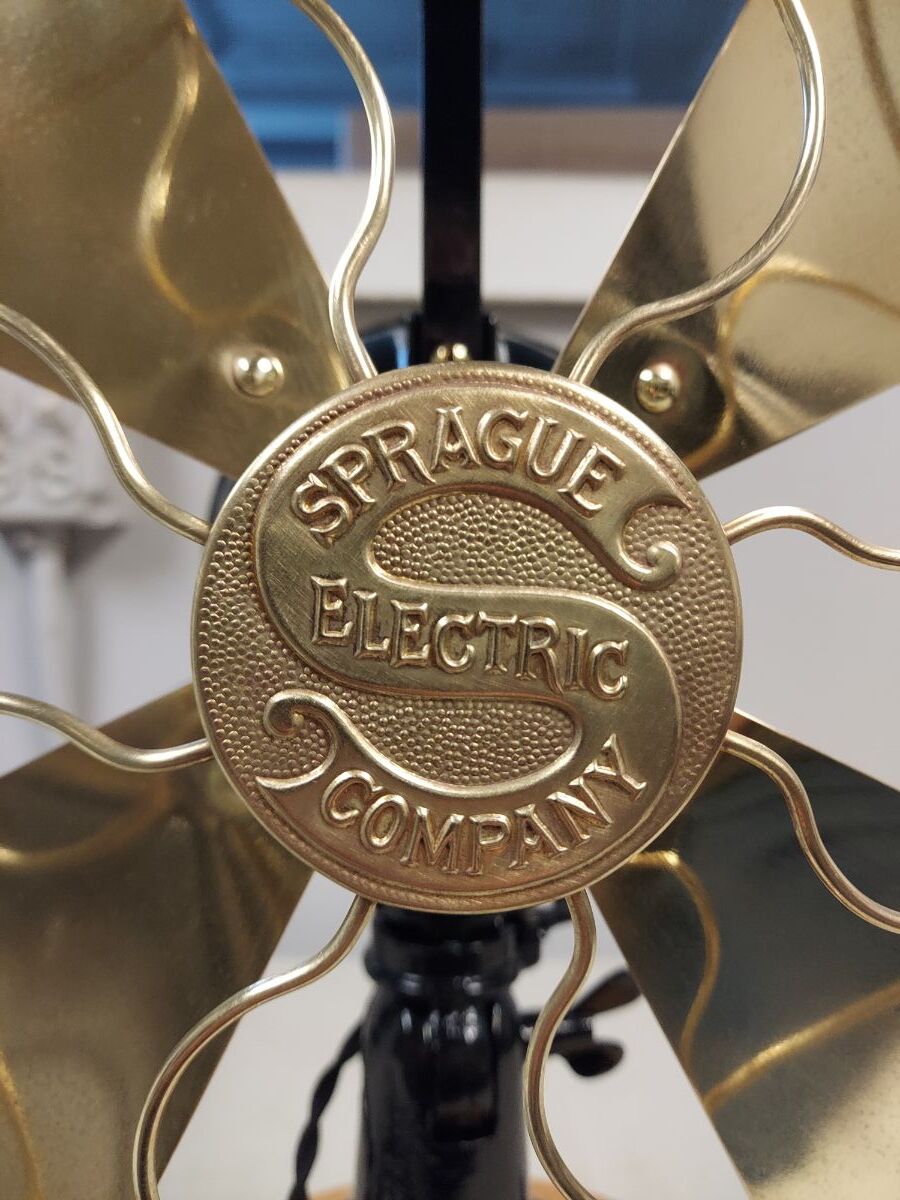
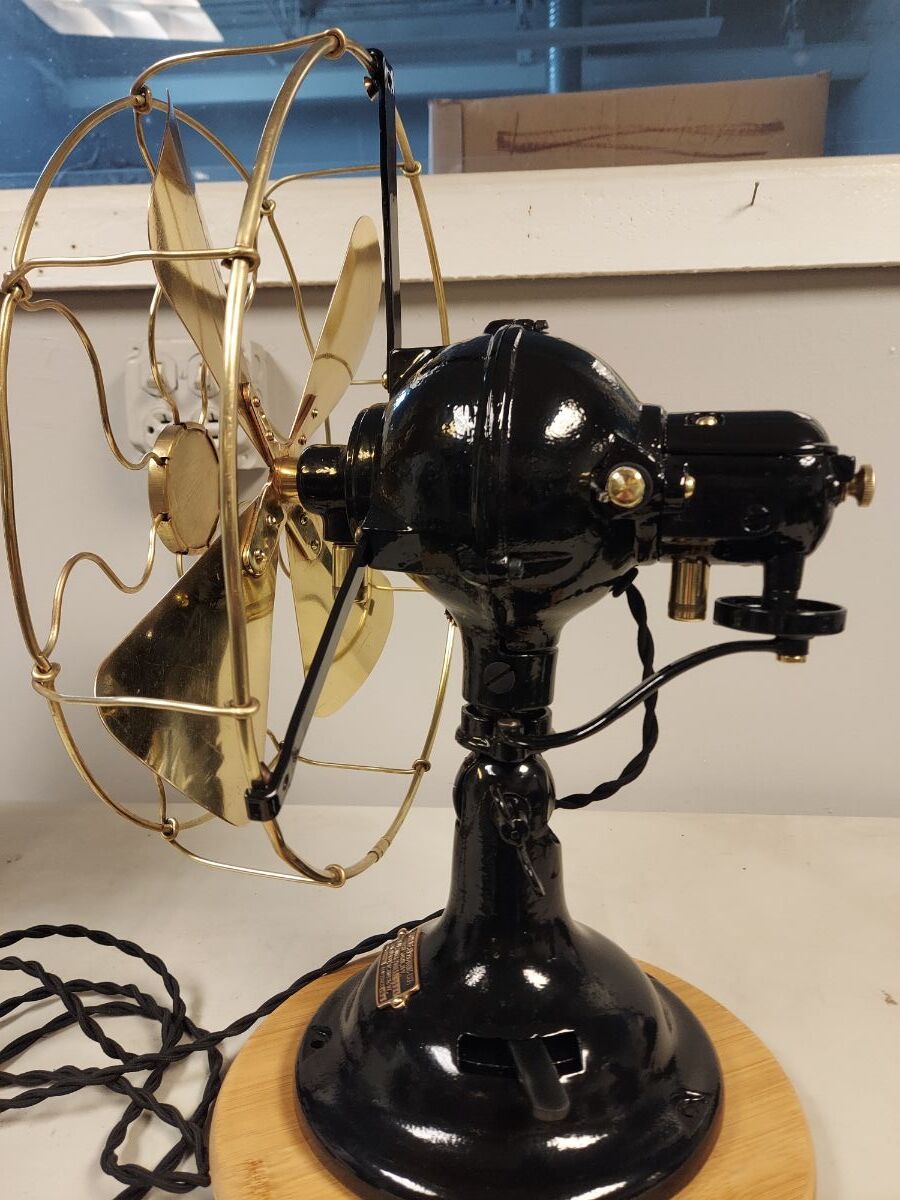
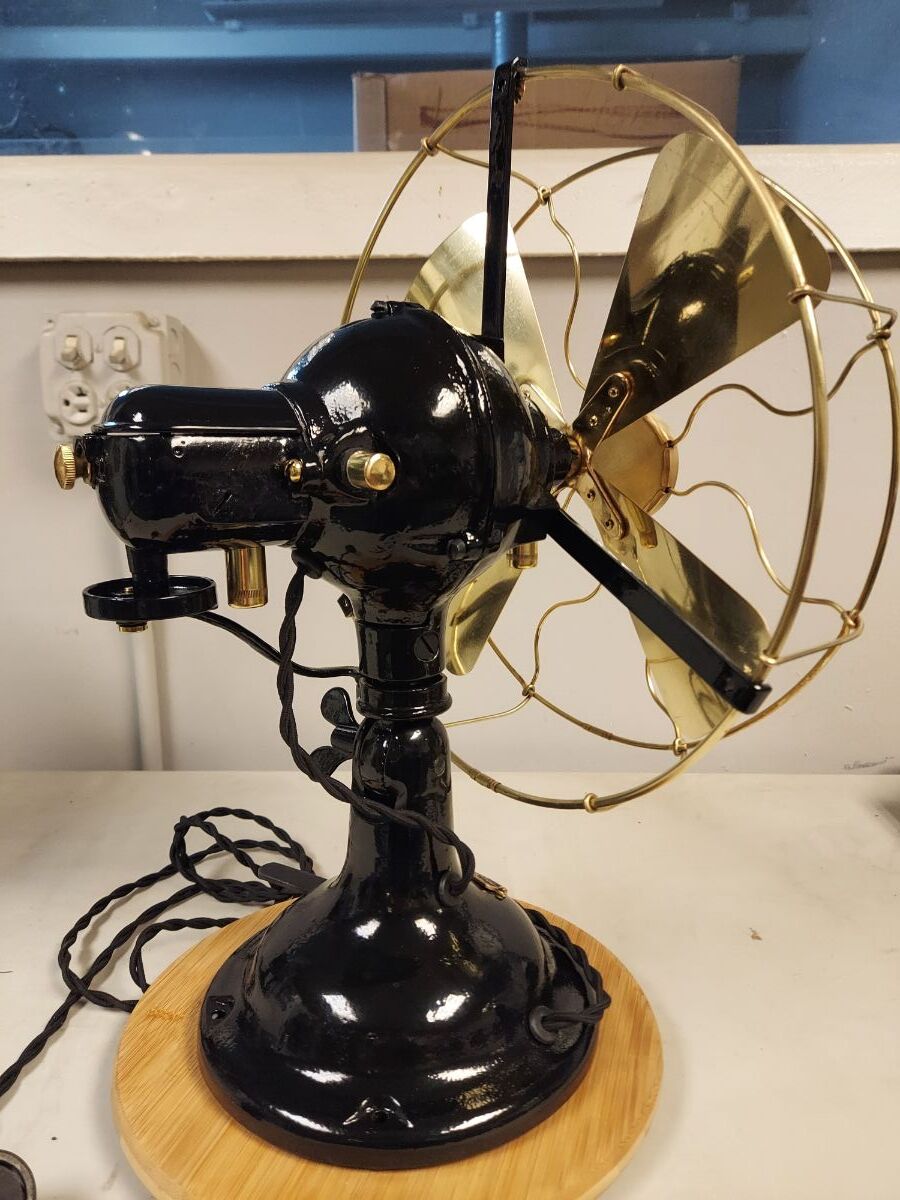
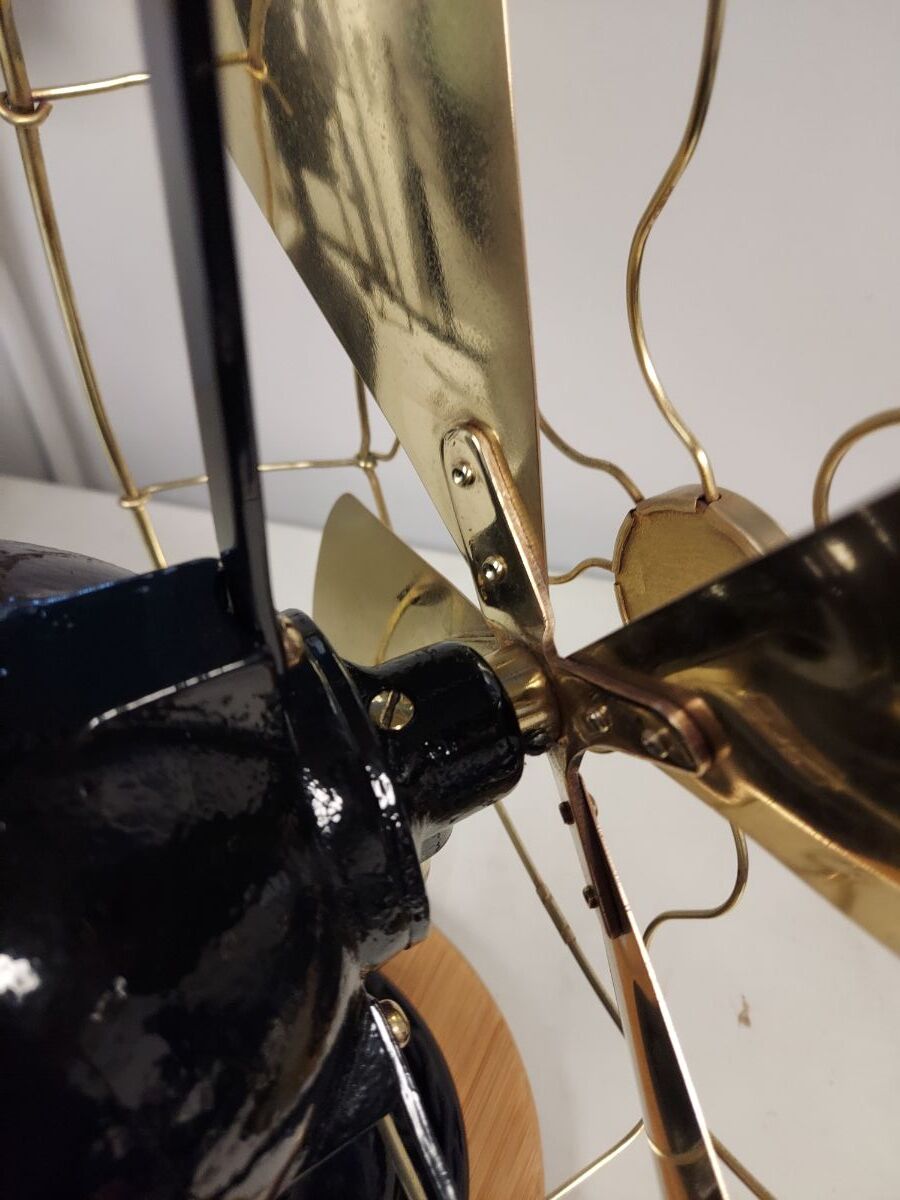
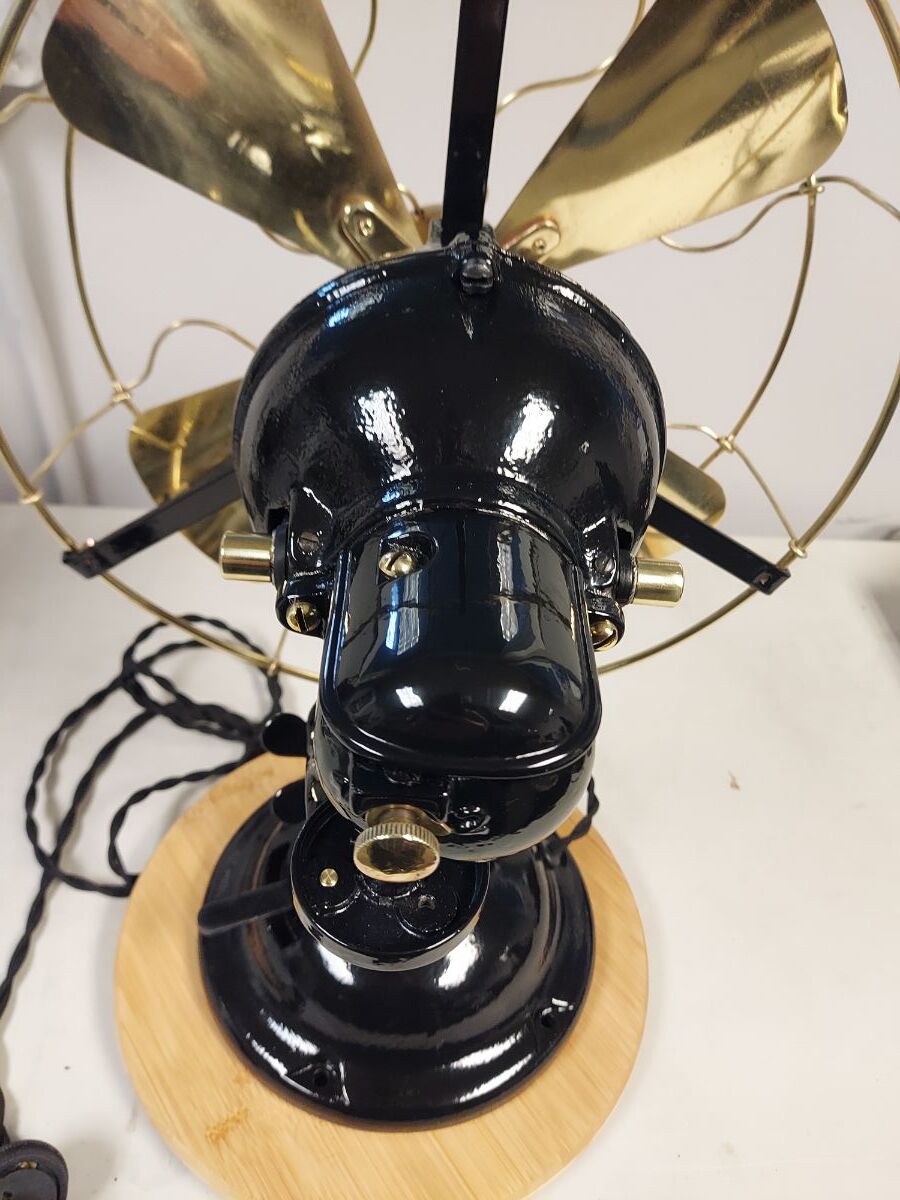
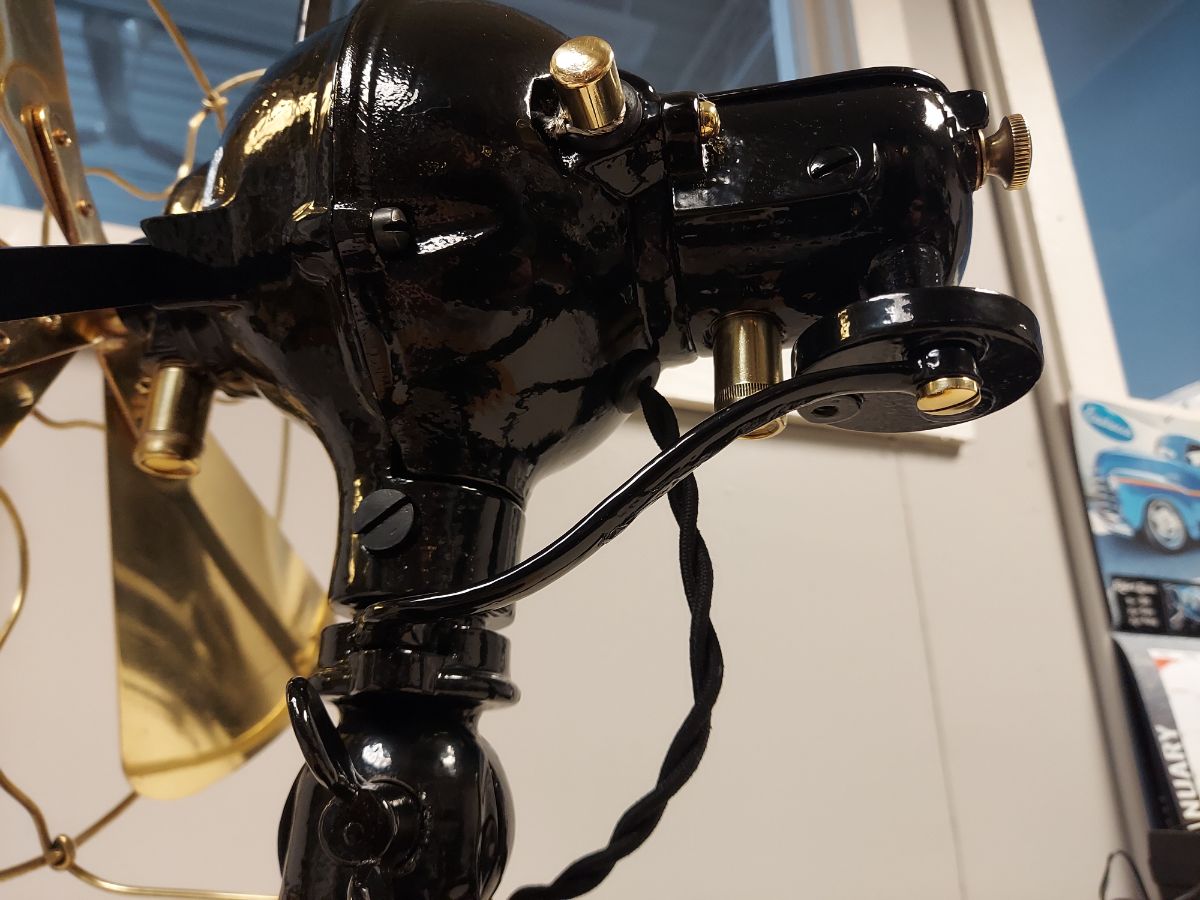
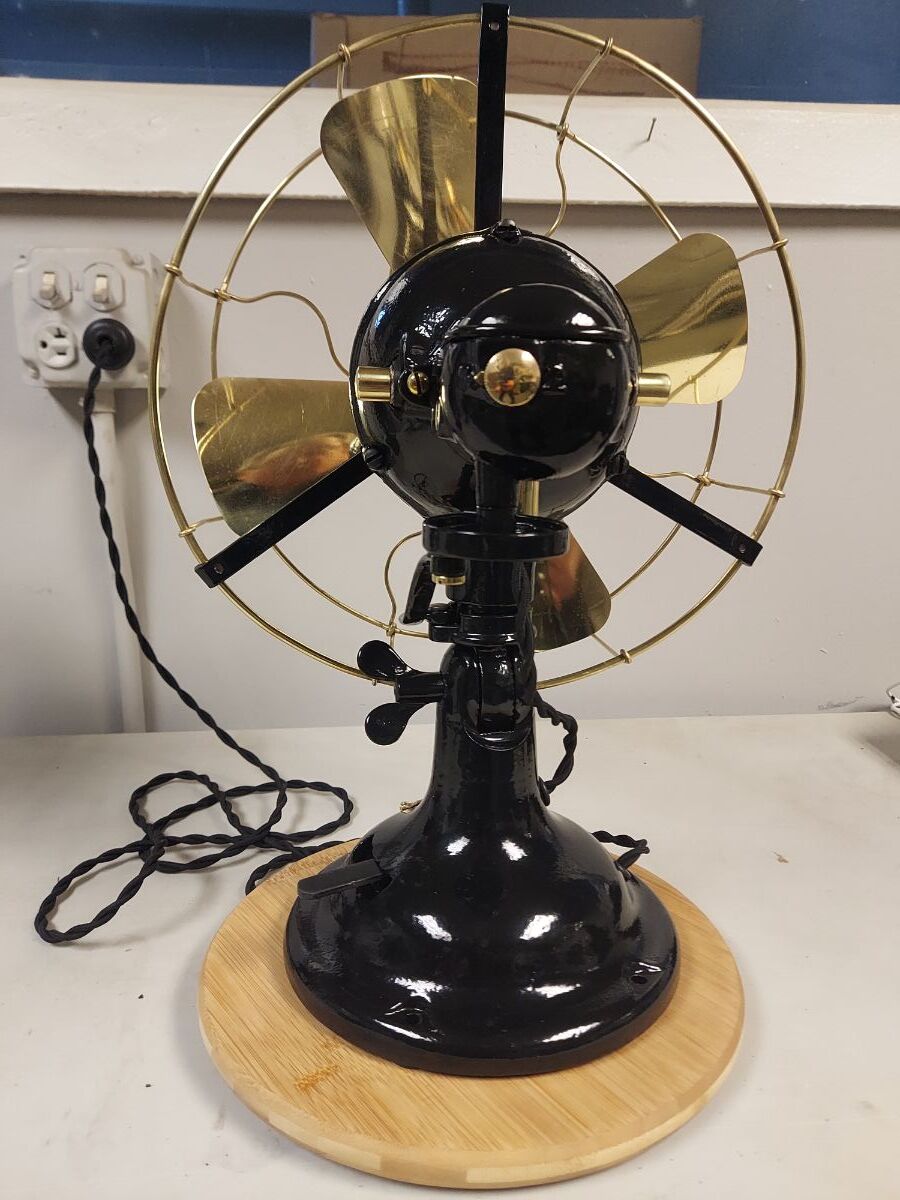
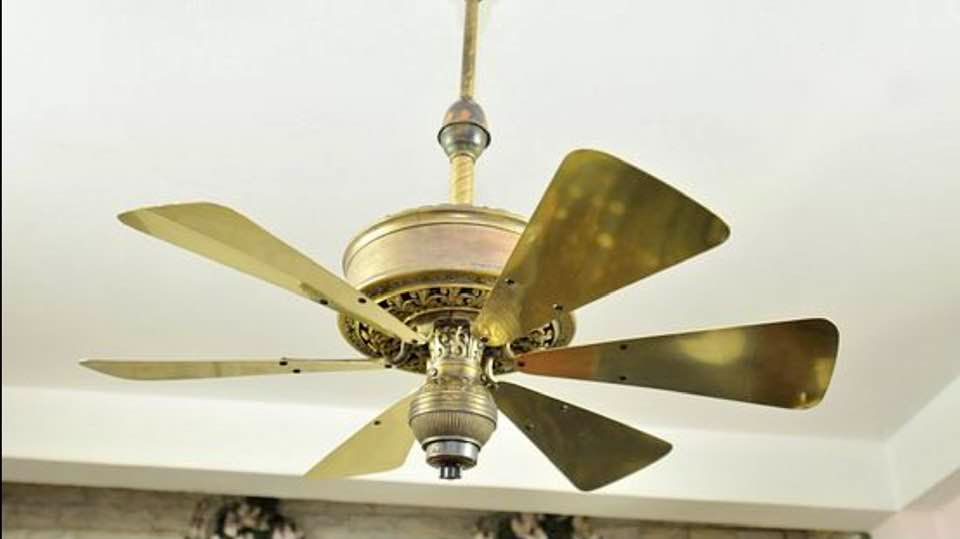
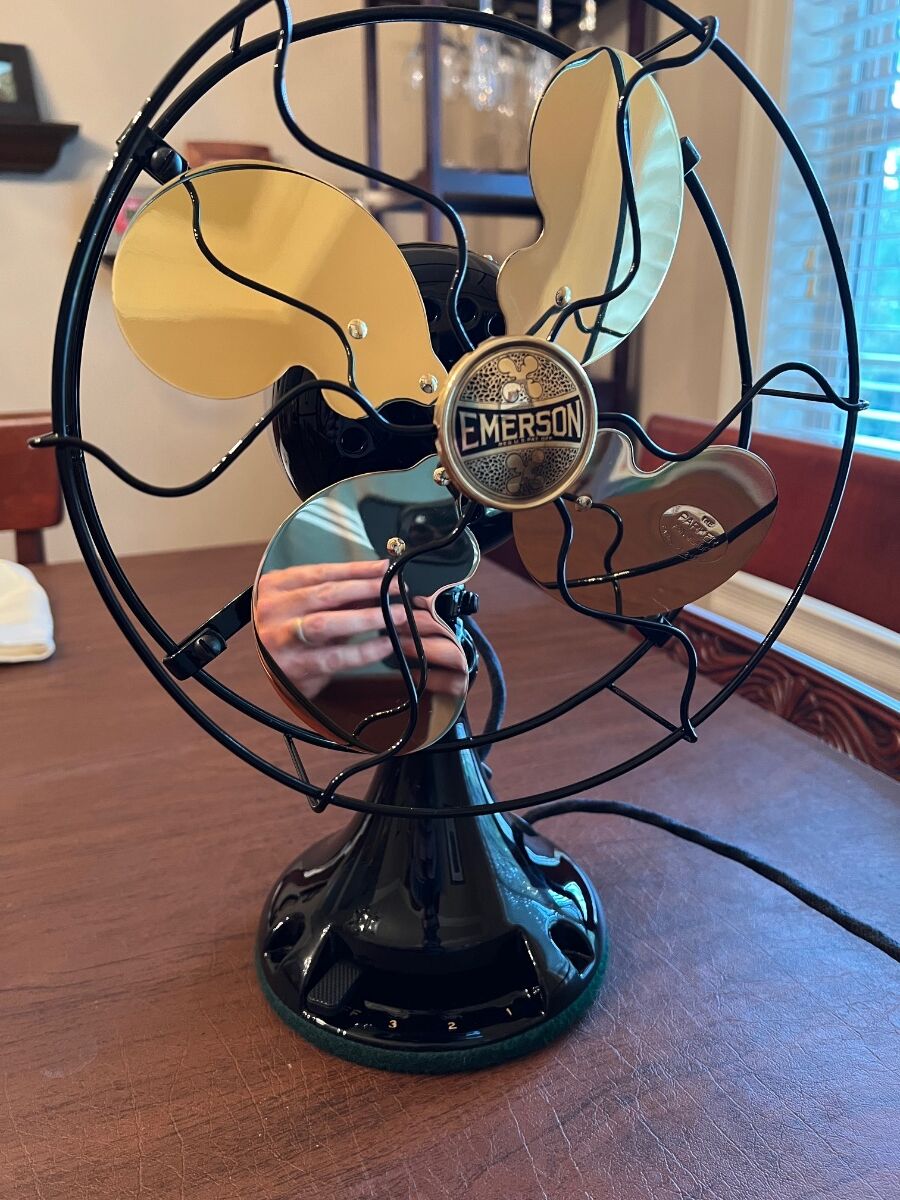
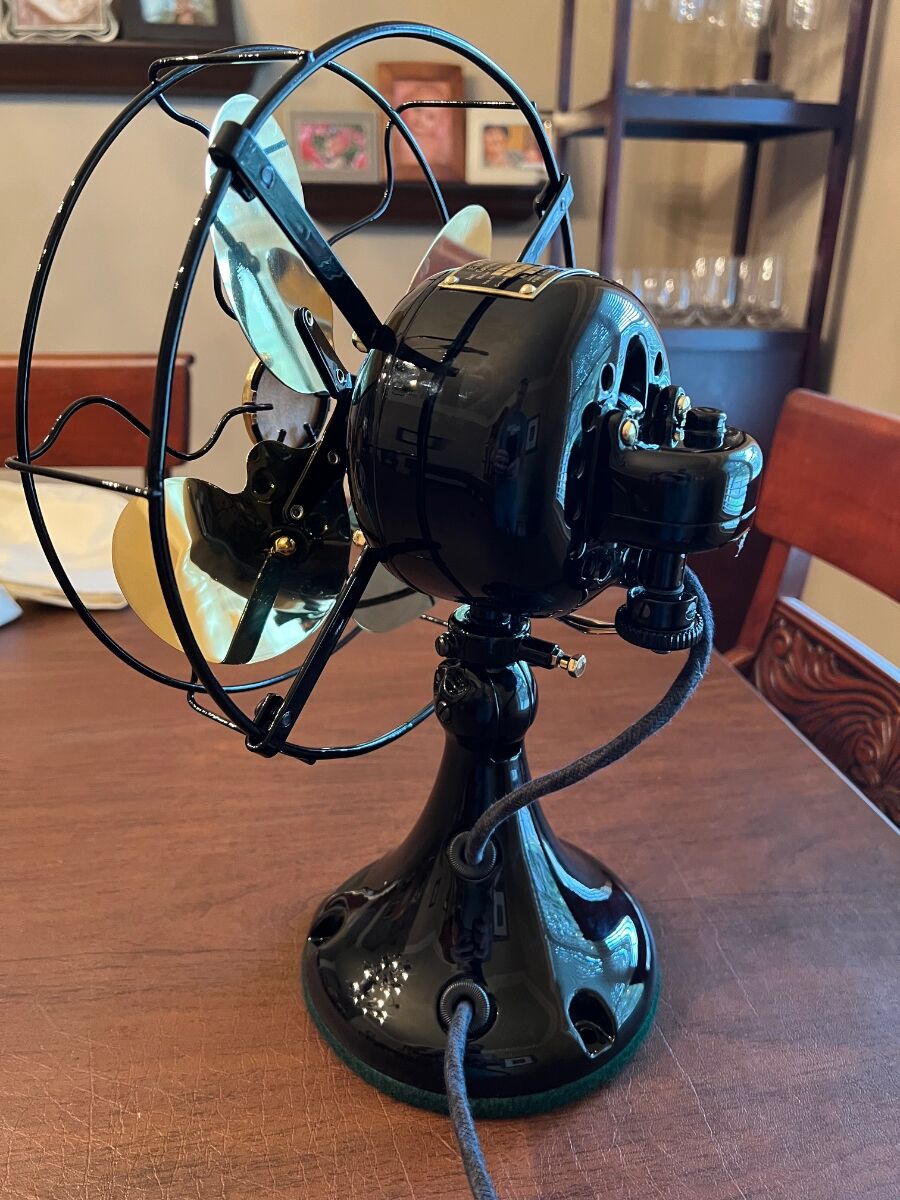
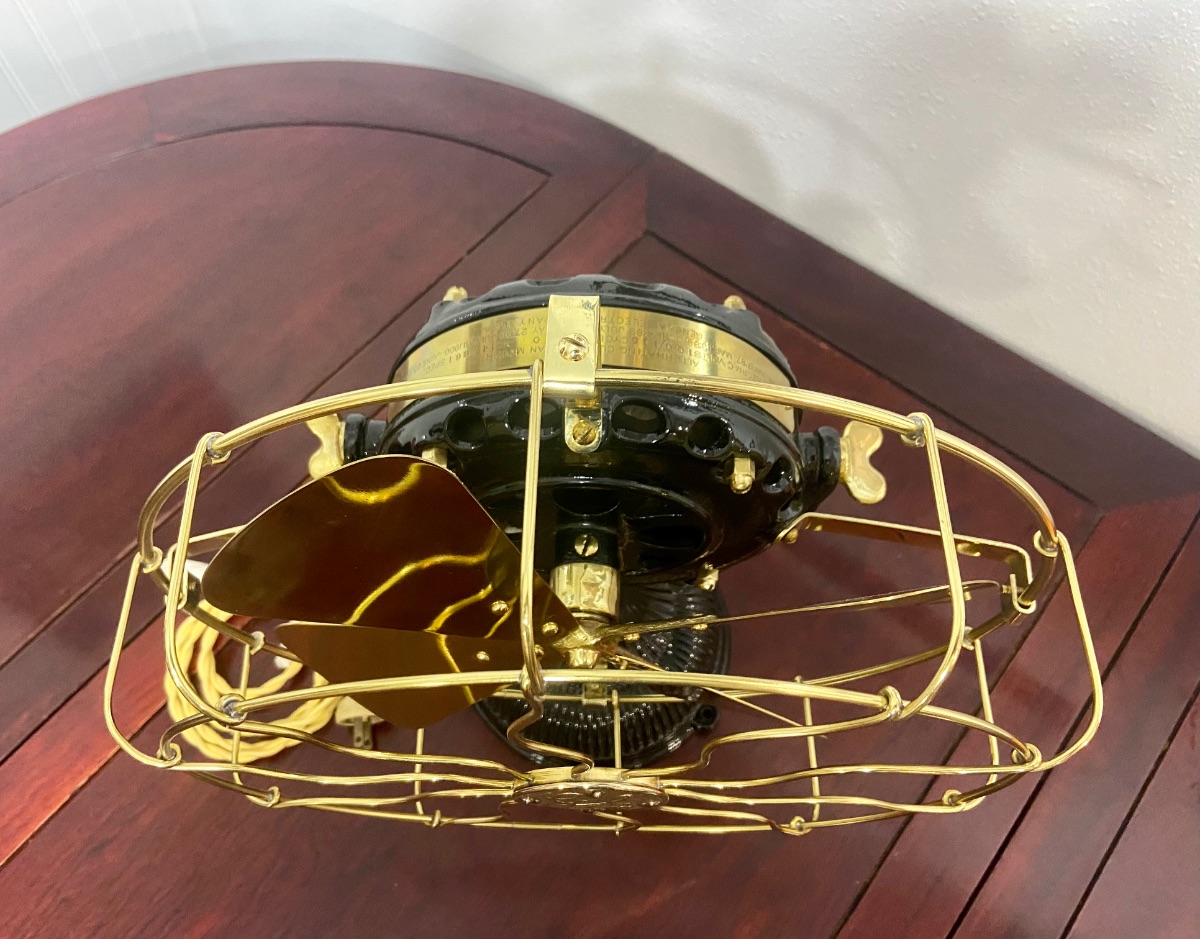
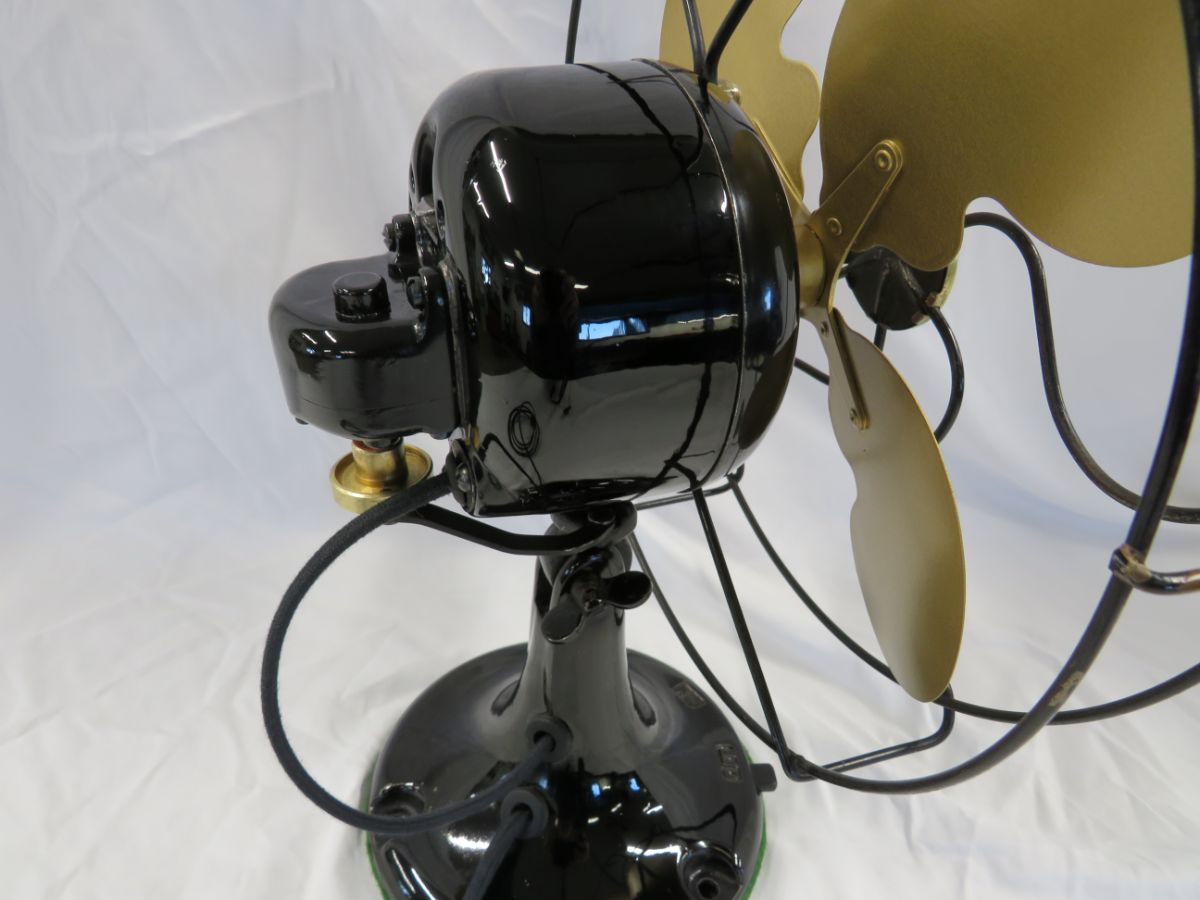
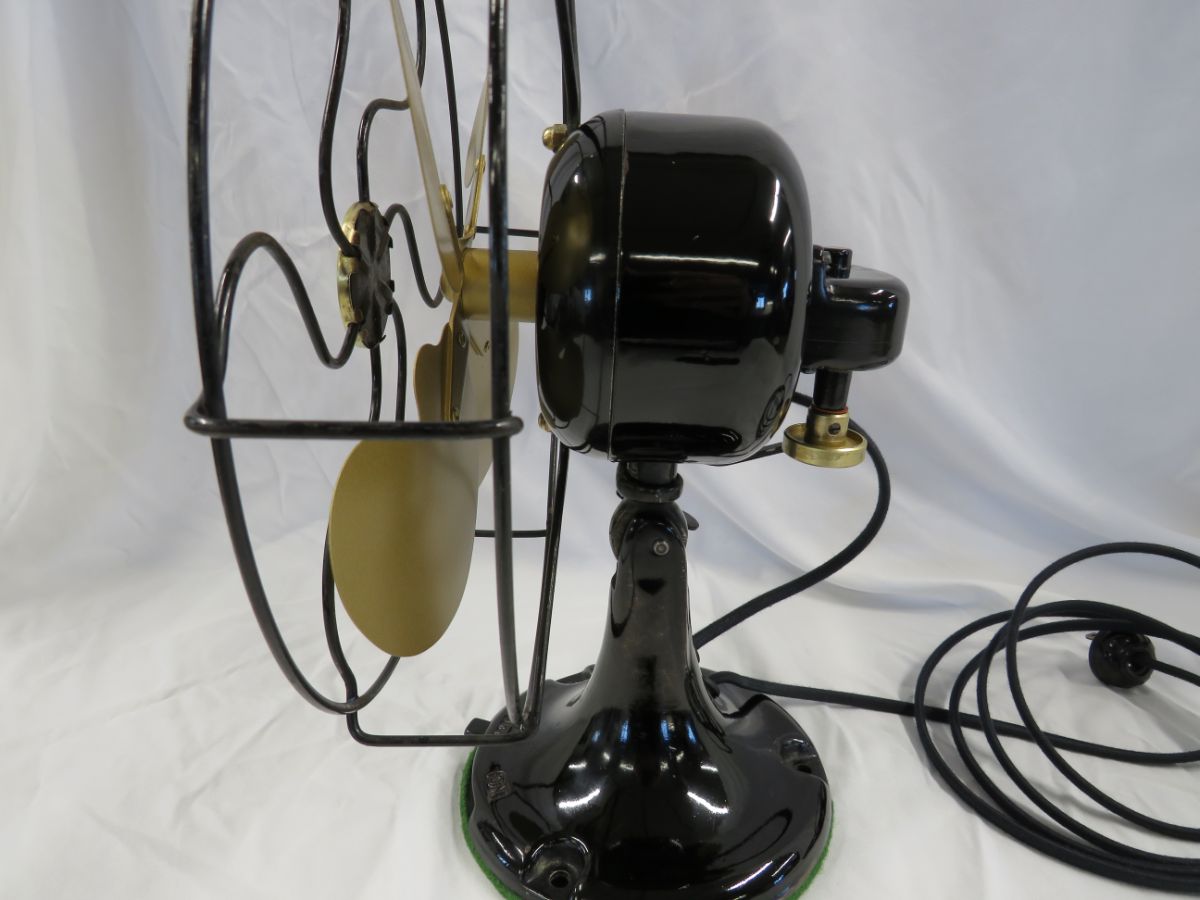
Just finished this lil guy! Factory finish was shot so I sent it off for powder coat. Thanks to Korey Kreitman for the new motor housing nuts. Tony Clayton custom wire for the head wire and power cord. And thanks to Mark Olson for the rewind on the field coils.
 16 points
 -
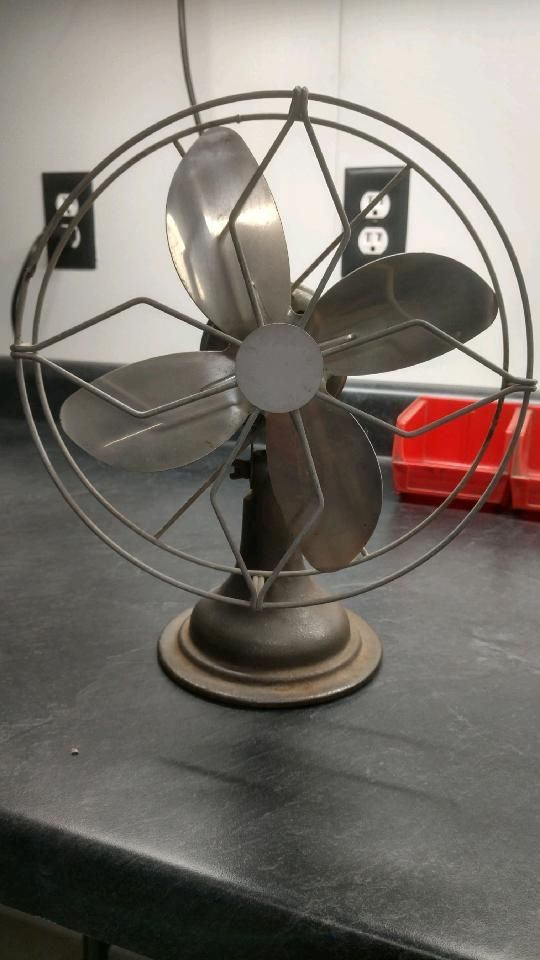
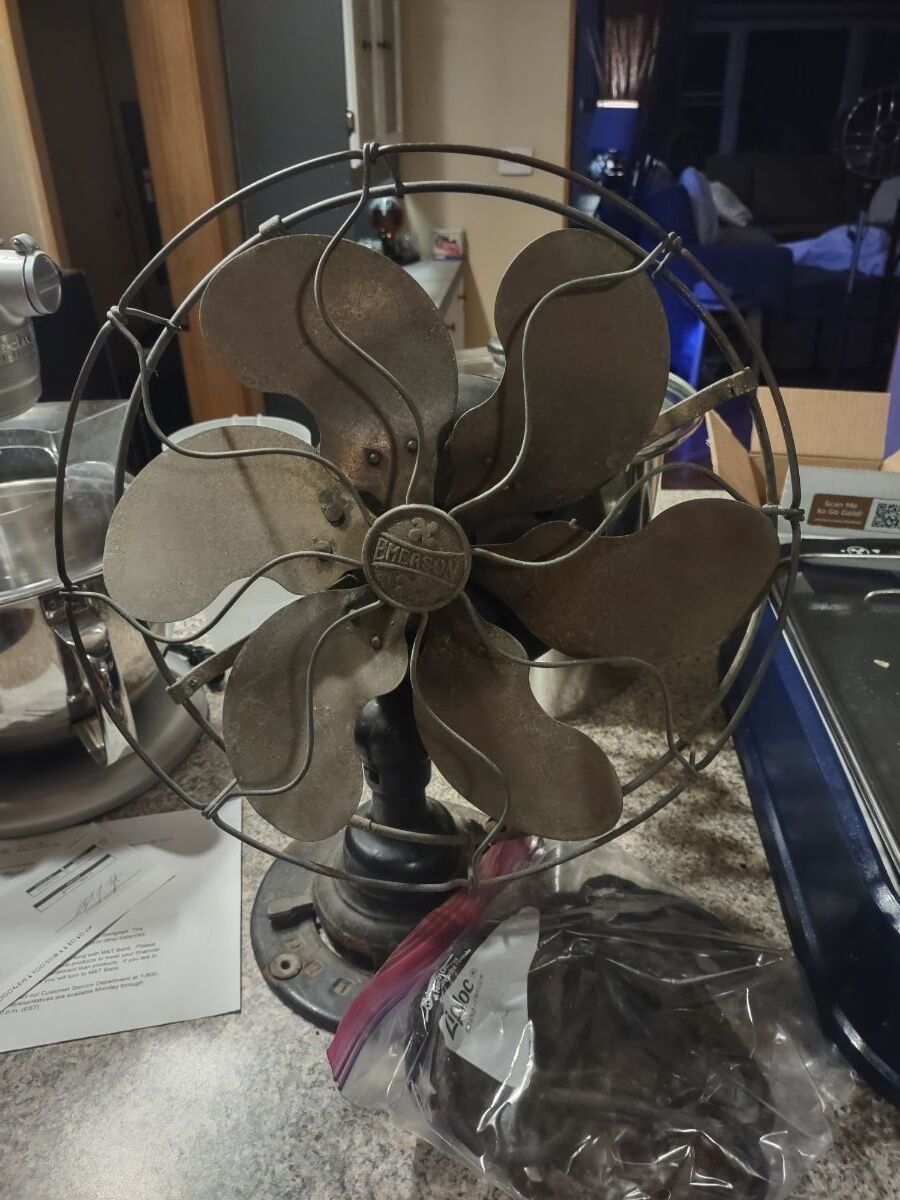
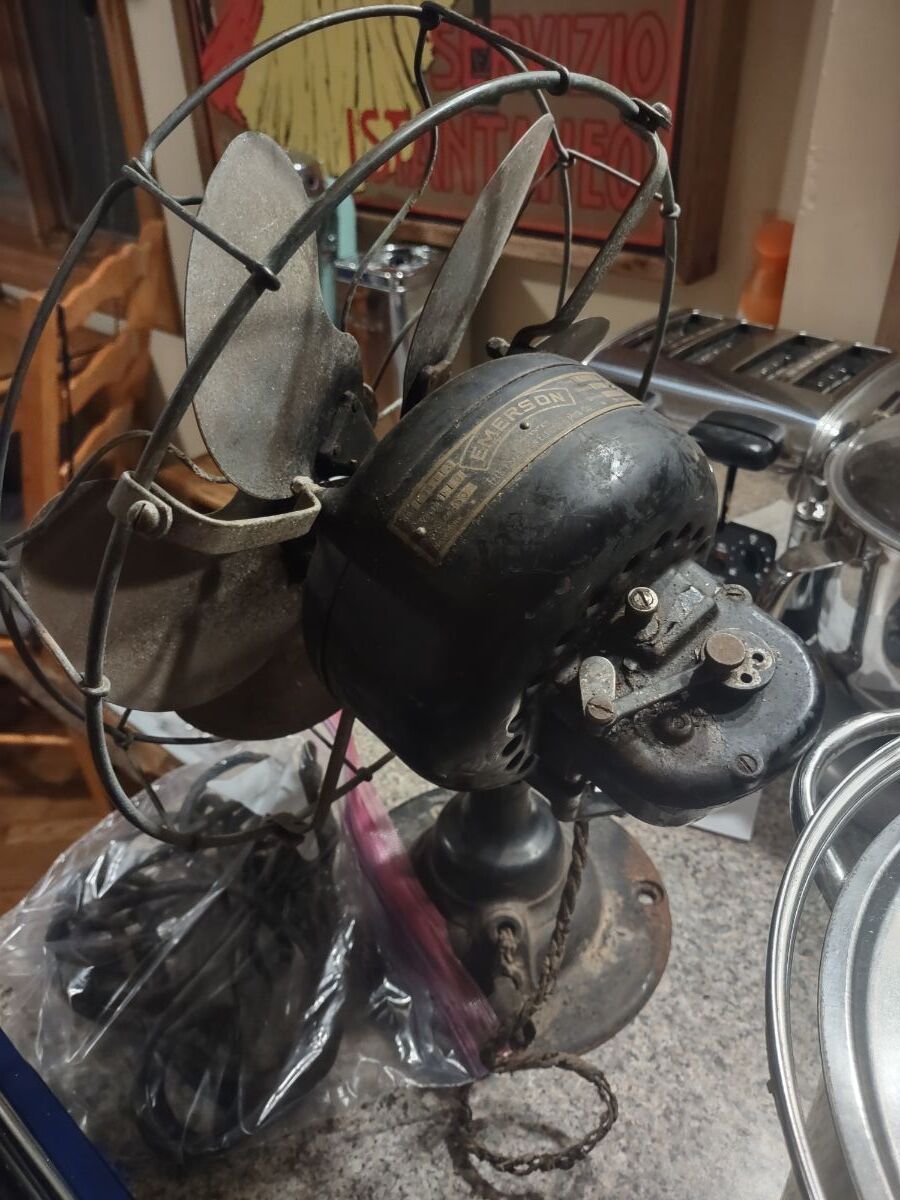
Needs a few things... The original pin striping is there! Needs a few pieces but I think Paul Graves has them in a drawer somewhere in his shop!😊😊
15 points
-
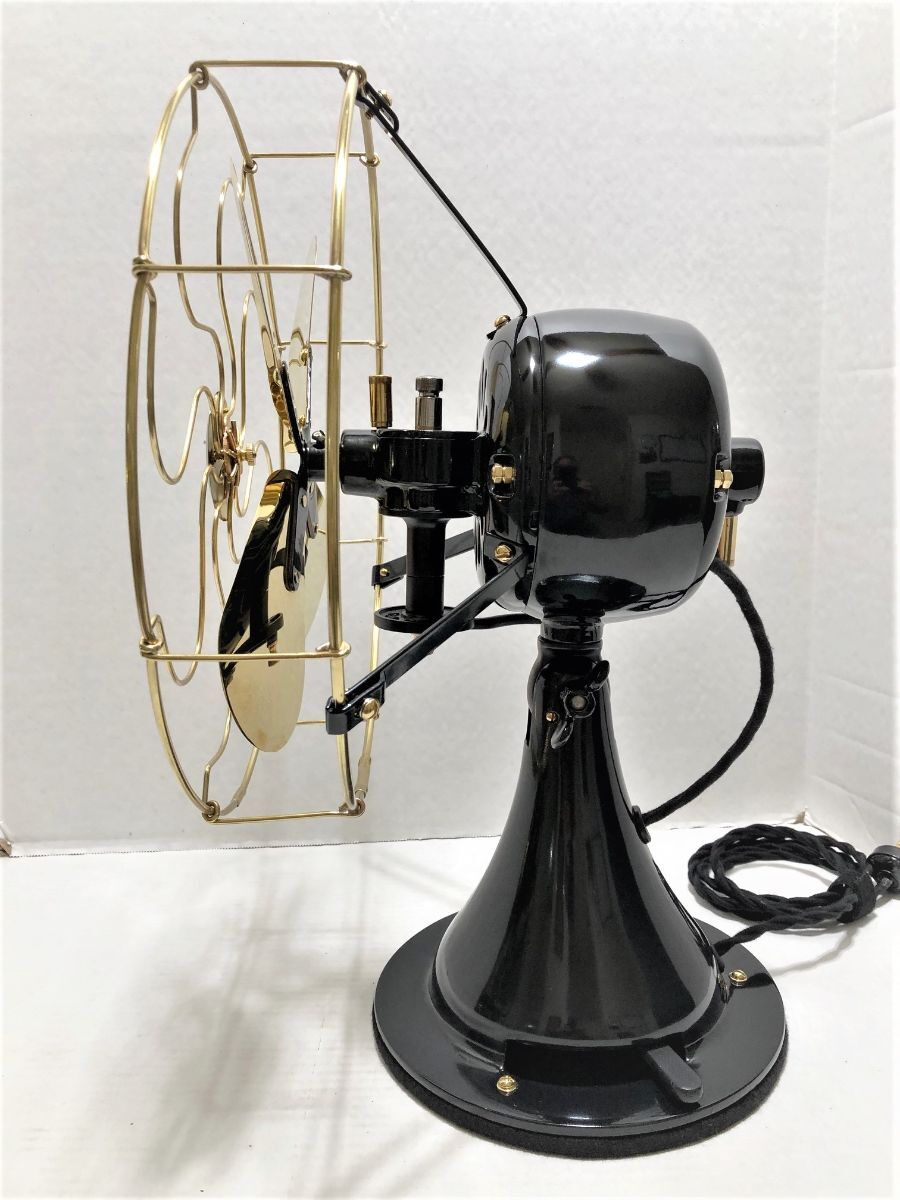
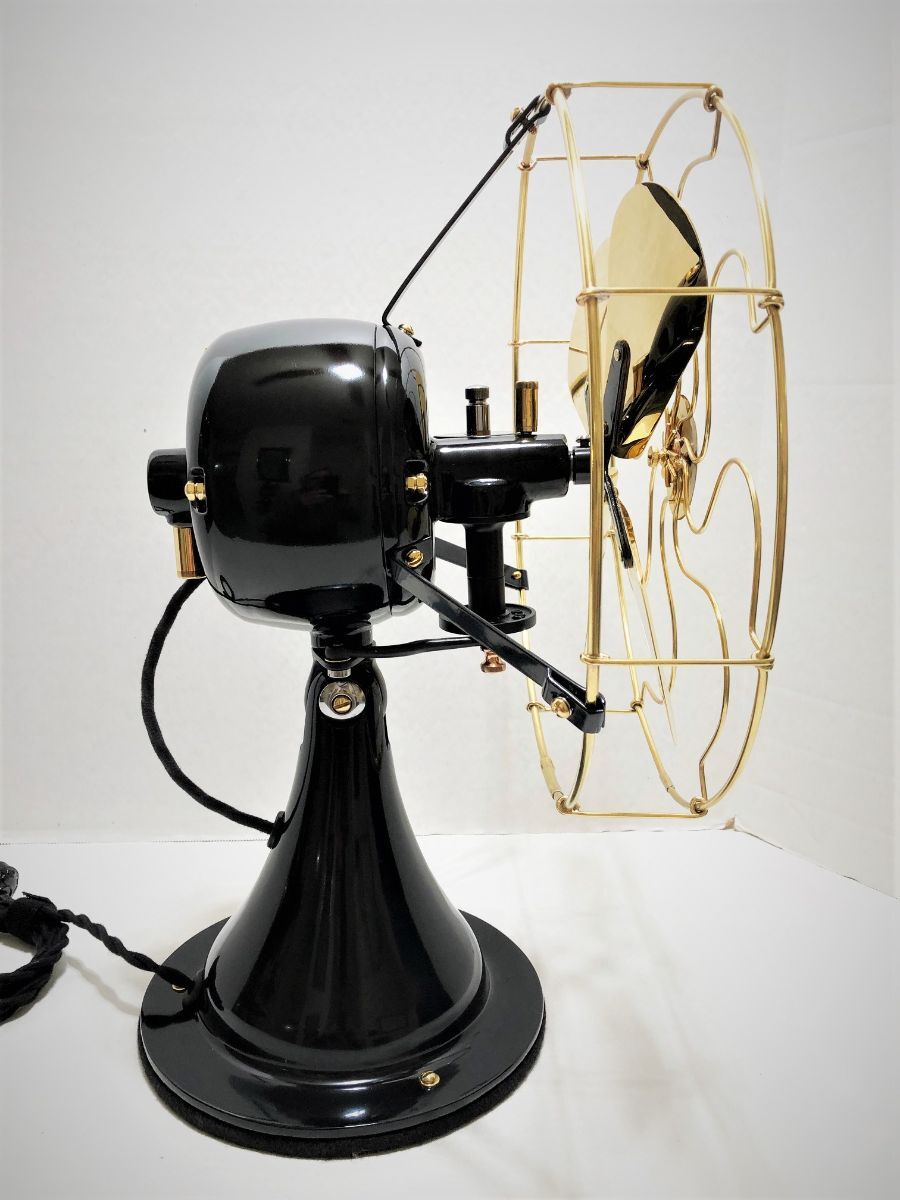
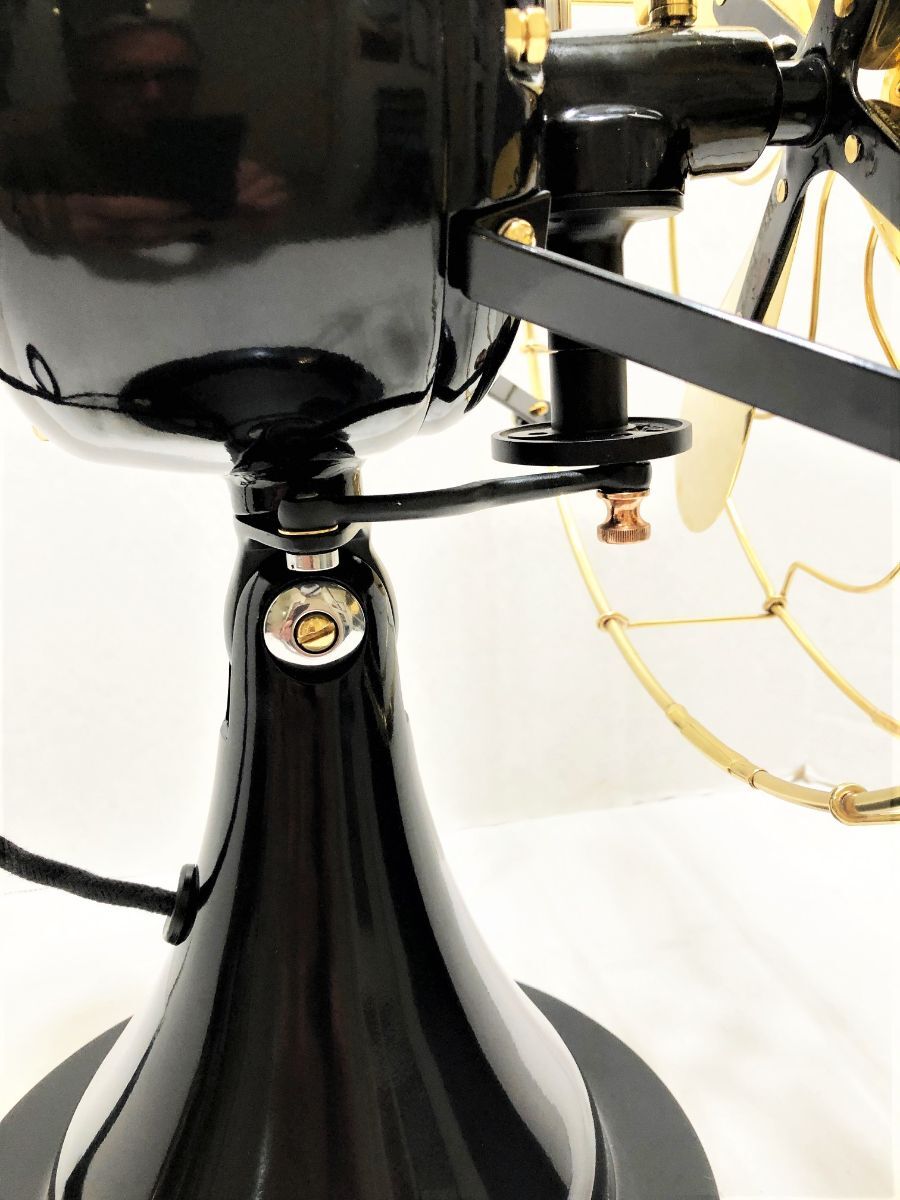
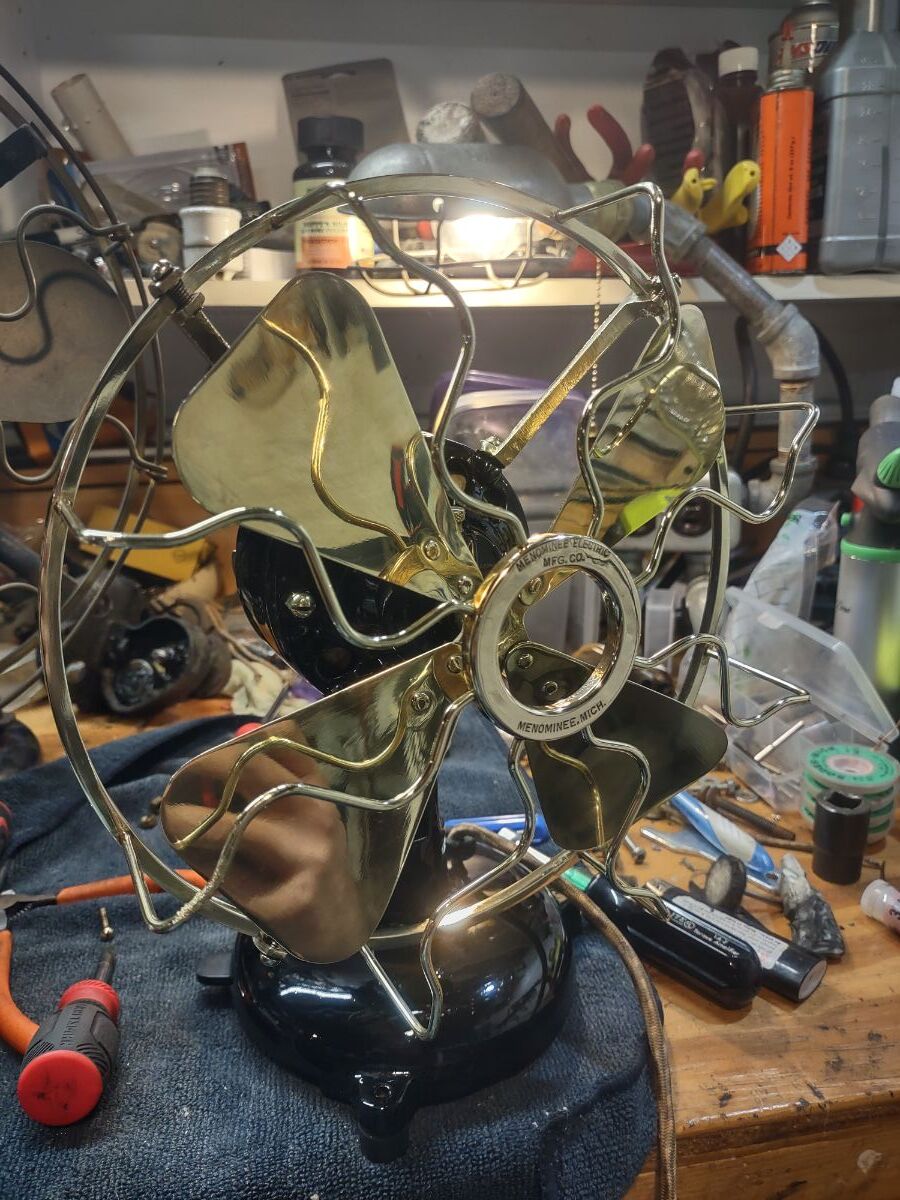
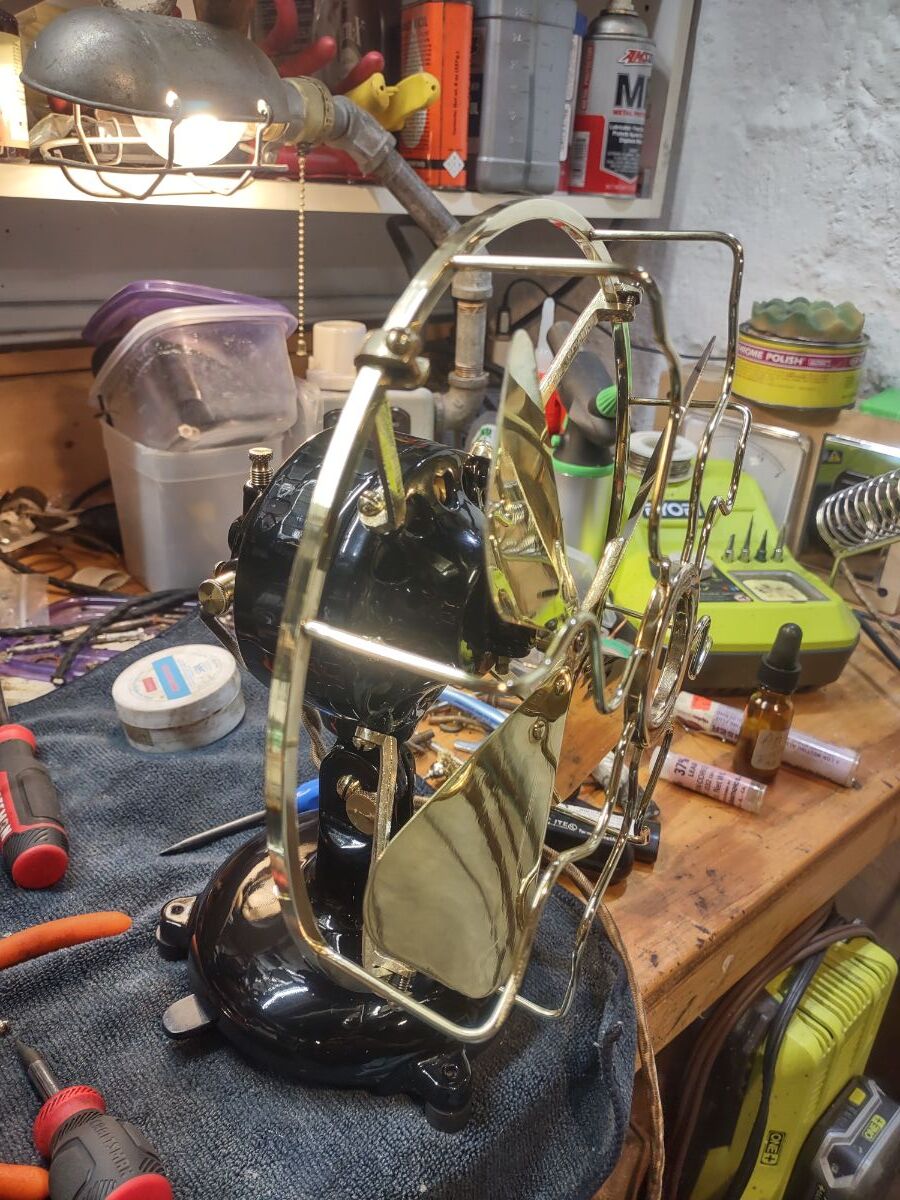
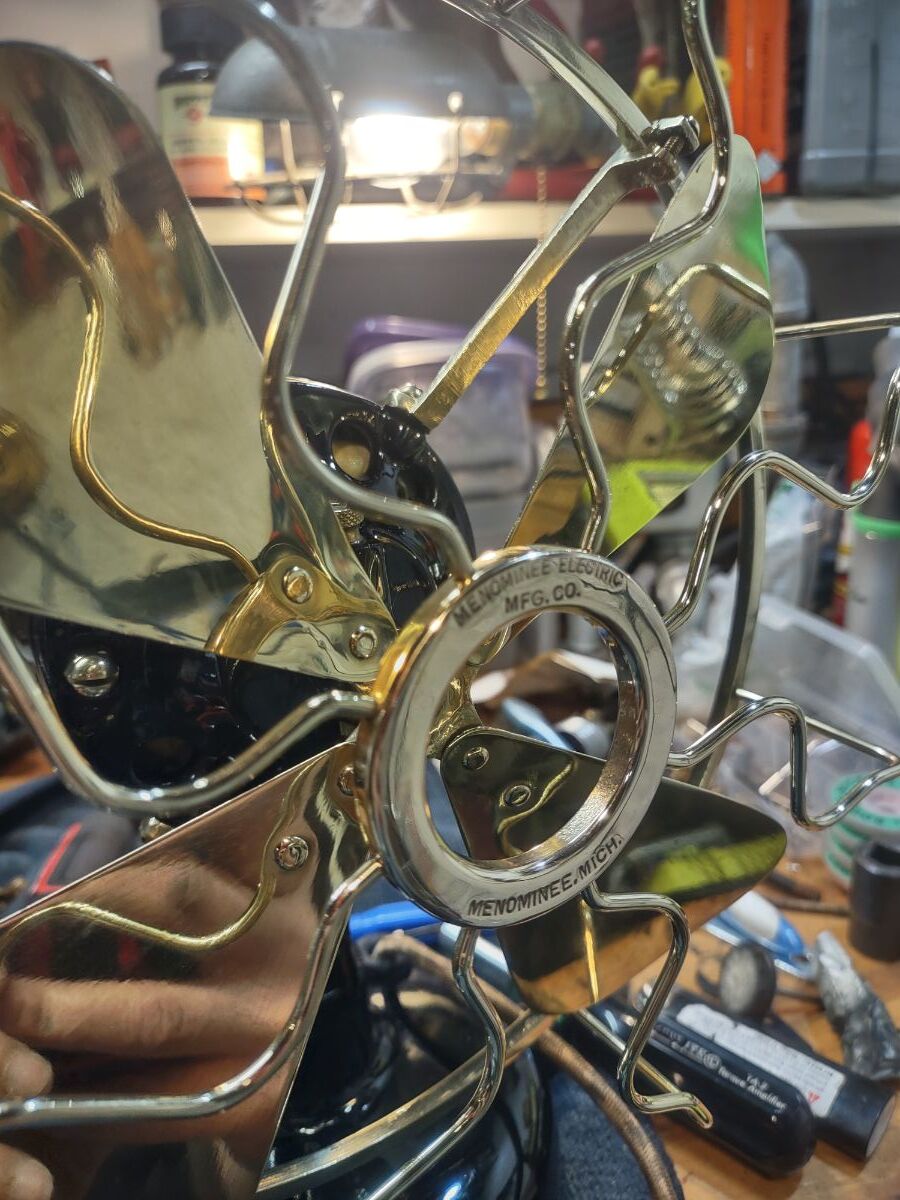
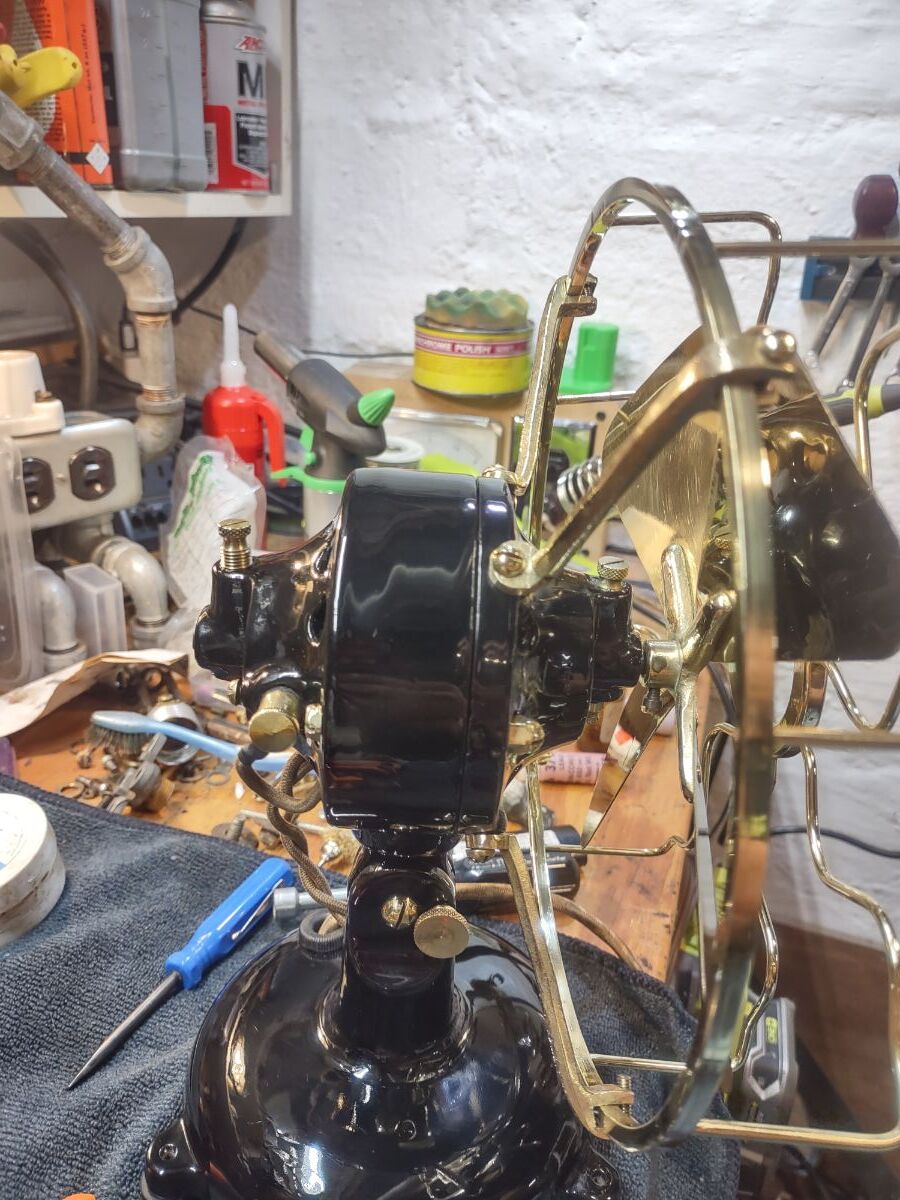
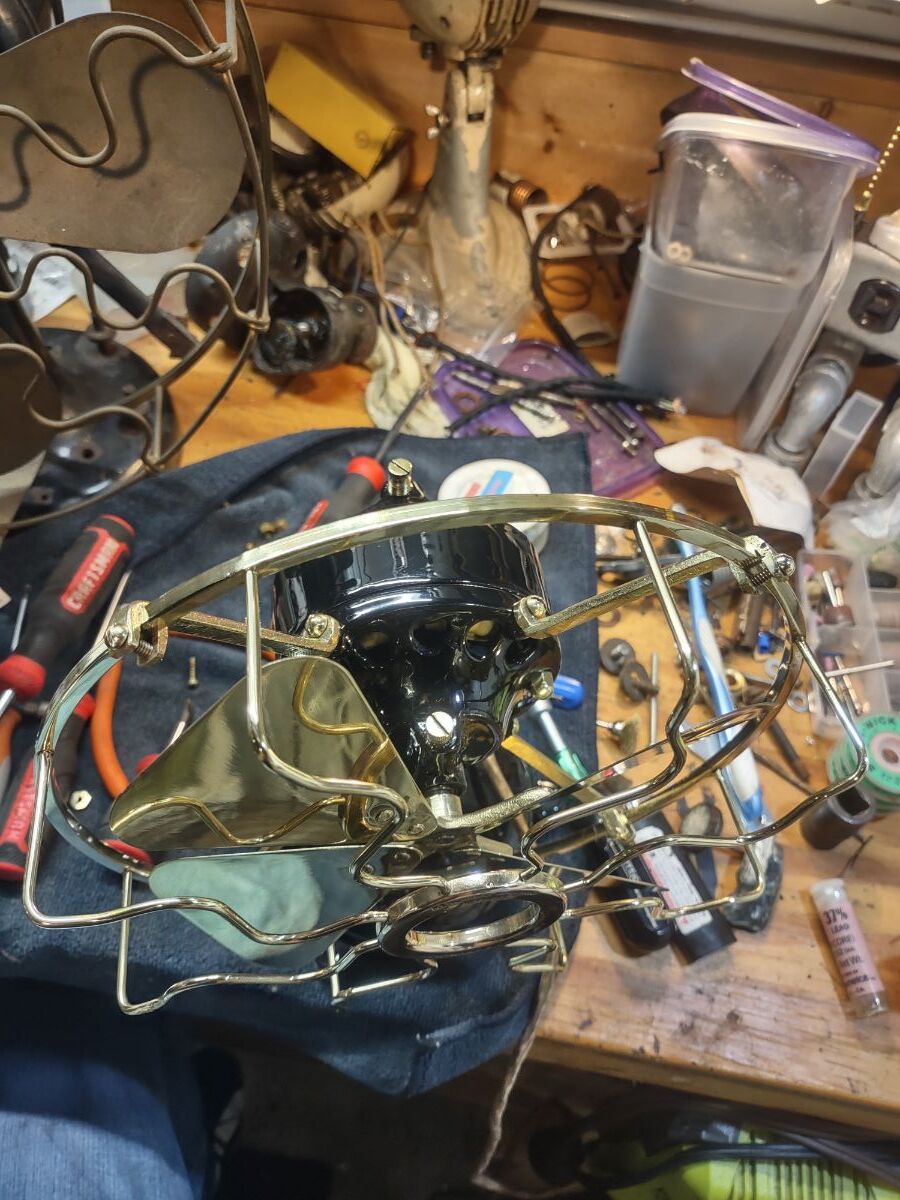
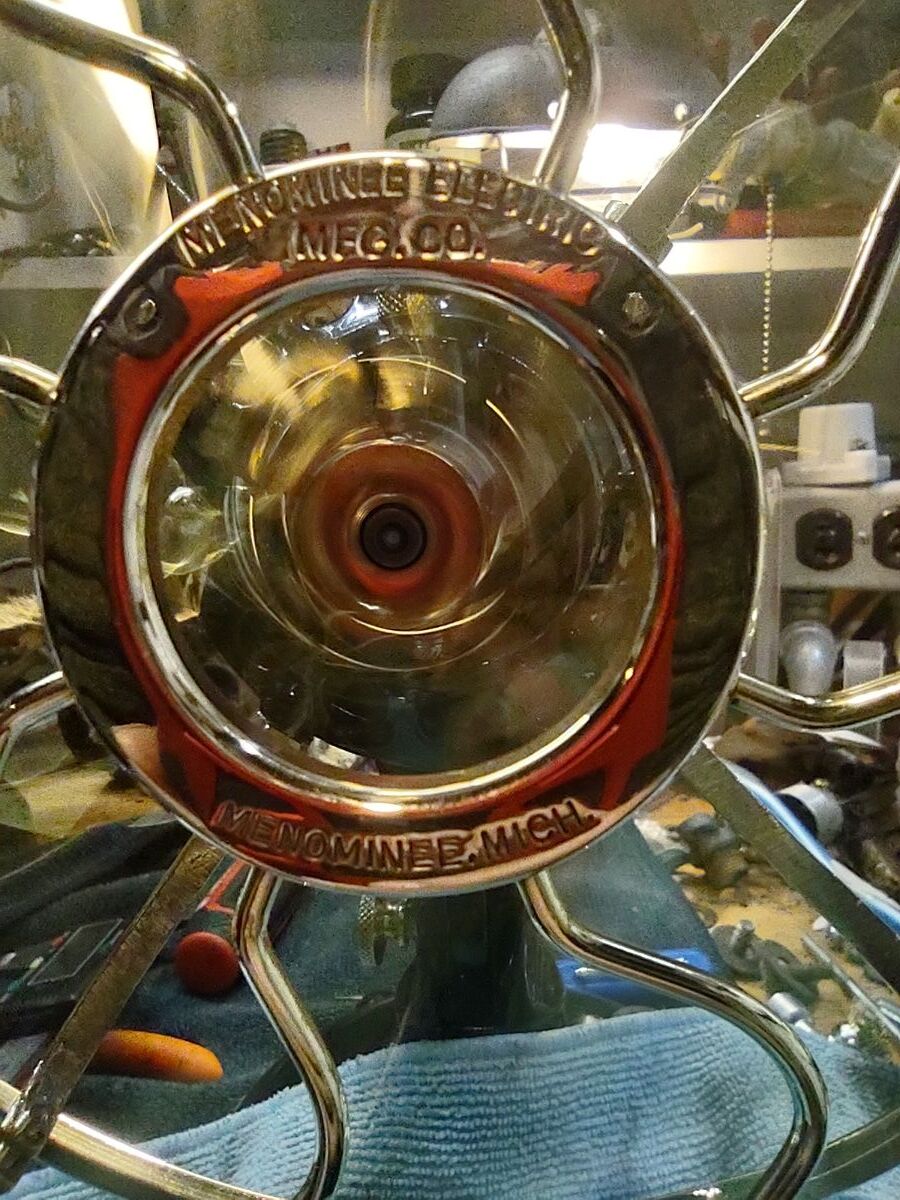
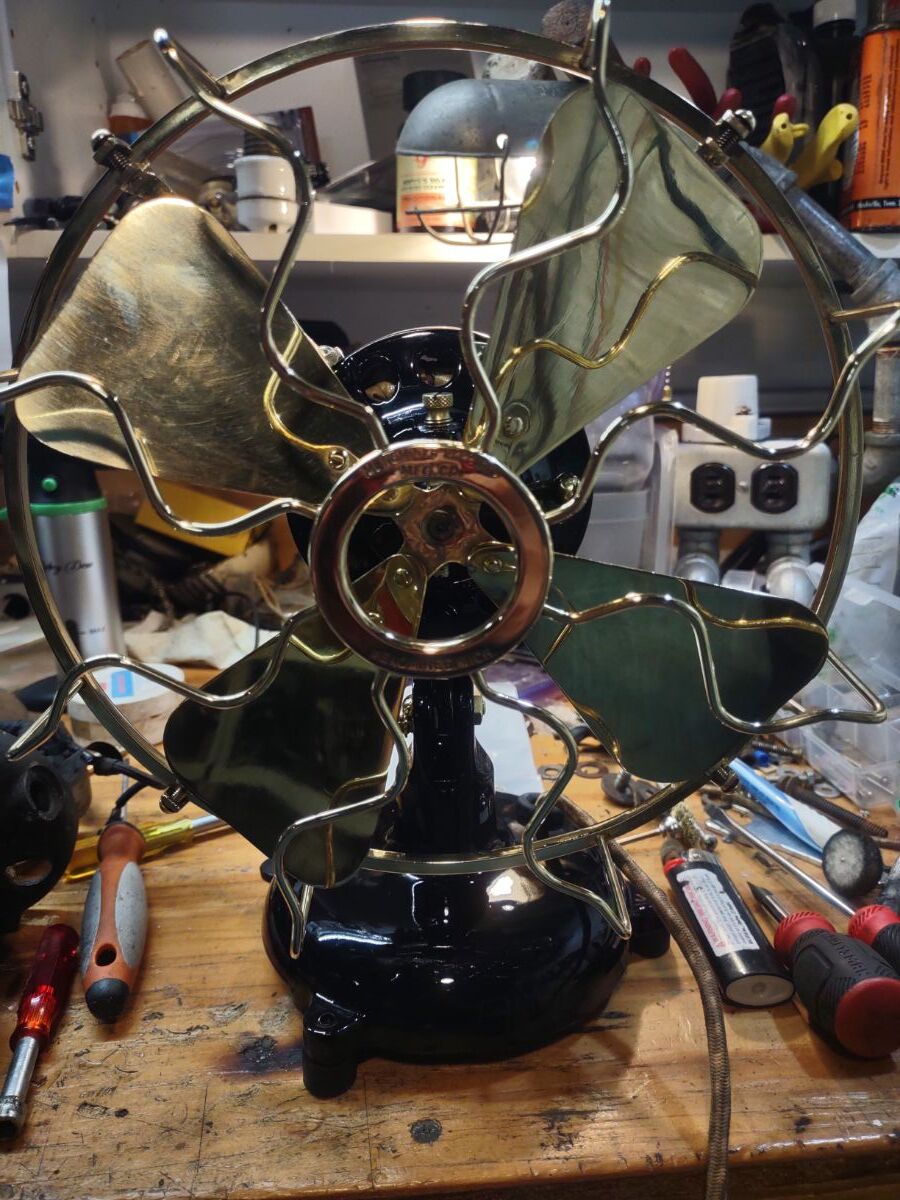
Menominee tab base snowflake, almost done.
15 points
-
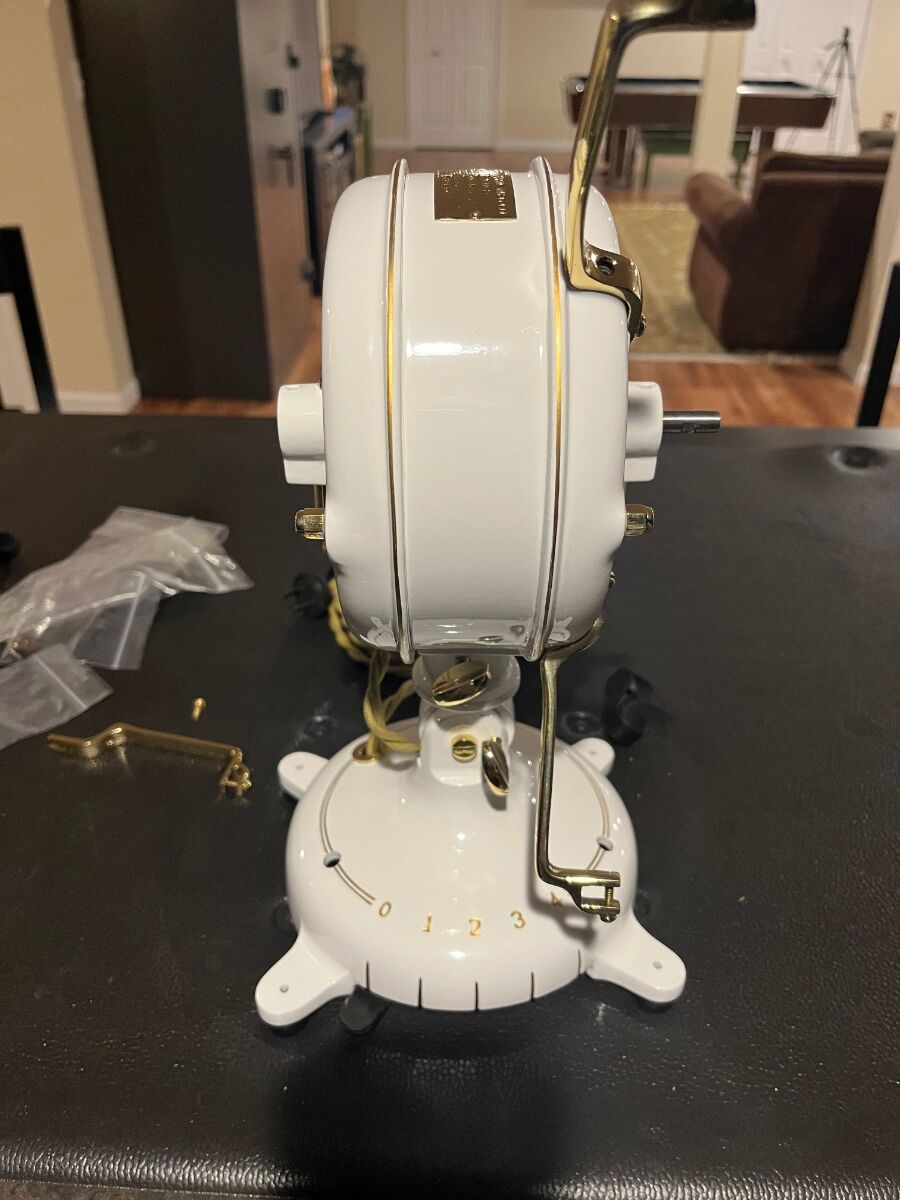
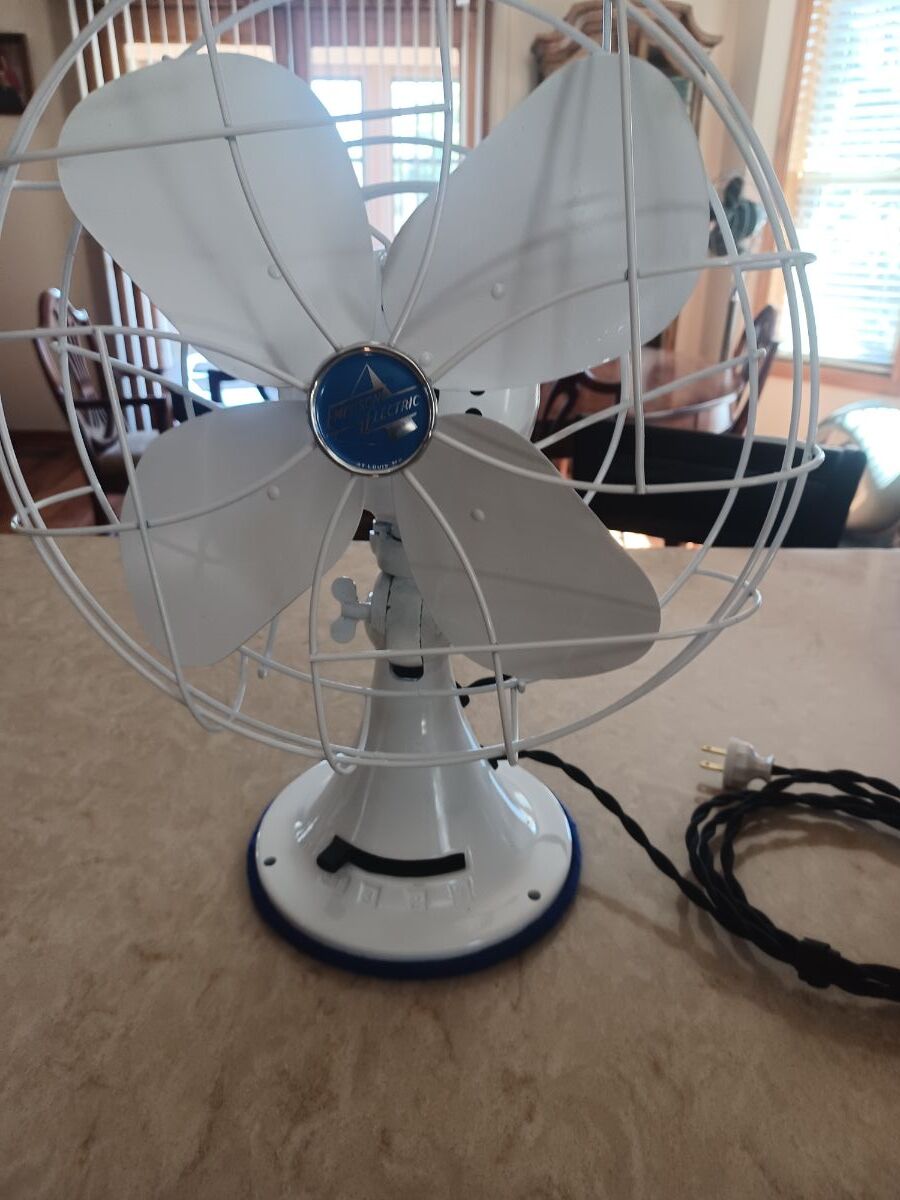
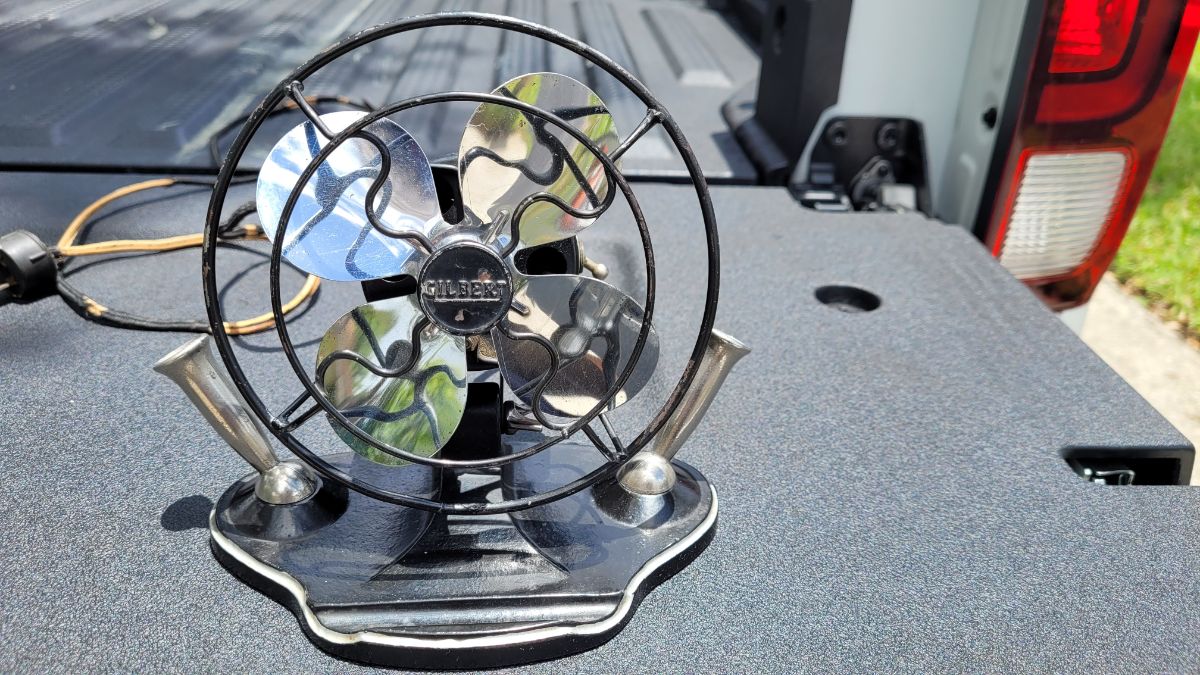
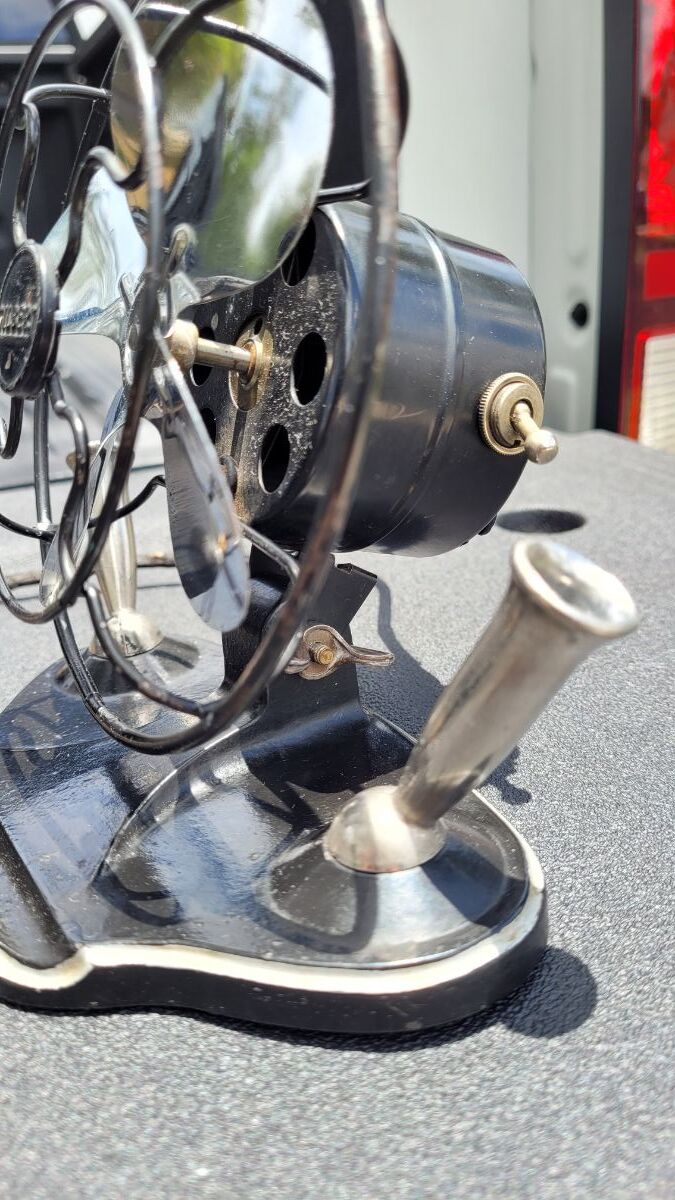
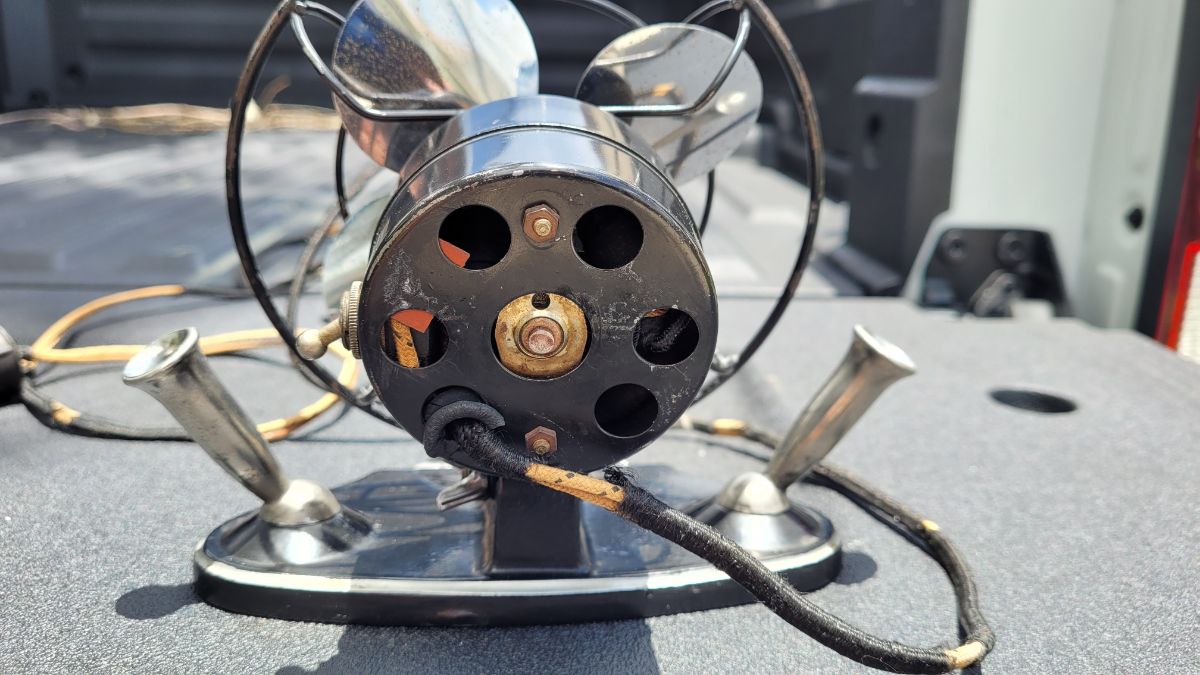
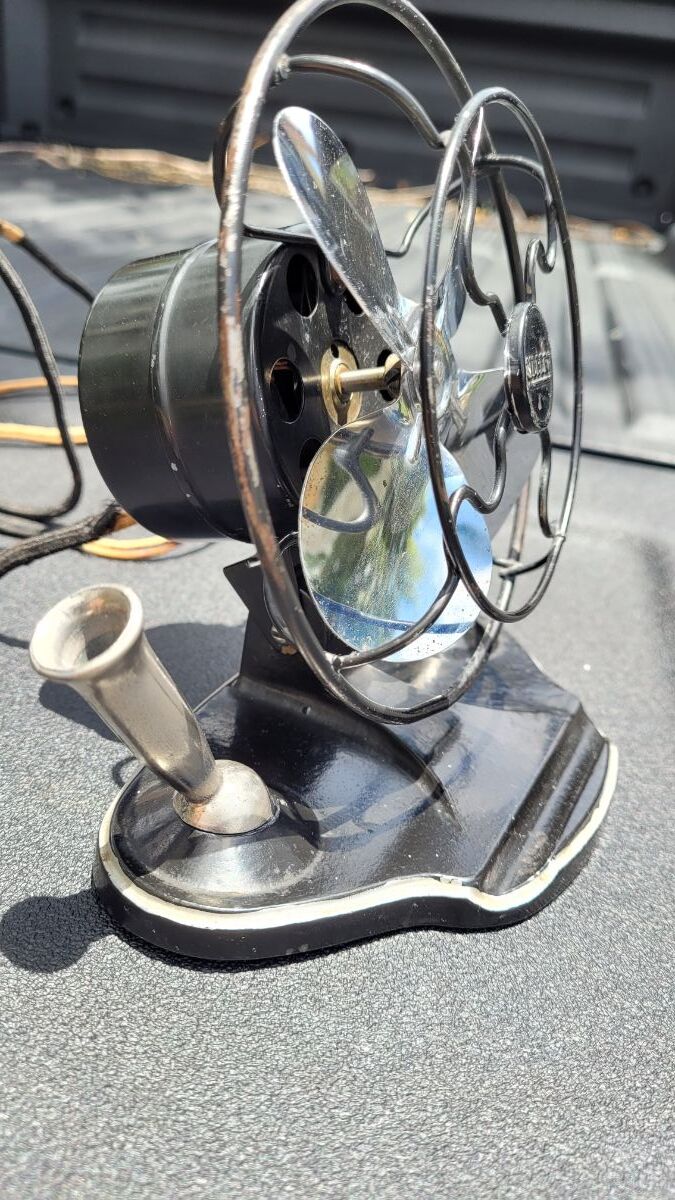
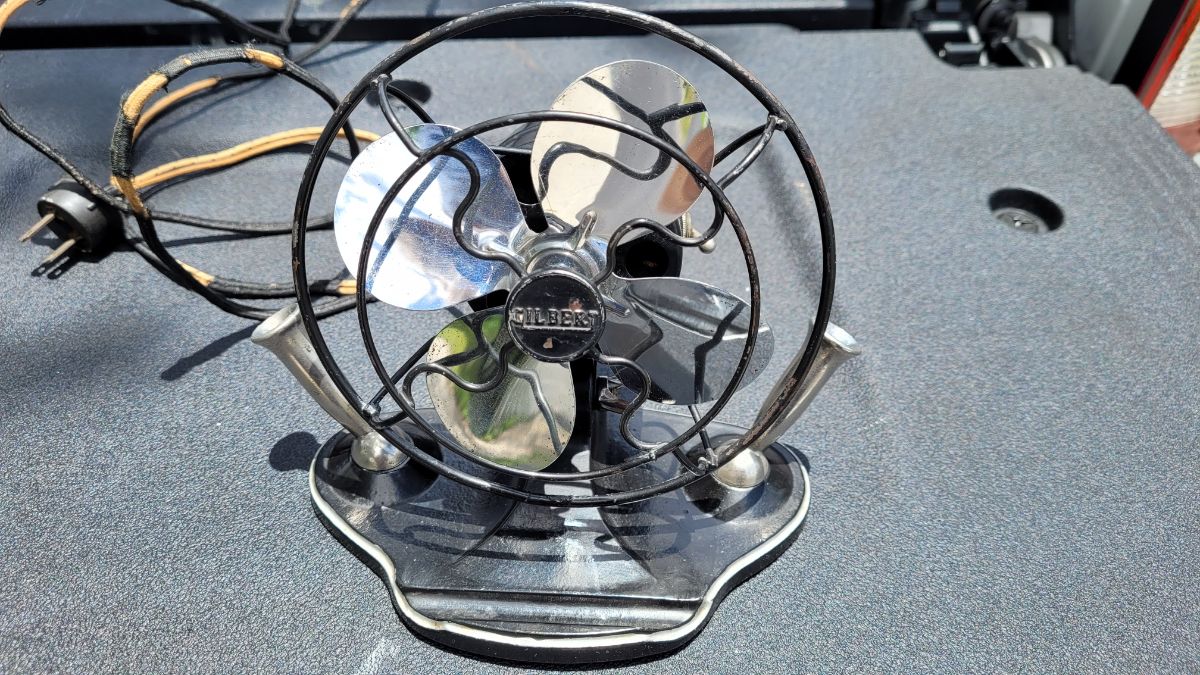
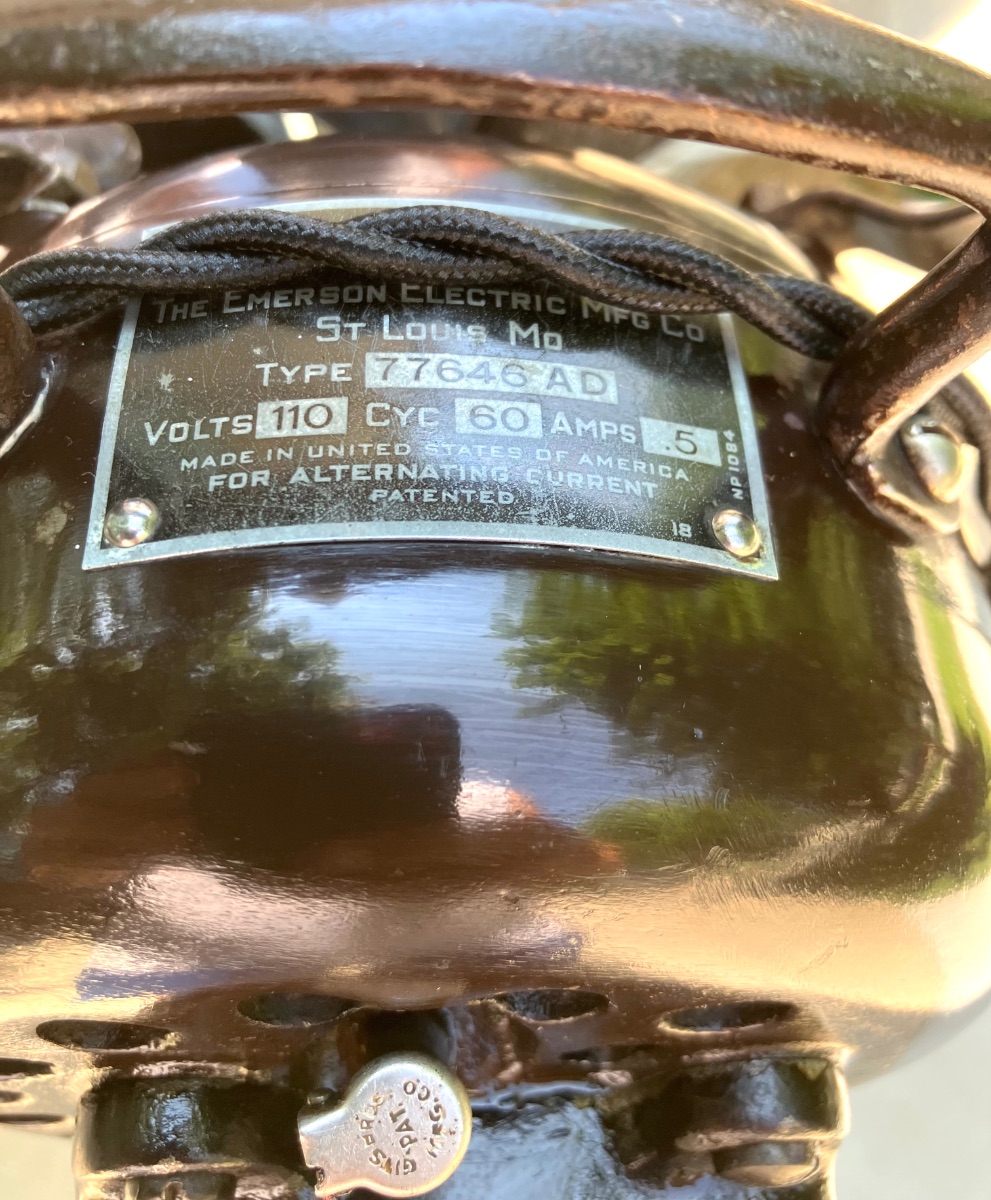
Turned out pretty good. Had issues with rotor making a loud thumping noise, so I replaced it with a 77646 rotor. Runs smooth now. I had some white paint so I painted it white with blue felt to match the badge.
14 points
-
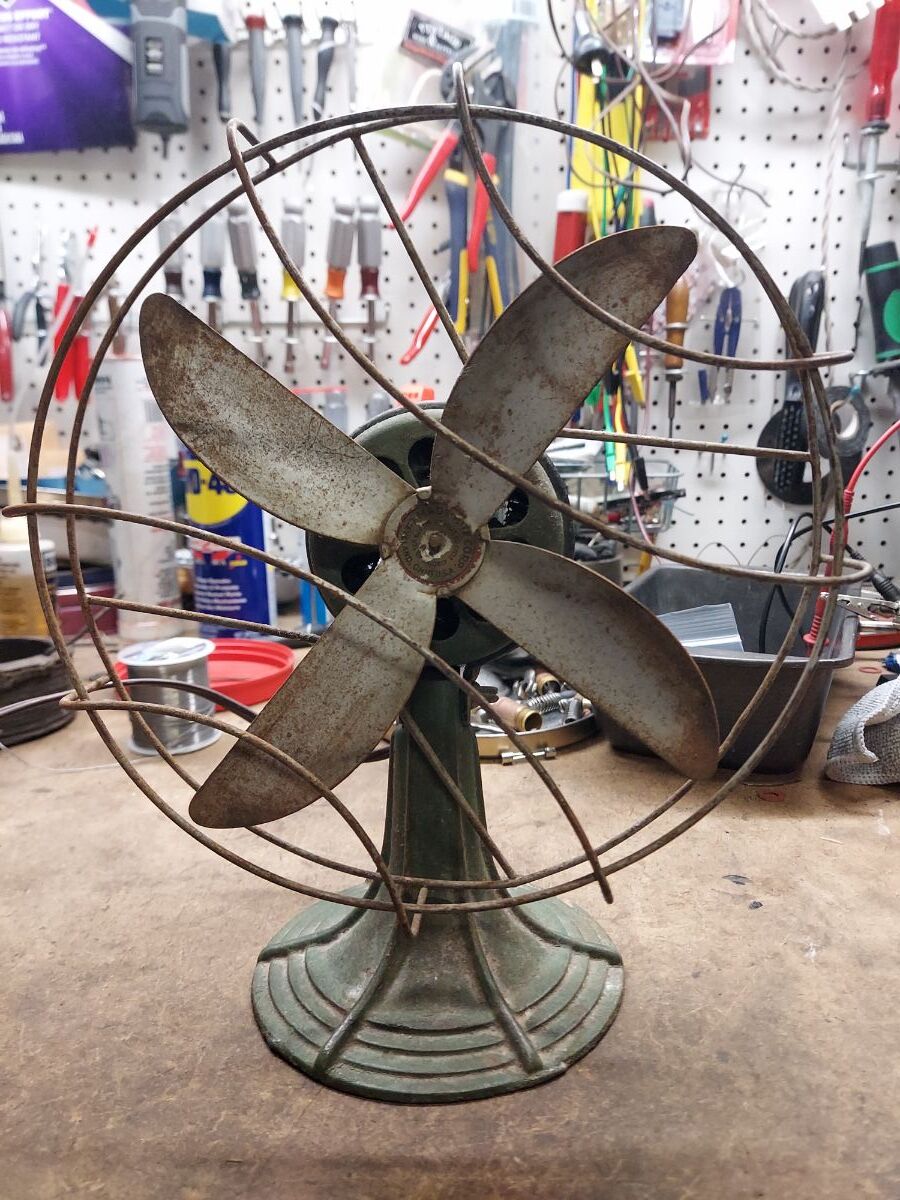
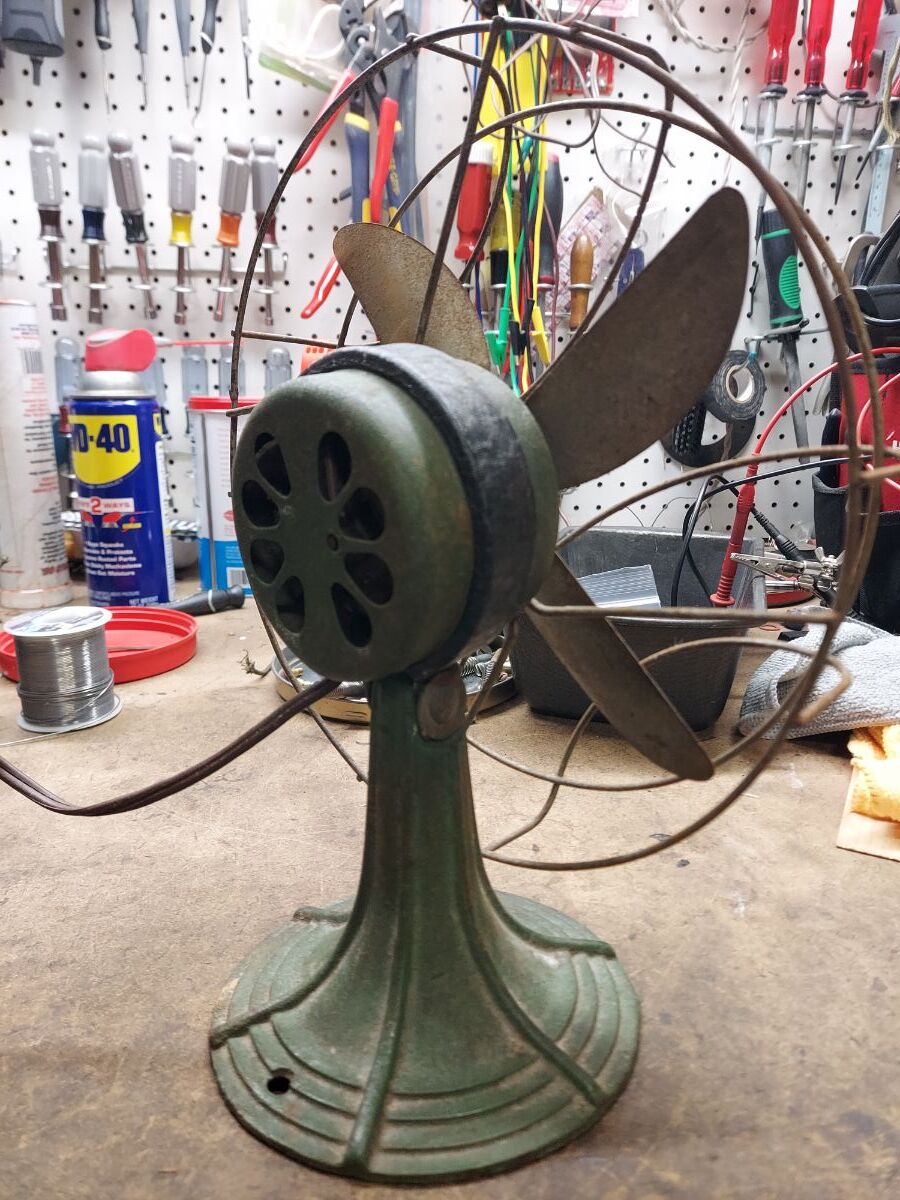
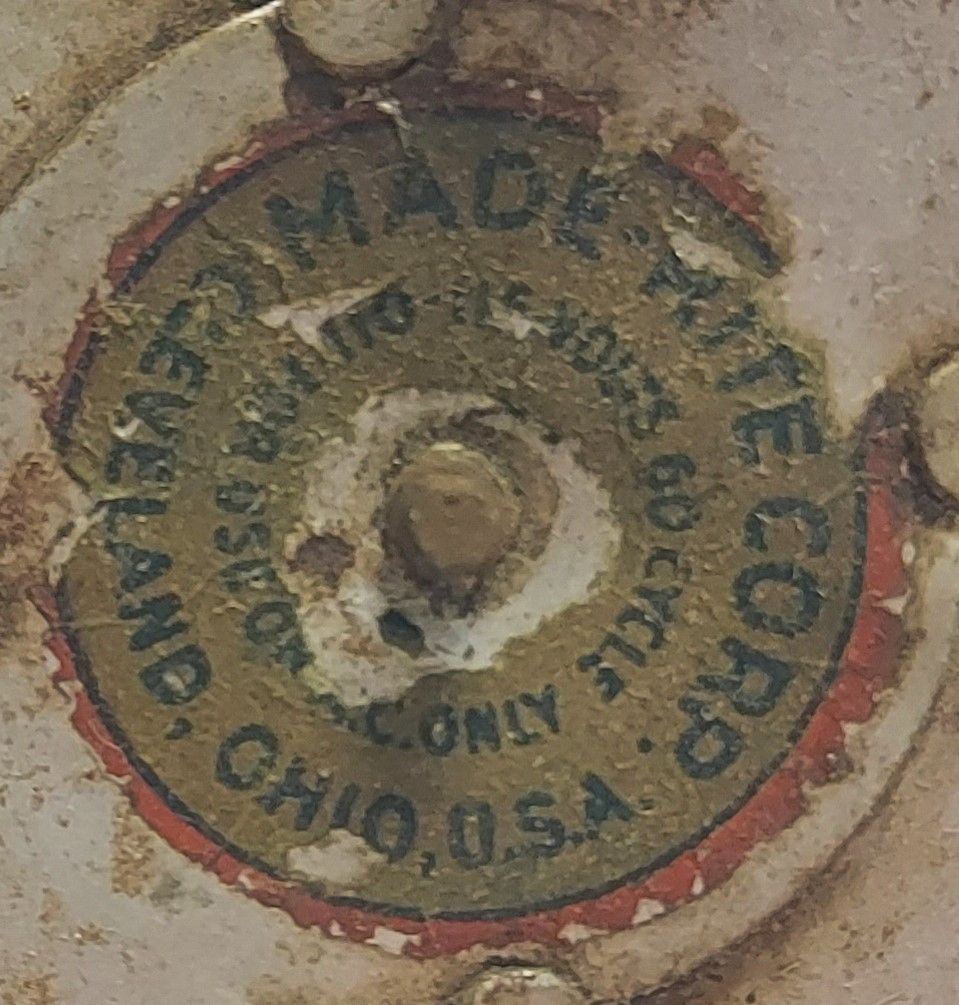
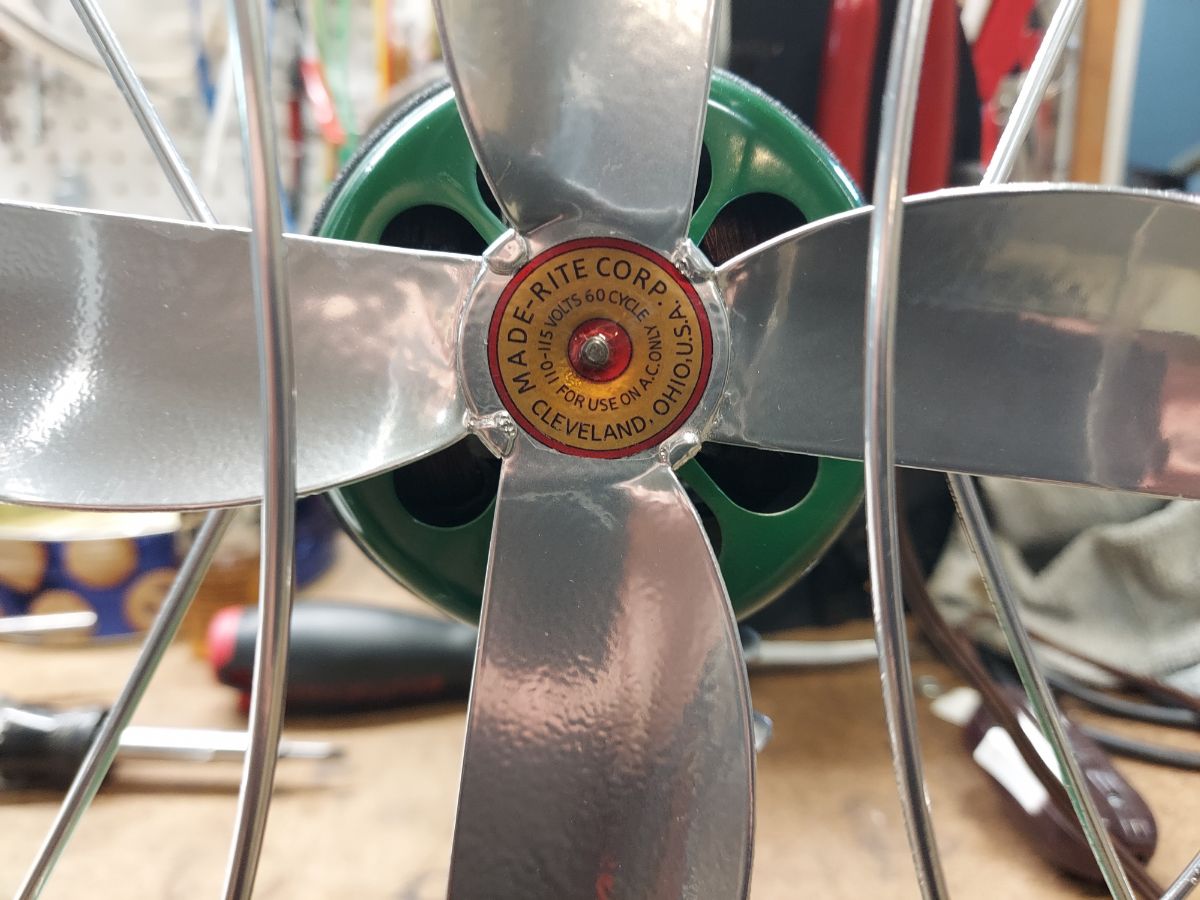
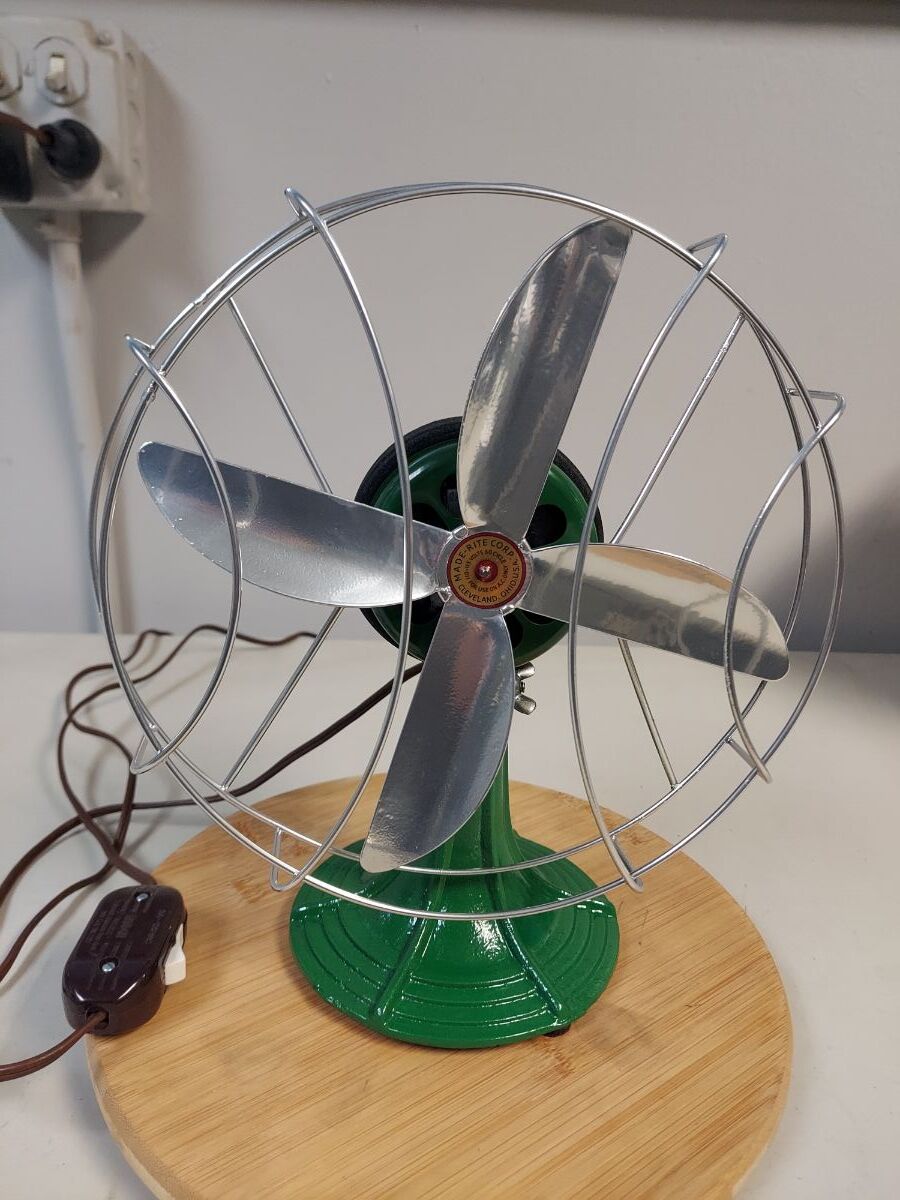
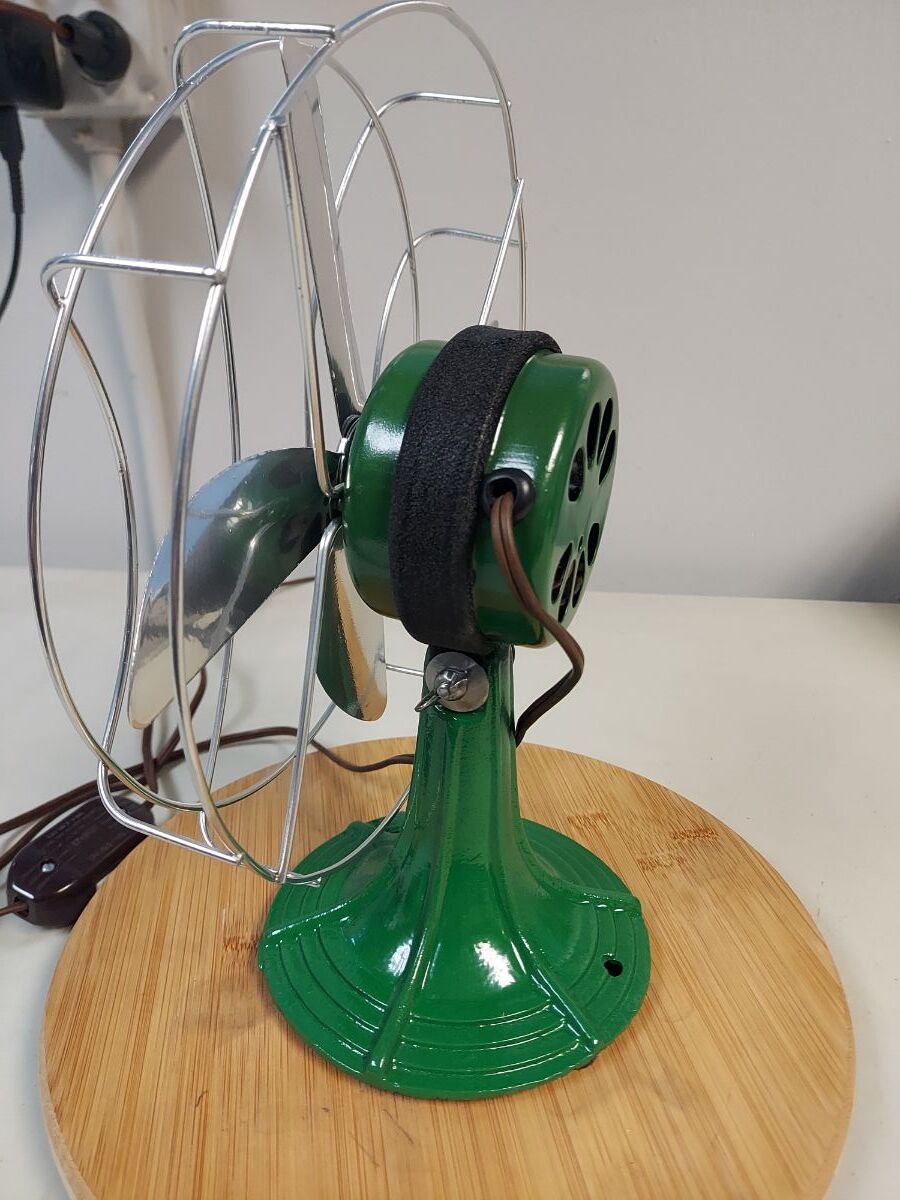
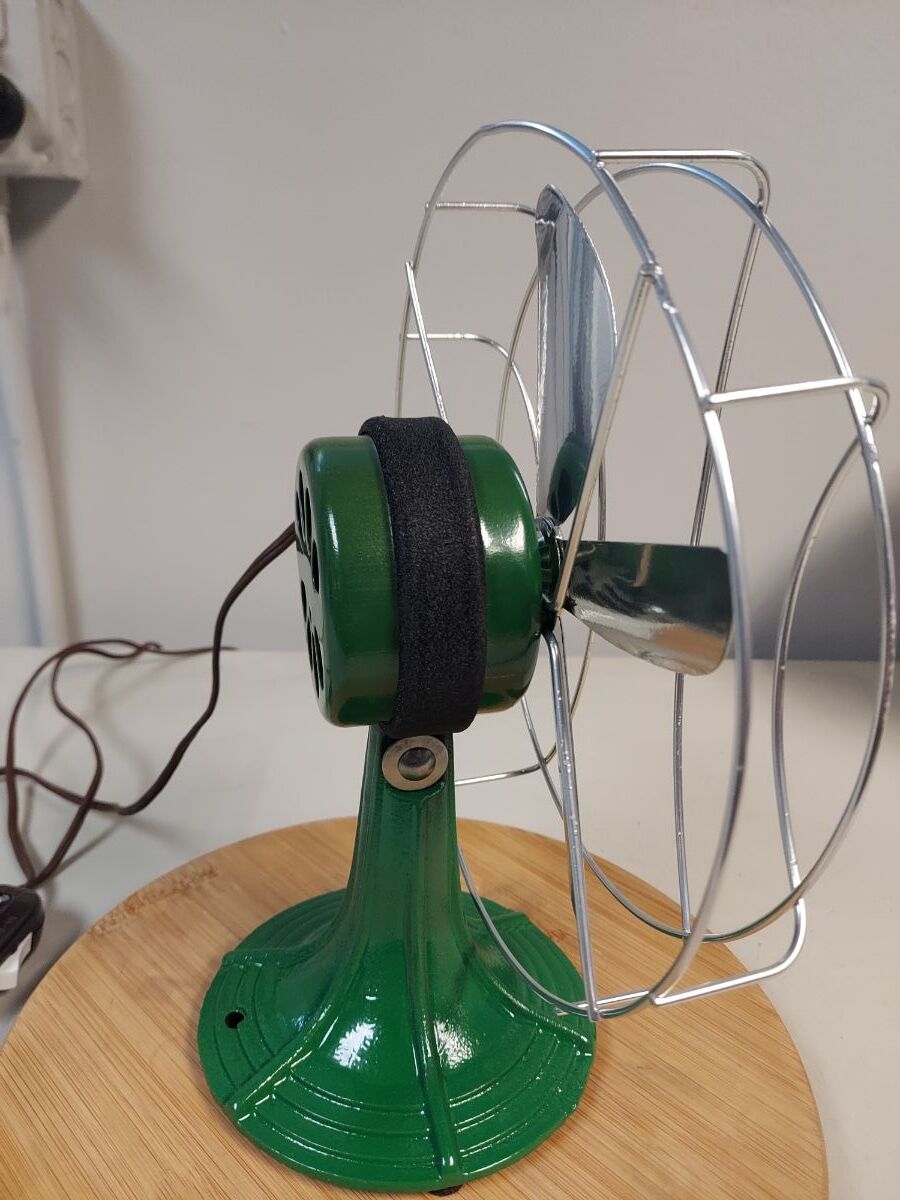
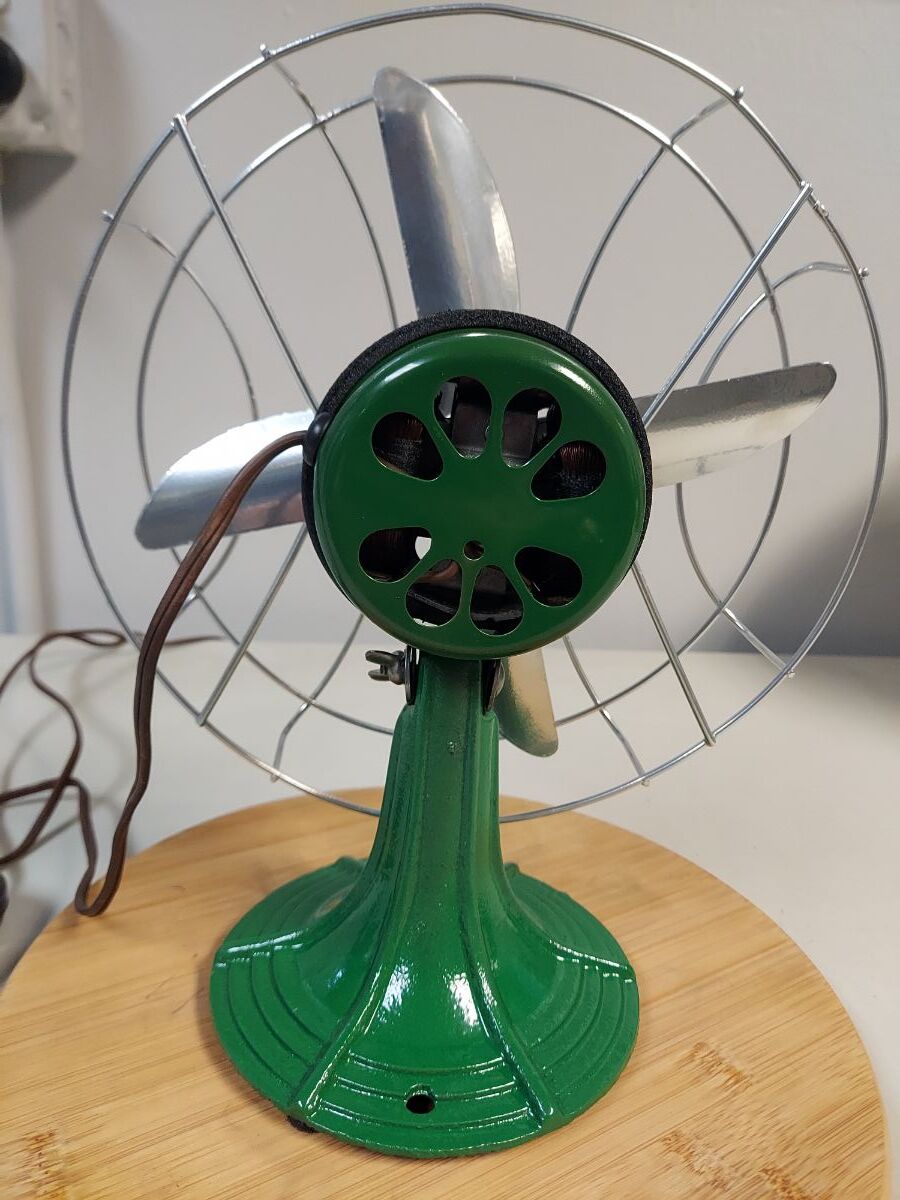
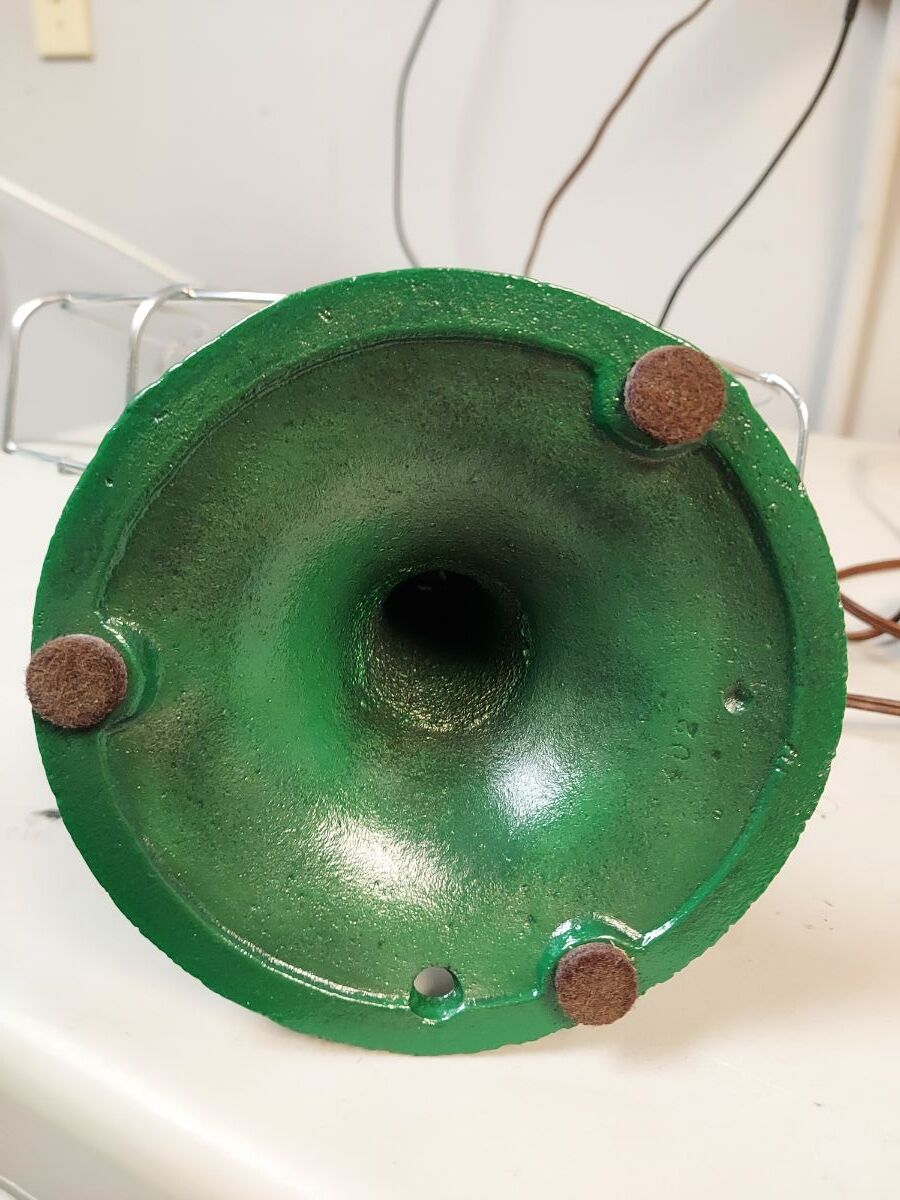
Got this little guy done. It's a 8" Made-Rite one speed with SB/SC. The base is cast iron, the motor housing is stamped steel. I powder coated it a tractor green. Powder coated the cage and blade chrome. The coupler ring I spray painted it a black wrinkle finish. I added an inline power switch for convivence. I want to thank Louis Luu for making the badge file. I think it came out pretty good.
11 points
-
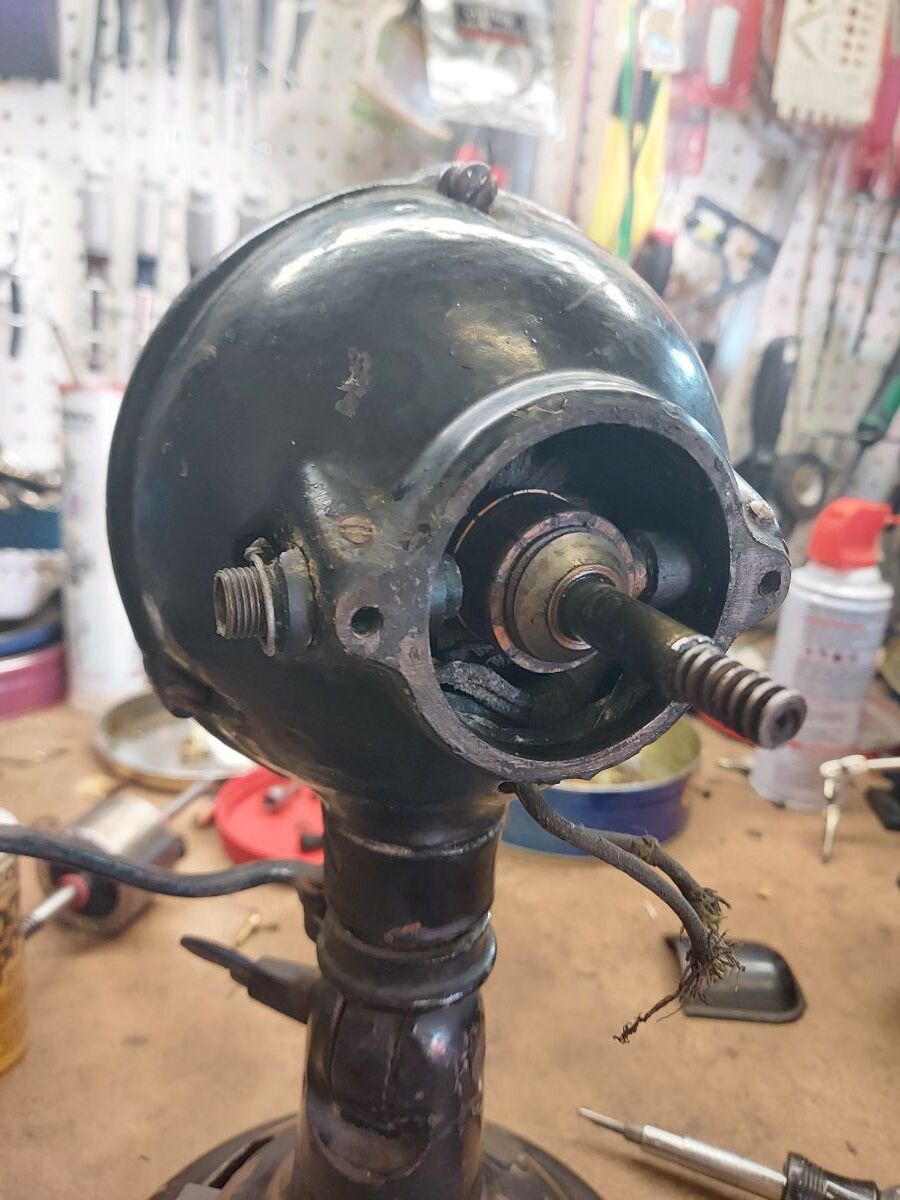
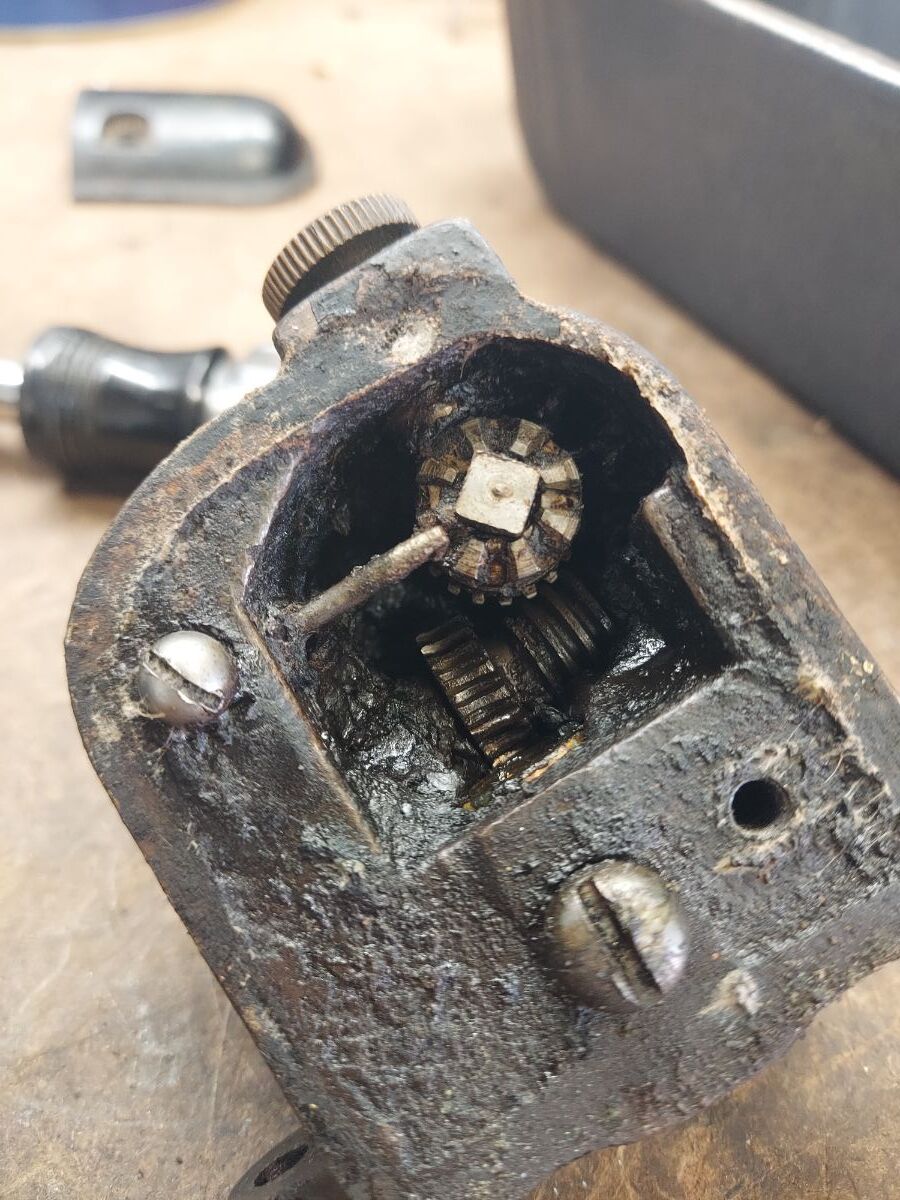
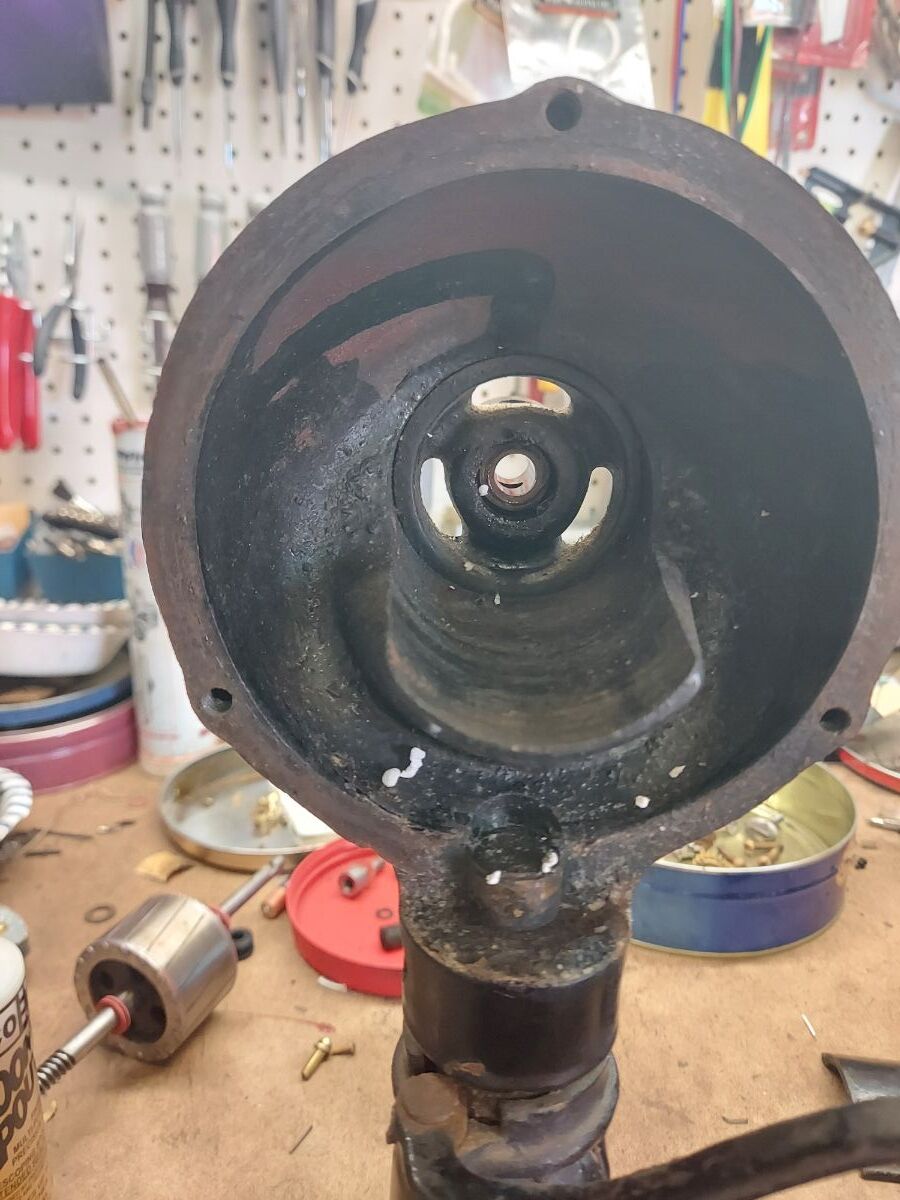
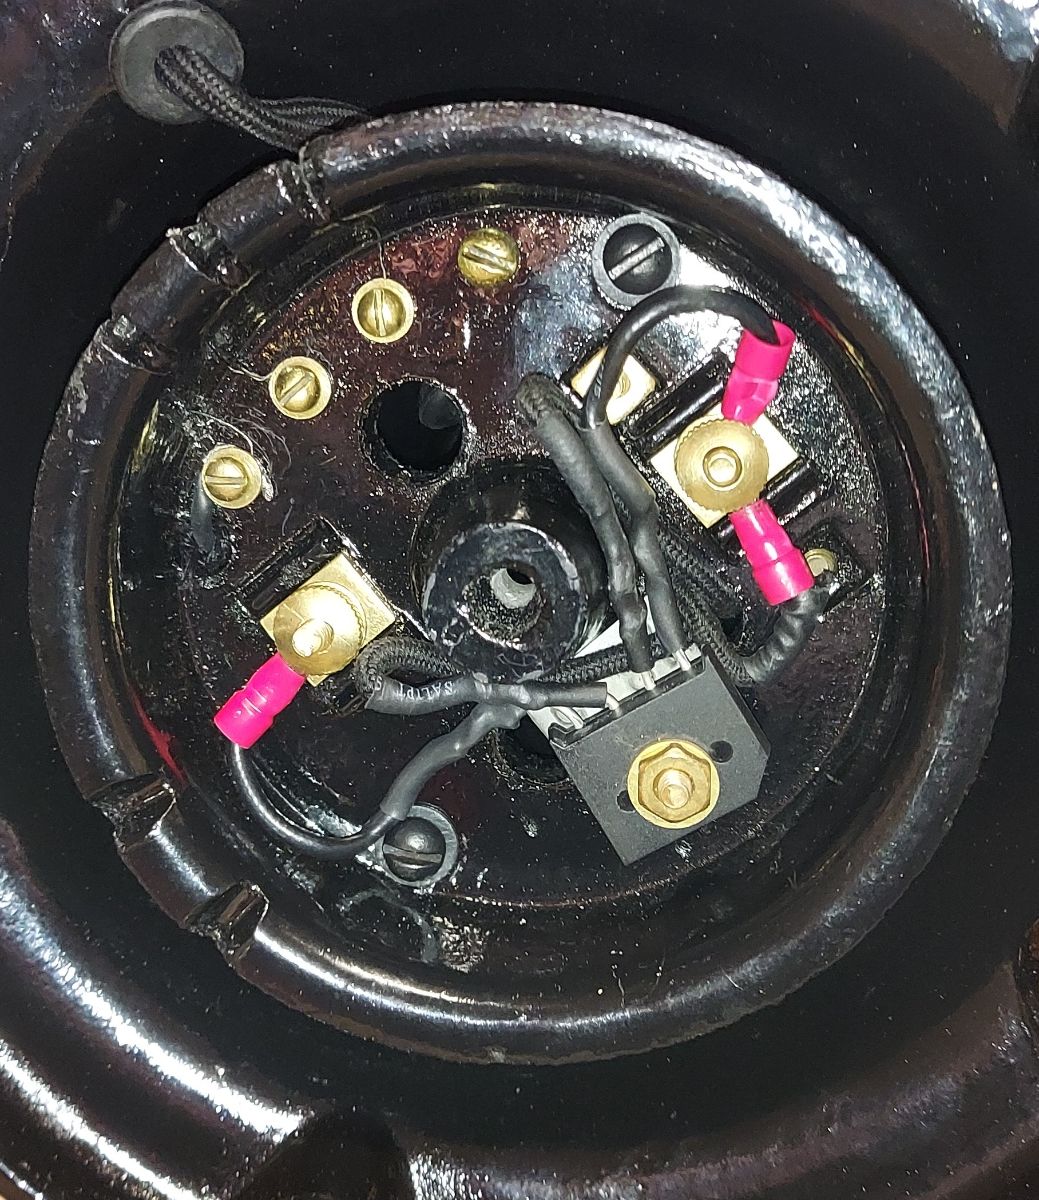
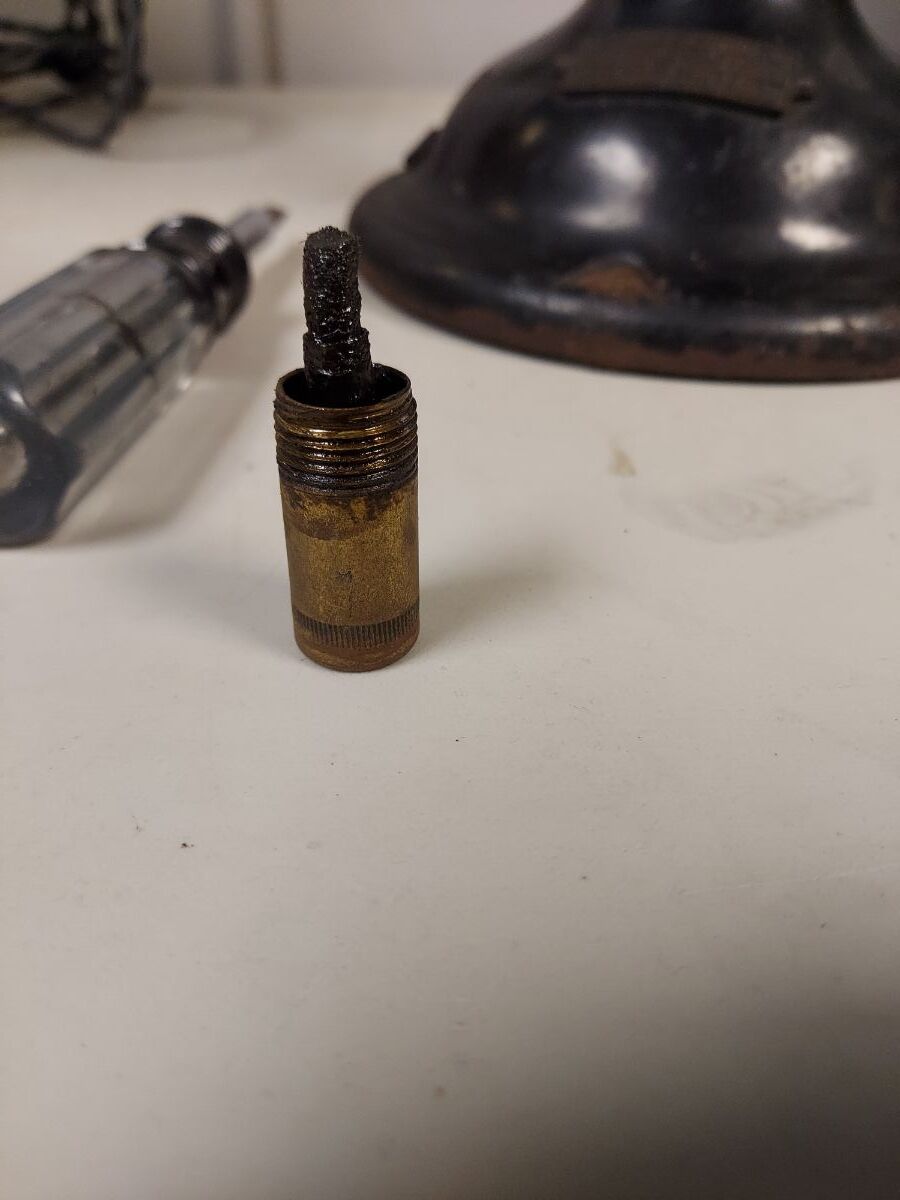
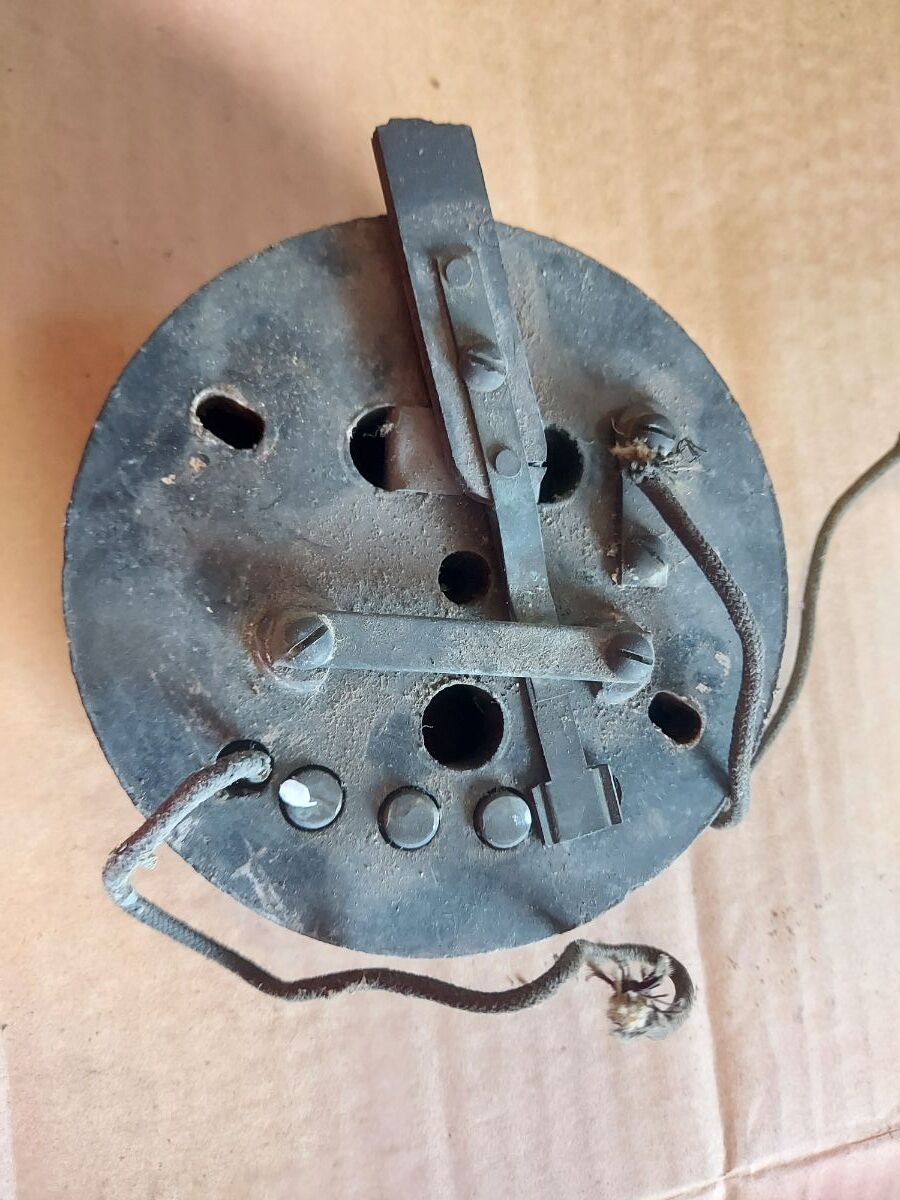
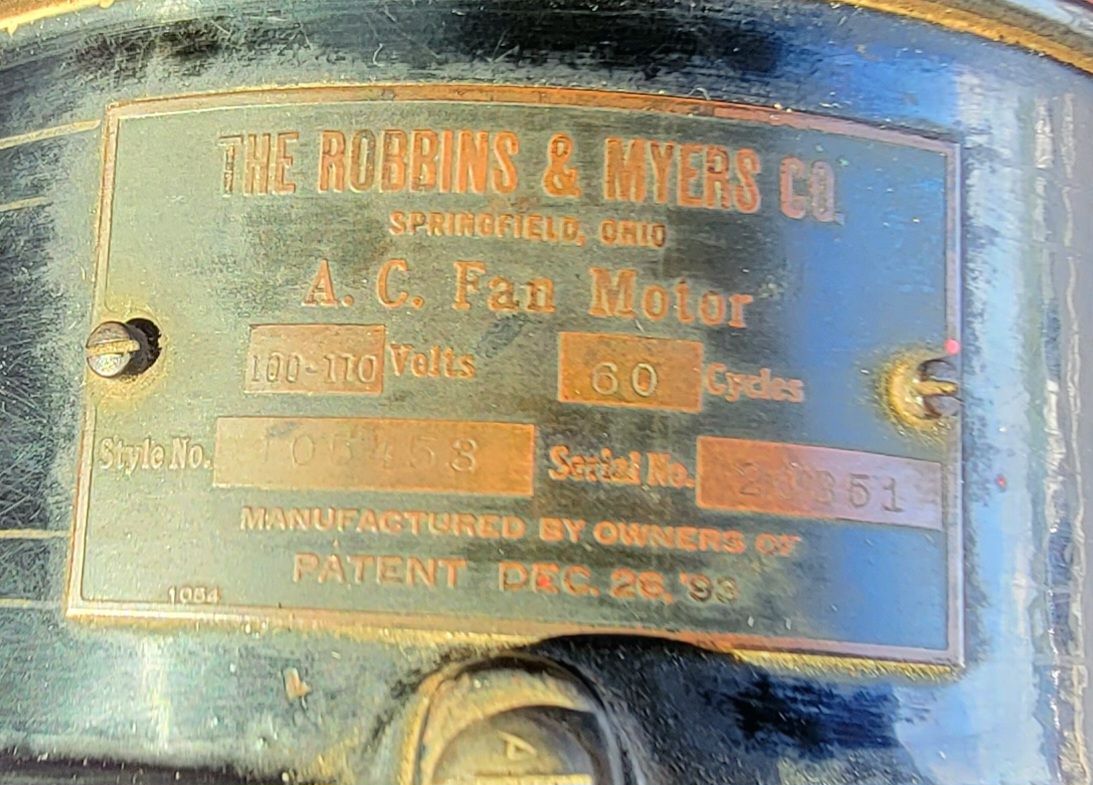
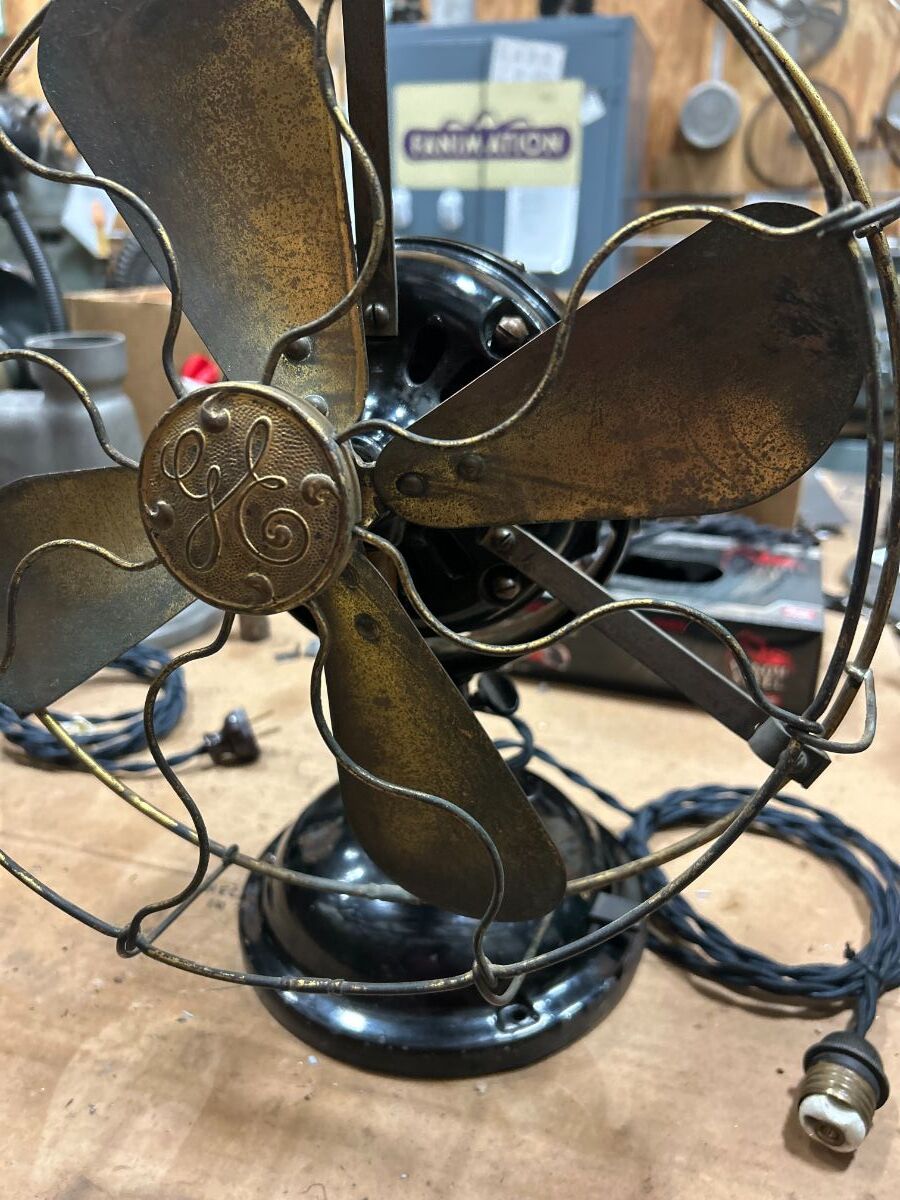
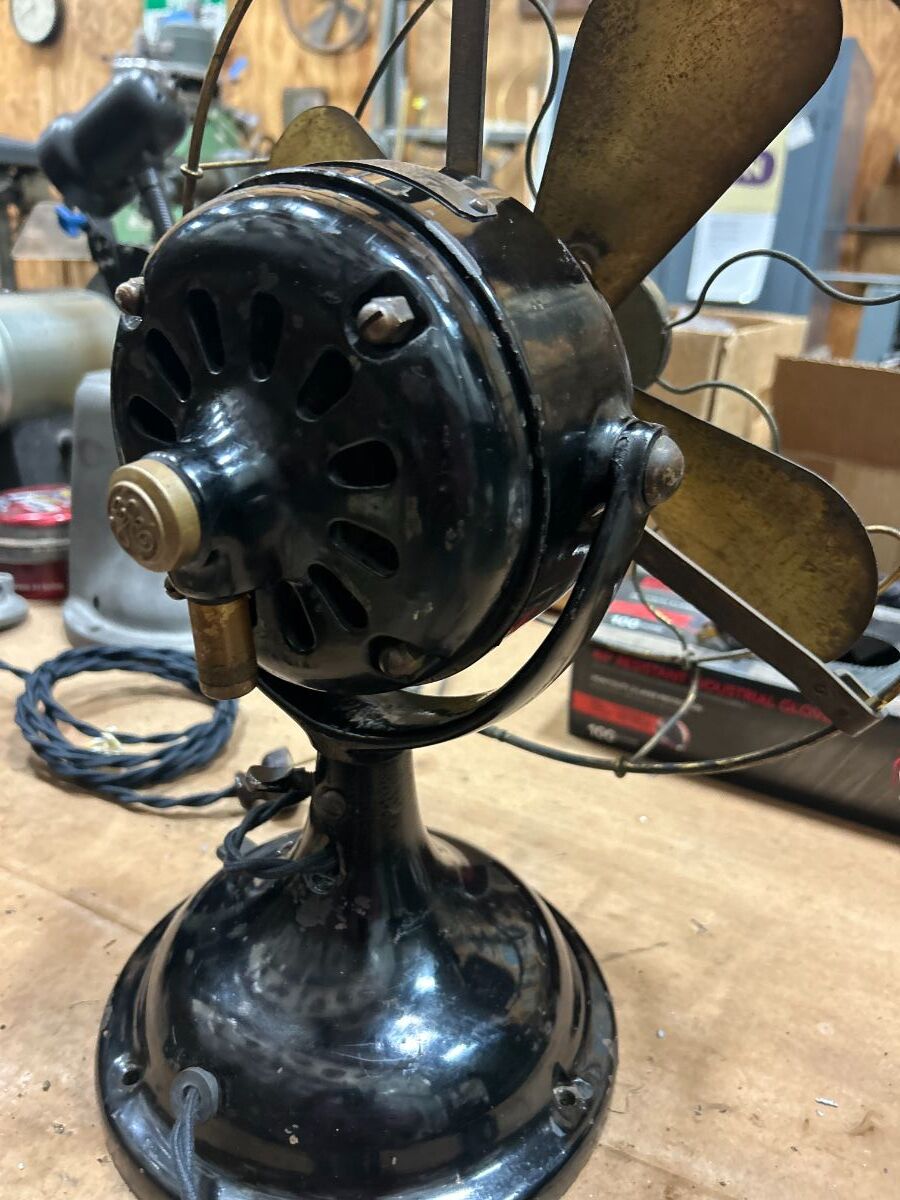
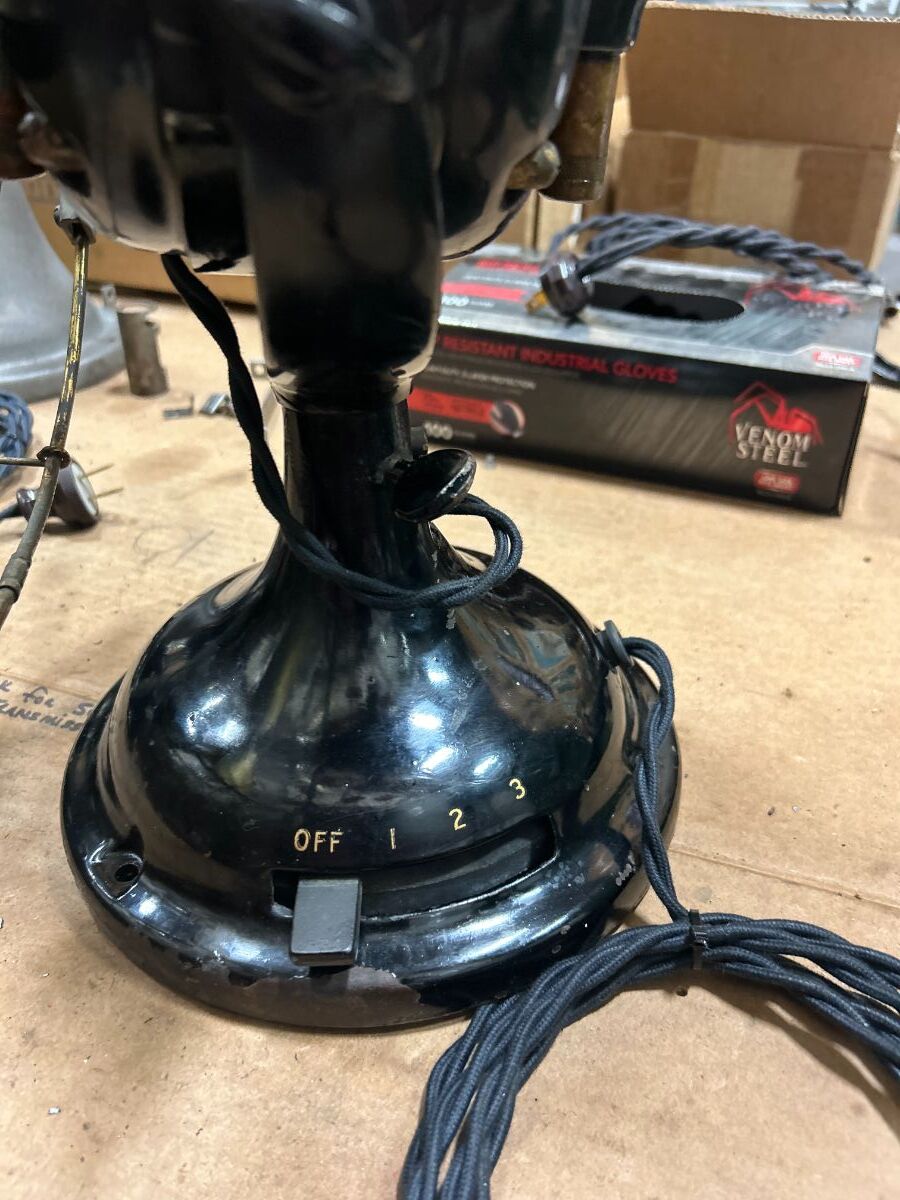
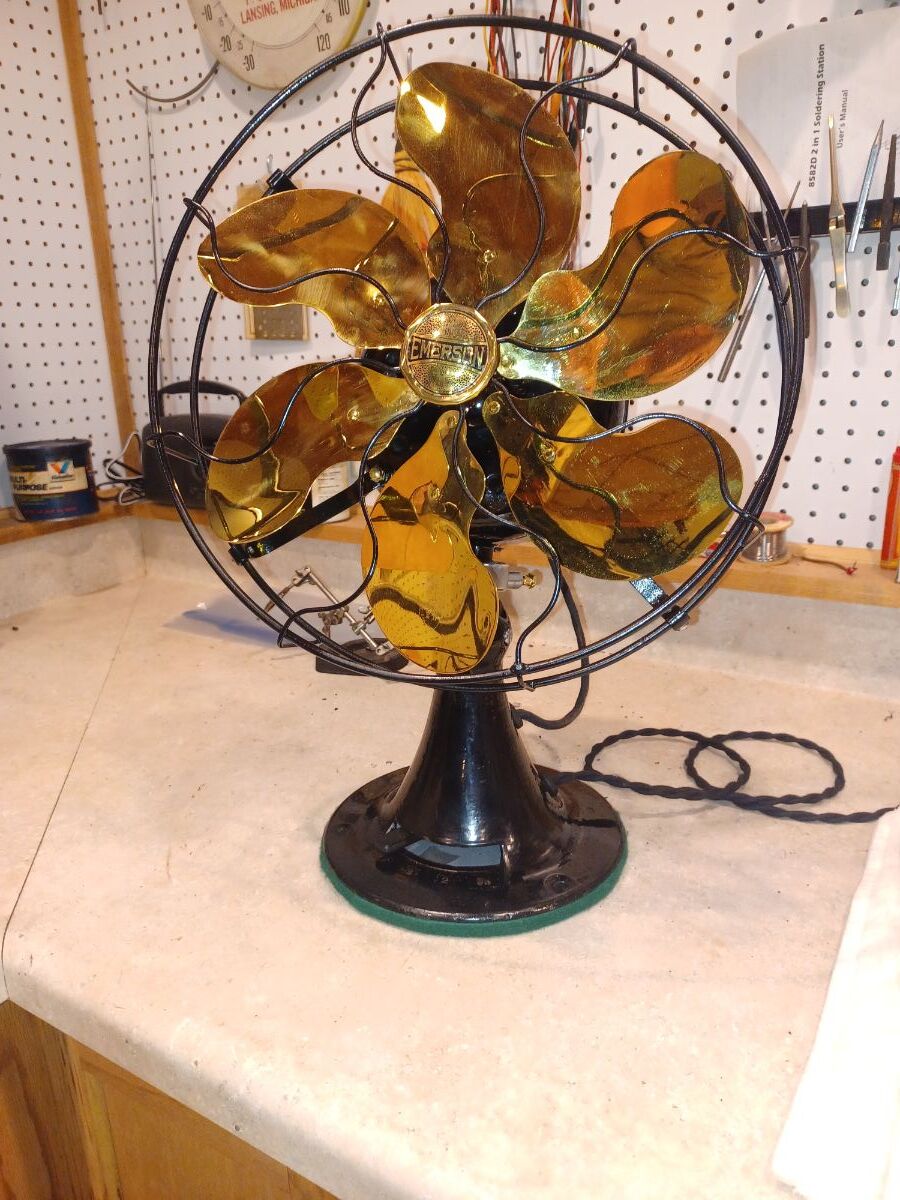
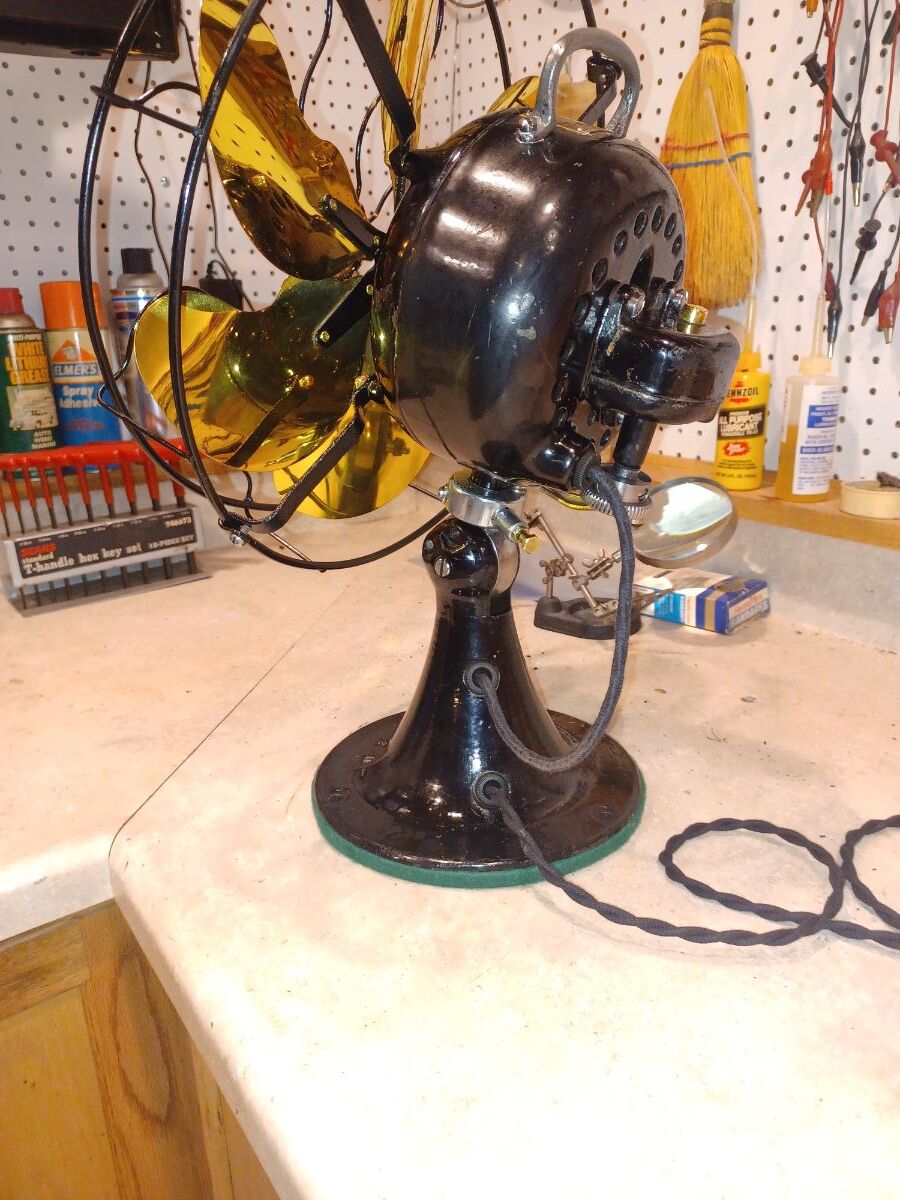
Last week, we had two visitors to the Museum with an old fan in tow. They were brothers, both retired, and had found the museum online. I figured they were wanting some info on it so I had them bring it back to the shop. I recognized it immediately as a 1908 GE BMY, but what really caught my attention was it's condition. Other than being a bit dirty and dusty, it was in remarkable original condition, right down to the ragged head wire and cord with Benjamin plug. As I examined the fan, I explained to the owners what it was, it's place in the GE lineup and where it fit in. I asked what their intentions were for the fan and they said they wanted to sell it. I gave them price ranges that this model fan has sold for and showed them the examples in my collection in the museum. I made them an offer and they accepted. It is a 1st variant BMY that was made later in production with a serial number of 342973. It has the improved centrifigal start switch. Even with a sketchy cord and head wire, it fired right up and ran smoothly on all three speeds. After a bit of cleaning, replacing the wiring and installing new oil wicks, it will join my other 12 inch 1908 BMY with the plunger type start switch in the Museum time line. A nice survivor that is good for another twenty five years.
11 points
-
11 points
-
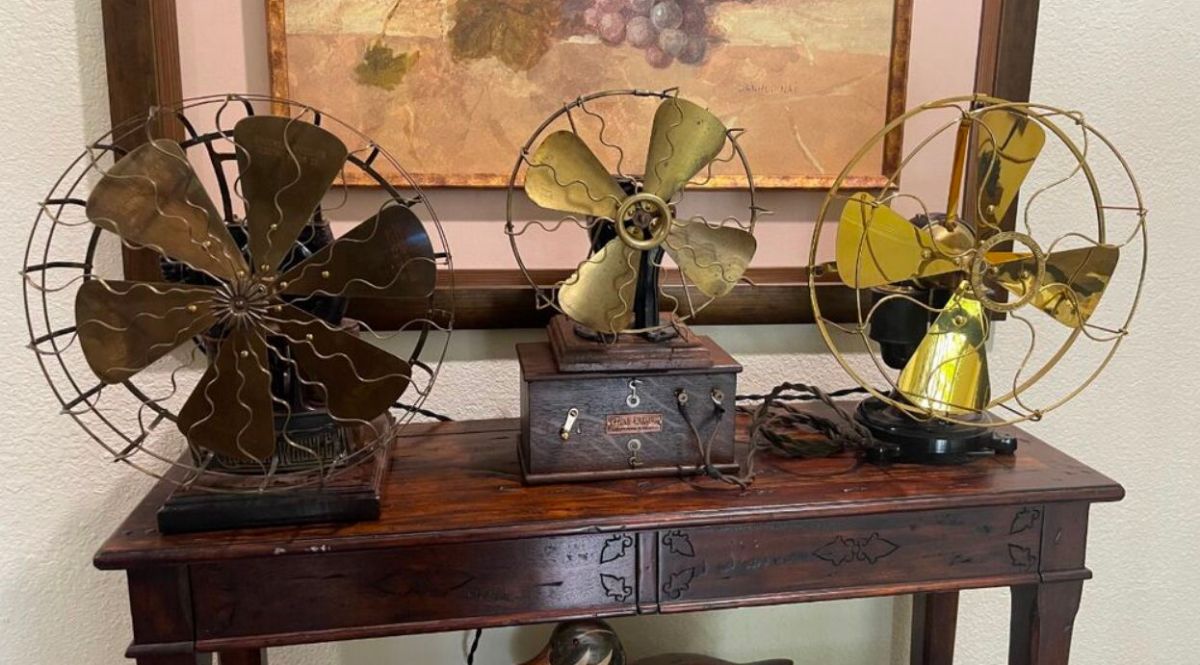
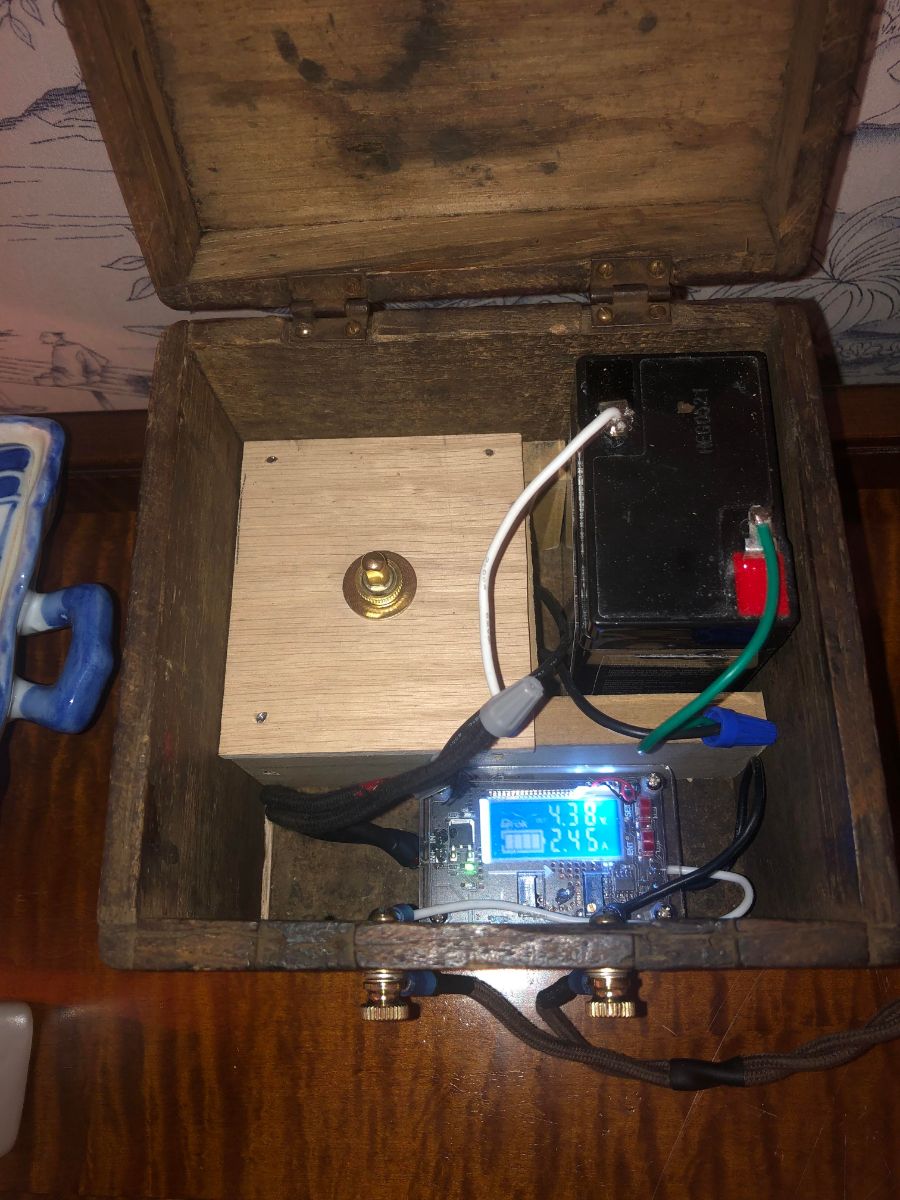
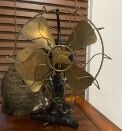
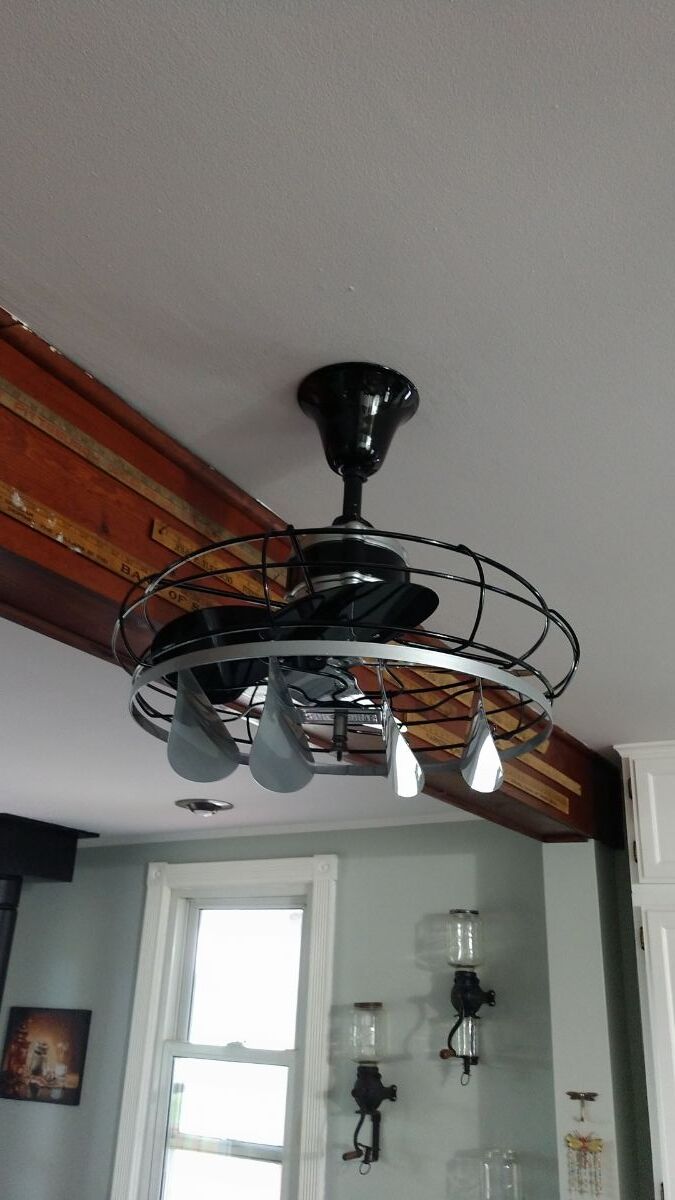
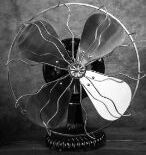
Friends: I have long admired Dave Cherry's artistic eye for creating lovely settings for his fans. Larry Brand sent me this picture which is also very attractive: With both gentlemen to inspire me, I found a little box (seems quite old) on eBay for $41. It arrived yesterday. It was quite rickety and fragile so I applied some glue, here and there, and clamped it to improve the structural integrity. It was just the right size to house a six volt commercial battery, the DRoc buck converter and a push button switch (so that the buck converter doesn't drain the battery by being constantly on). It may not be as nice as Dave's or Larry's settings, but it certainly cleaned up the arrangement. What do you think? Thank you to both Dave and Larry for their inspiration and creativity. What fun!
11 points
-
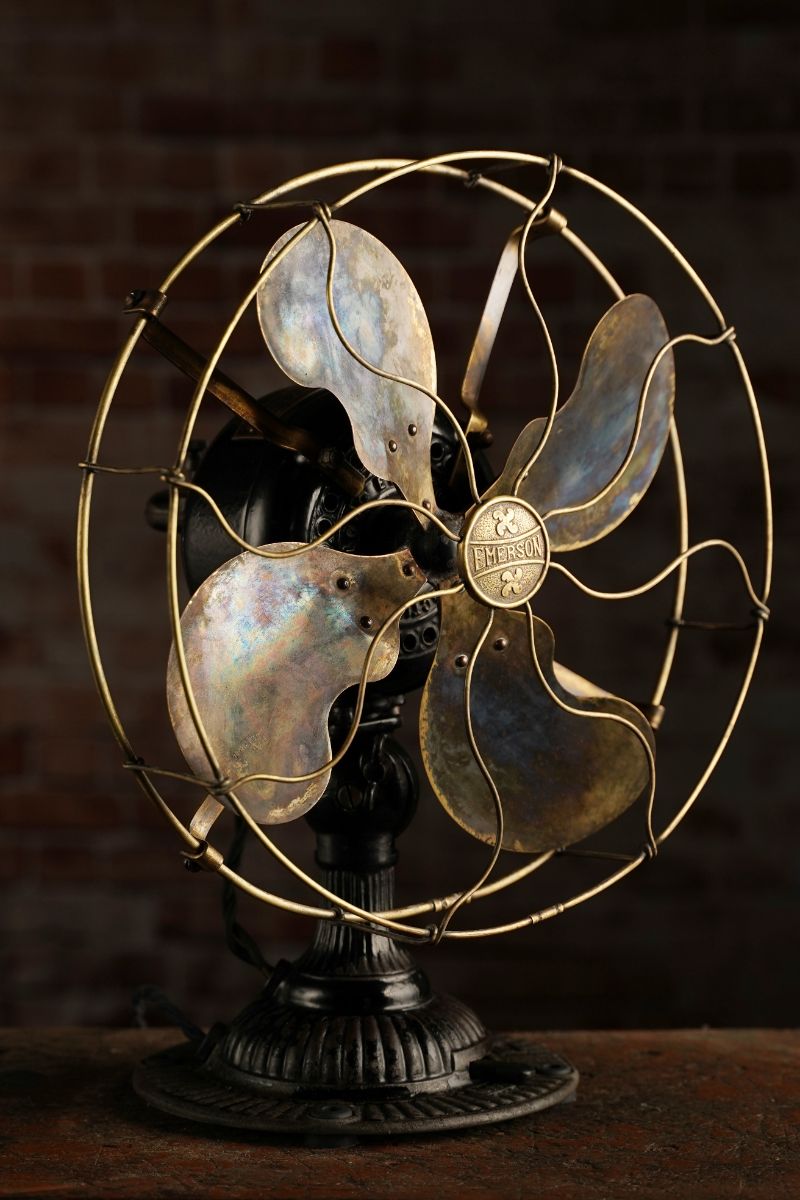
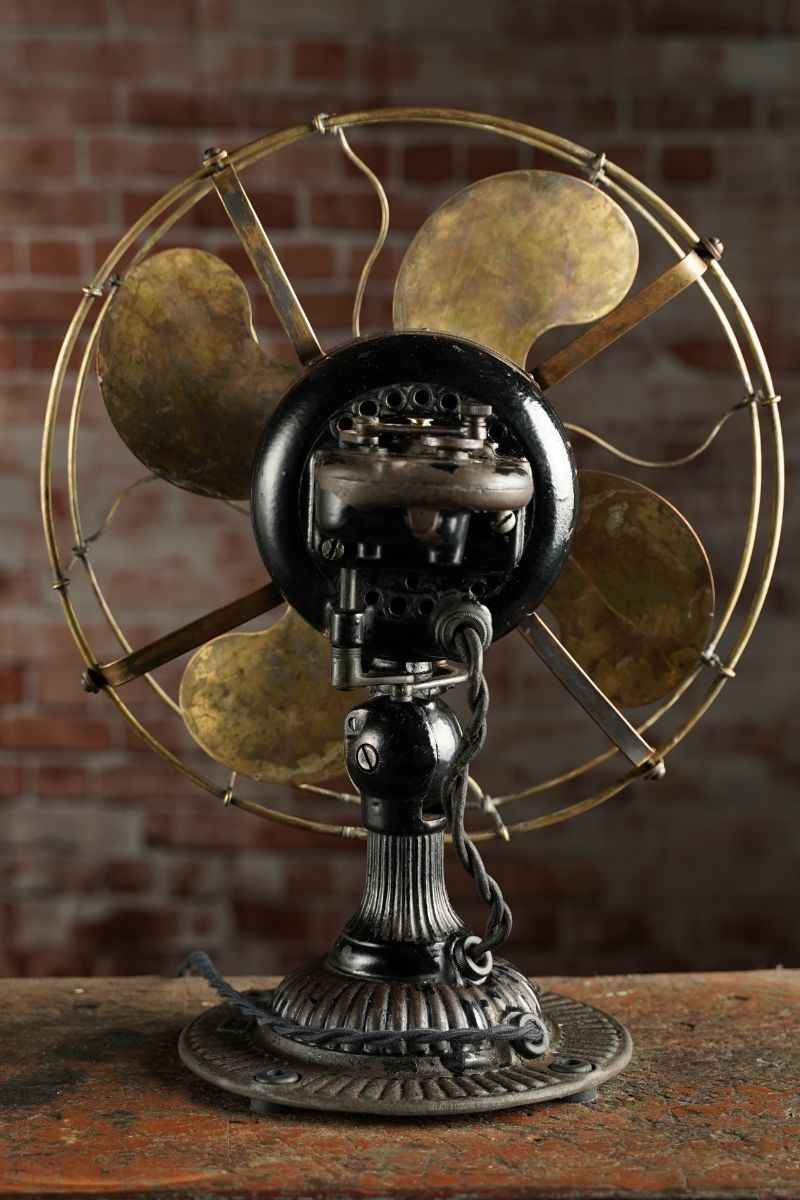
I’m feeling better after selling my old 1975 Ford pickup yesterday to “fuel” my fan obsession. (Gosh, I loved that truck). Right as I was putting the new Kim Frank made struts on my new 1903 Pancake, here came the UPS man dropping off a 12666 Emerson from Trevor Soundararajan. He did a stupendous packing job! Check out the pics below 👇
11 points
-
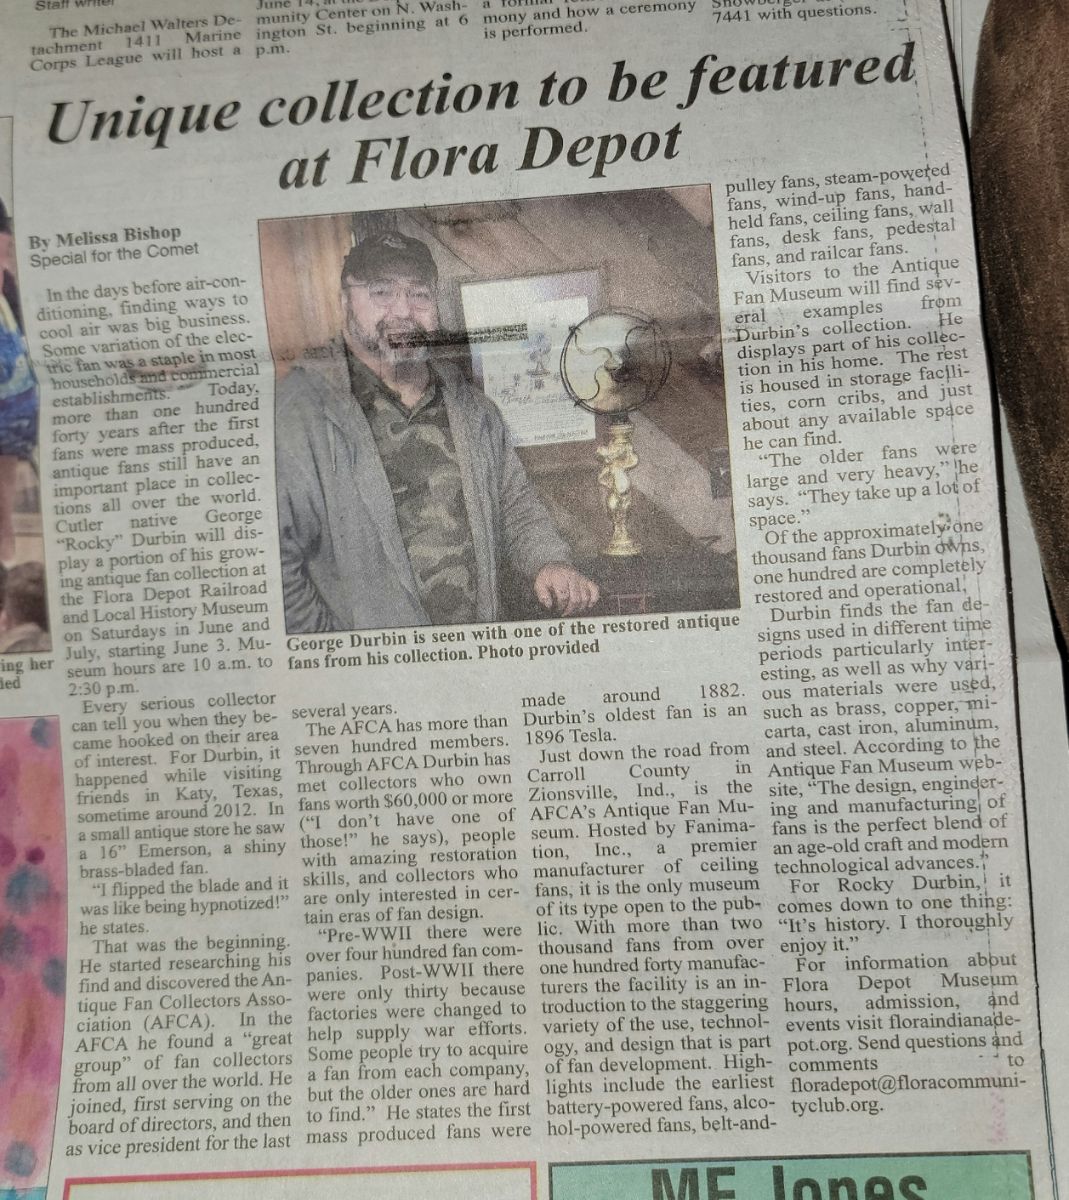
Good news! I am in the big time now! Royalty actually! I made the back page of the second section of the Carroll County Comet!! 😅🤣😂 And I was not in the police arrest report "this week" and I was not in the obits either! So I got that going for me!!
11 points
-
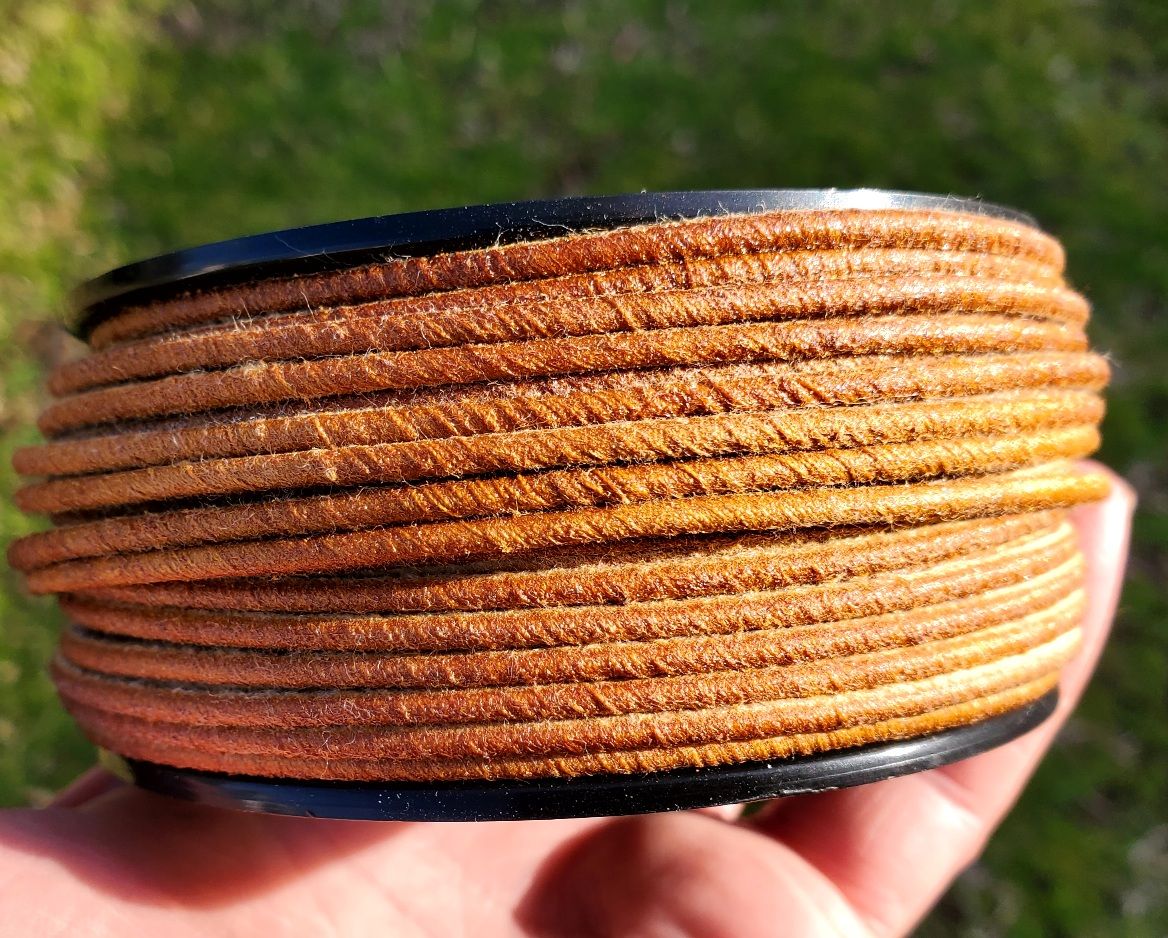
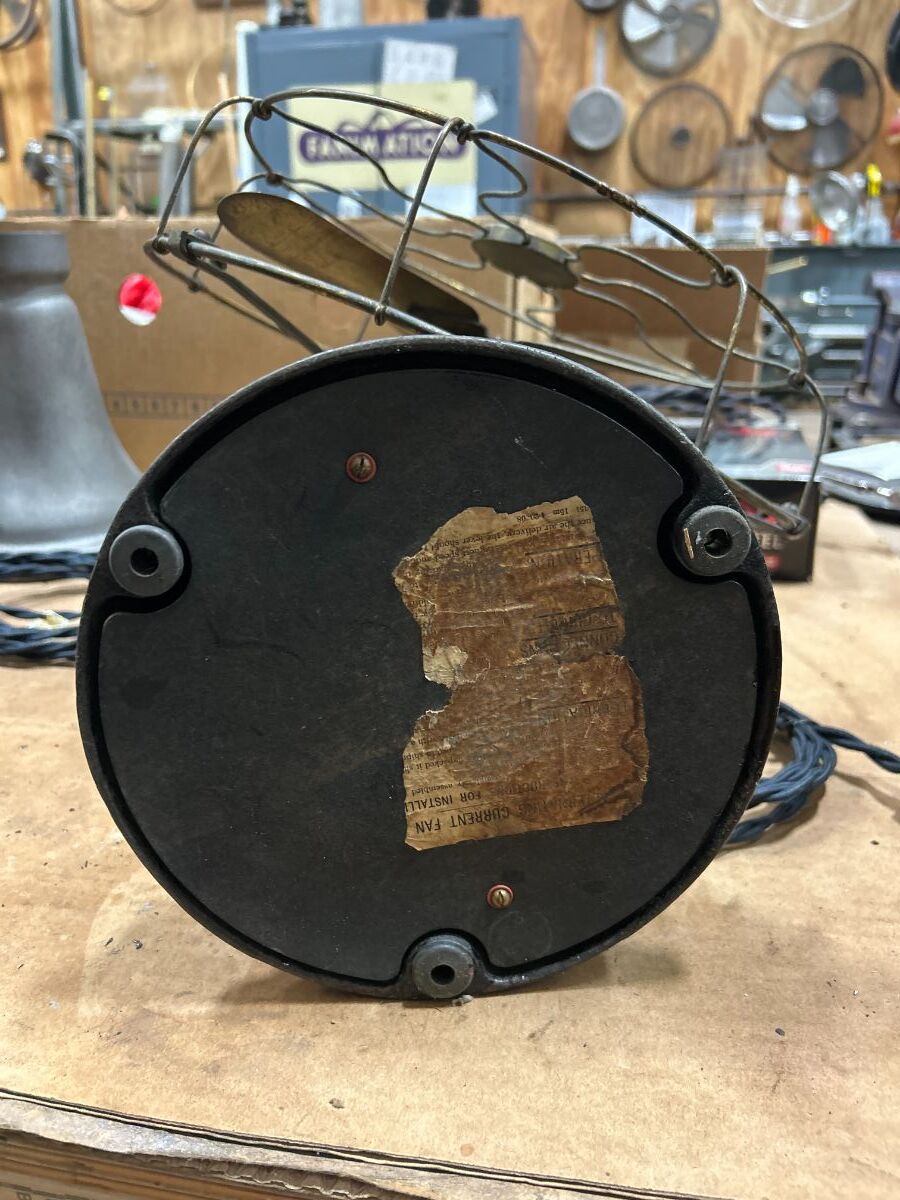
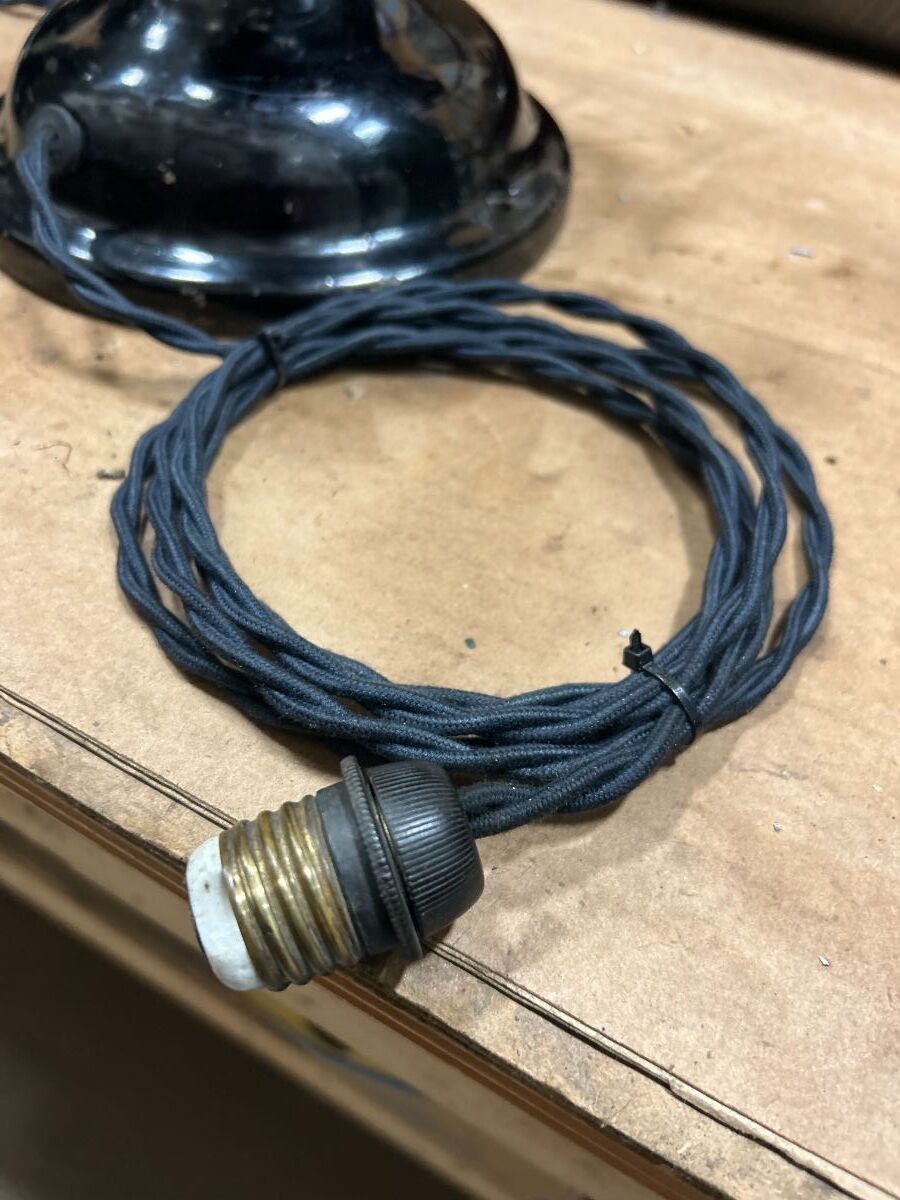
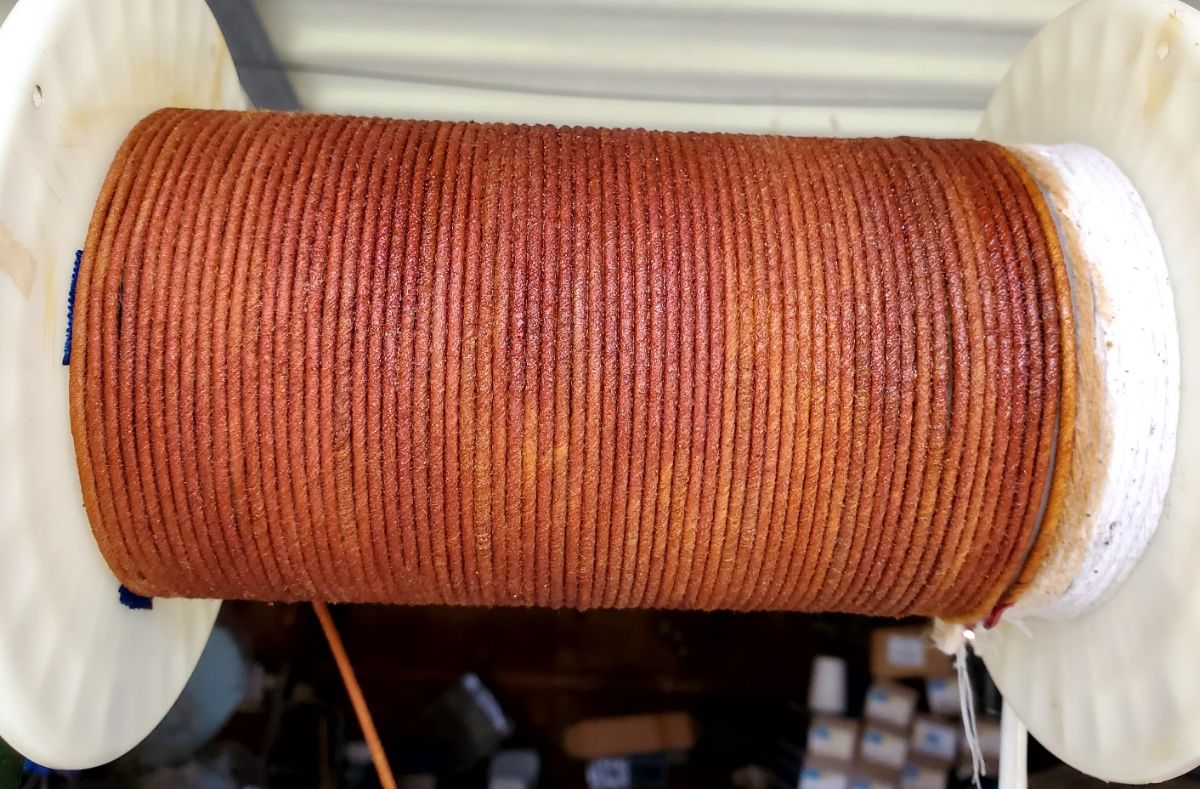
Here a newly developed wire for Edison C Frame Battery Fan. Wire is pictured currently curing.
11 points
-
I picked this one up a while ago, I knew it needed a rewind but the price was right. Nothing fancy here, I was able to save the original finish but I did paint the blades and gear box. I rewound the stator and cleaned up the hardware. I didn't polish any of the brass so it would blend in with the original finish. Here's some before and after pics.It was a 1929 badge that was restamped for 1930.
11 points
-
Here's a Jandus C frame I've almost completed. Just waiting on wire and plug to assemble, and an itty bitty GE lil' ripper. Cute, eh? Cheers, Bill
11 points
-
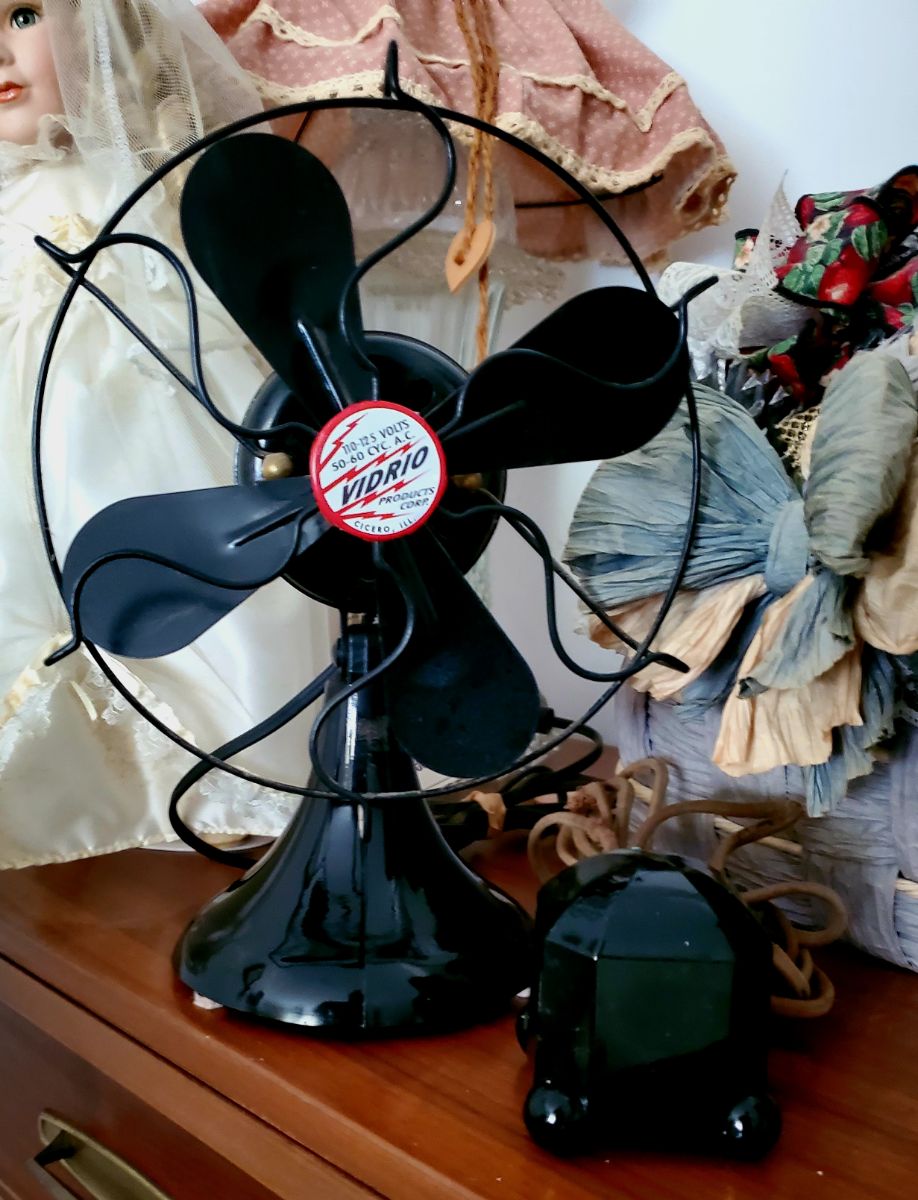
Just finished a new cage badge for my seldom seen Onyx Vidrio.
11 points
-
Here's my Emerson 16666 fresh off the work bench and writing this up while enjoying watching it run (I know it's 17 degrees out but who cares!?!?). When I got this fan, it was complete and not in trashed condition. Cage was surprisingly perfectly round. Seller said it ran. I'll take his word on it as I wasn't going to test it with that much bare copper showing. I wasn't in the mood for sparks everywhere. Enough sparking had already been done on this fan as one of the hub fingers had been welded back on. I sent the blades to Jerry Bravi for his expertise. He reported back that the weld was good and strong. A couple days later, I had a beautiful set of blades back in my hands. Jerry does spectacular work! All the iron was sent to my buddy Dustin Soto at Mirror Image Coatings in Racine, WI. His powder coat work is absolute perfection! I handled the rest of the brass polishing. All of the steel fasteners and steel parts of the oscillator linkages were gun blued. These lever oscillators are a thing of beauty in my opinion! Such a smooth and quiet runner! It's too bad all of that beautiful linkage is hidden at the back of the fan!
11 points
-
Good morning to everyone. I just wanted to let everyone know here that myself and Robert Grove have settled our issues in regards to the sale of the HC and ECK fan. We have recently spoken on the phone and had a wonderfull talk, between everything that was going on we have finally settled this matter between us. And both parties are very happy, Robert had expressed some issues that he was worried about on my behalf and I agree with the way he felt, and both for myself. It's a hard battle when parties live on the otherwise of the world. I'm glad I can see that Robert is a reasonable man and quite understanding. By any means I don't think any bad of Robert and would be happy to continue to sell/ buy fans of him in the future. I wish everyone the best with fan hunting!10 points
-
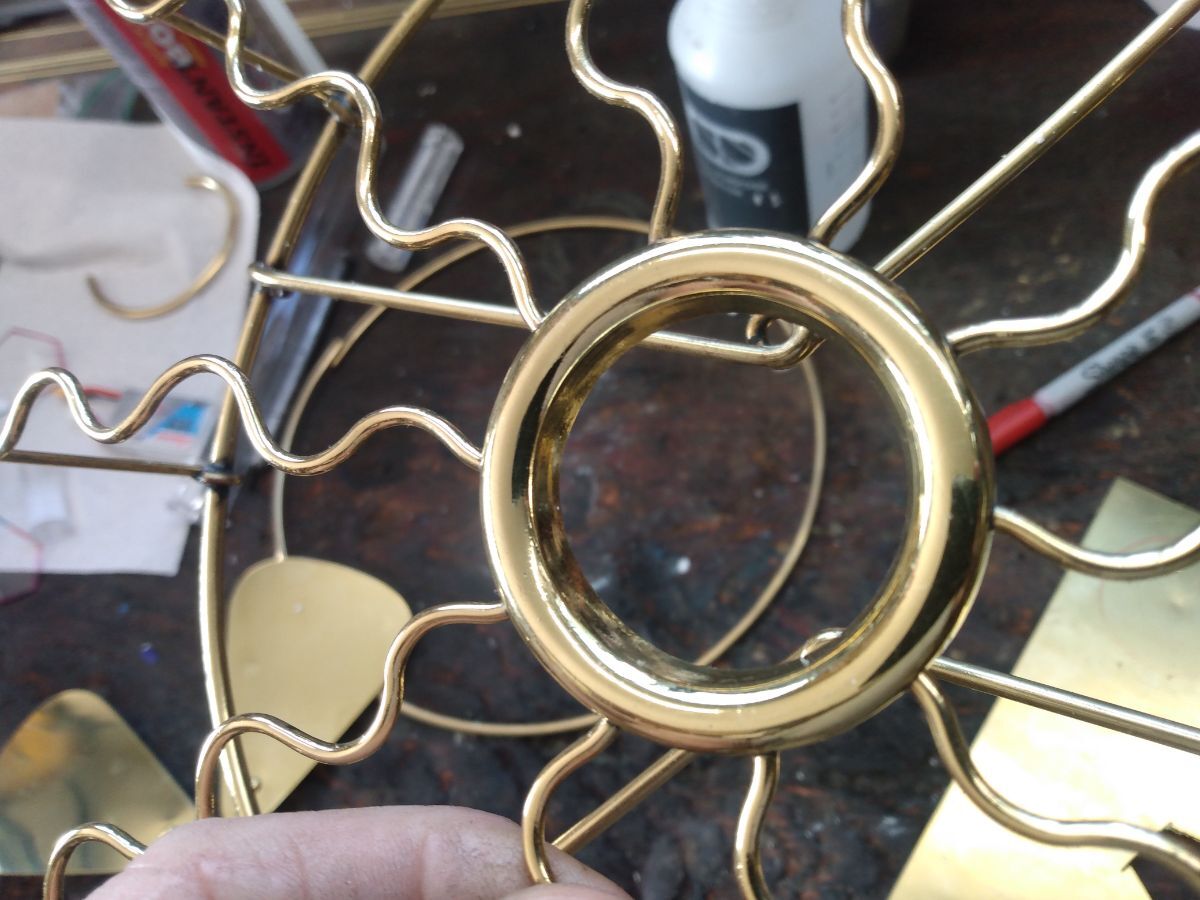
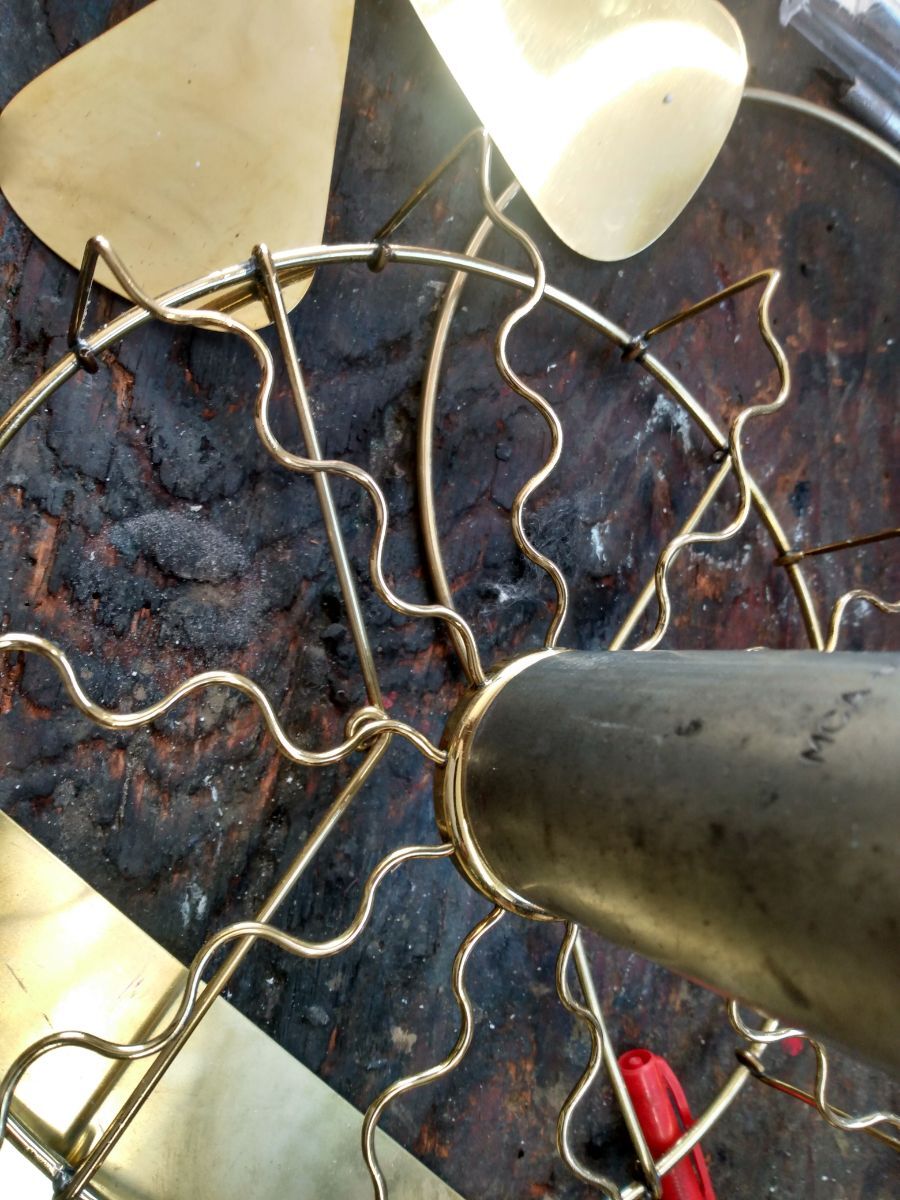
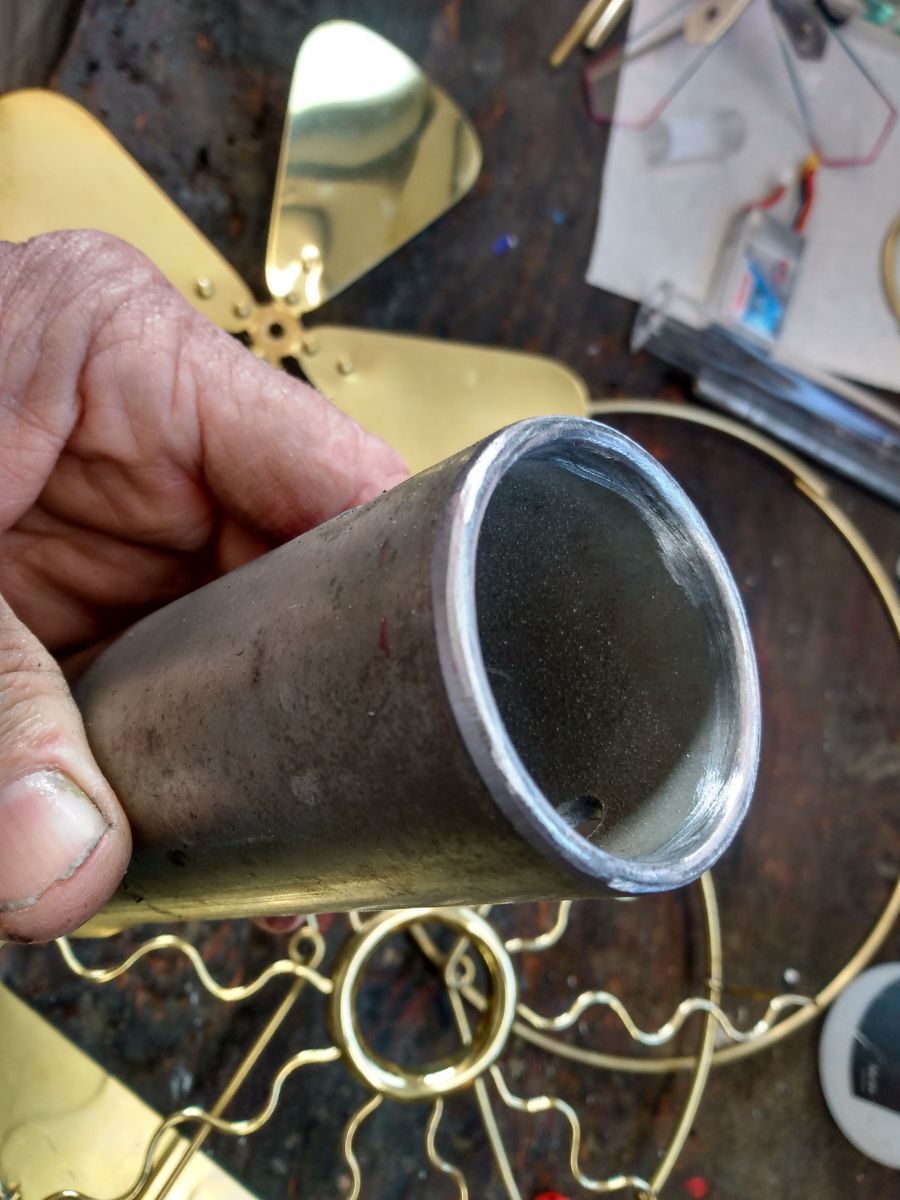
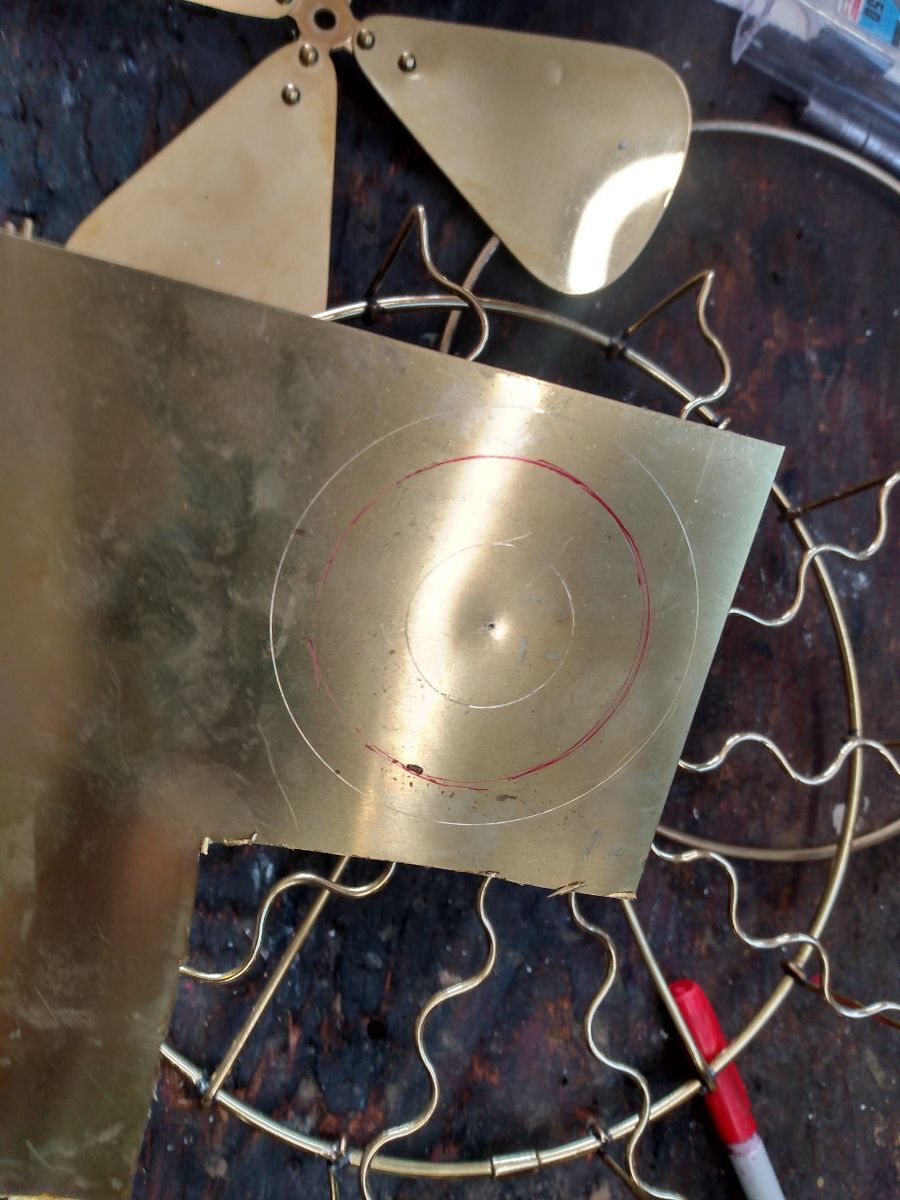
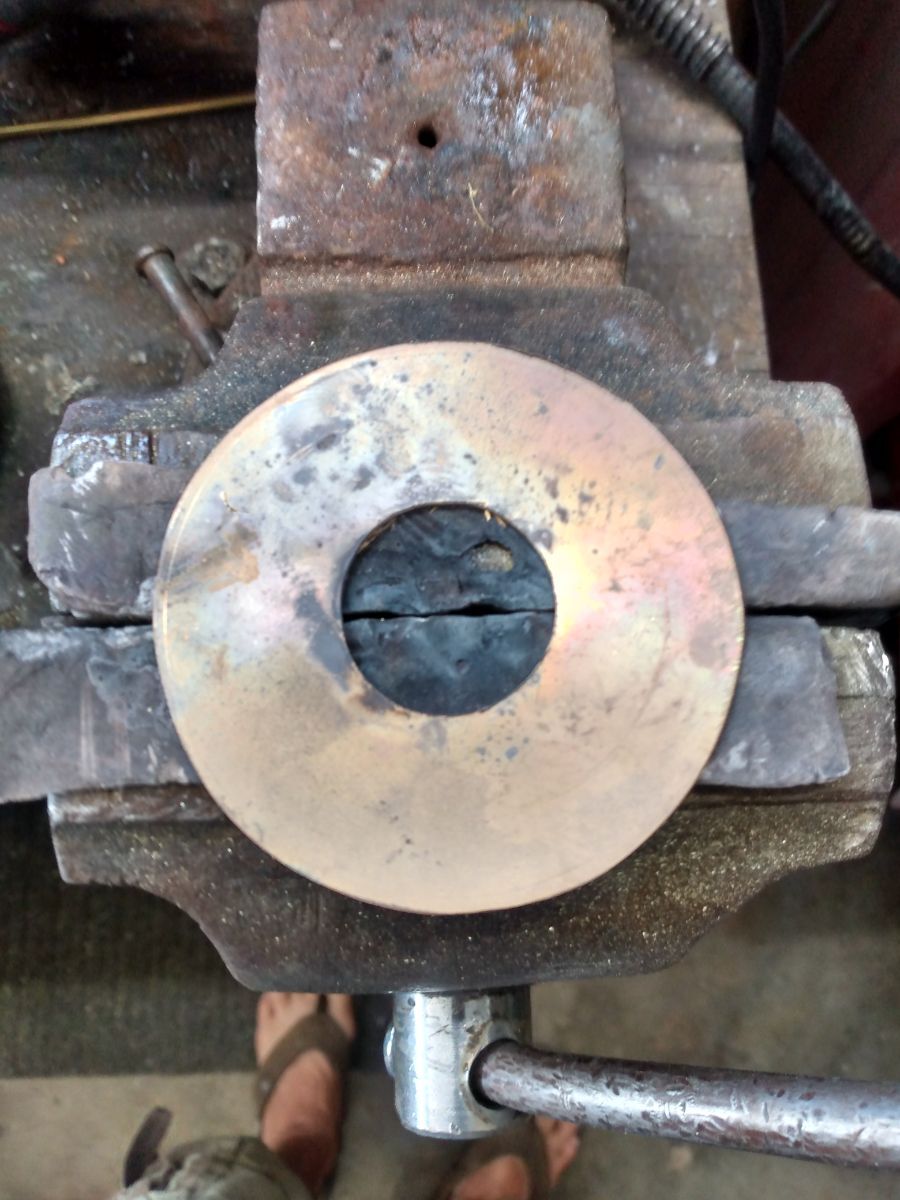
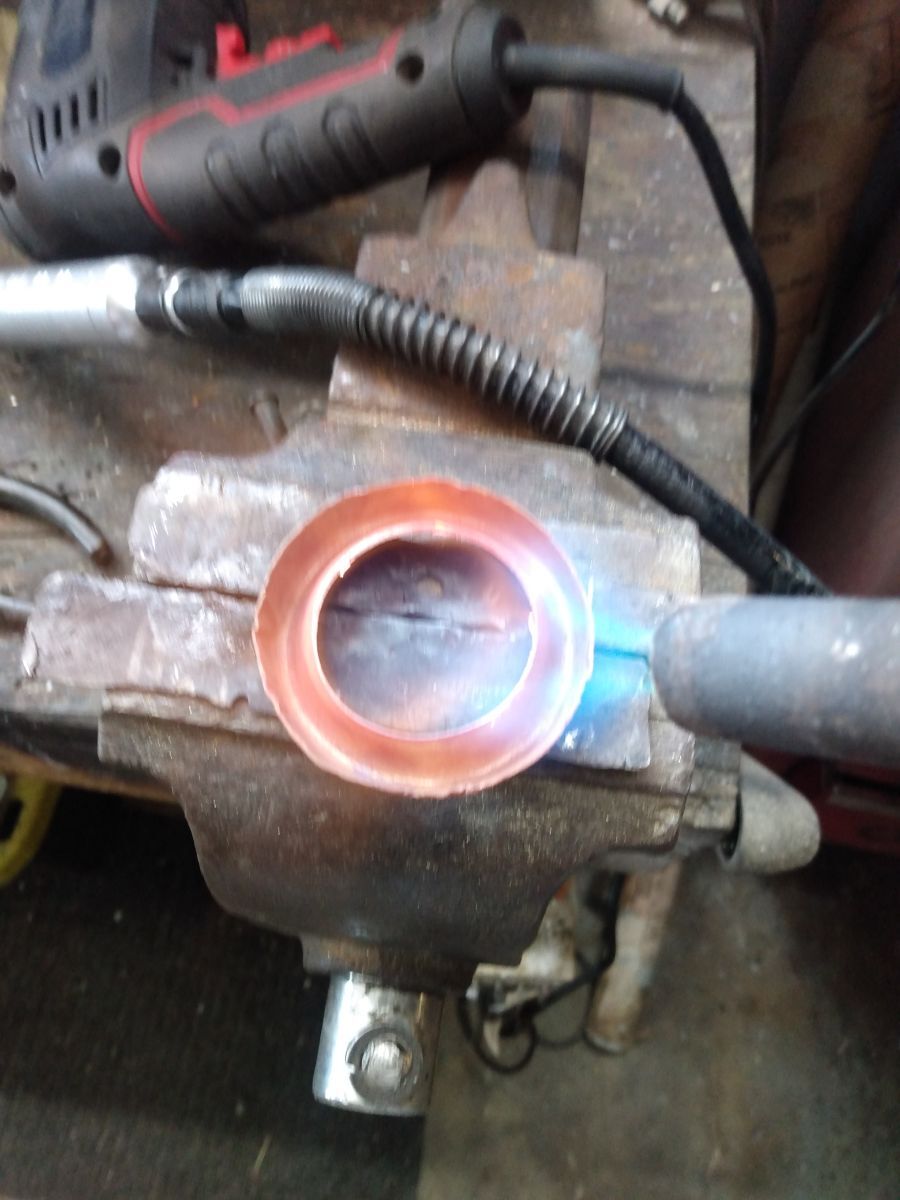
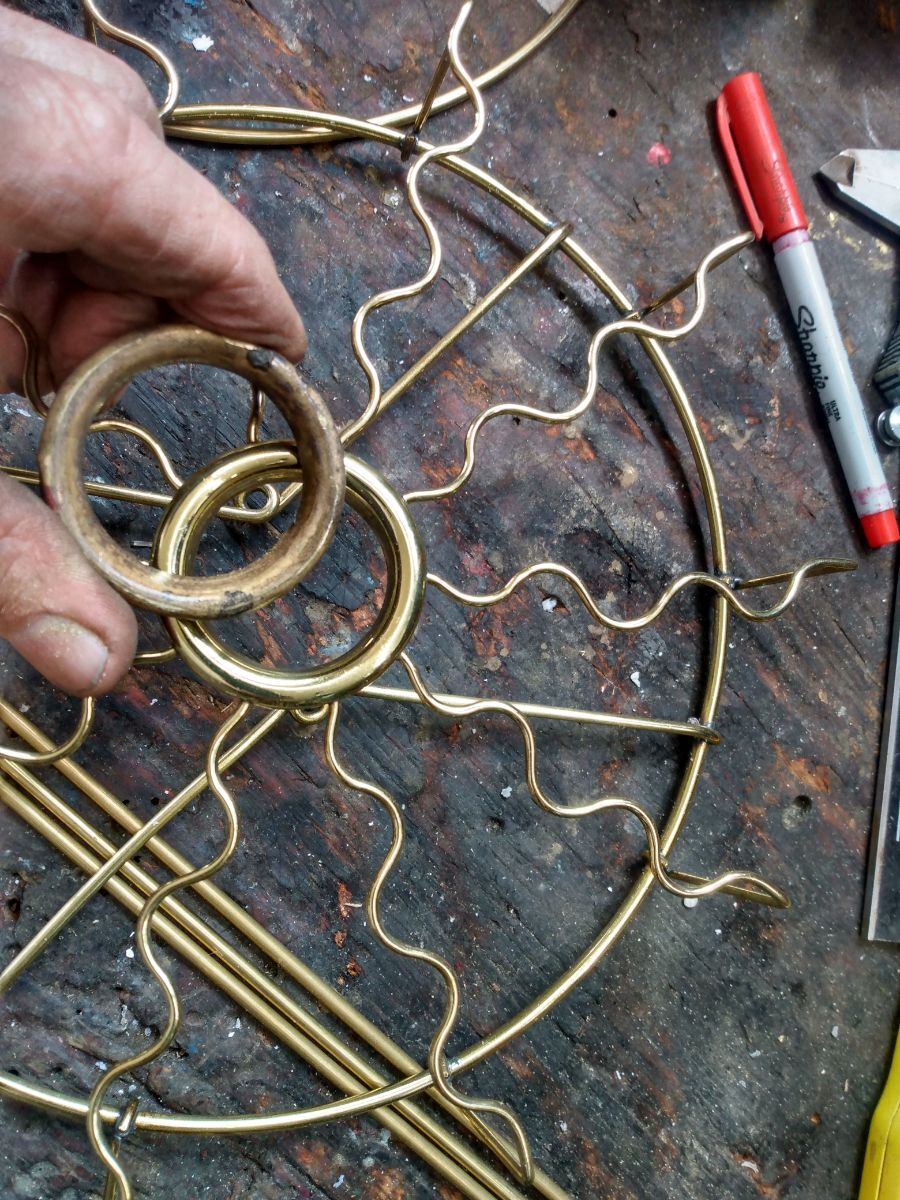
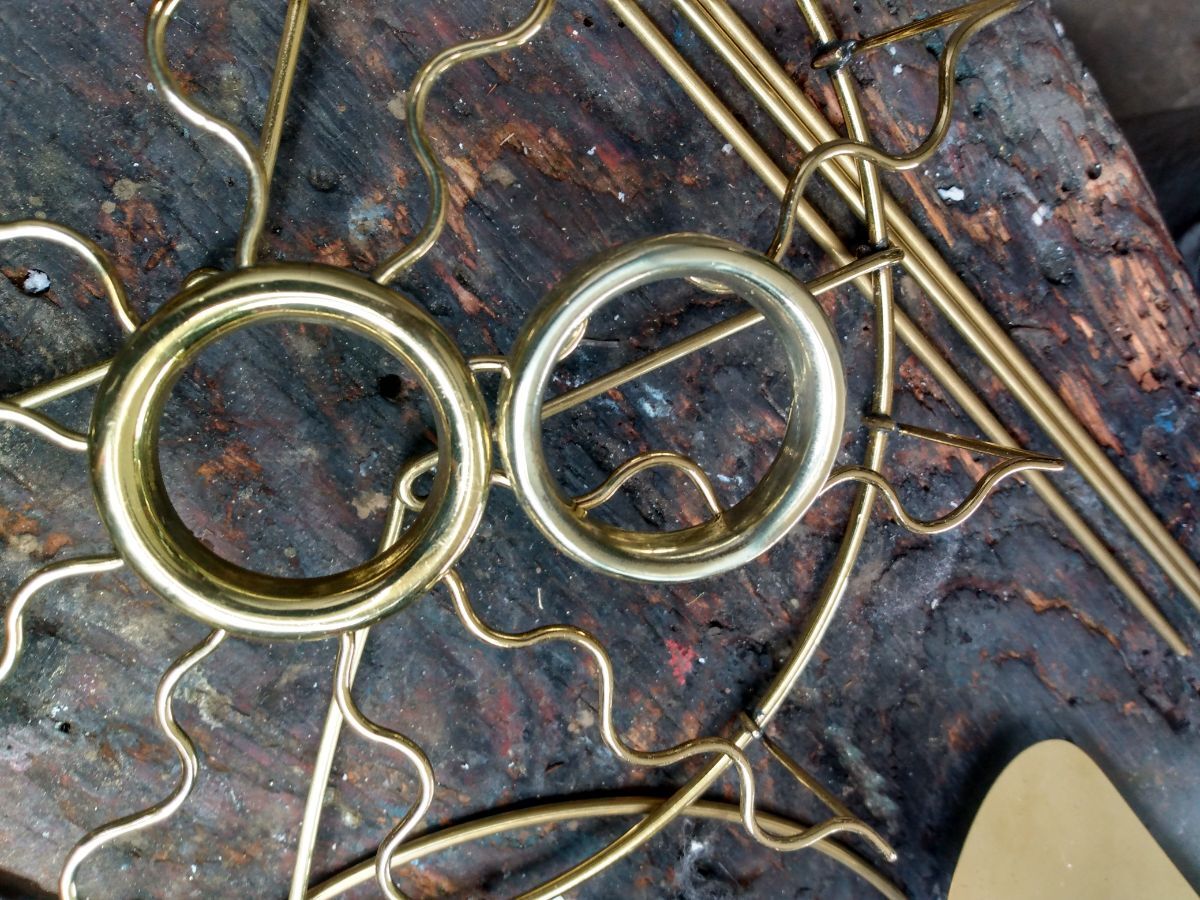
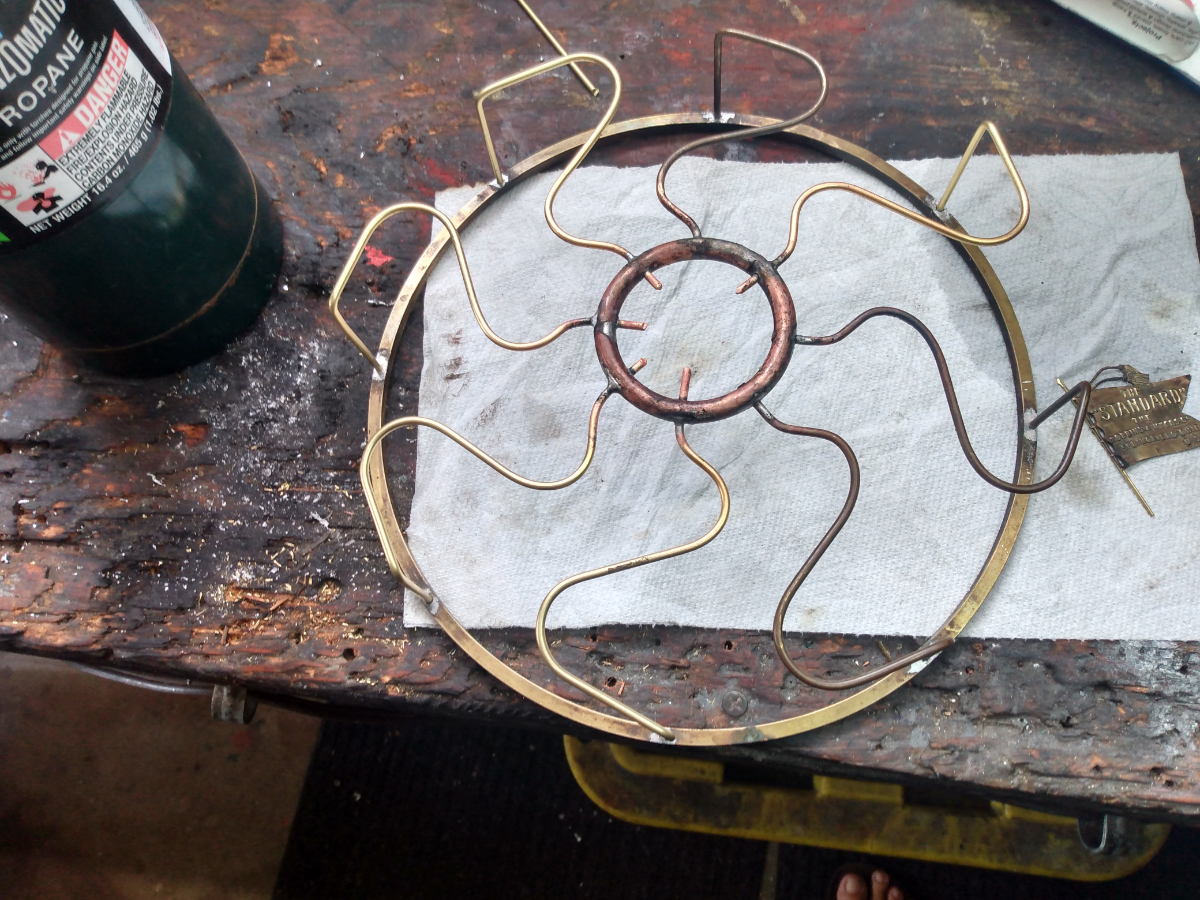
I received a request to reproduce a Manhattan fan cage using a sample. When I opened the box, I was met with a real problem. The center piece was a stamped ring instead of a solid ring. I don't have a punch press and tooling to make these, so If I couldn't figure out a way to fab this up, I would have to return the cage and not accept this project. Searching around my toolbox, I found a huge tube socket for the sprocket nut on one of my bikes. It was the right size. I rounded the end of it on my belt sander and radiused the inside with my moto tool. Taking some sheet brass, I measured it up and cut it to size. Using hammer and dolly method, I folded the edges around the tube socket, stopping to frequently anneal the brass so it wouldn't crack and split. At this point I used my drill press to push the center through inside the tube socket. Now I had something that would work. Success. I saved the project. The rest is just like any other cage, with rings and spokes. Cheers, Bill
10 points
-
10 points
-
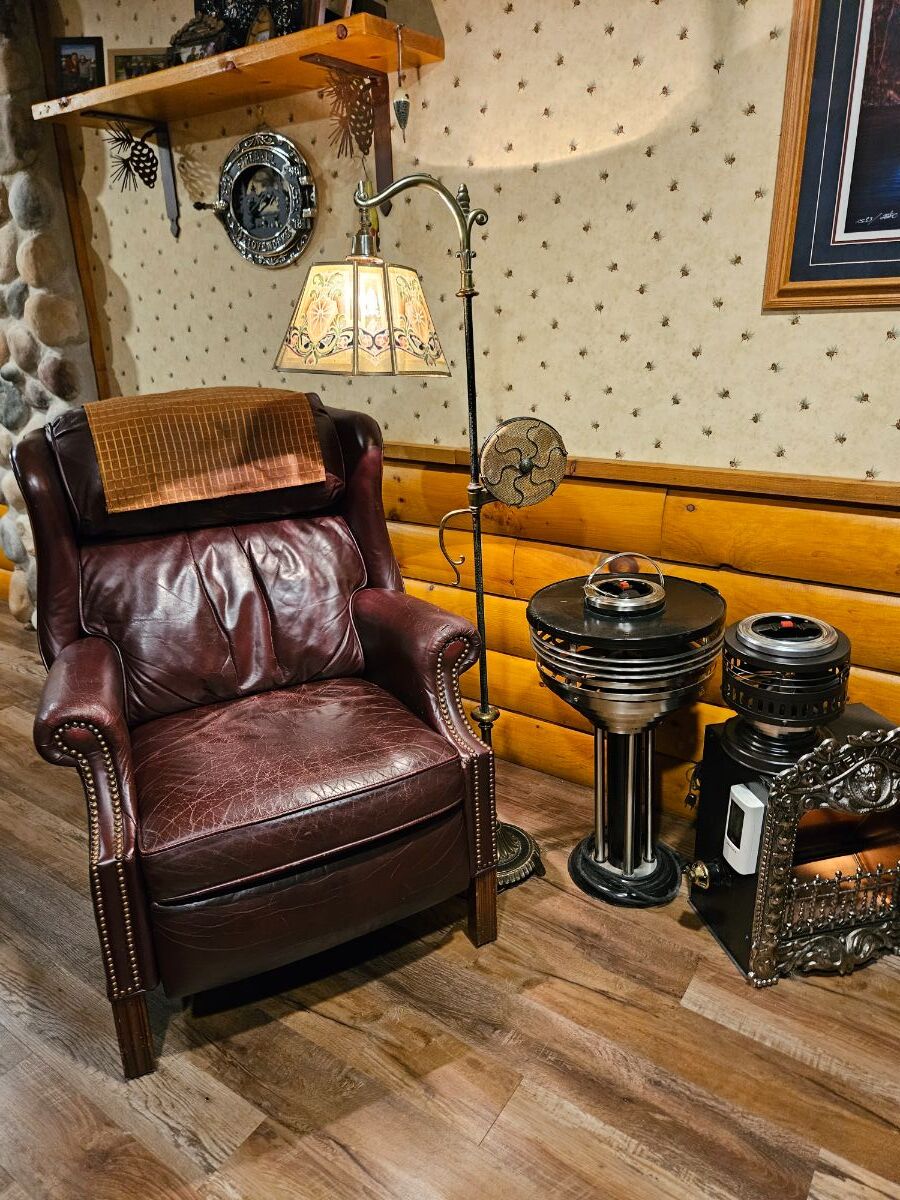
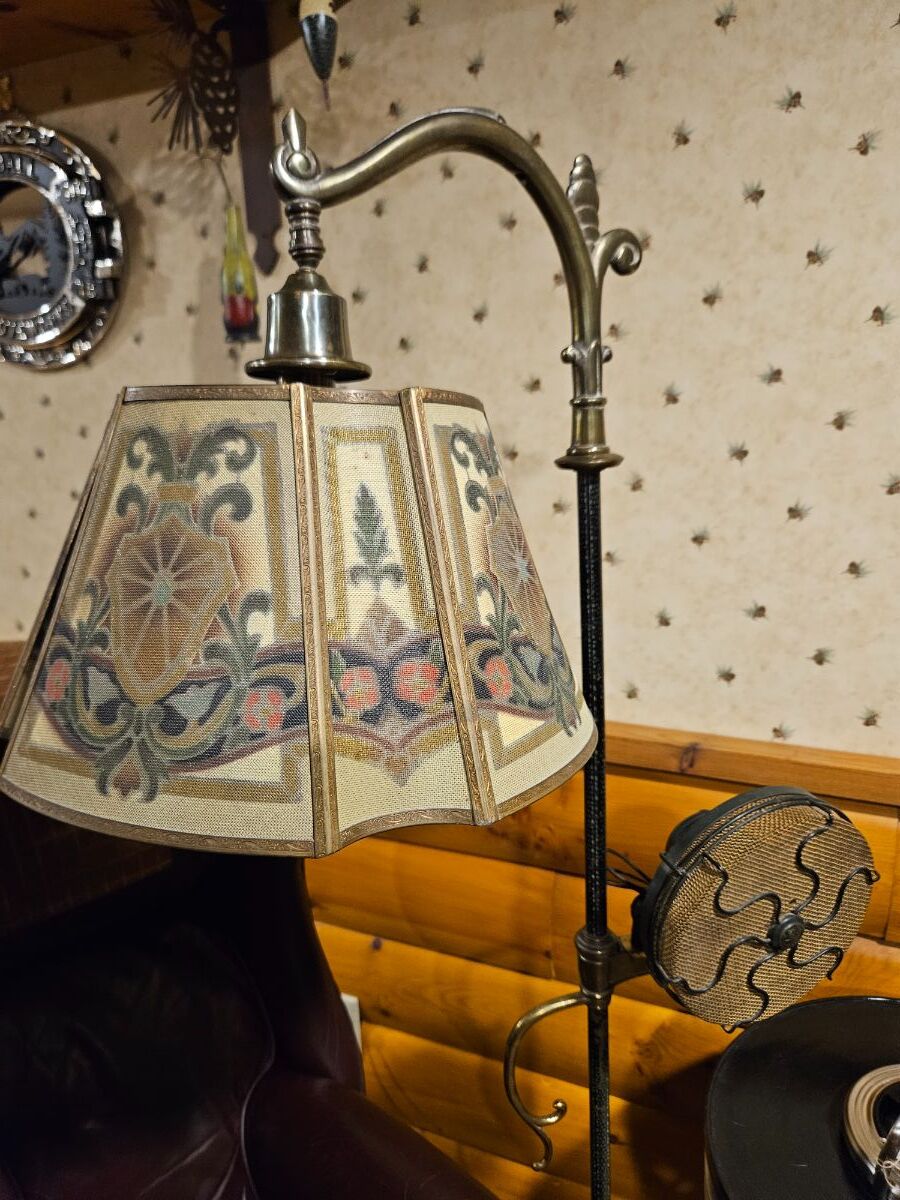
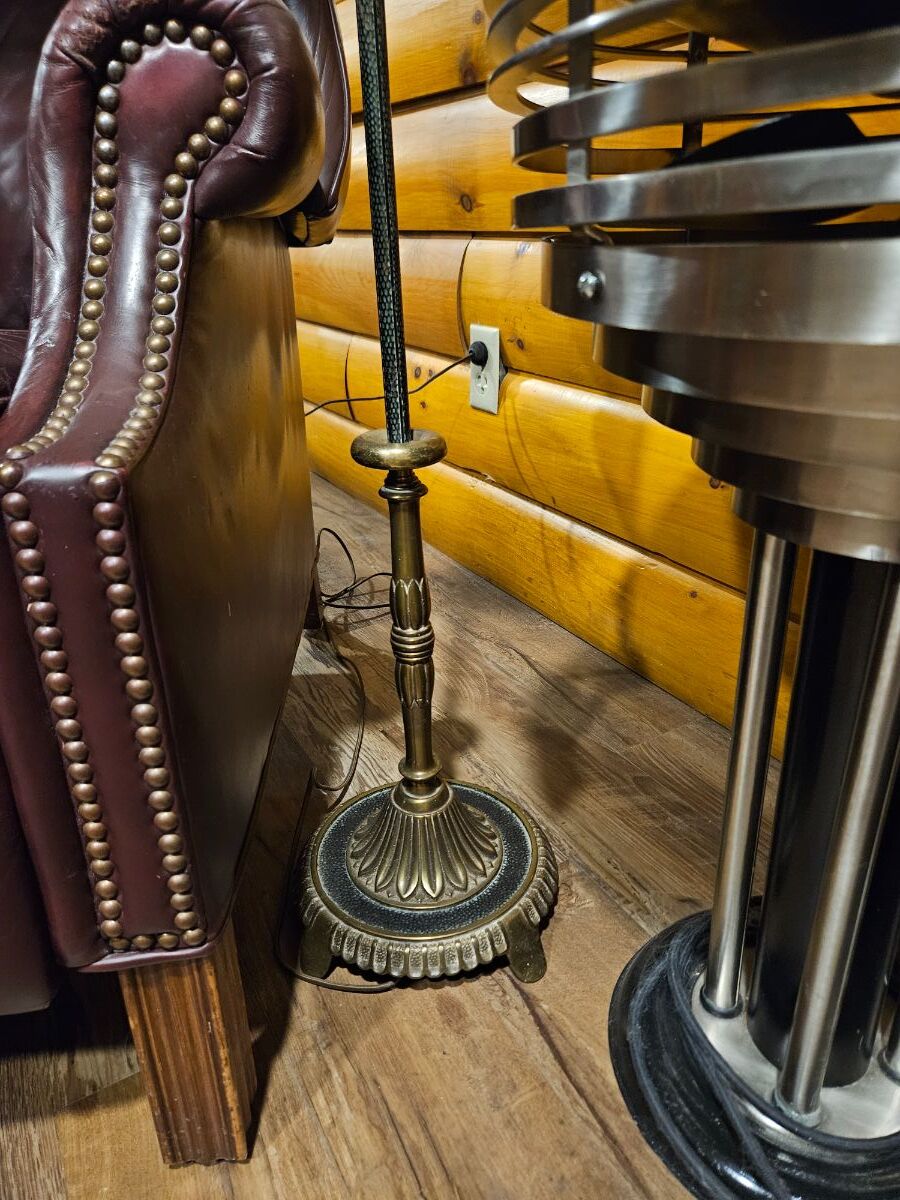
New home for Rembrandt smoking lamp. Currently fan not working I will have to get in running prior to smoking or use the kisco
10 points
-
This was a particularly messed up cage, so I thought I'd show the process to reanimate this one. Photo pictorial. 5 new spokes required and new flag pole and spear tip. Blade re-wing next. Cheers, Bill
10 points
-
I was fortunate to live in a house with a really big back yard that has been able to host 3 barns / storage buildings, 2 of which were constructed since we bought the place in 1993. My Bride tends to like retiring early, like when the sun goes down. There was a time when I would come home from a fan meet or a weekend search and acquire event and I would arive home just after dark, drive directly to the barns out back, unload a truck load of whatever, then turn around and " come home " with an empty truck. I did get into trouble occasionally, like when we went to one of the early fanfairs in DeSoto TX. We cane down with a carload of fans to use as illustrations in a seminar event. They somehow seemed to attract more fans during the Bourse event & Auction. I had to rent a U-Haul trailer one way to Arkansas to get everyone back home. Couldn't hide those....10 points
-
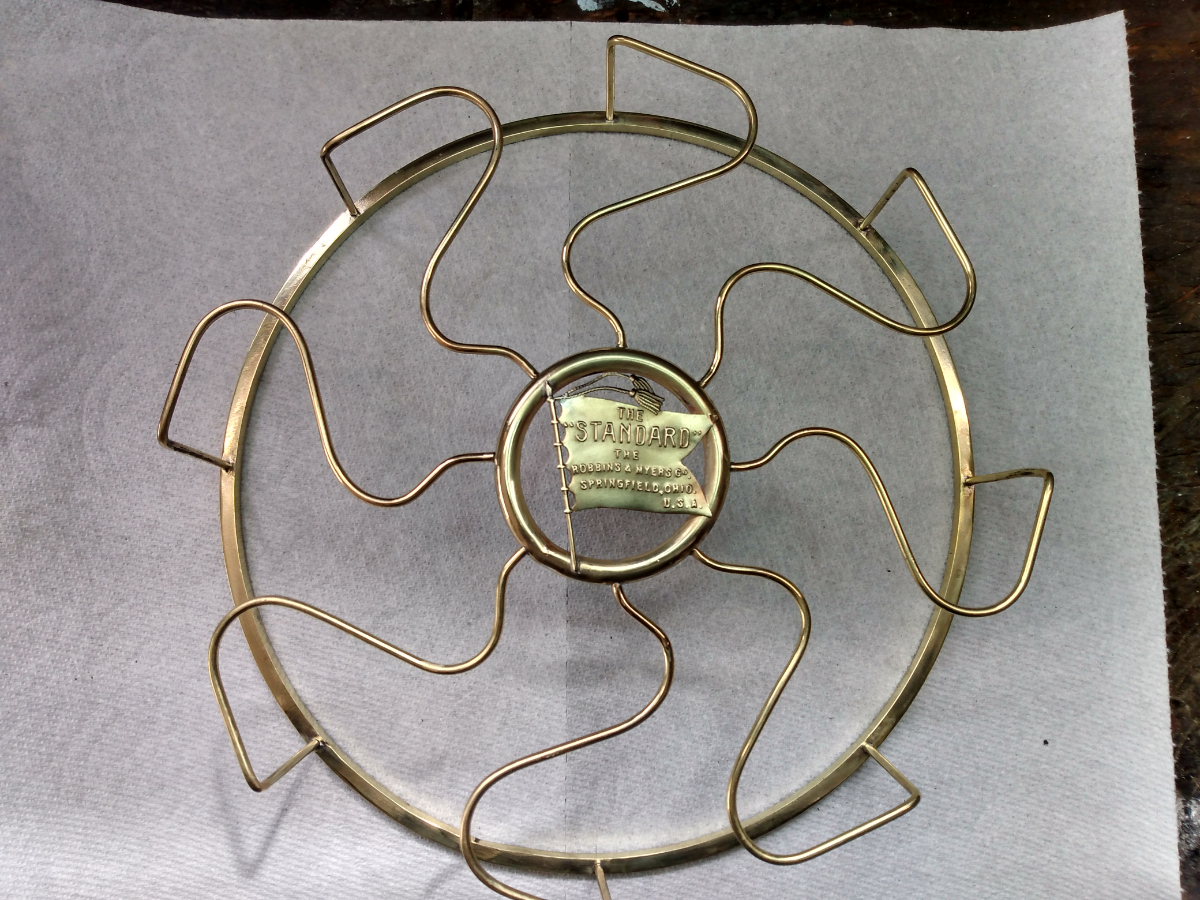
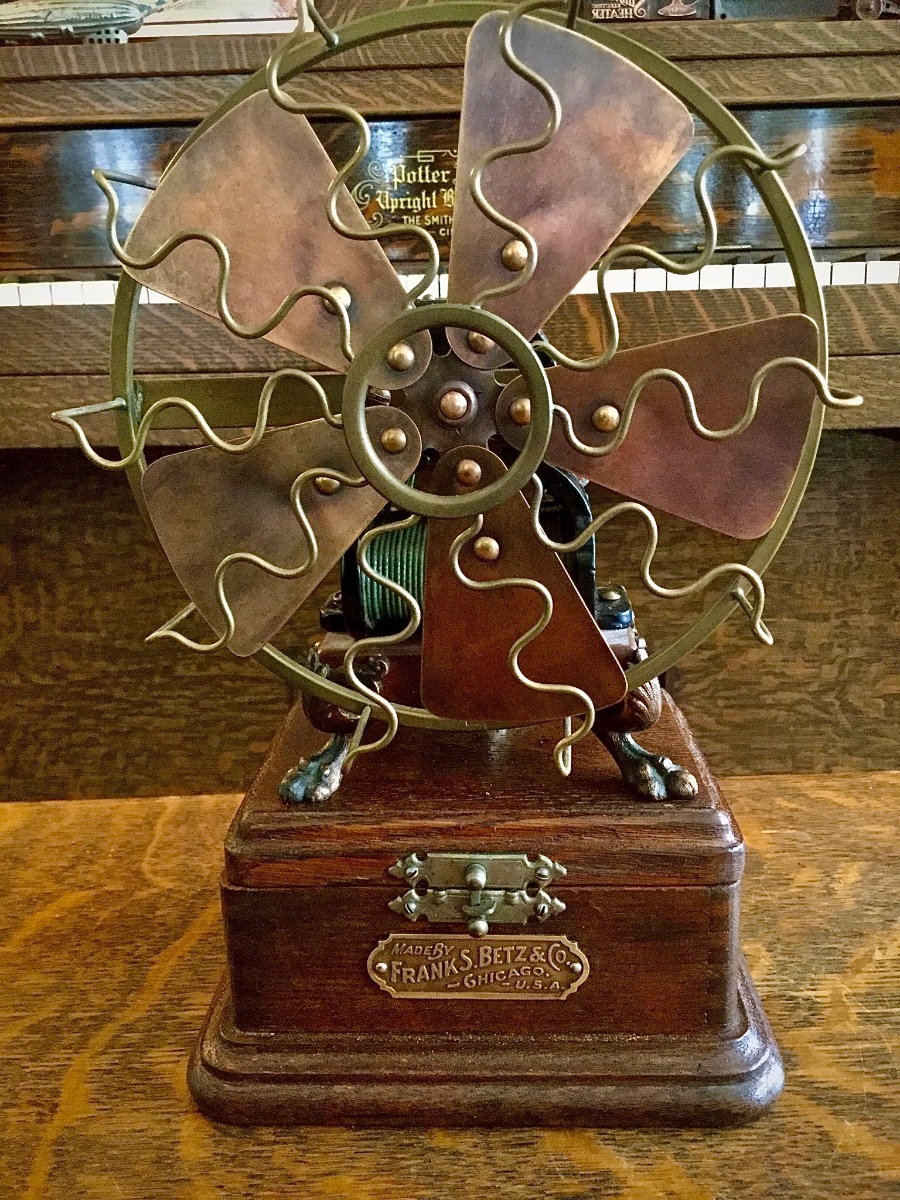
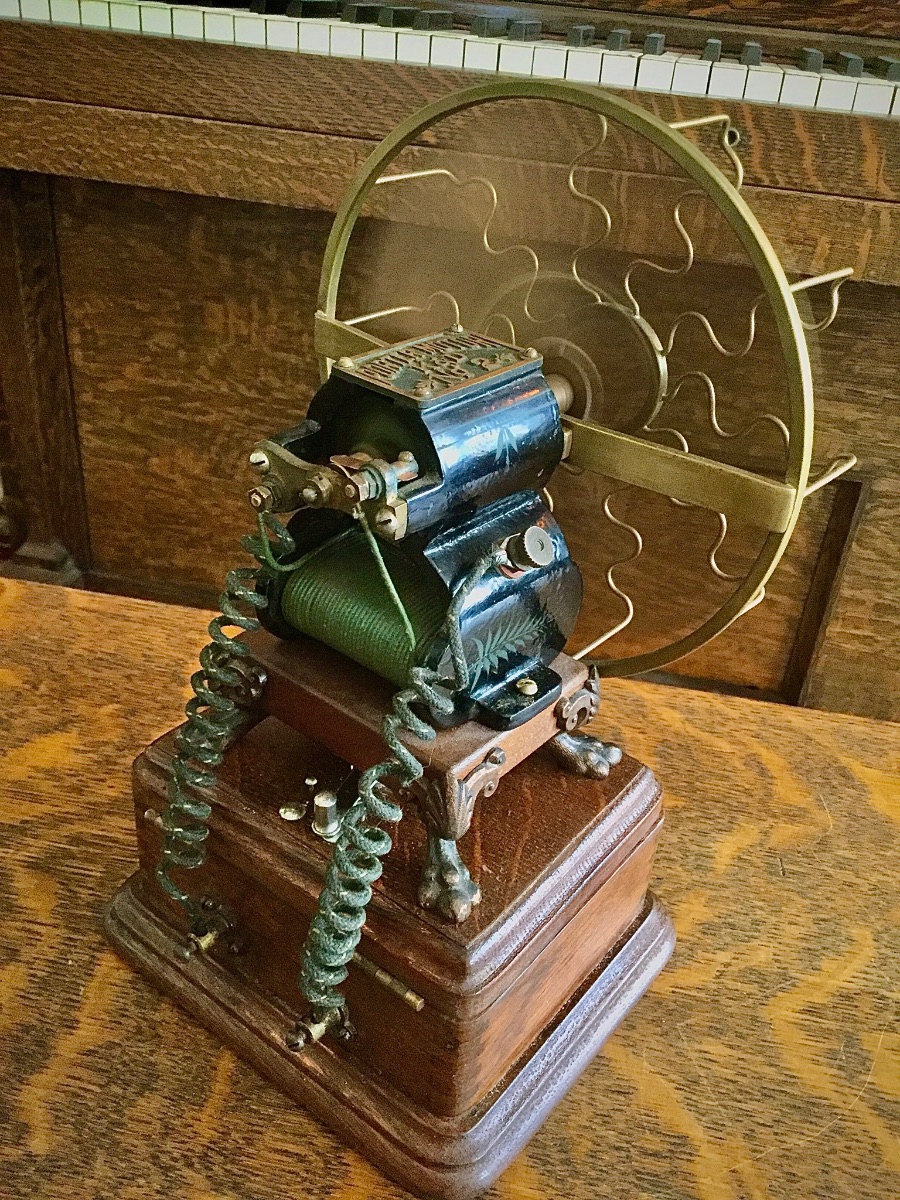
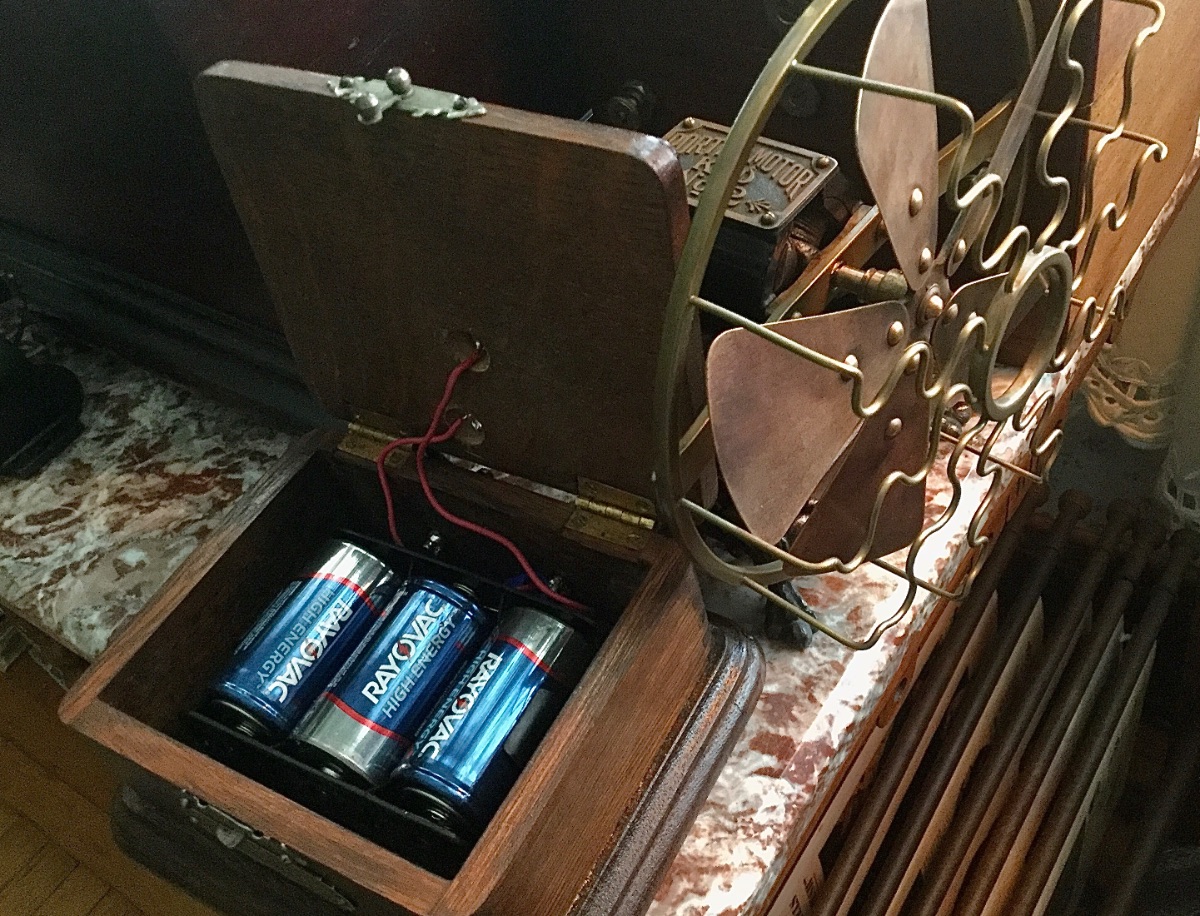
3 visions coming together.. 1)...Take a small porter motor and turn into a fan.. 2)... Put animal feet on it like a Curtis Crocker fan.. 3)... Make a custom antique quarter sawn battery box that fits it perfectly, making portable...
10 points
-
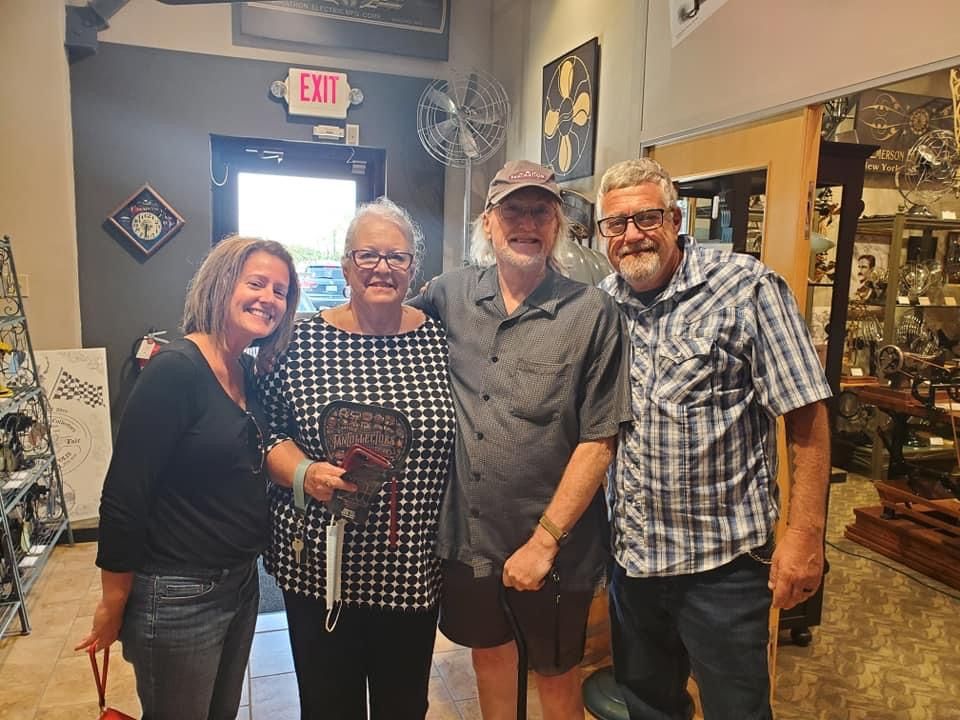
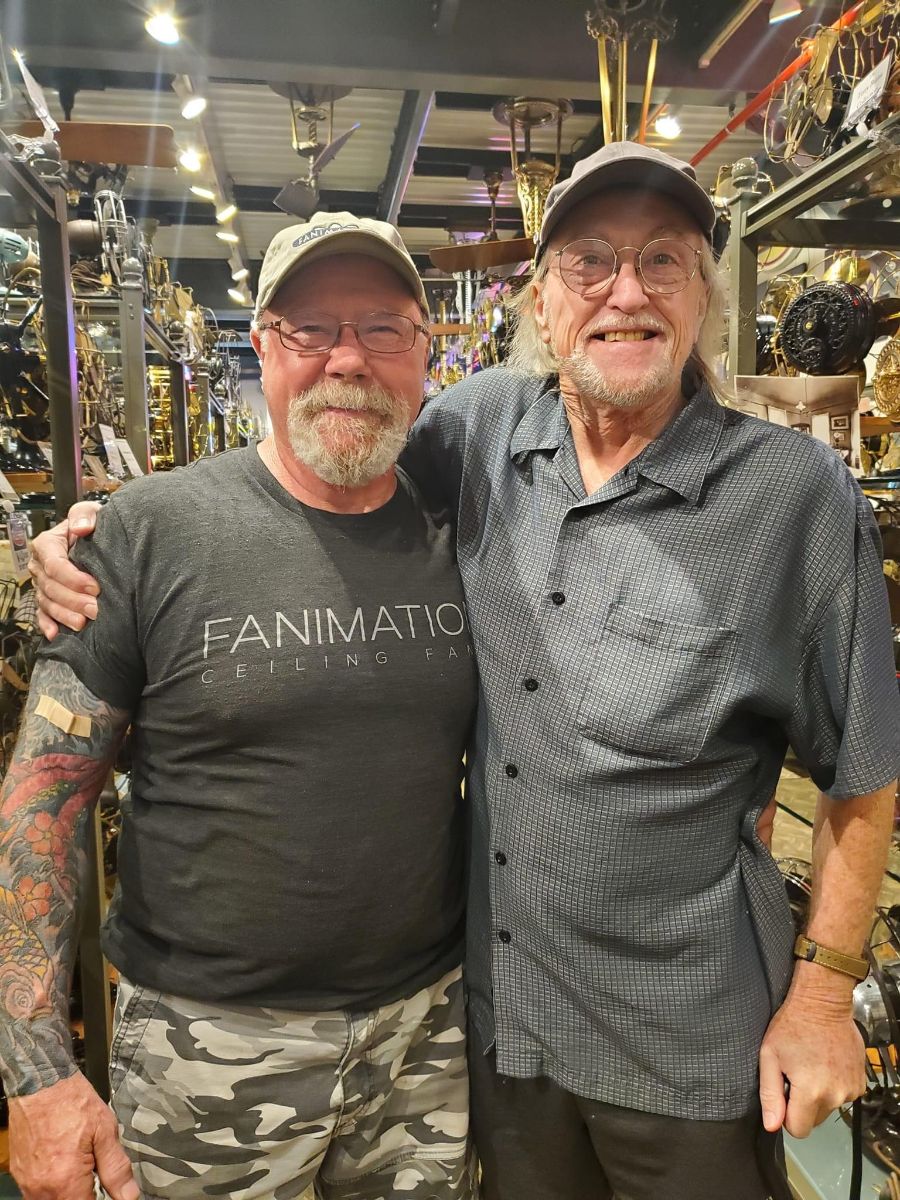
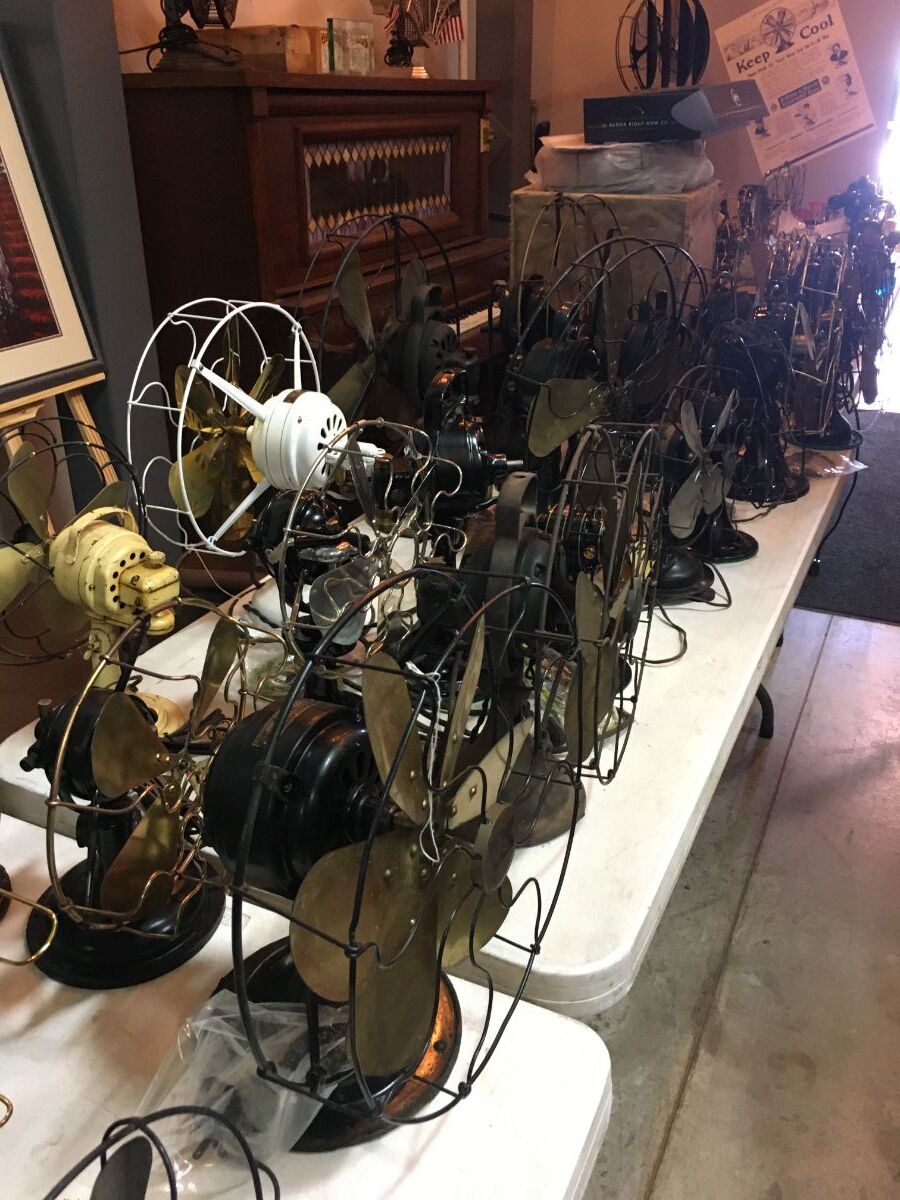
Terry Burns visited the Museum yesterday with his kids Rick and Stephanie and first wife Beverly. Eddie and I had a great visit with them and Terry showed them around the Museum and they were able to see his collection on display. He said he wasn't up for coming last week during the Museum meet but we're glad he felt good enough to come this week. Those of you who don't know Terry, he is a fan collector extraordinaire with over 150 fans. Those fans are on display in the museum now. Terry had been collecting long before I got to know him . We met because he had sent some fans to be restored by another restorer who had no idea on how to do quality work. I gave him a hand and we became fast friends. We are honored to have his collection here at Fanimation. Terry, come back and visit soon! It was good to see you guys.
10 points
-
Mostly original paint. Cage and struts where painted. New wiring, thoroughly cleaned everything.
10 points
-
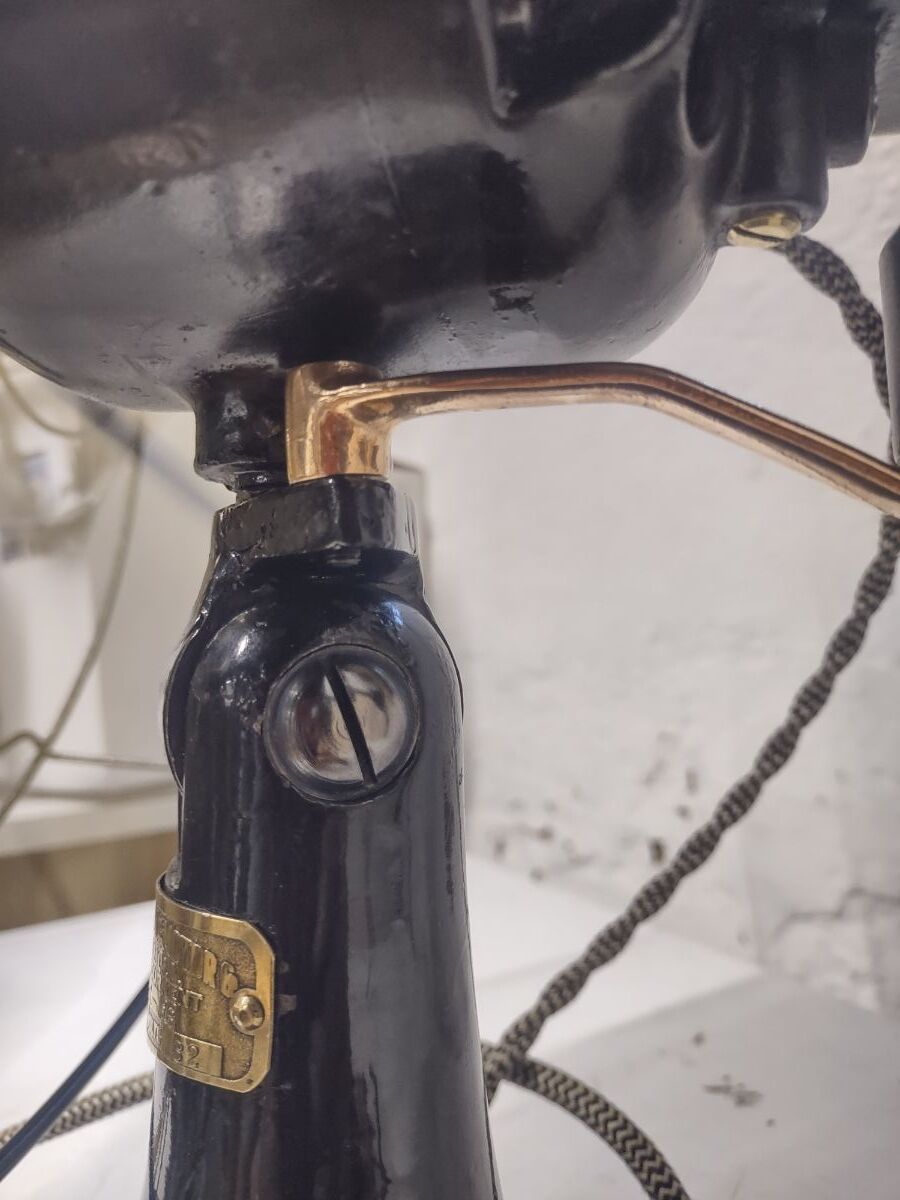
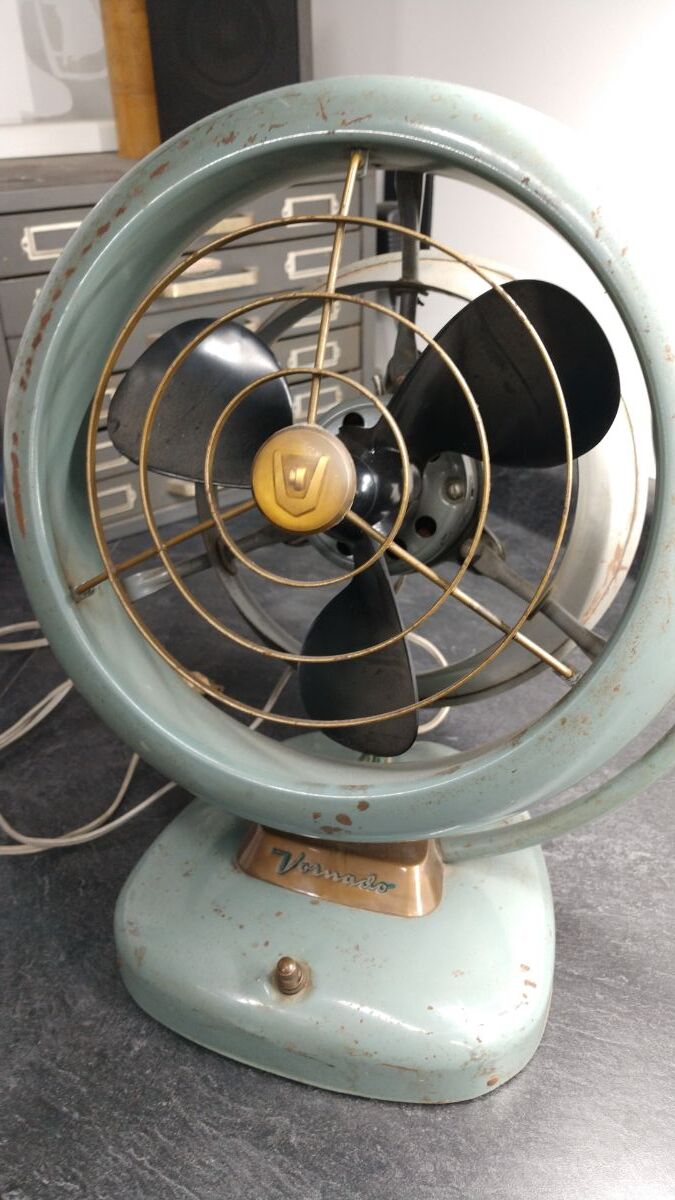
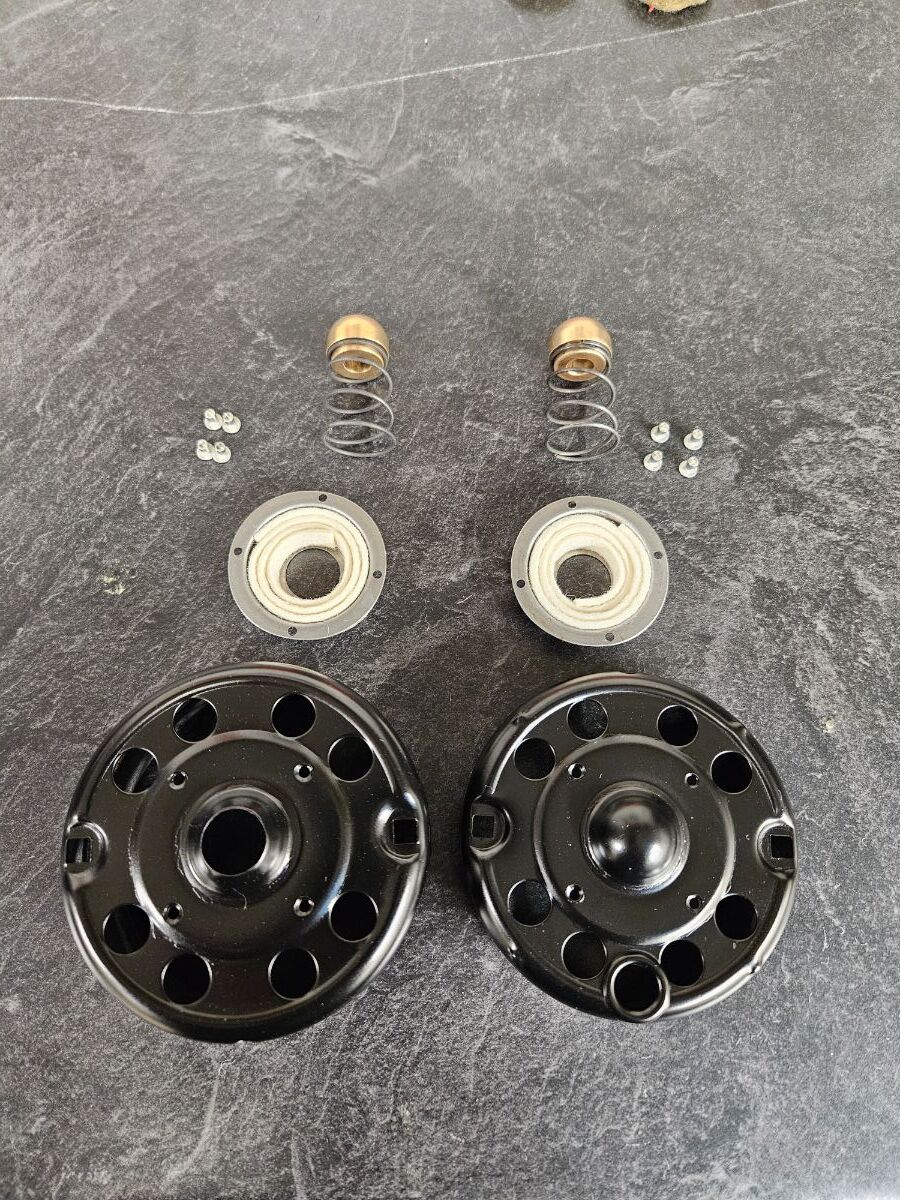
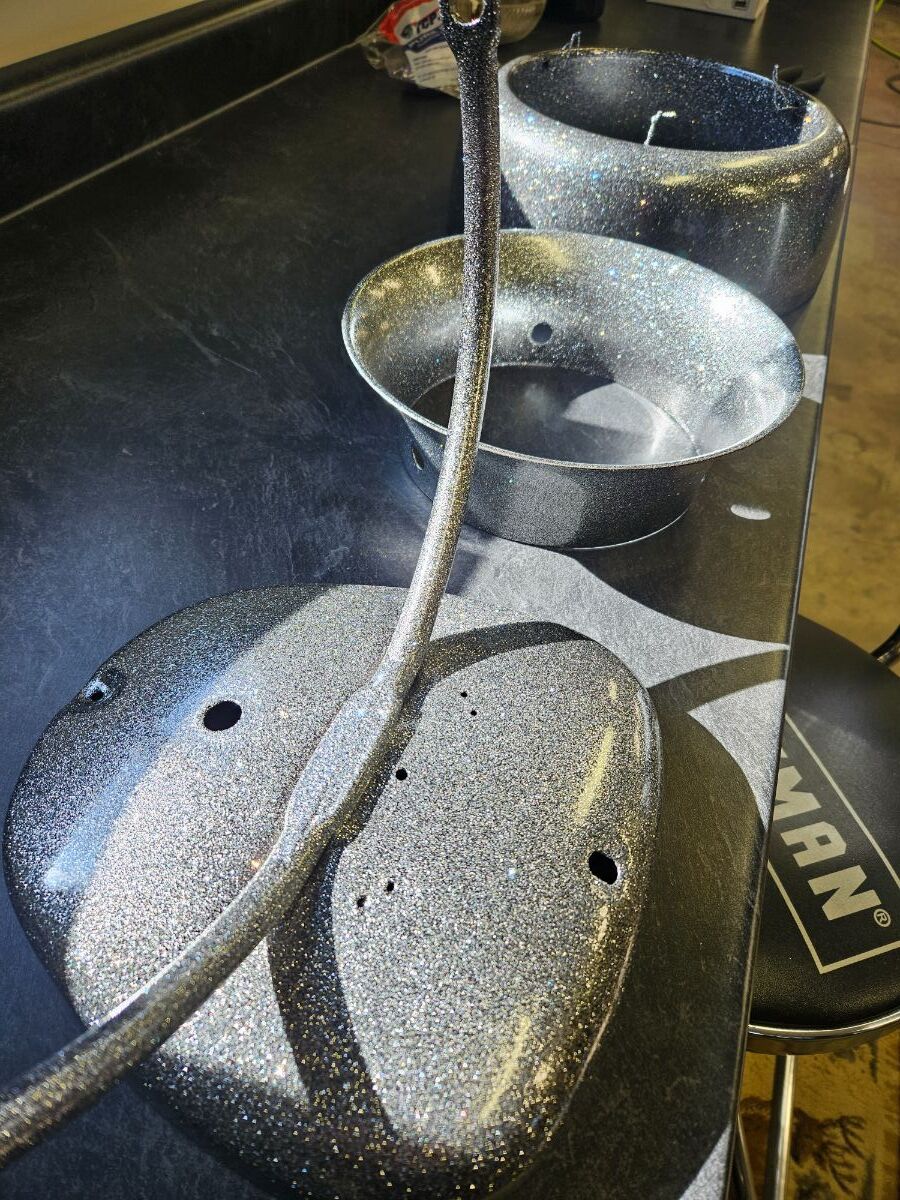
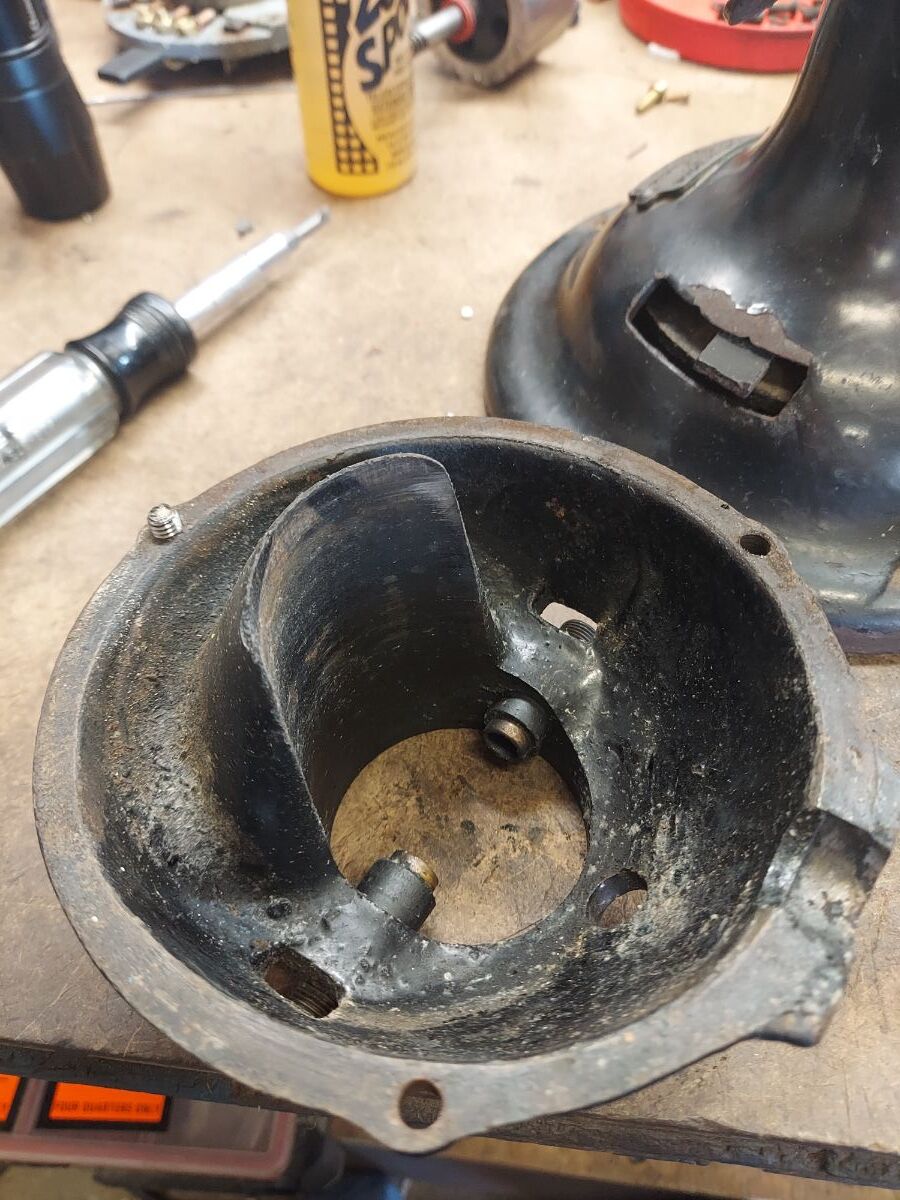
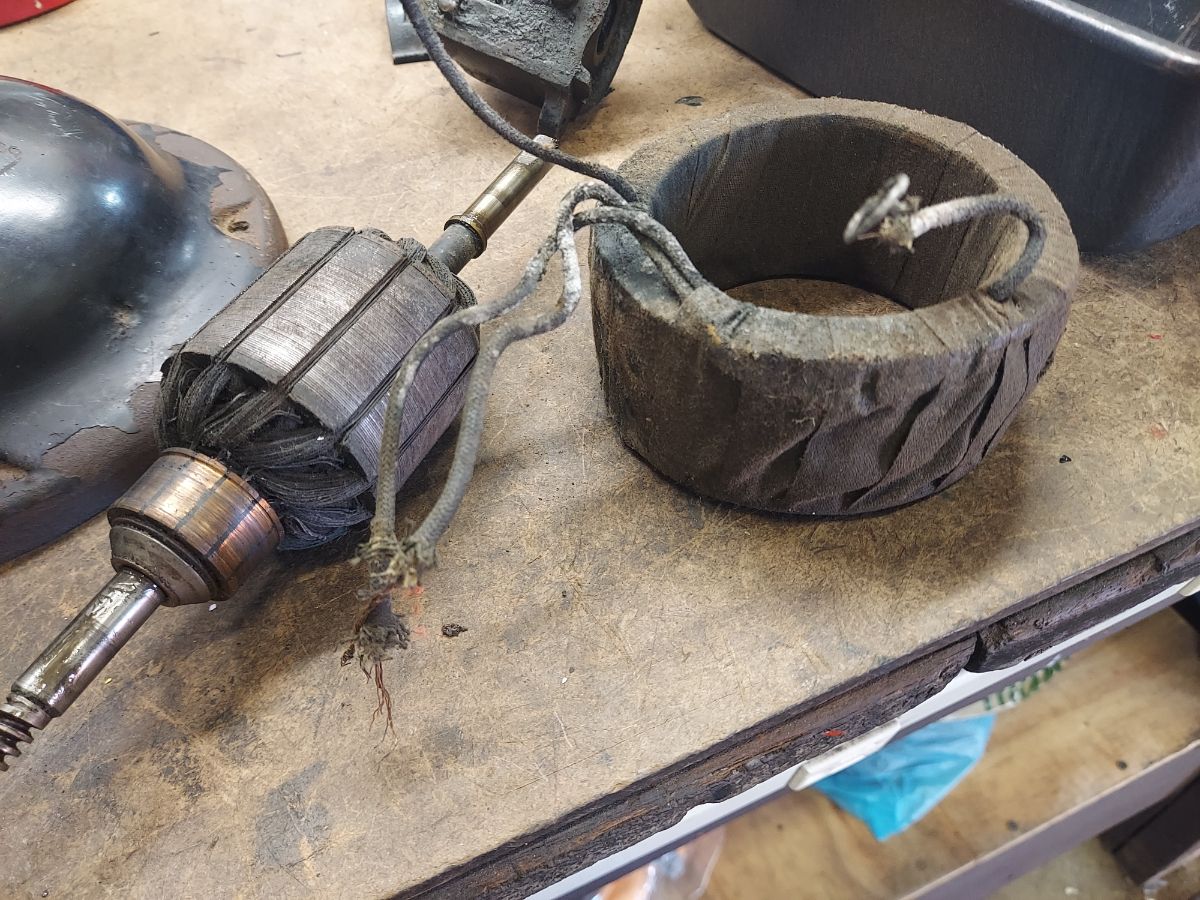
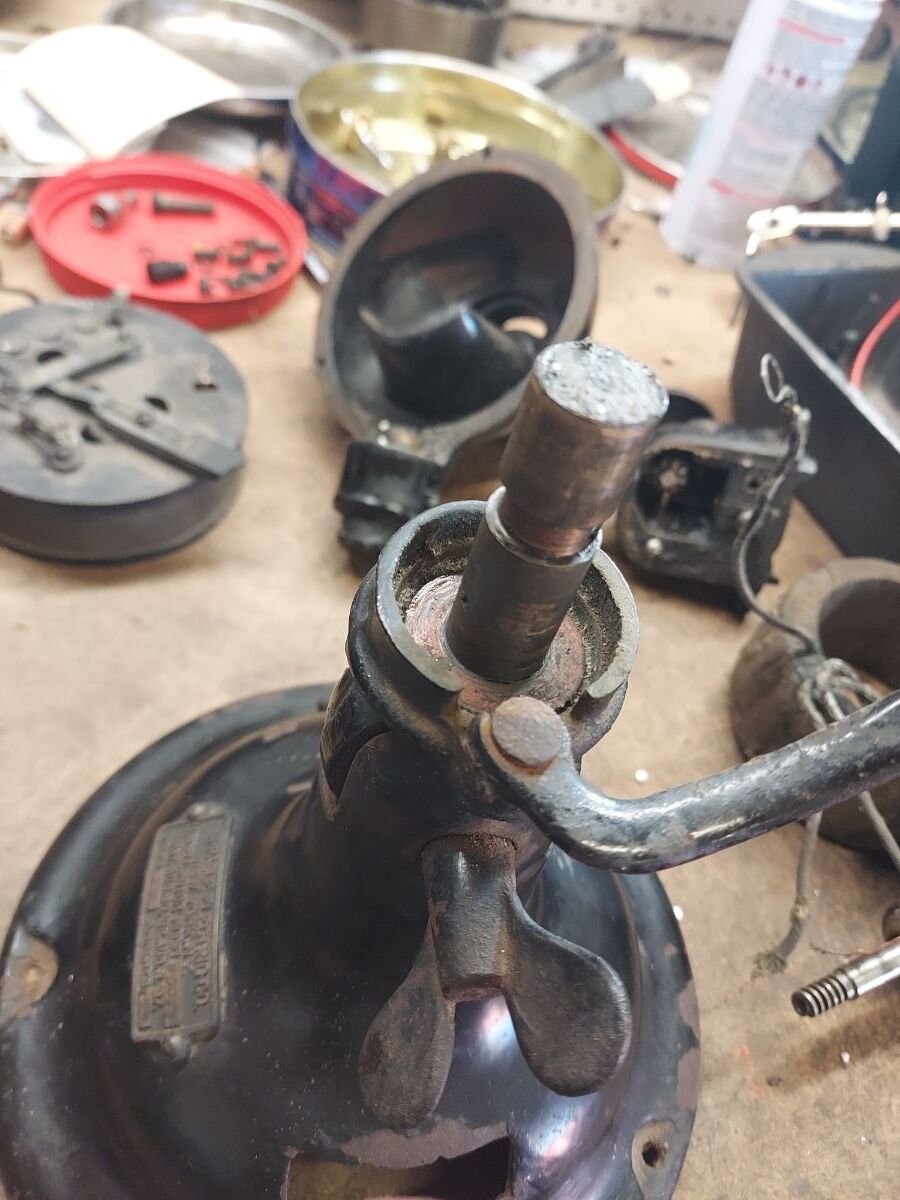
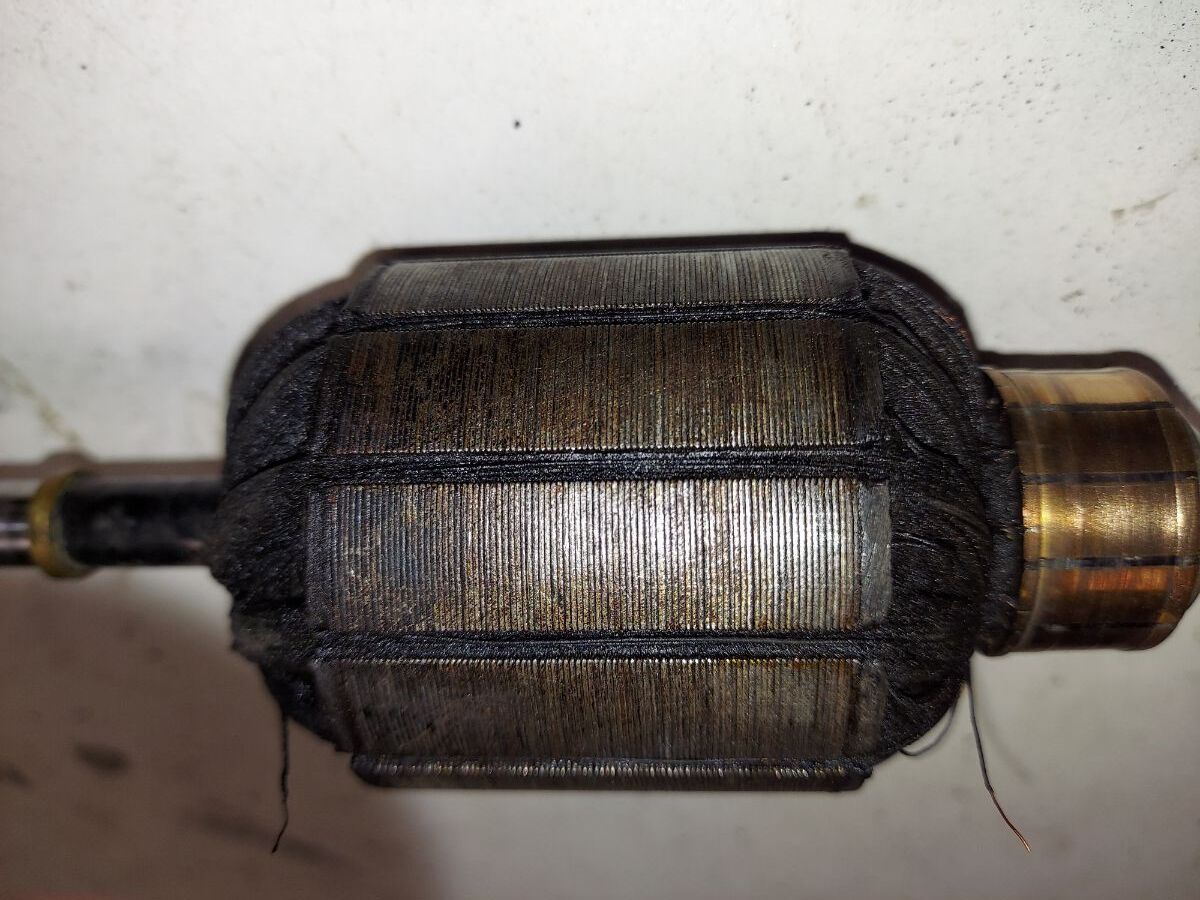
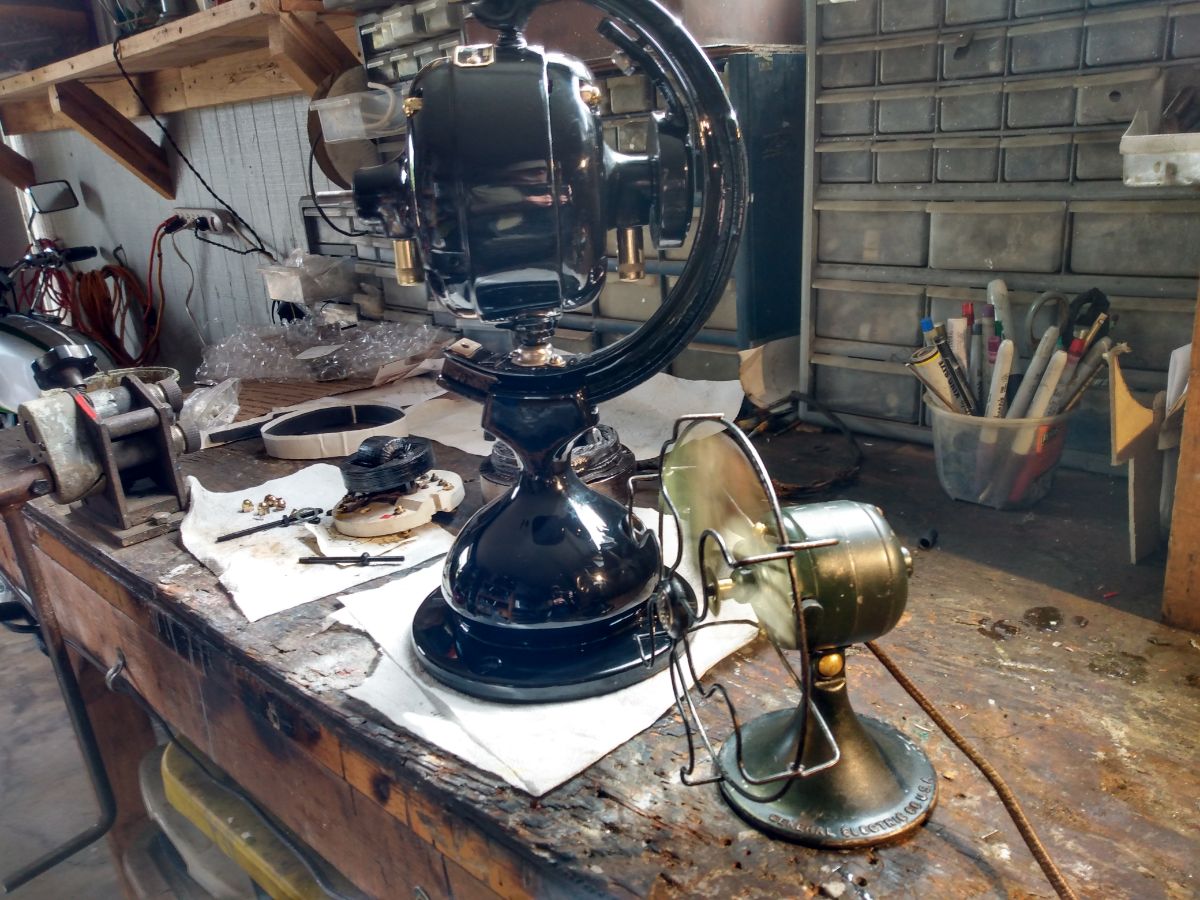
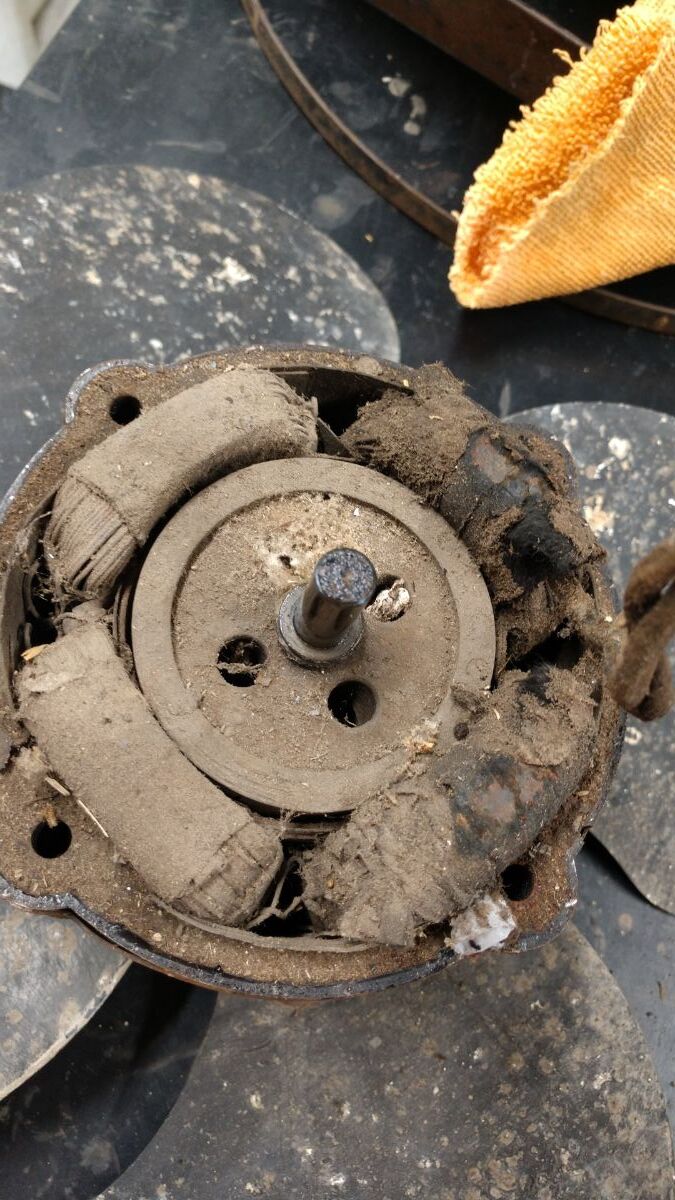
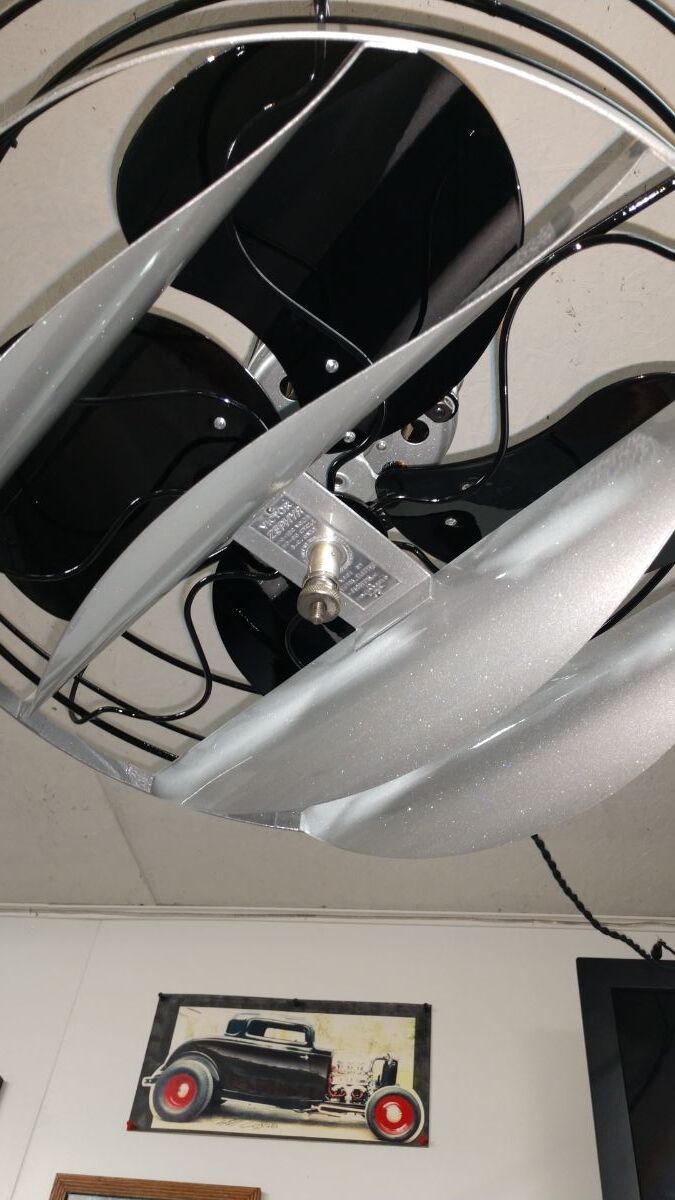
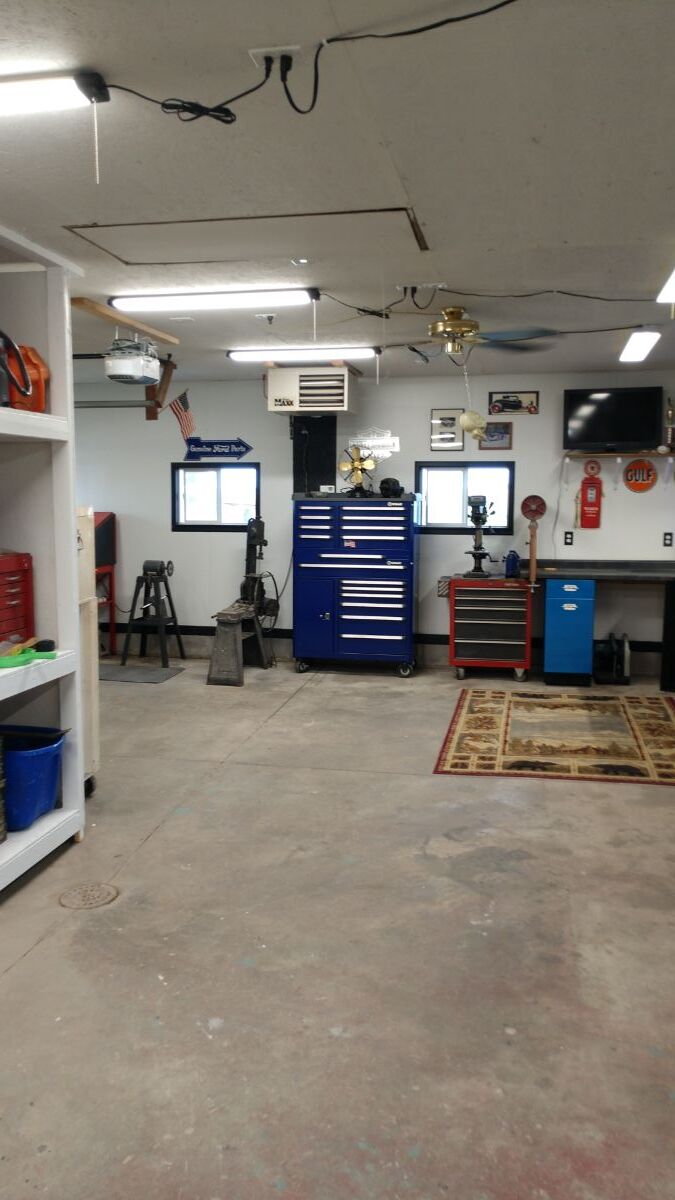
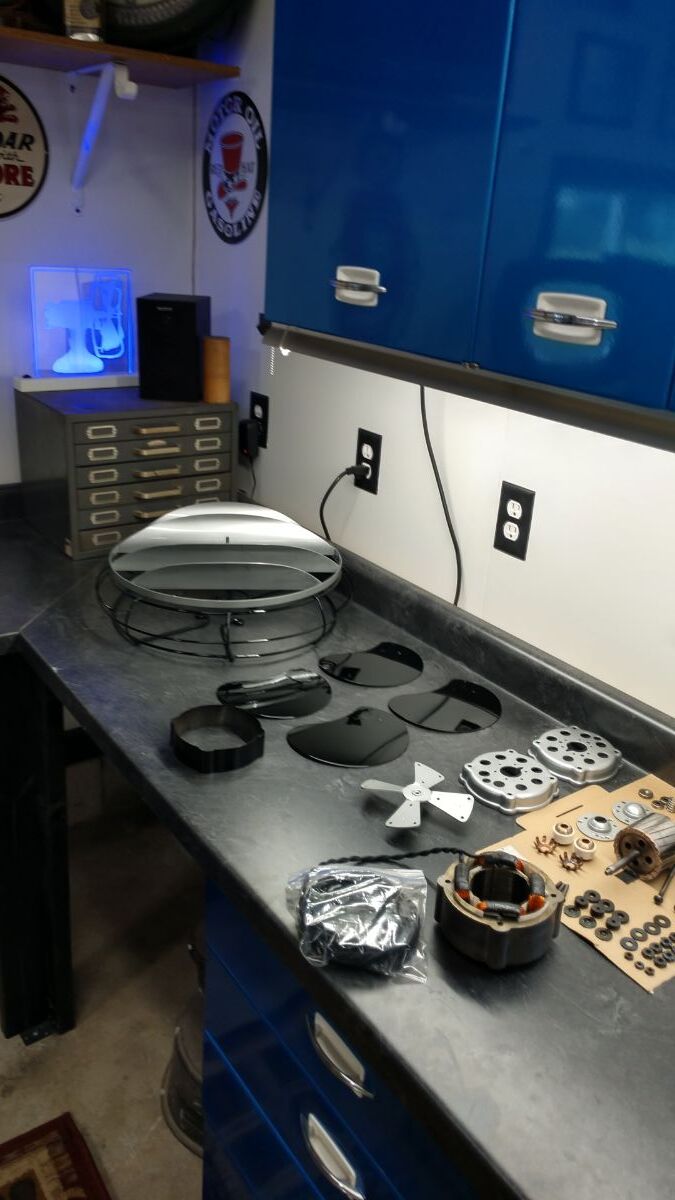
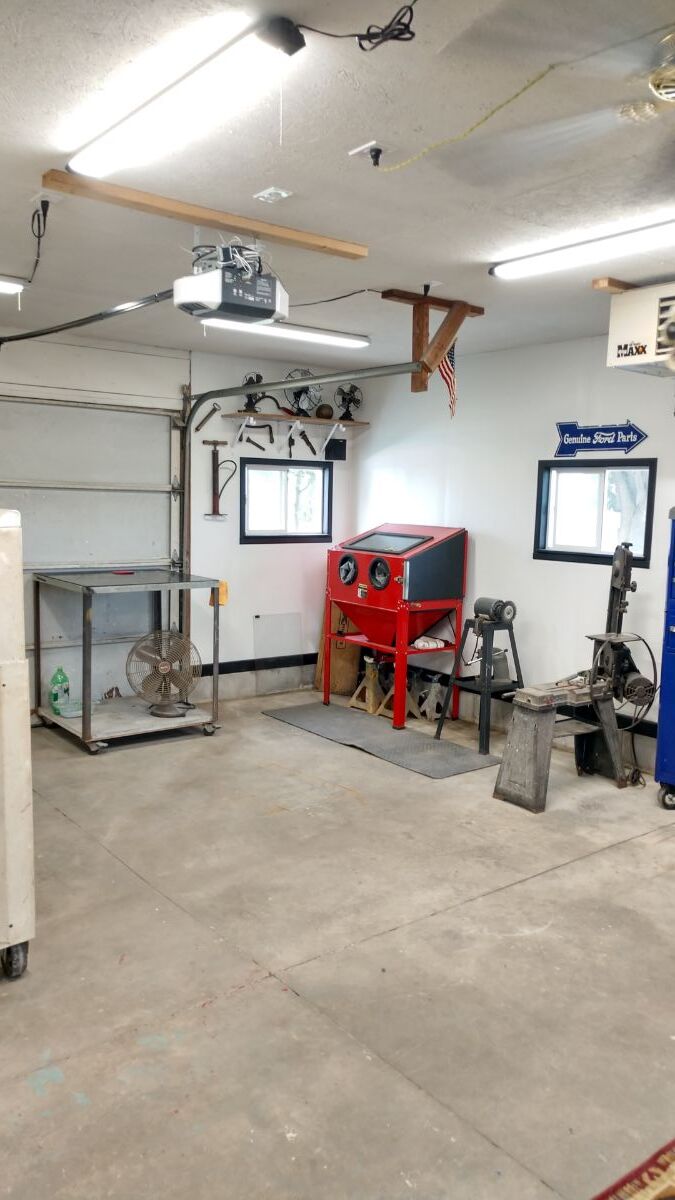
It's been about 5 years since I've posted a restoration. I've been working for a large electric motor repair shop and had to stop doing full time restoration work. I bought a 1902 farmhouse 3 years ago and I just finished up the shop. I have a bunch of cast iron and brass fans that I've been dying to restore but this fan was actually needed in the kitchen so it took priority. Luckily it was a simple and straight forward job. I gave it a fresh rewind, made new bearings from Oilite bronze and replaced the felt. Everything was blasted and finished with epoxy primer and a metallic silver and black base coat/clear coat.
10 points
-
Terry Burns' collection of 150 fans is now at the AFC museum and is being put on display. Terry is a long time collector and a good friend. Terry has been battling cancer for several years and felt that his collection needed to be seen instead of stored away or sold piecemeal. He reached out to me and asked if the Museum would be interested in purchasing his fans, which of course was a no-brainer. Tom Frampton bought the collection and Eddie and I went up and got it loaded last week. It took two trips to Wabash to transport it down to Zionsville. We are going thru it right now, tagging each fan and making display cards. It is a stellar collection of early GE's, Daytons, Menominees, Westinghouse, and R&M, along with some off-brand stuff like Emerson and Century. Terry collected whatever caught his eye and I'm guessing if it had blades on it, it caught his eye. Lots have been restored, lots are nice originals, and some could stand some TLC. It's all going in as is. The fans will be on display as The Terry Burns Collection. This is an important acquisition for the AFC Museum, as it really fills in a lot of holes in the timelines. I'm hoping that Terry will be able to attend next month's Meet and see his fans. Those of you who know Terry, know that he is a warm and friendly person with a passion for all things fan or fan related. We here at the Museum are proud to have Terry's Collection available for everyone to see. Come and visit us us and see it for yourself. Thank you Terry!
10 points
-
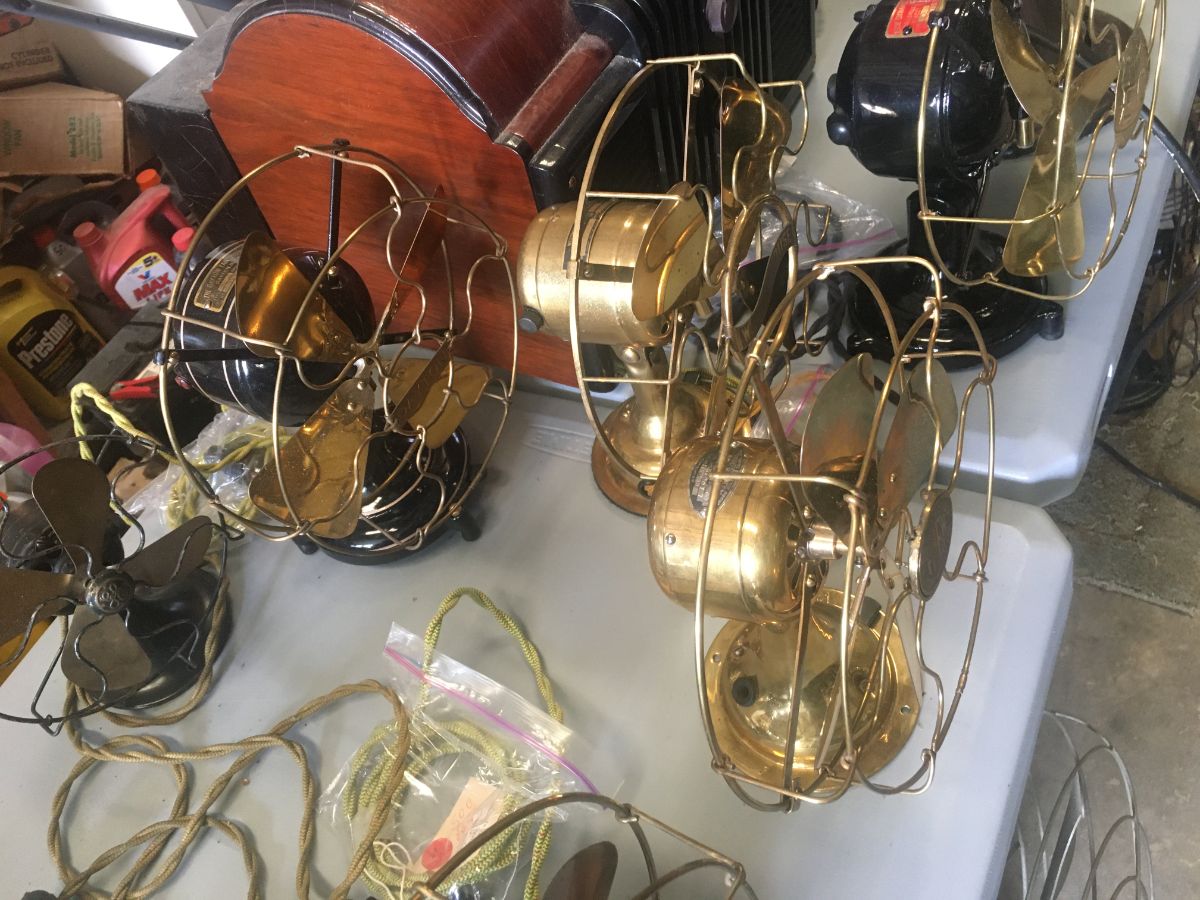
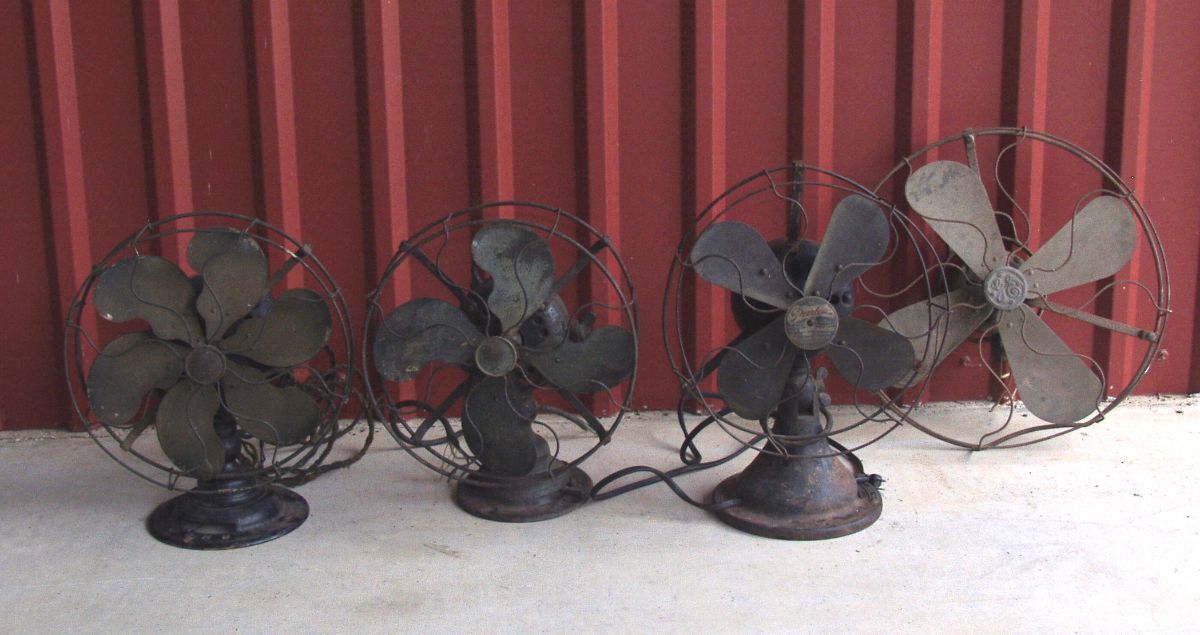
I went to the flea market Friday hoping that the good weather and holiday would bring out some better buying opportunities. I was not disappointed, I was able to pick up 3 (and a half) fans of still, undetermined quality. However, I did bring home two Emersons. A 19666 and a 19646. I also picked up a an older Peerless (BB1?) stationary, The half I got was the top half of a 16" GE Loophandle with a busted pot metal rear bearing carrier. Not too bad for half an afternoon spent wandering around in warm and windy weather.
9 points
-
Here it is, fully complete VID_20240324_141451.mp4 and functional. Look for a video in the next few days about this one in greater detail. Man, those Monster Energy drinks are really stimulating my imagination.9 points
-
We have completed the transfer of the old forum material over to the new forums. You will find it all in the Members Area, under Old Forums. Once in the Members area, you'll need to click on the Old Forums title to display all of the Old Forums categories. We transferred everything we were able to transfer (which was content for any old posts including categories, images, videos, copy, etc.). Some things were unable to be transferred such as specific membership or guest privileges for the old posts (everyone became a Guest on the old posts and no icons were able to be transferred). I had to move everything within our current forum structure one last time, so our servers may be busy indexing the new position of the images and videos. I would like to give all of this a week to kind of update and settle in before having any discussions on what is working, what is where, and why. Although the "why" is kind of easy. You all requested it, Larry Hancock and Lane Shirey headed it up, and the Board approved and was able to pay for it. The old forums are in the Members area and should only be available to Members. It should be searchable, at least up to whatever the search capabilities are in our other forums on this relatively new platform. I do not yet know if a search by Guests will display content from the Old forums. That remains to be seen and addressed if needed. No one should be able to post anything to the old forums or reply to anything in the old forums. Enjoy your new toy! 😁9 points
-
As you all can likely see, we are in the midst of making some changes to the forums. There will be new categories added, a few deleted, and a few renamed. Please take the time to familiarize yourself with the changes. You can see my article in the April Fan Collector magazine if you want to hear about what all is going on in the background.9 points
-
Picked this little guy up also. Oiled it and you can hardly hear it which I assume was by design.
9 points
-
Finished cleaning this one up! Had to force patina the blades 😕 I sort of like it though. For some reason after I cleaned the black paint off the guard it wouldn't take the patina ager.. I love this fan though! Runs great 👍
9 points
-
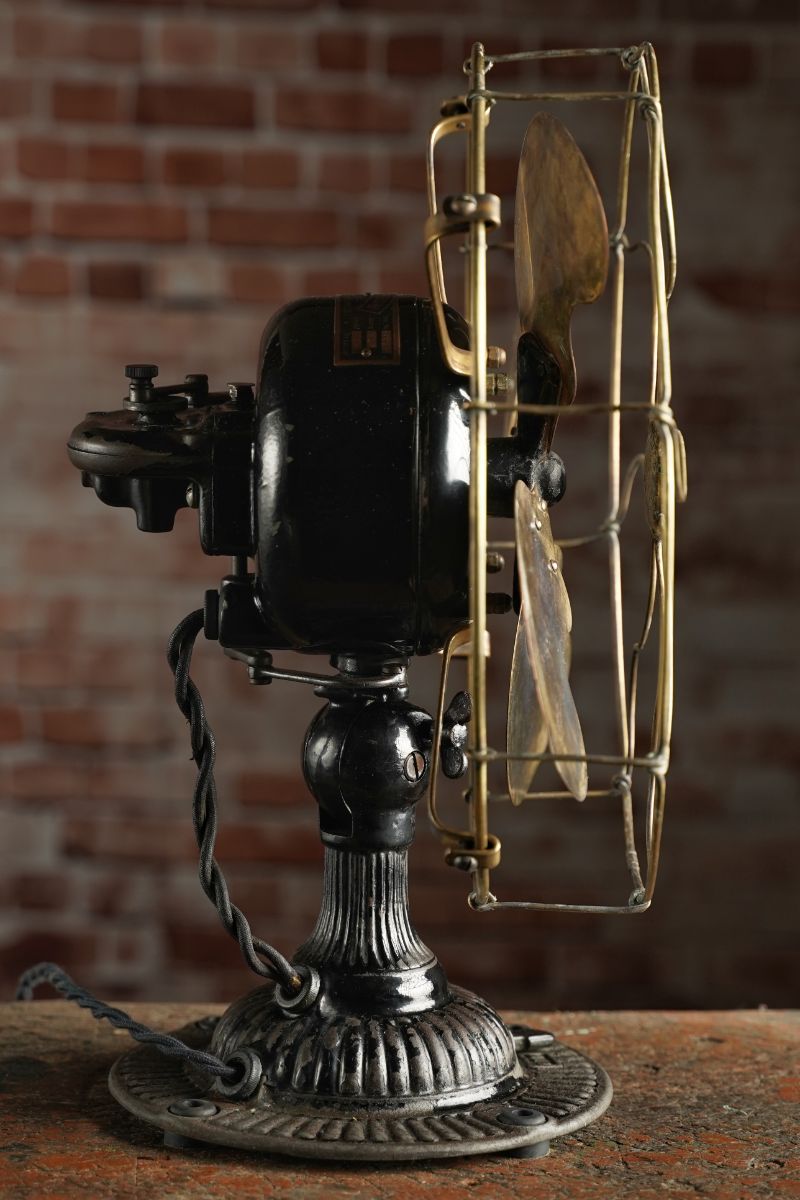
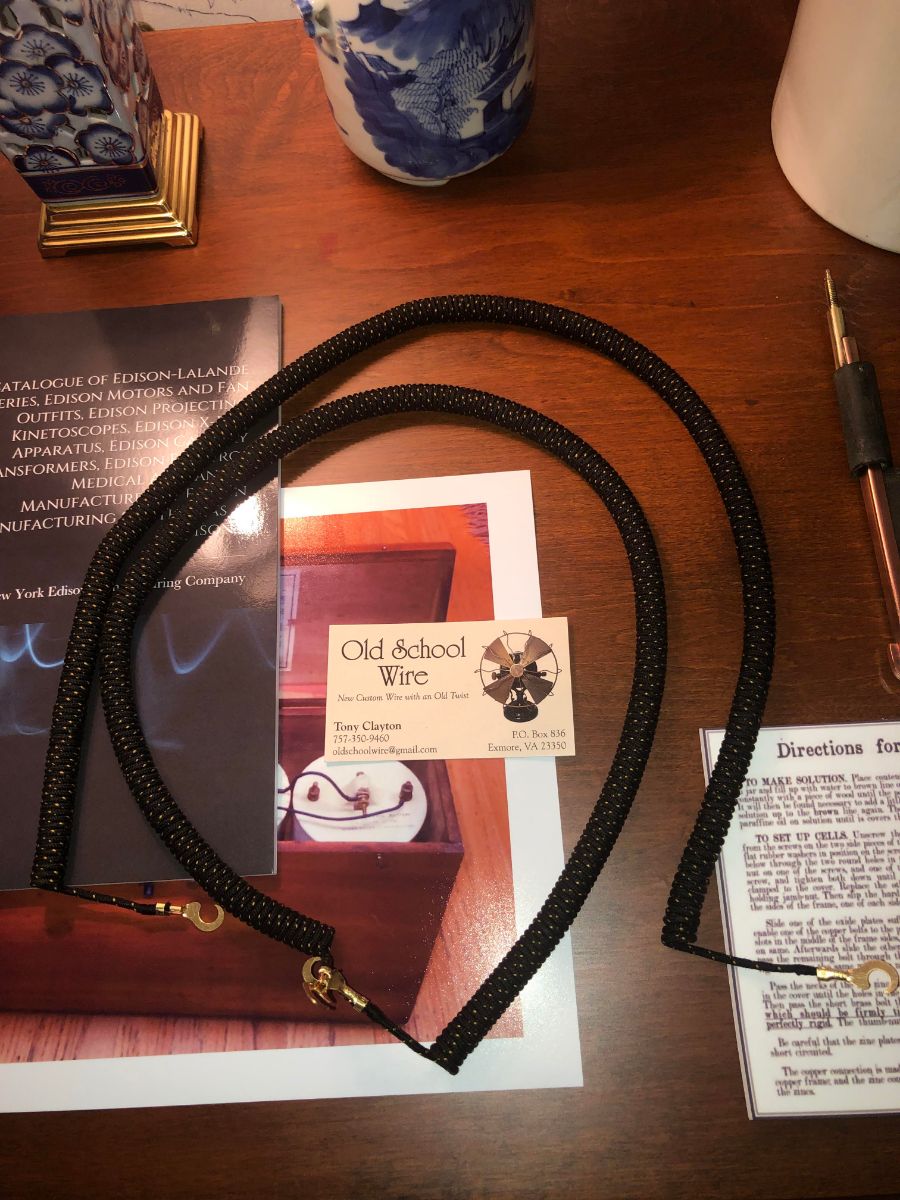
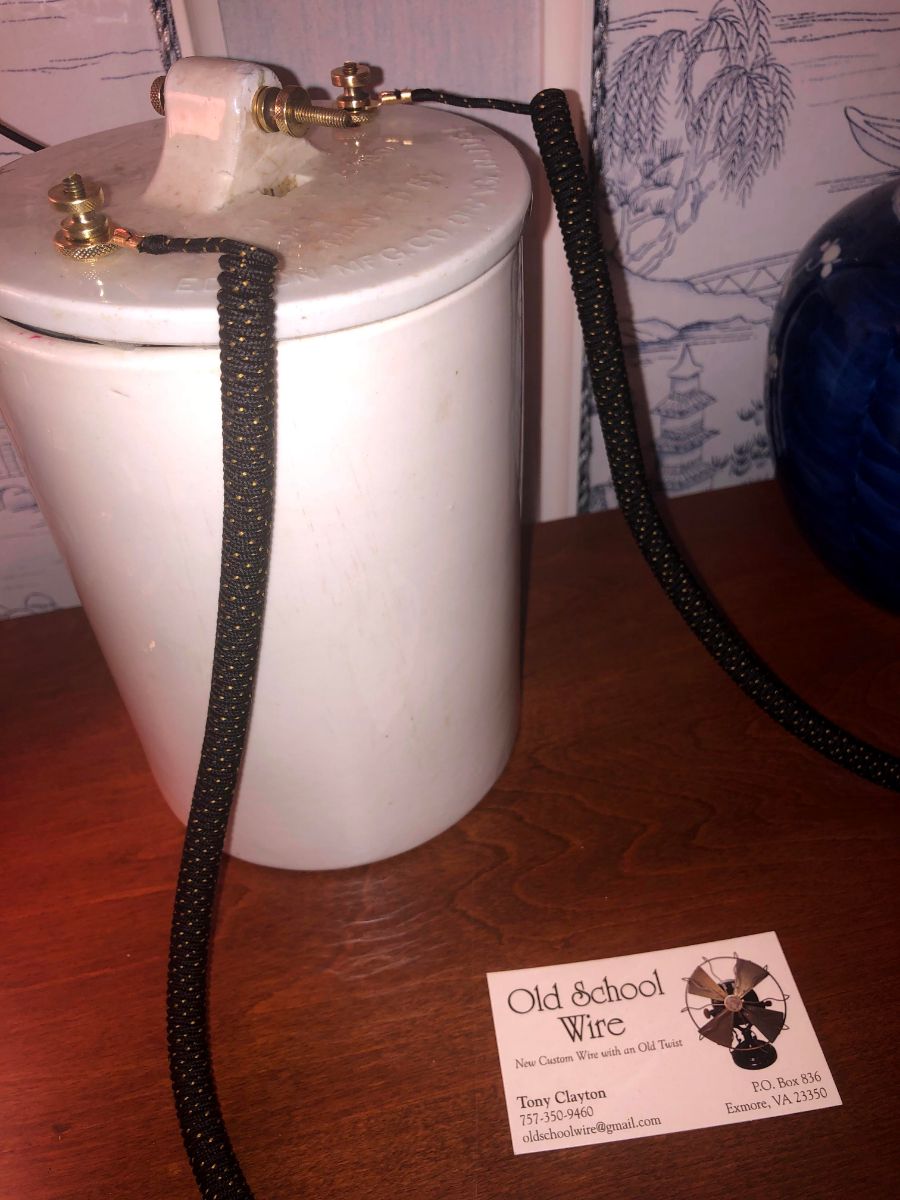
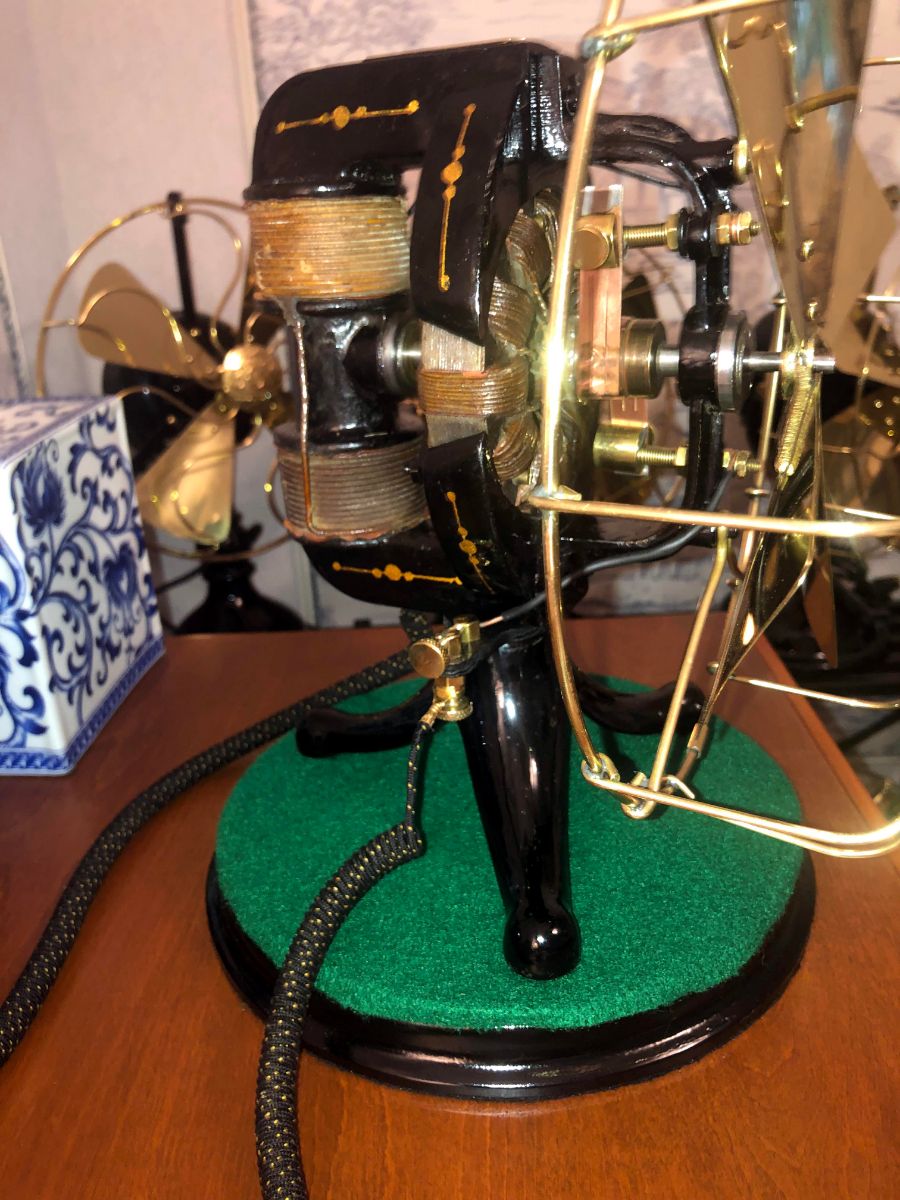
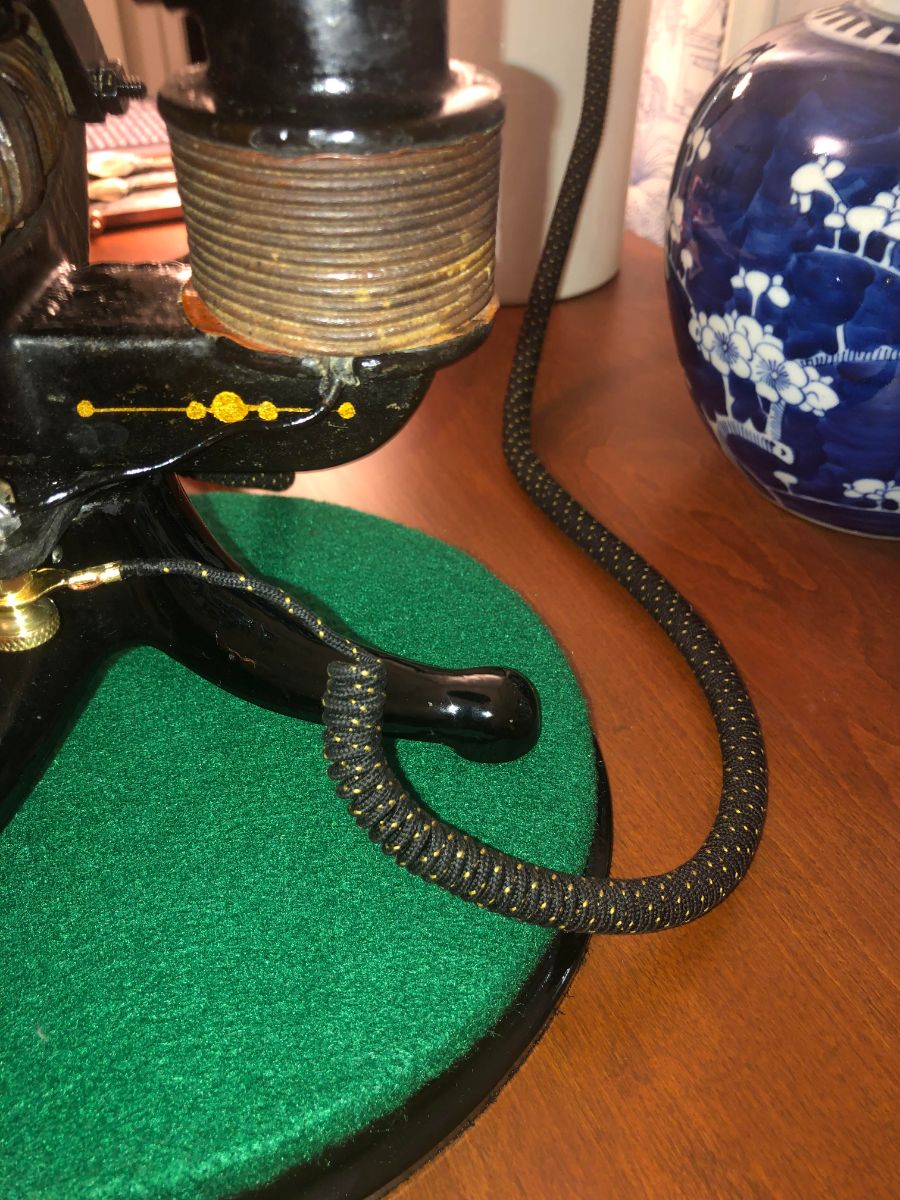
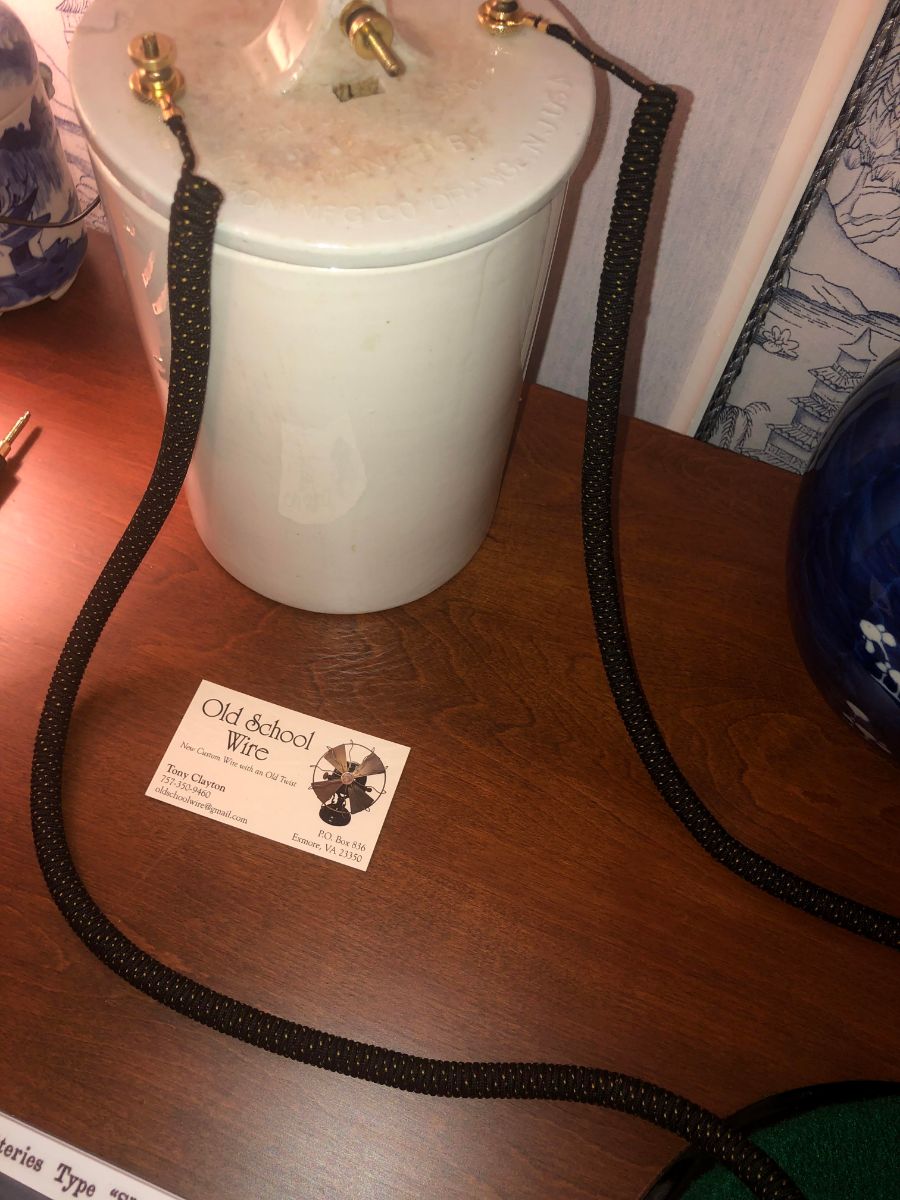
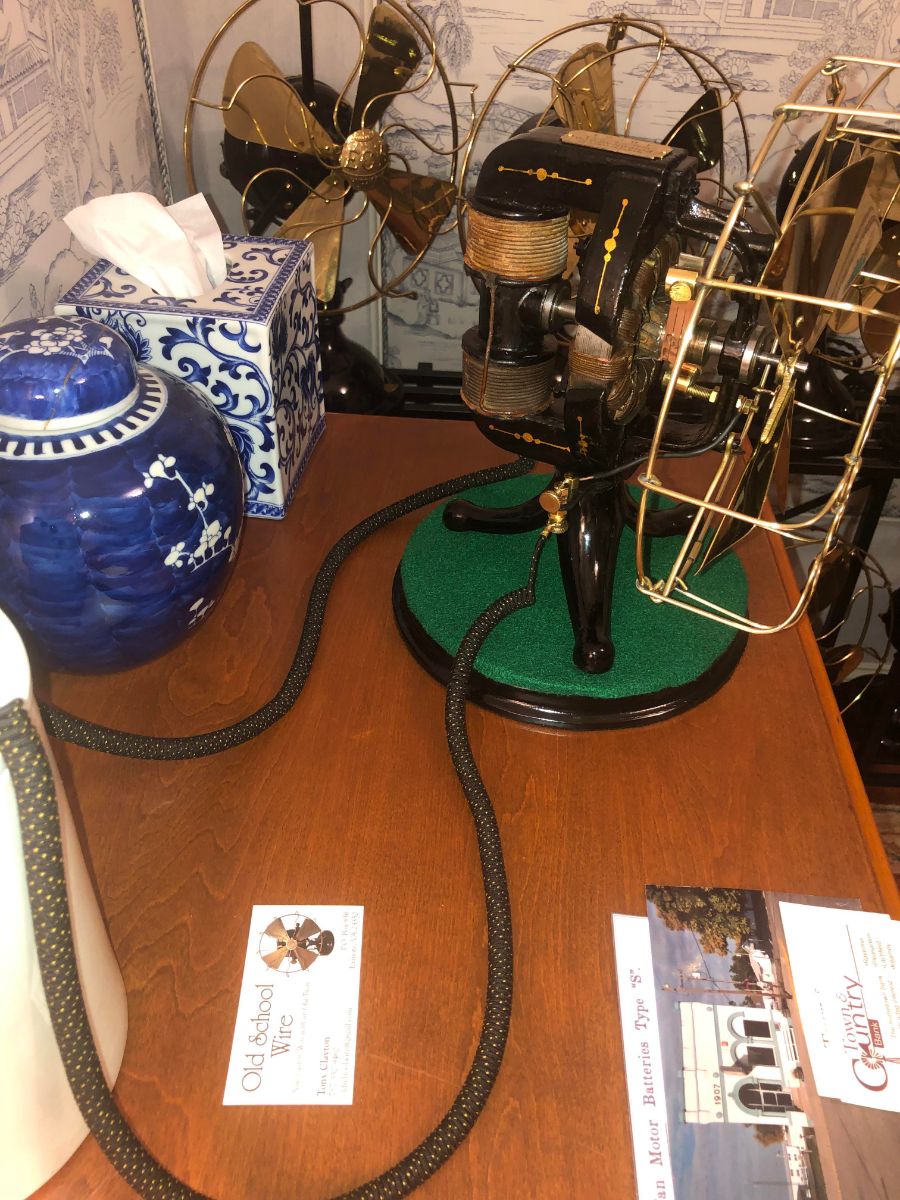
Friends: I just returned from Rochester NY (where my wife and I met at the U of R) to find a package from that master craftsman, Tony Clayton. I had asked Tony to create something special to connect my Edison-Lalande battery to the Edison bipolar fan. I sort of described what I was thinking about but in the end, I asked Tony to use his imagination. Below is what he created for me: Tony's description of this wire follows: "It's rather old era unknown 18AWG GE magnet wire which I braided with a new configuration on my machine which is actually producing a much tighter braid. I then wound the wire on a 5/15 rod to pigtail. The connectors are originally brass ring connectors, reshaped to C connectors to replicate something old. The connectors have four tabs. I stripped wire to long and placed under the forward tabs. I crimped and folded the extra over the top back to the second set of tabs, which were also crimped thereby creating a relief of sorts so that the wire would resist being pulled out if tugged" The wire gives a rather vintage look to the arrangement and ties together the jar and the fan rather nicely. See pictures below. I would encourage anyone who wants this extra special "touch" to contact Tony to discuss what you would like. We are so fortunate to have a fine gentleman, like Tony, who is so willing to share his superb skills with all of us. I'm sure Tony would love to hear your comments if you would care to post. As for me, I am beyond happy!
9 points
-
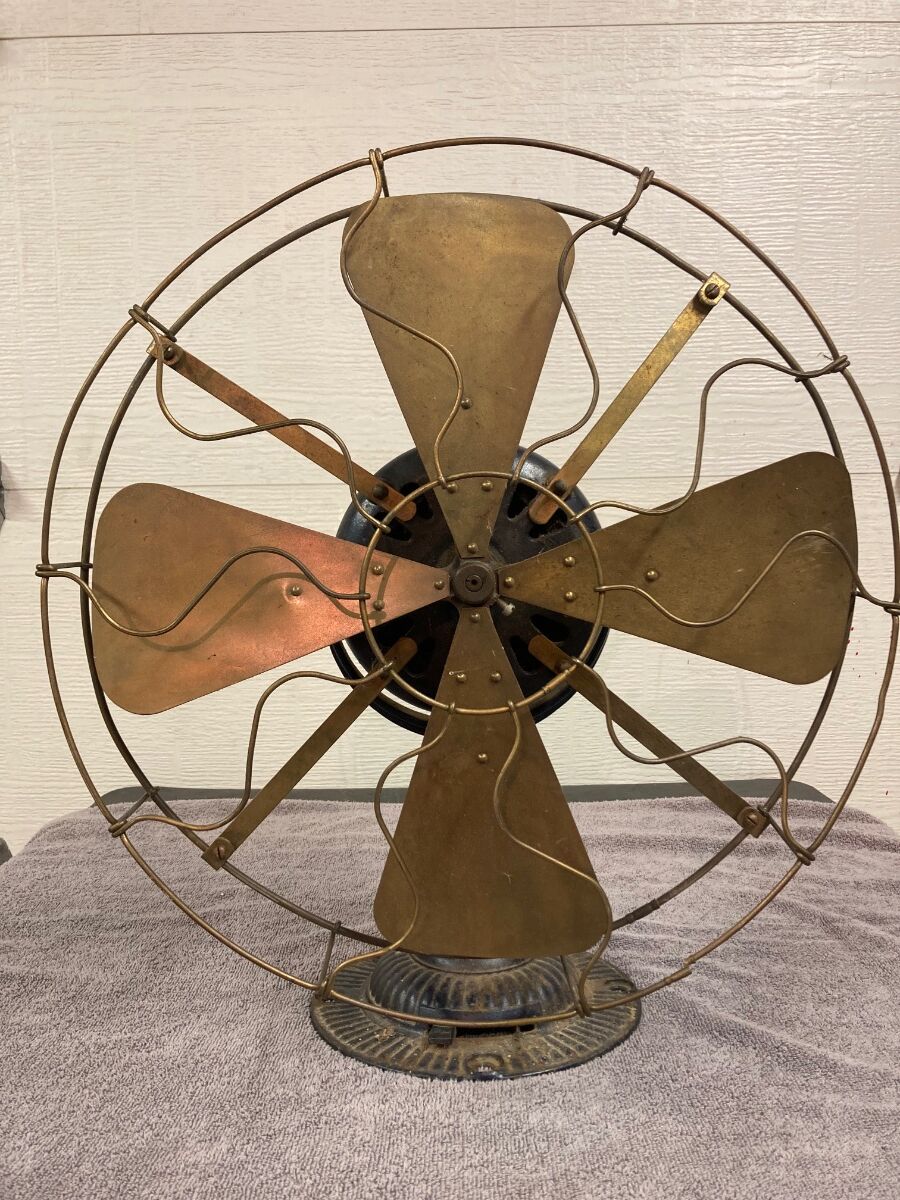
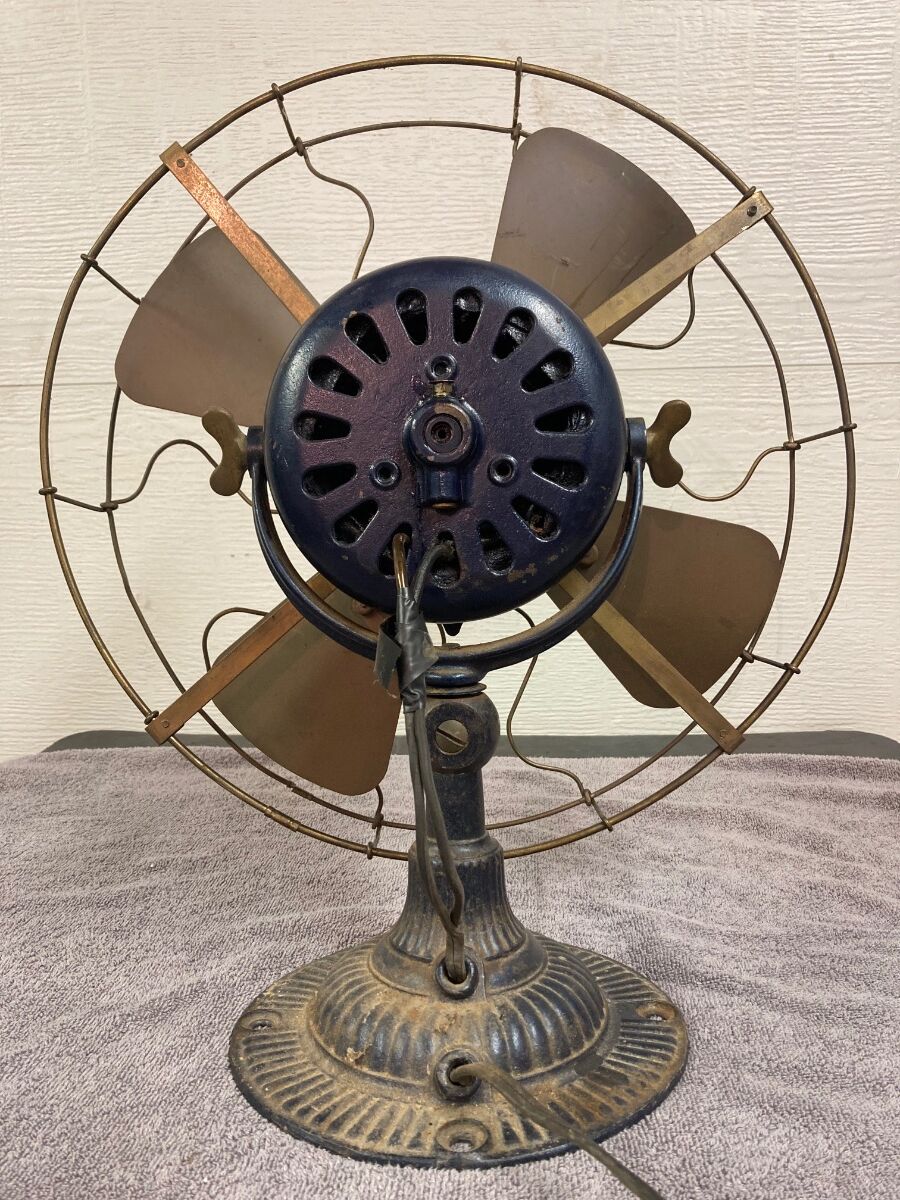
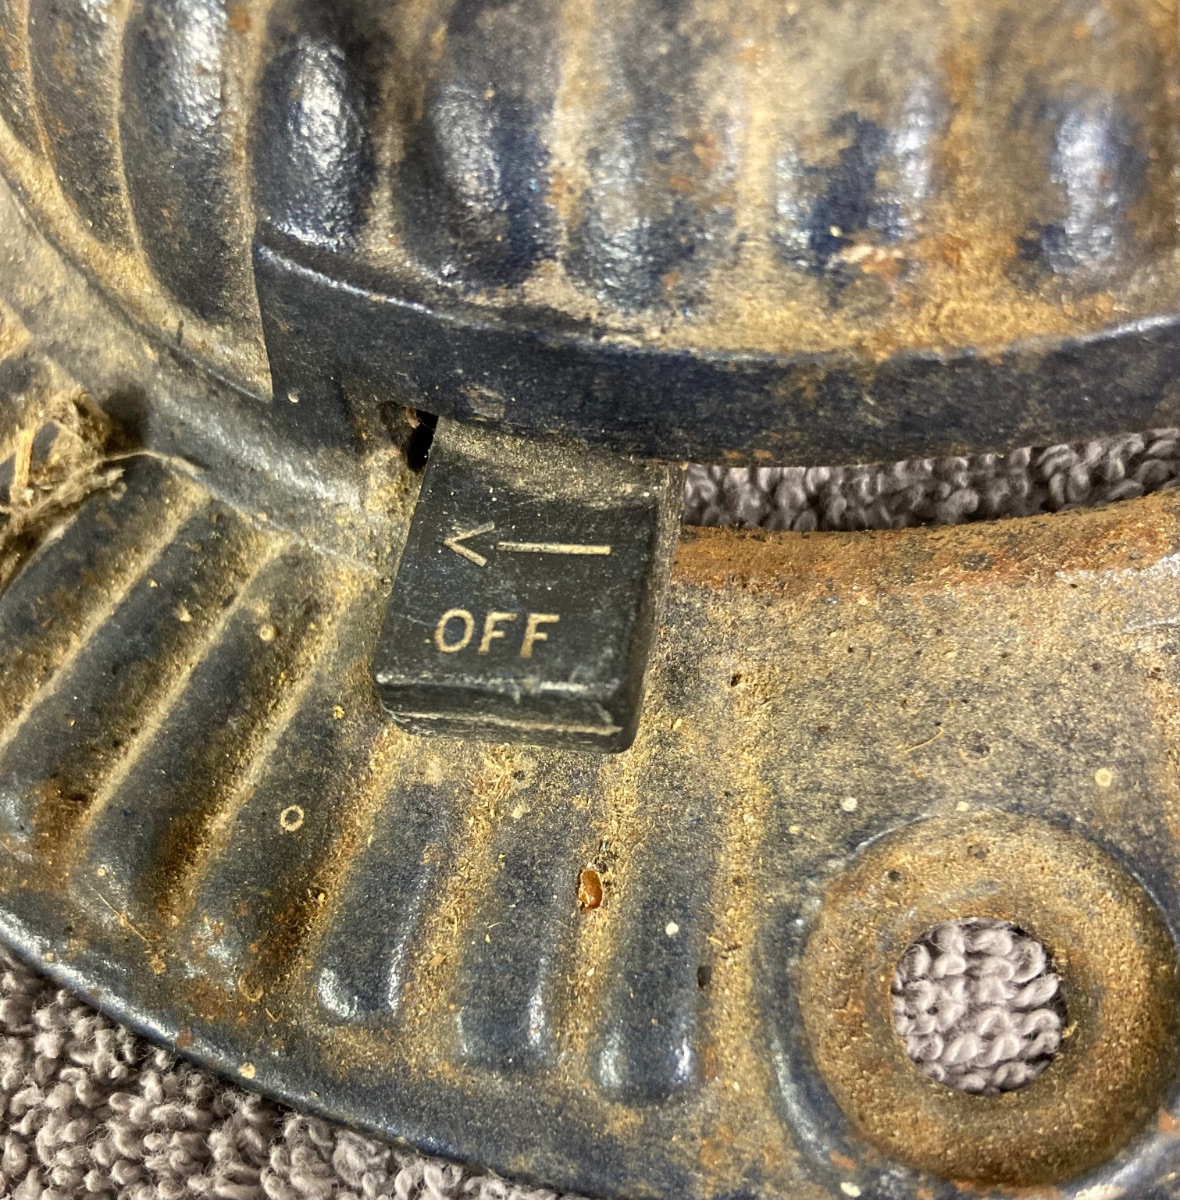
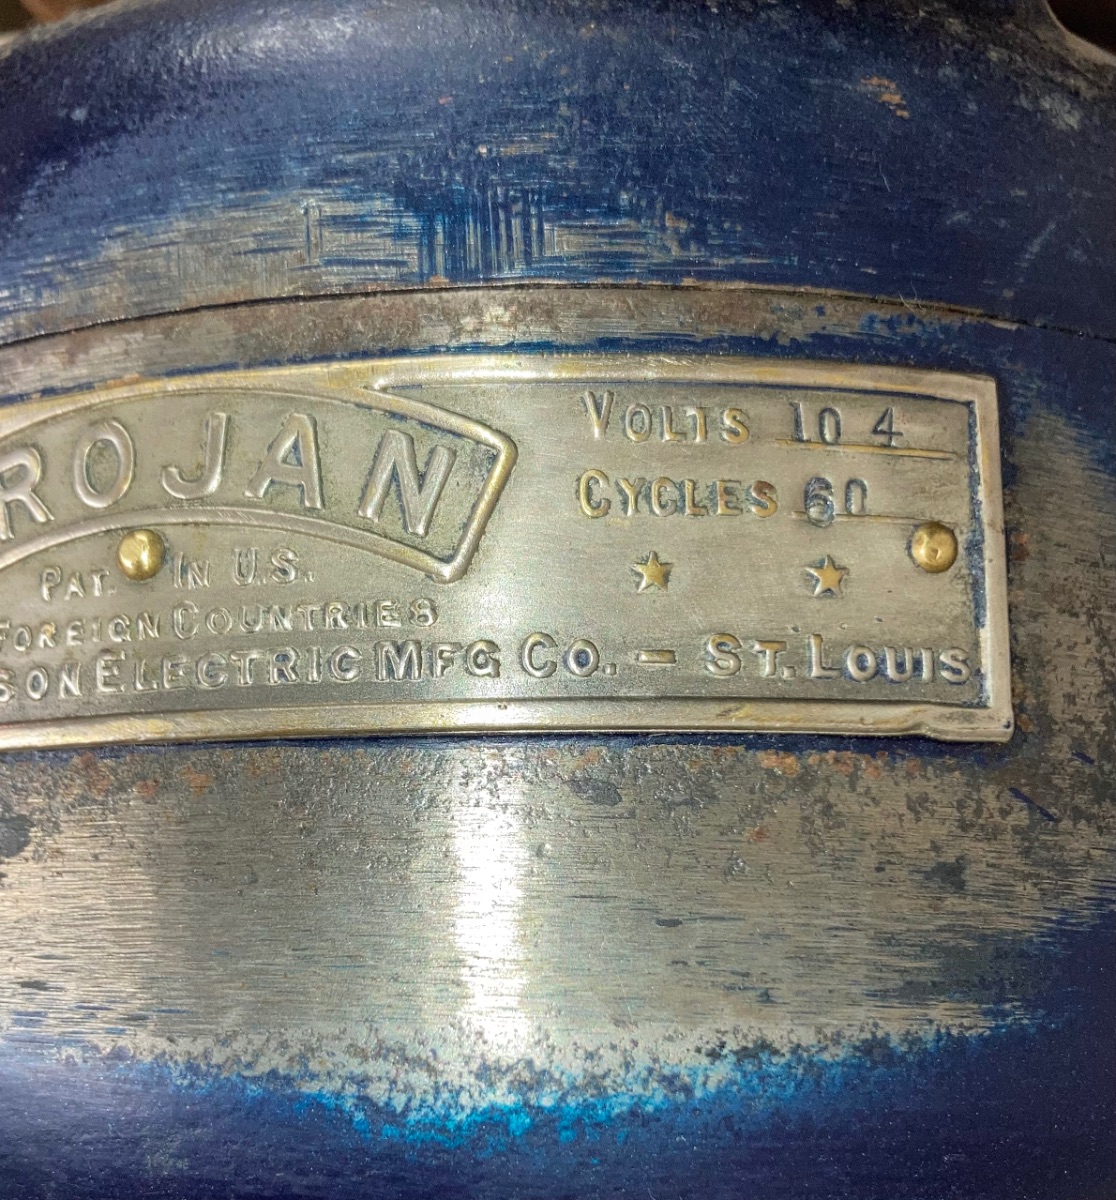
I took a handful of fans to the meet and was very fortunate to sell more than I expected. Thank you everyone who purchased one. That gave me the green light to nab this Trojan 5320. It’s wired direct and painted blue. Fortunately the switch is there and the motor fired right up. It has a braille tag. I couldn’t find any other examples pictured with that tag. Not very many in the survey. Donna was ready to kill me for bringing another 16” in the house. I explained it was a “good” one. Here’s some pictures.
9 points
-
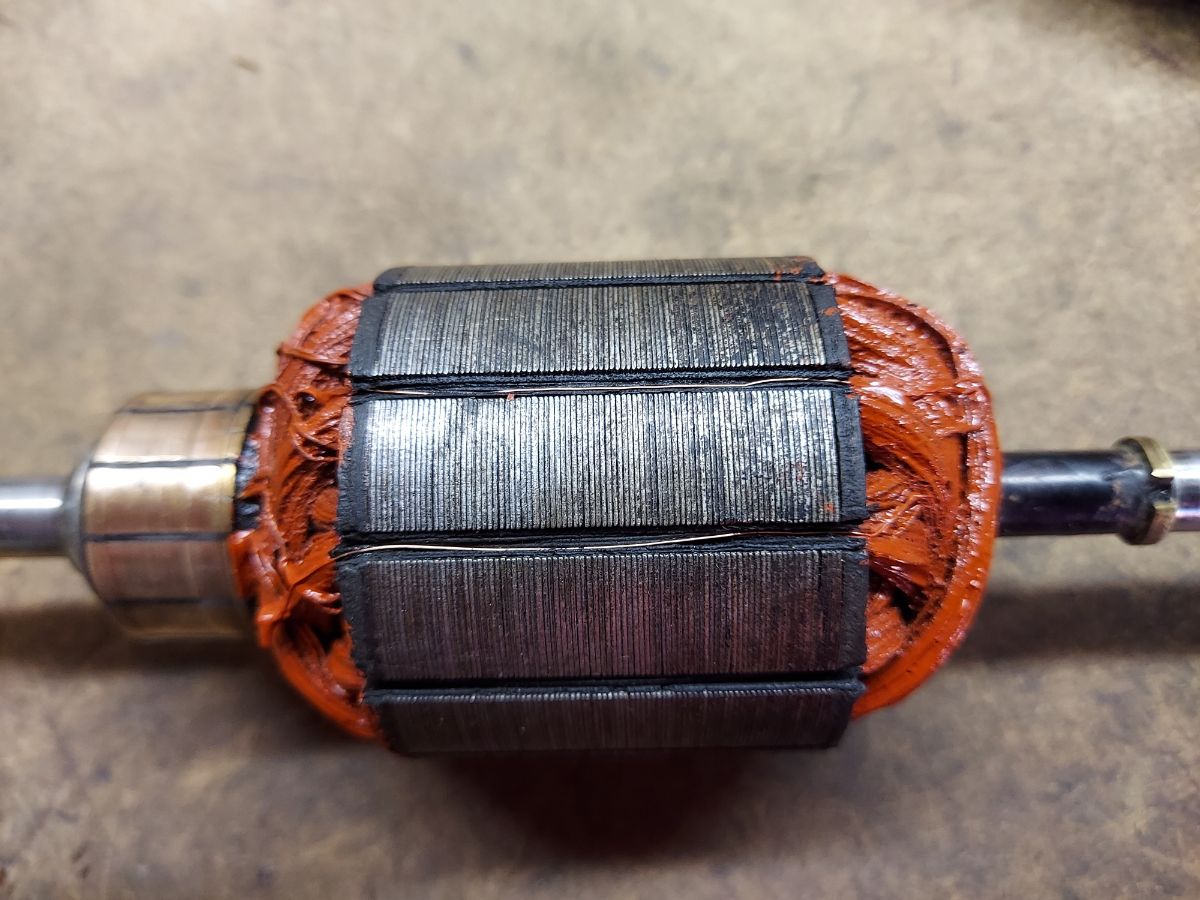
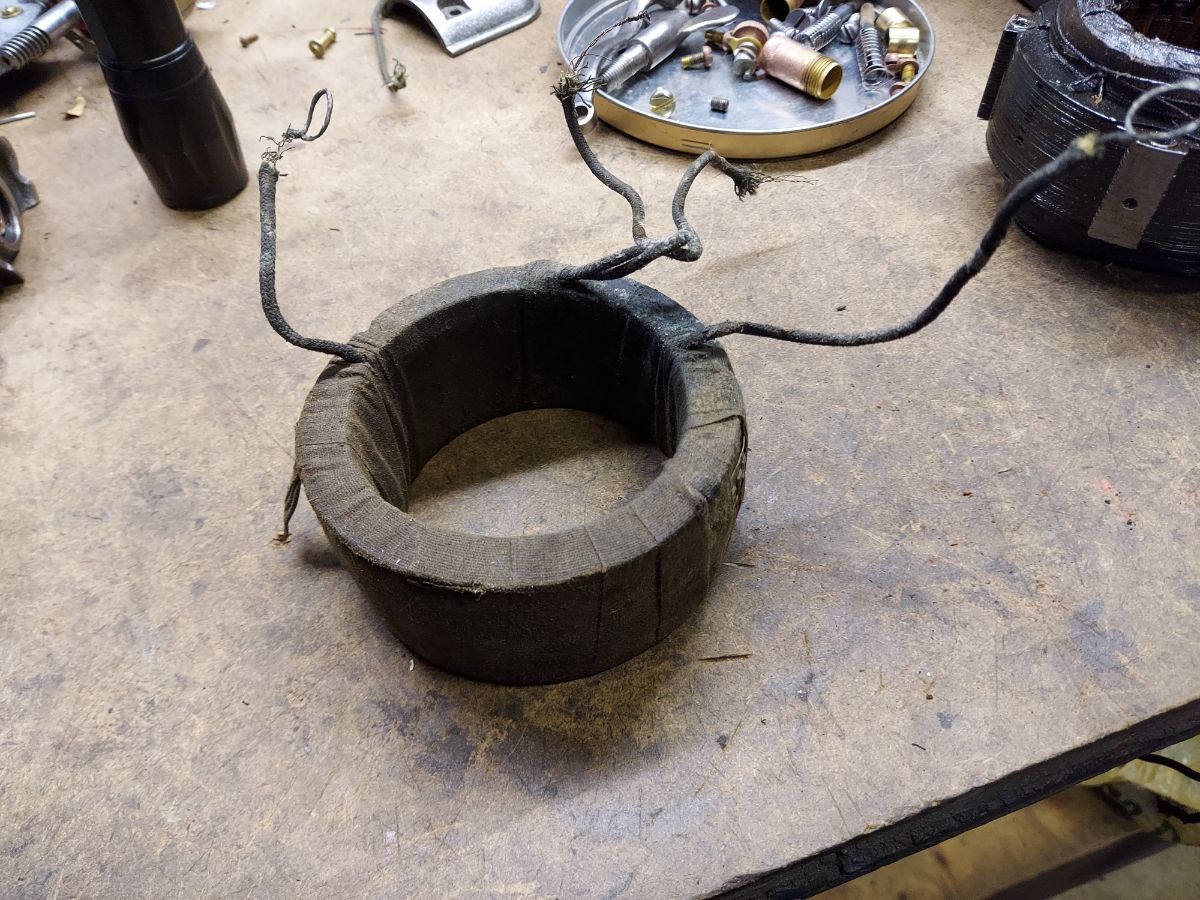
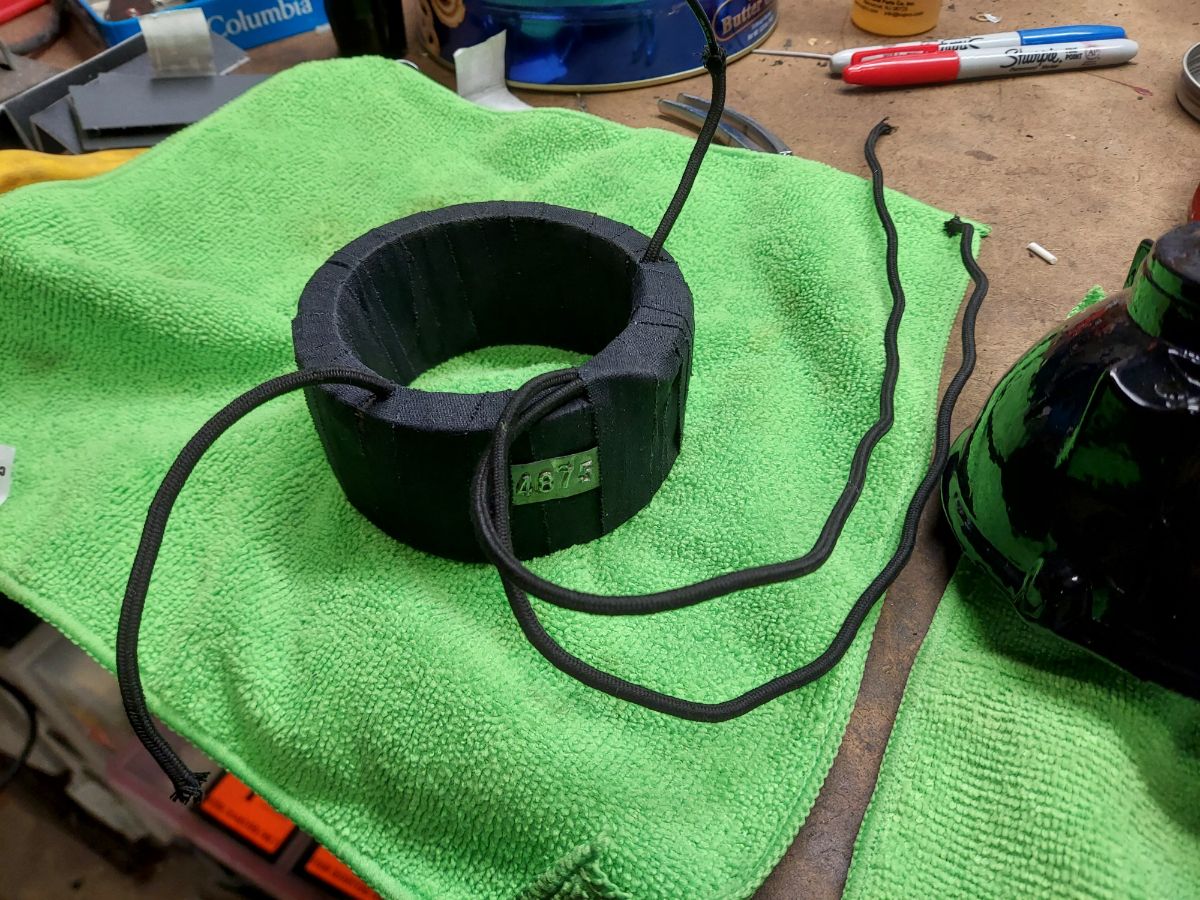
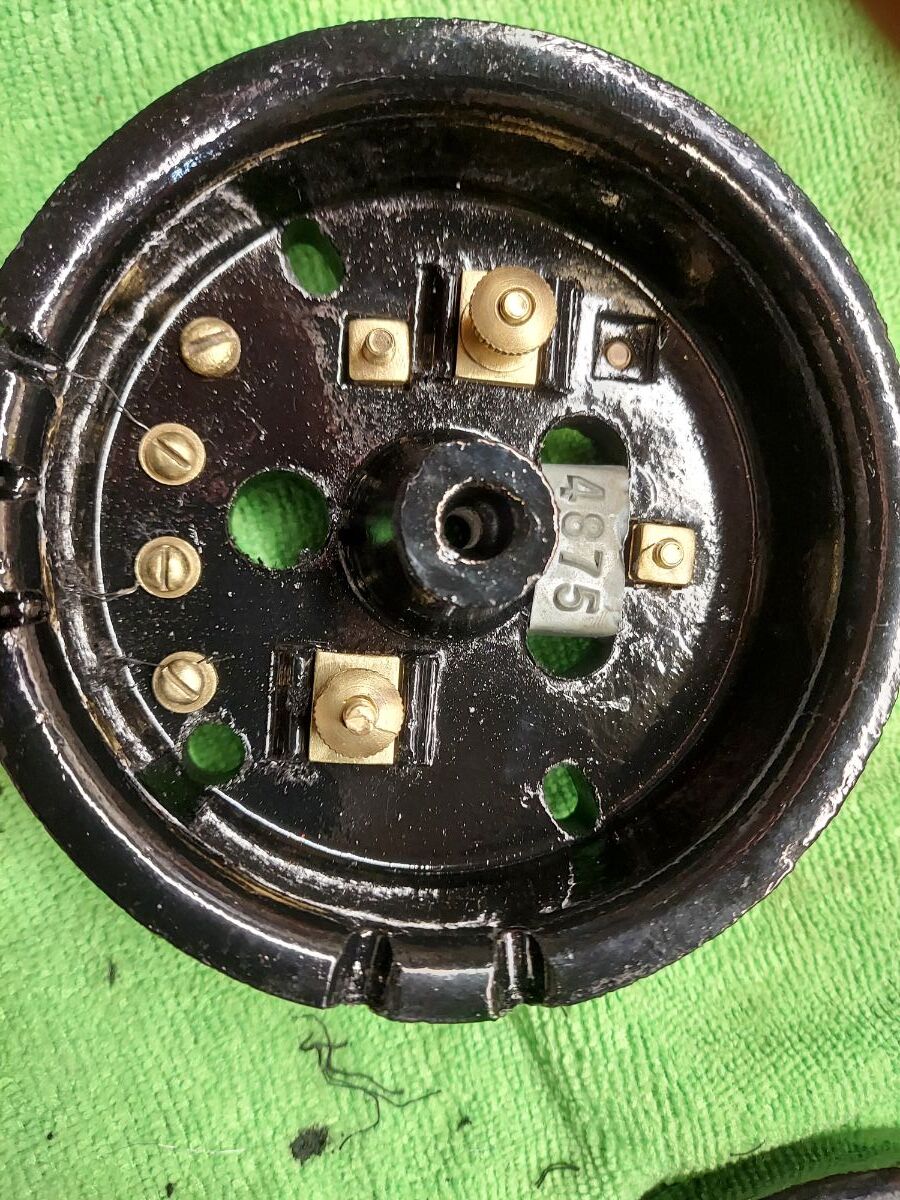
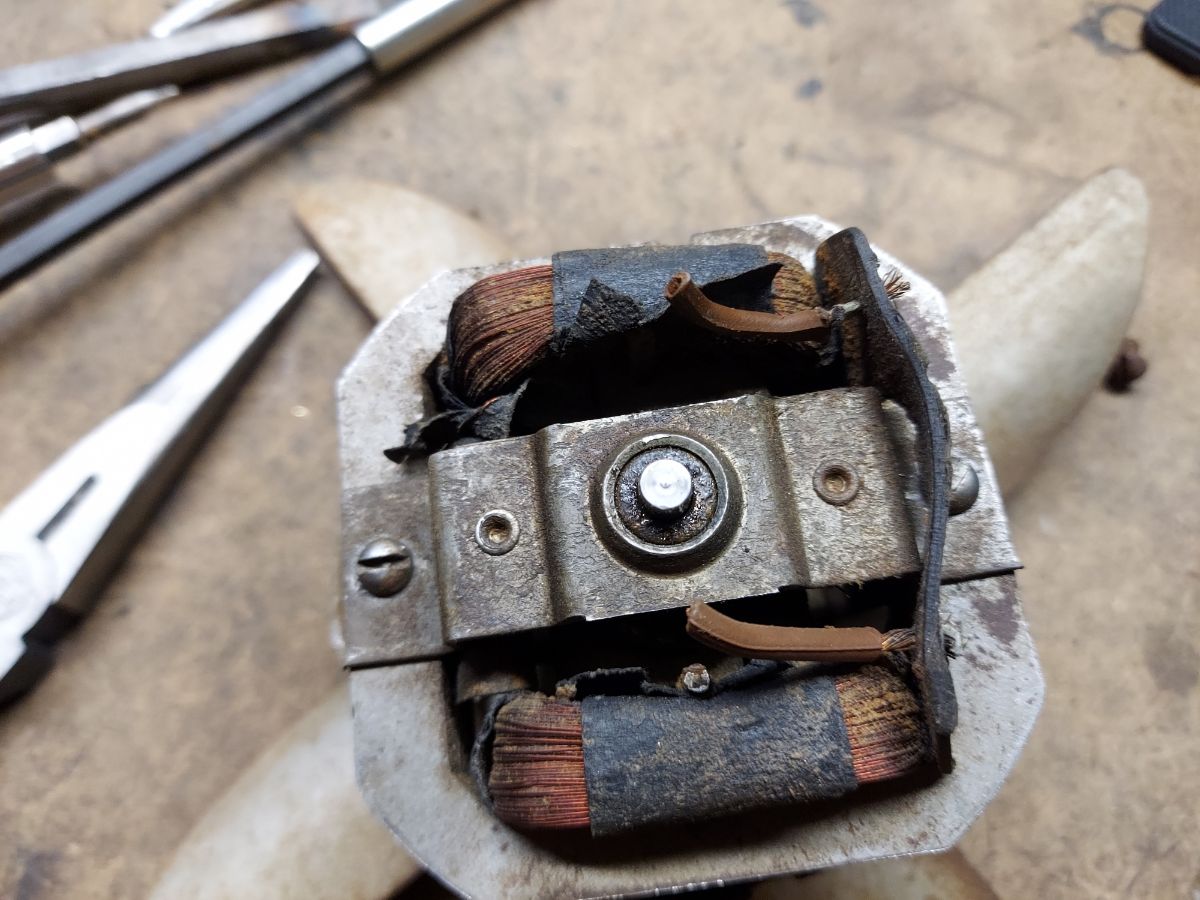
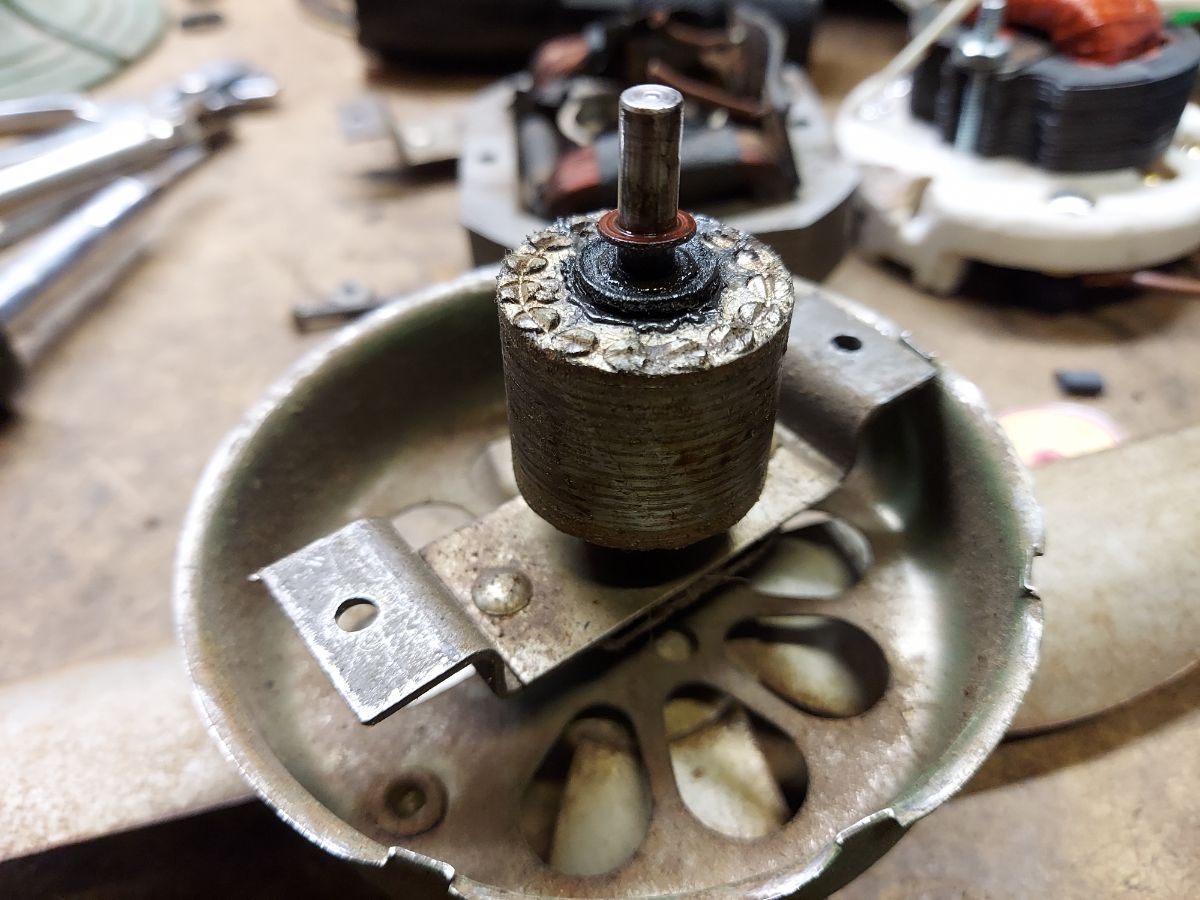
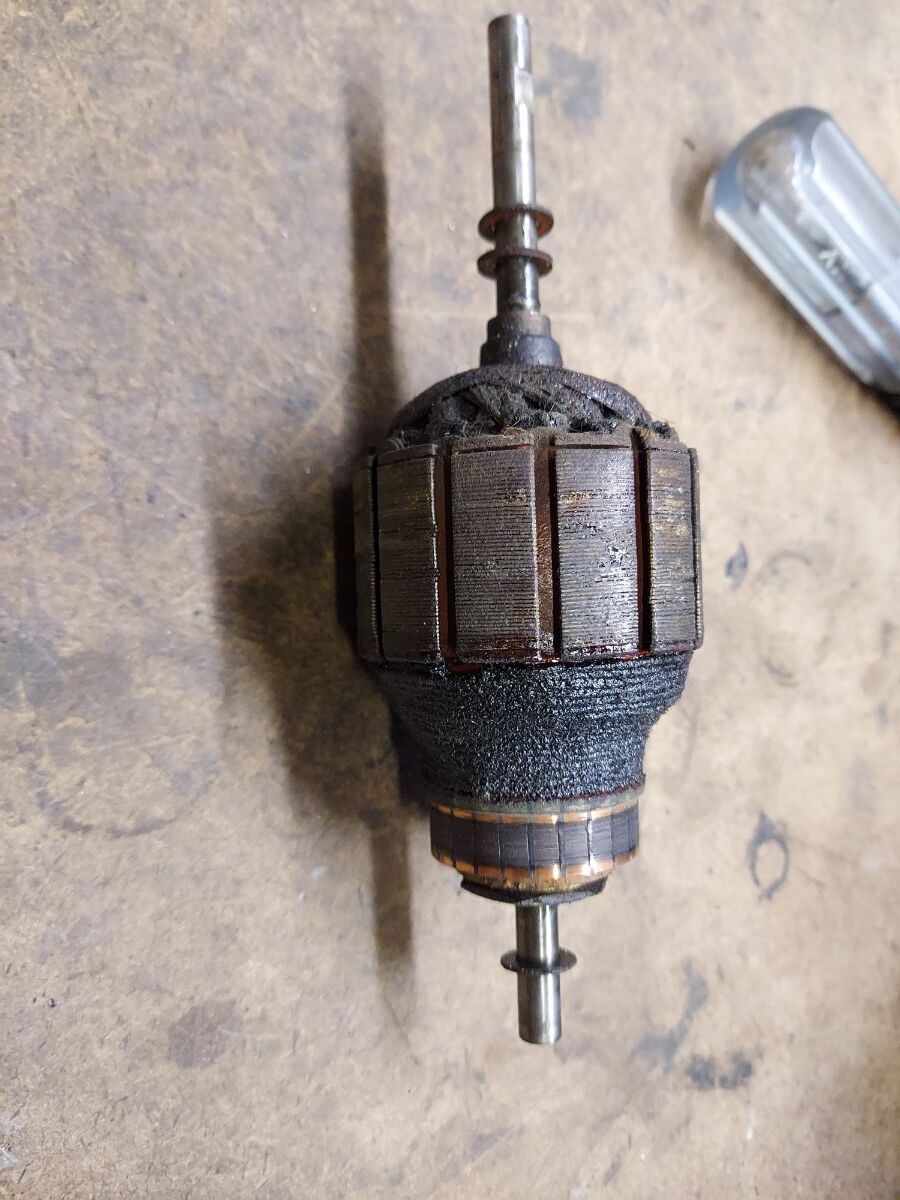
After years got it going this weekend. Dead stator, burnt speed coil & capacitor. Runs good, need some final tuning.
9 points
-
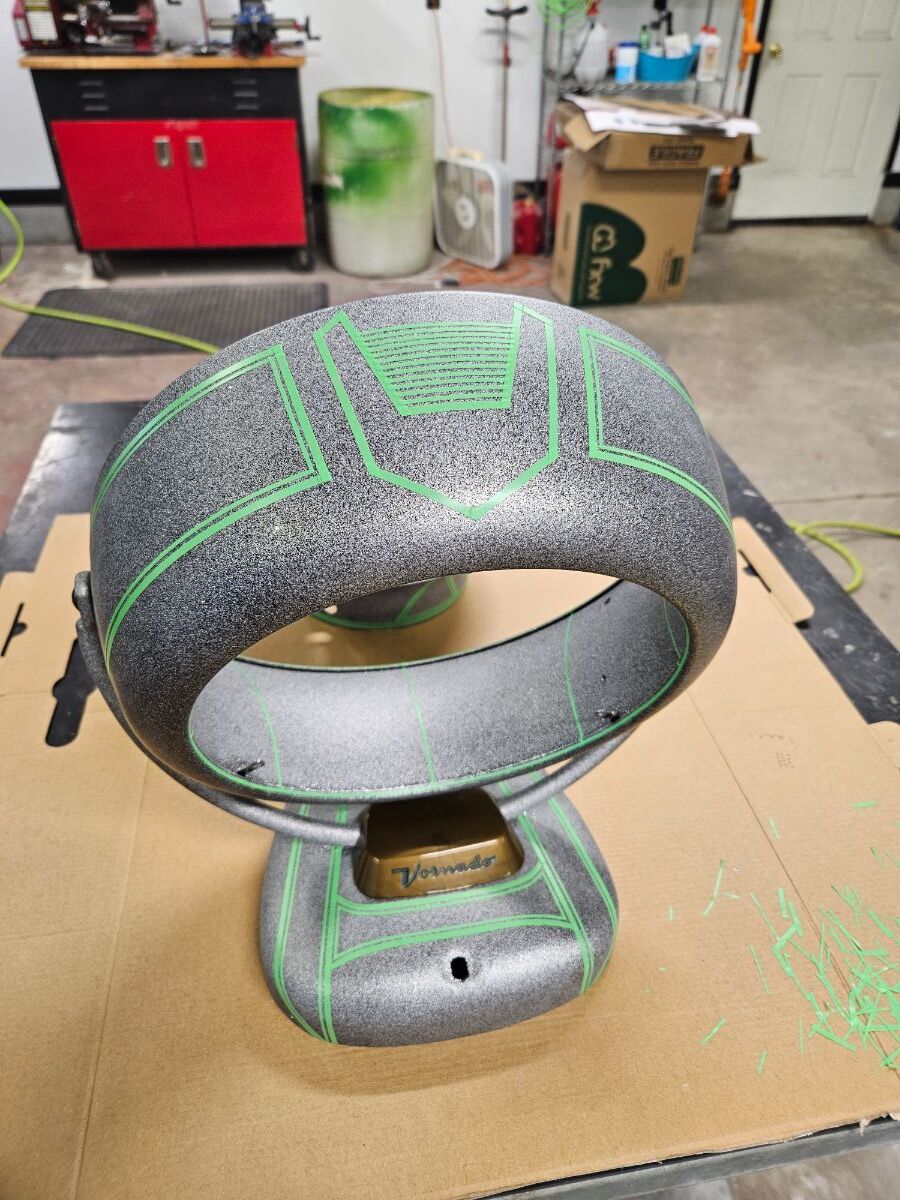
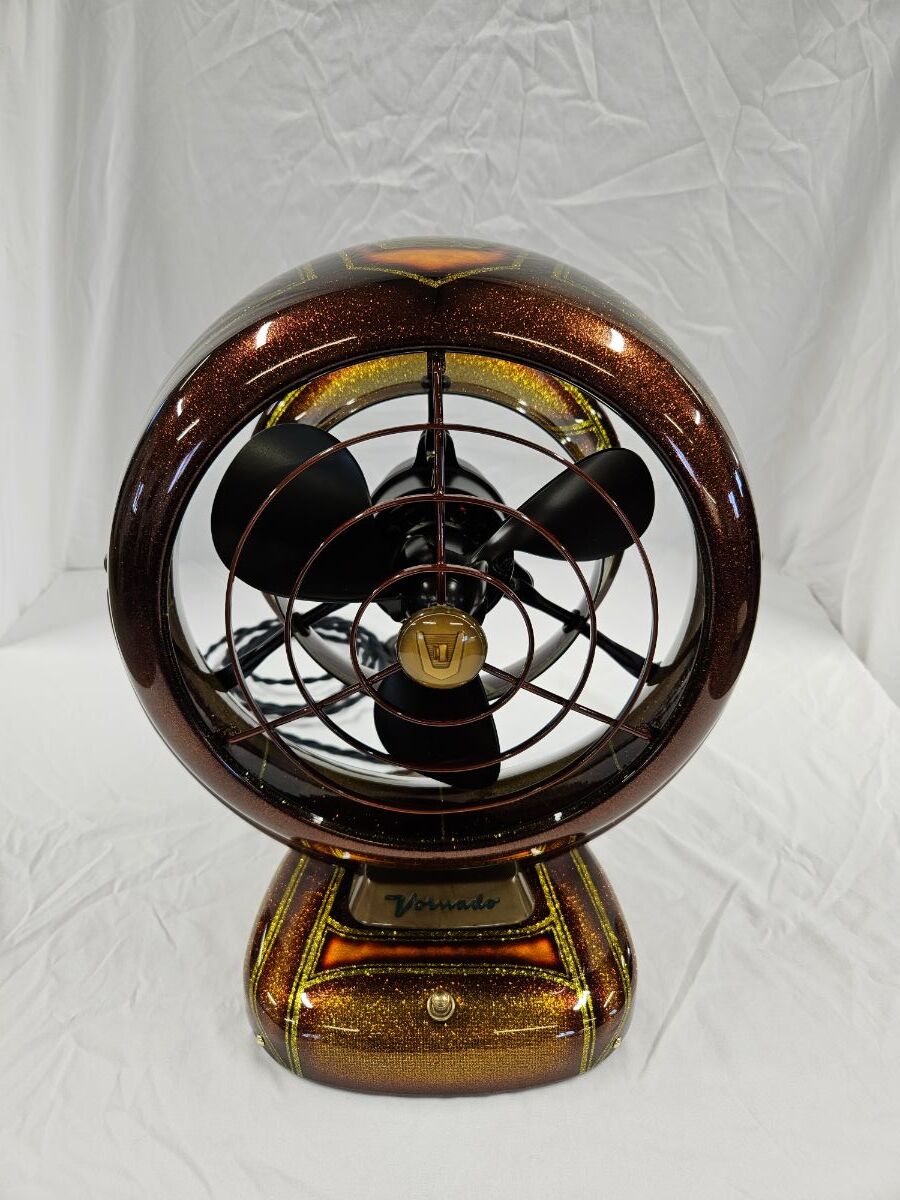
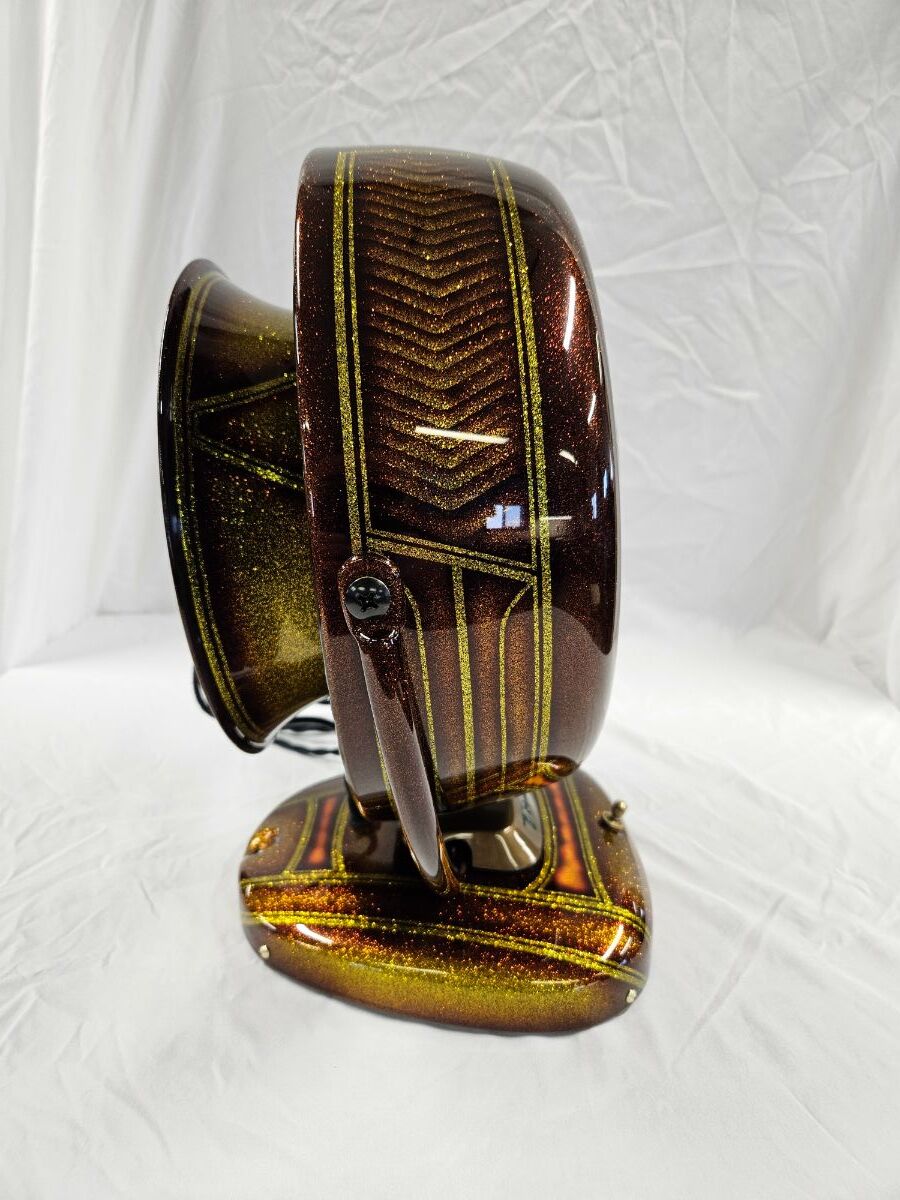
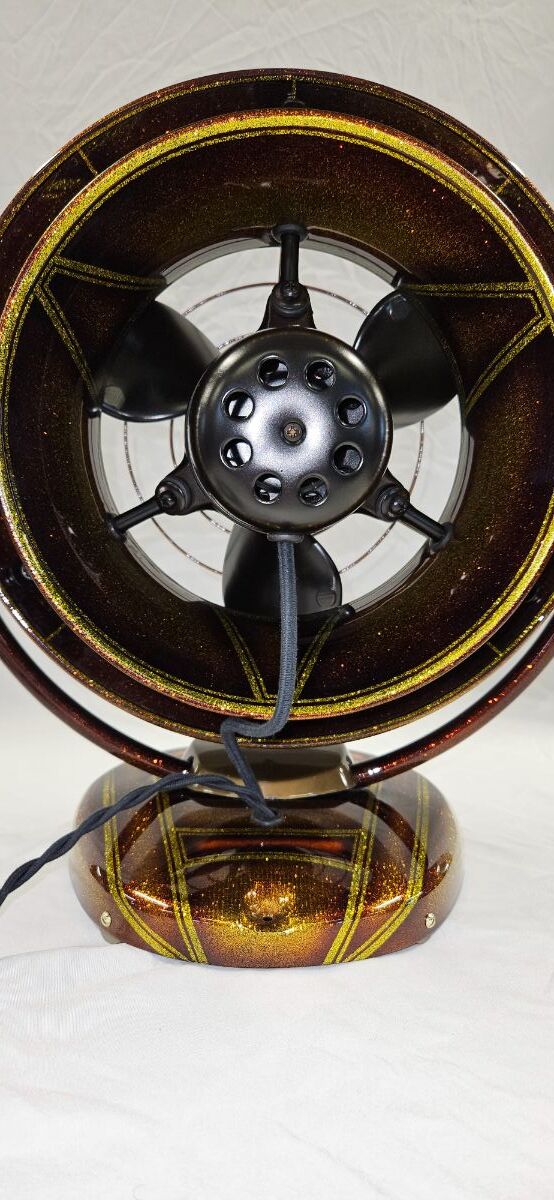
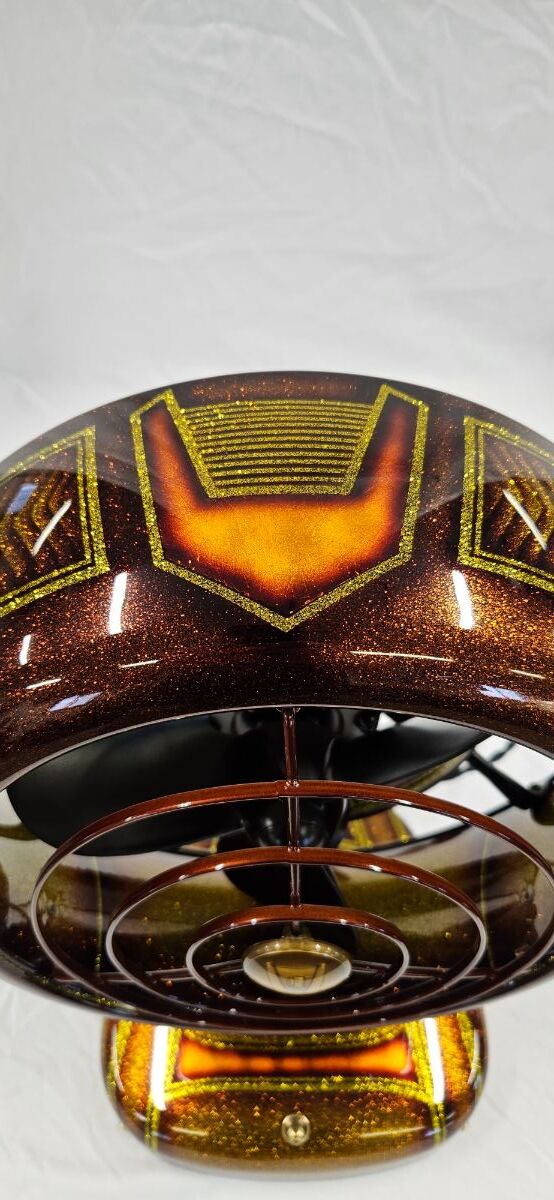
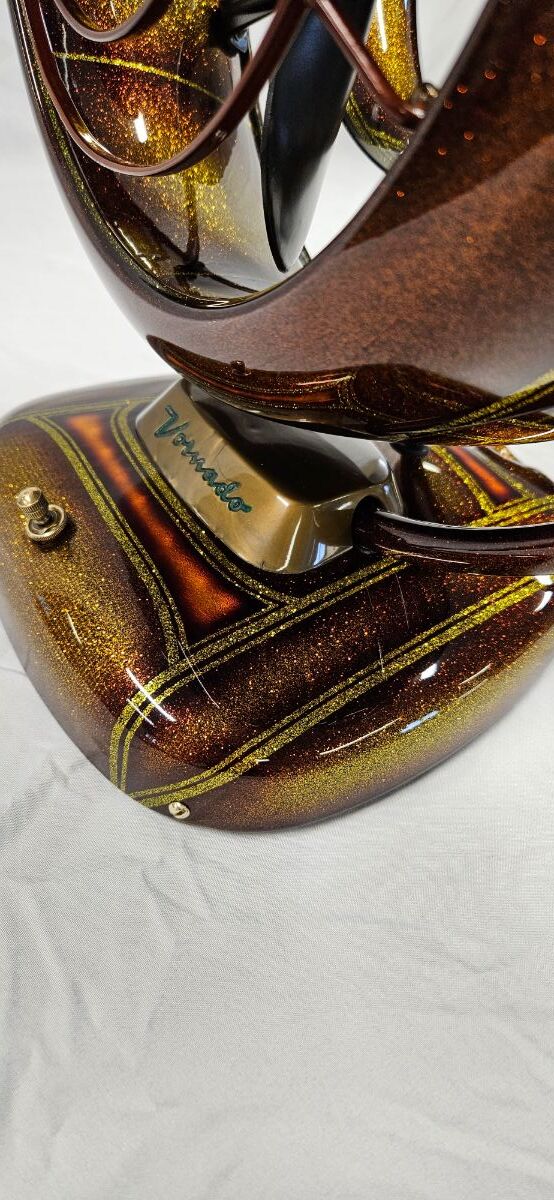
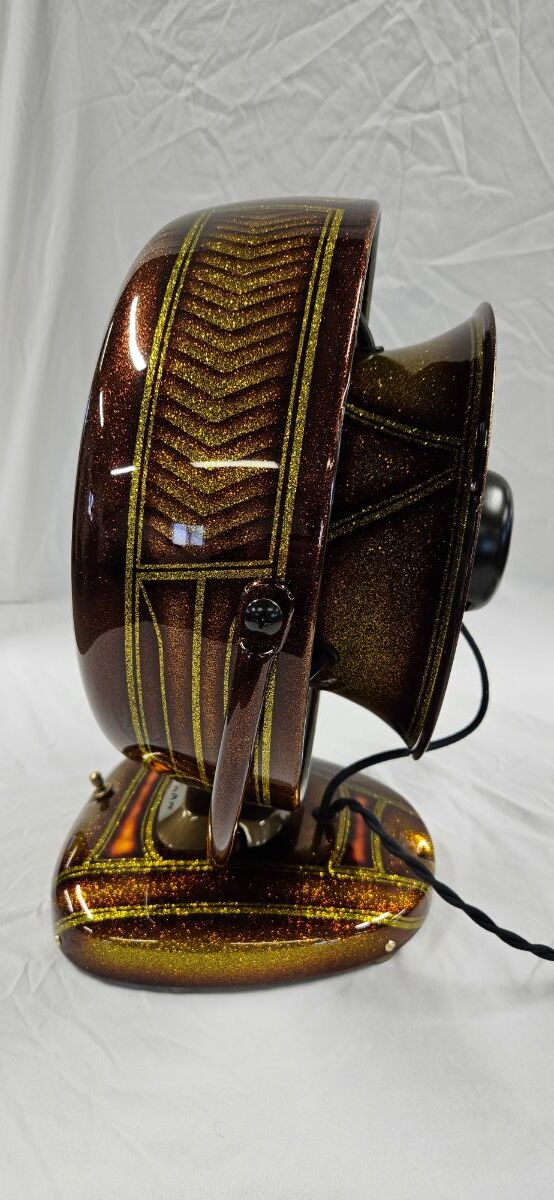
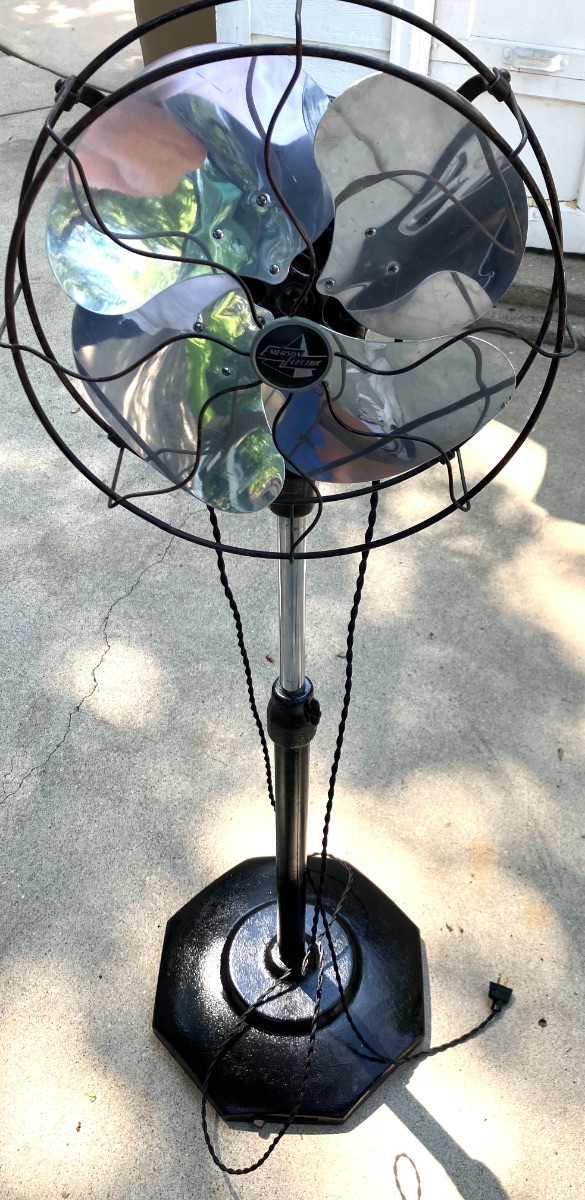
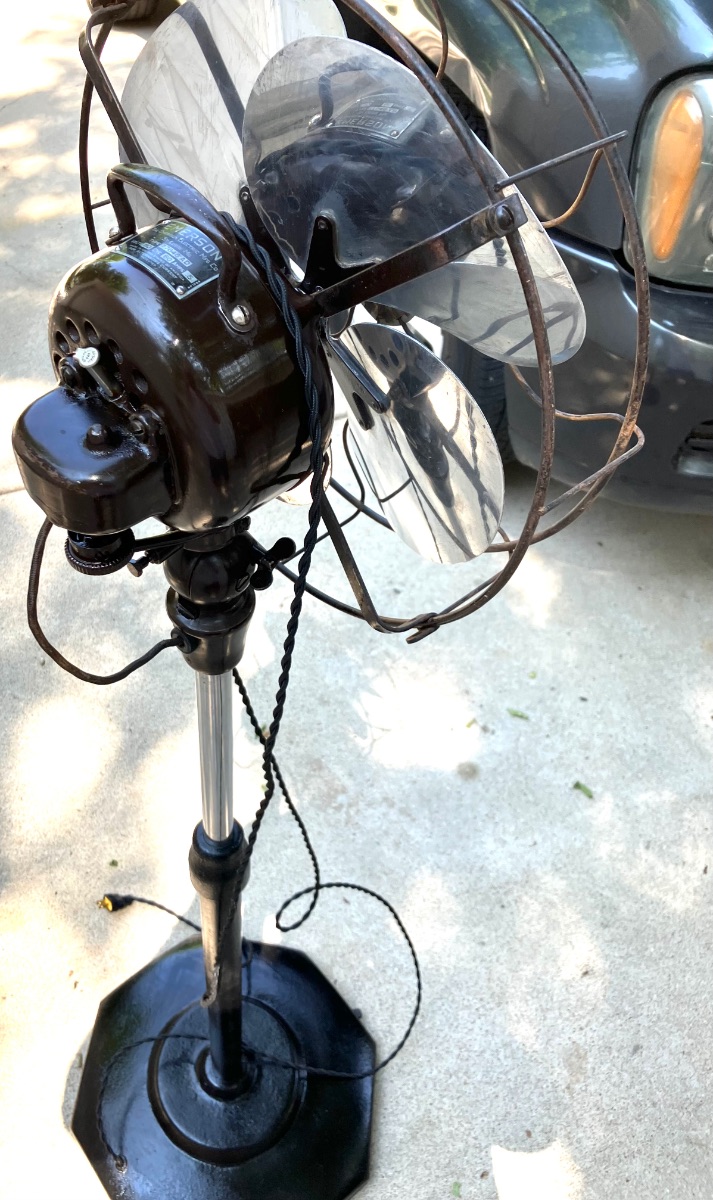
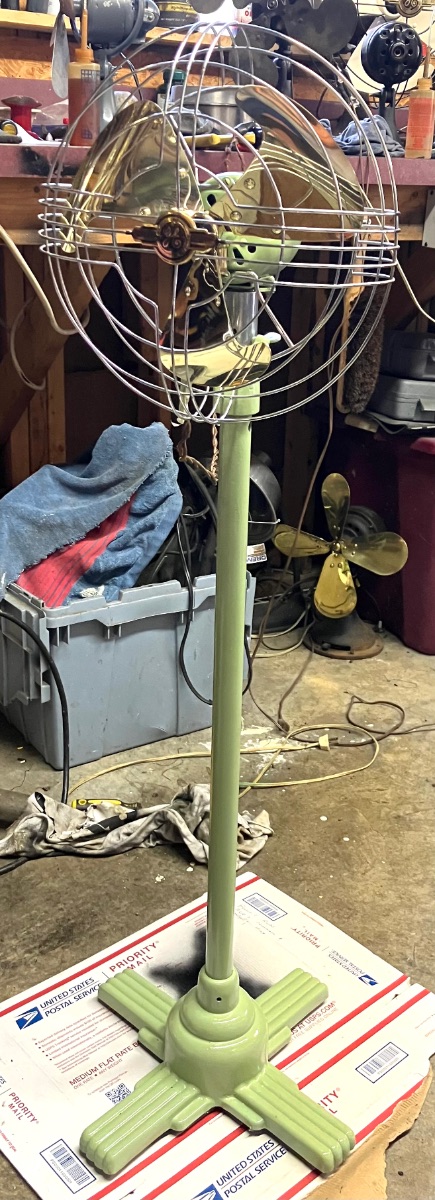
Getting there! My version of a 10” vortalex pedestal , complete with brass blades & Chrome cage. I’m going to install a new headwire & a 2 speed parts in the base( factory 1 speed) good times!!
9 points
-
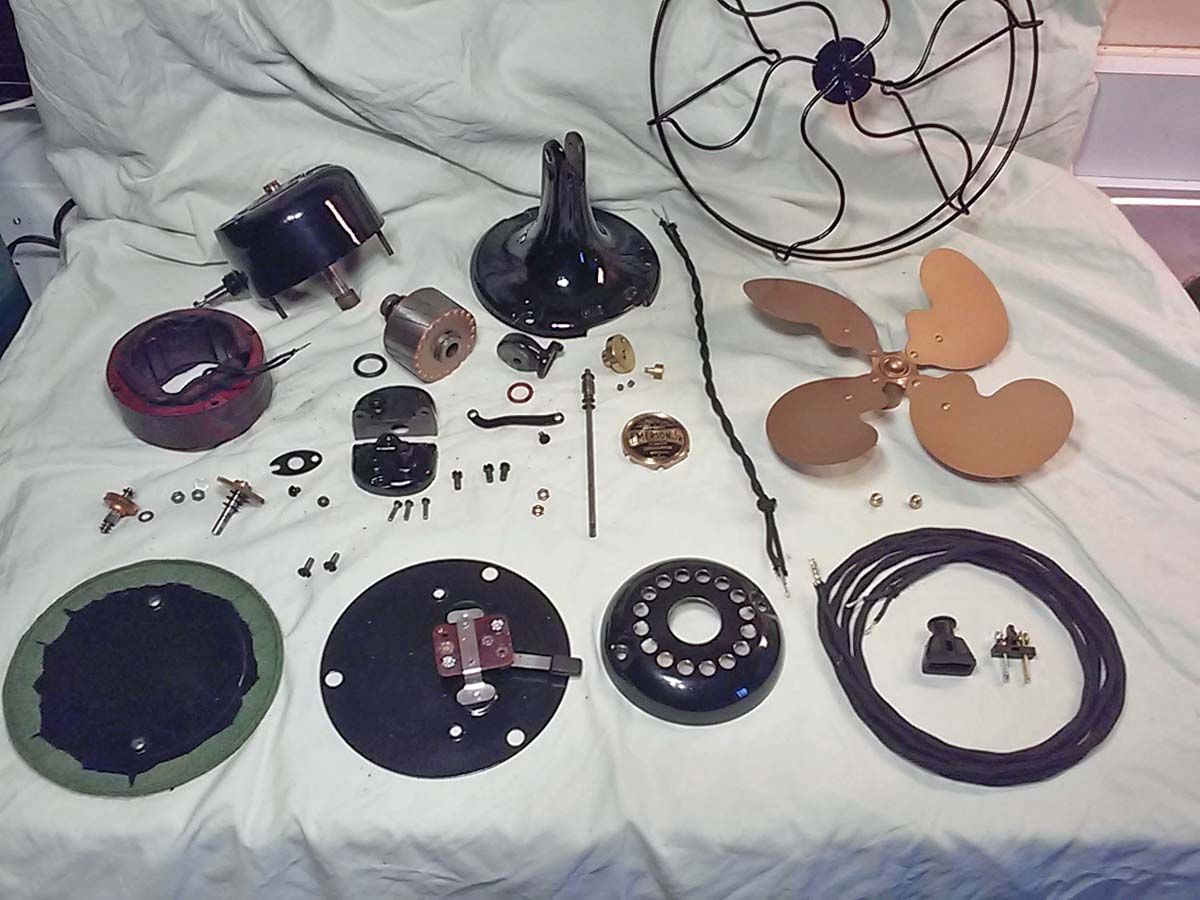
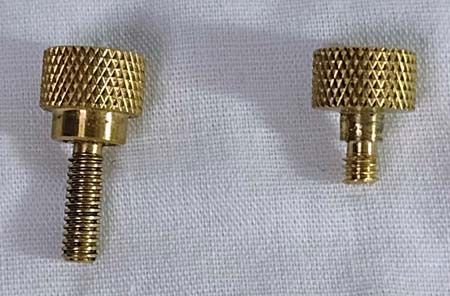
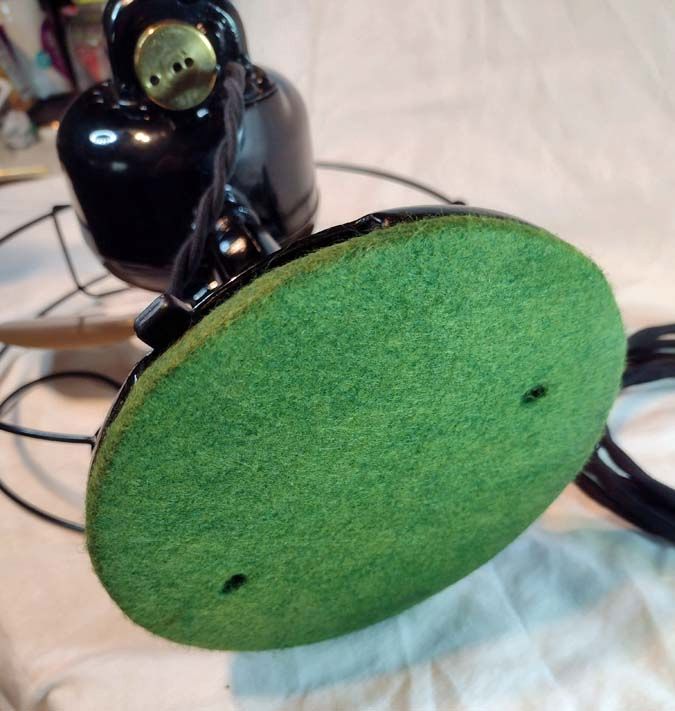
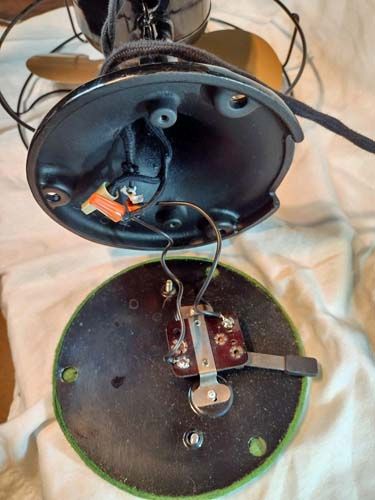
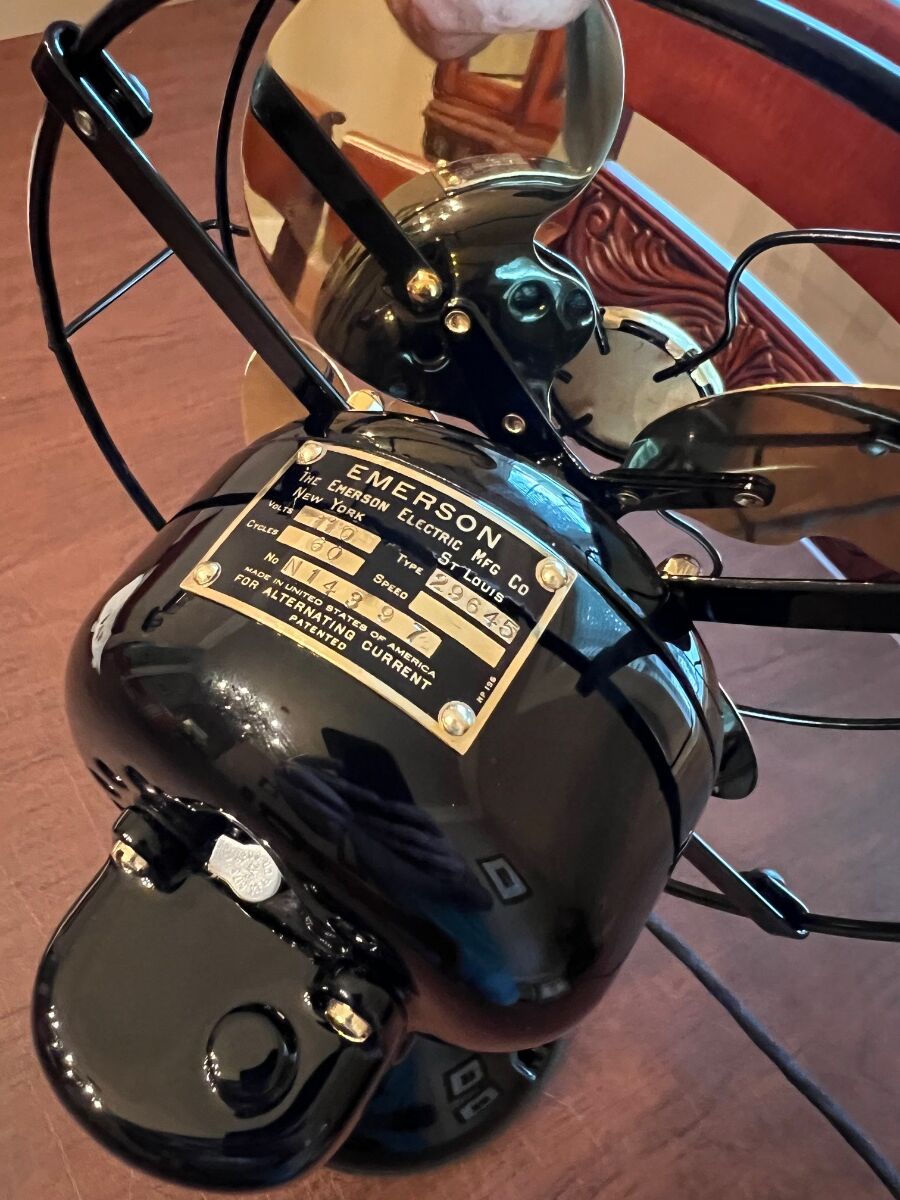
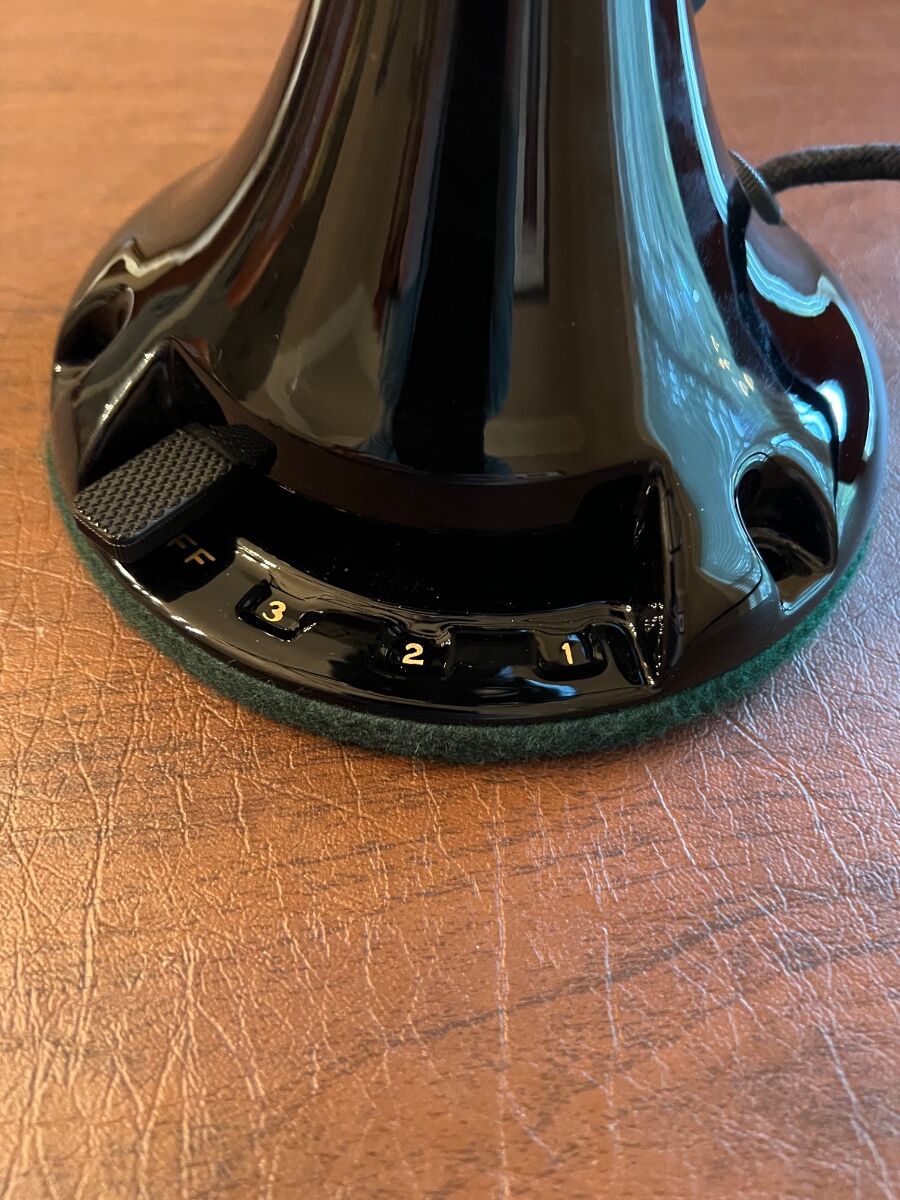
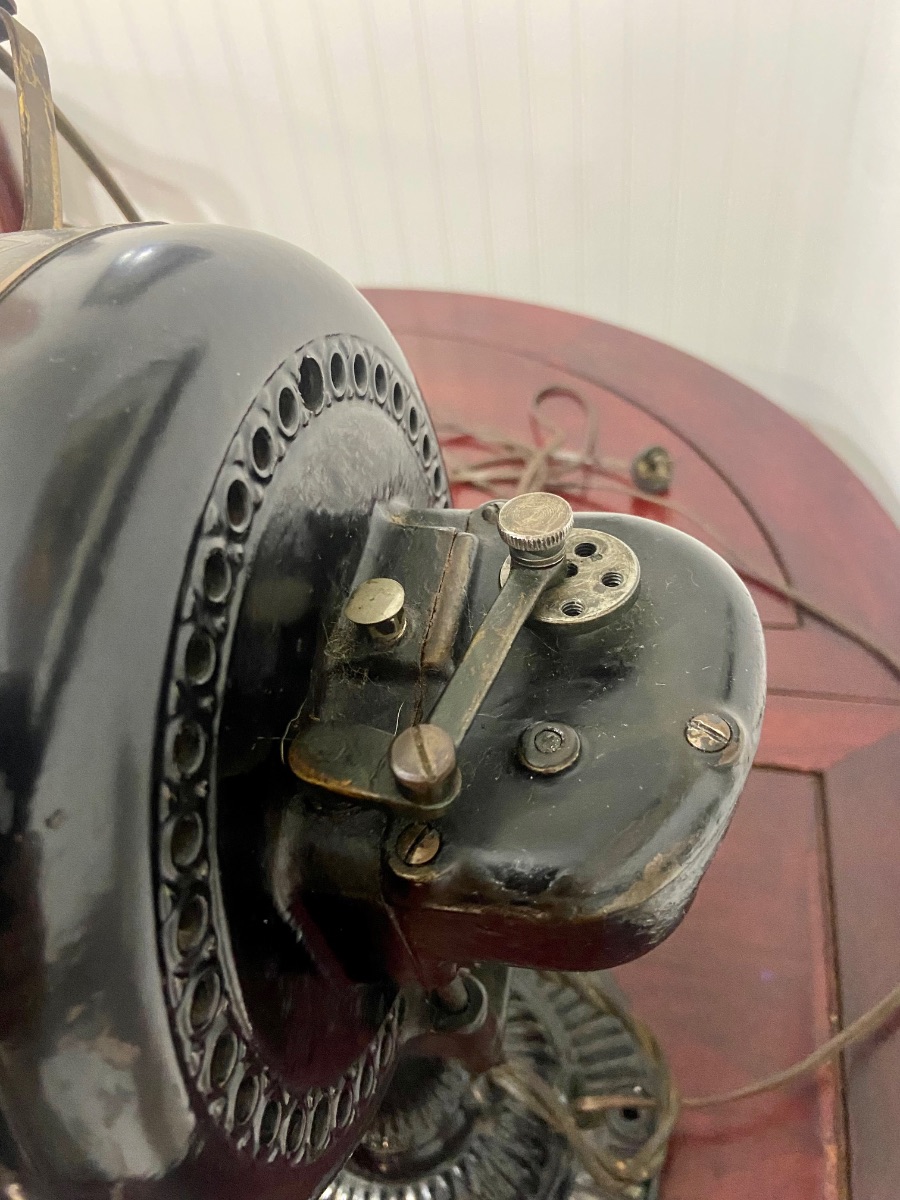
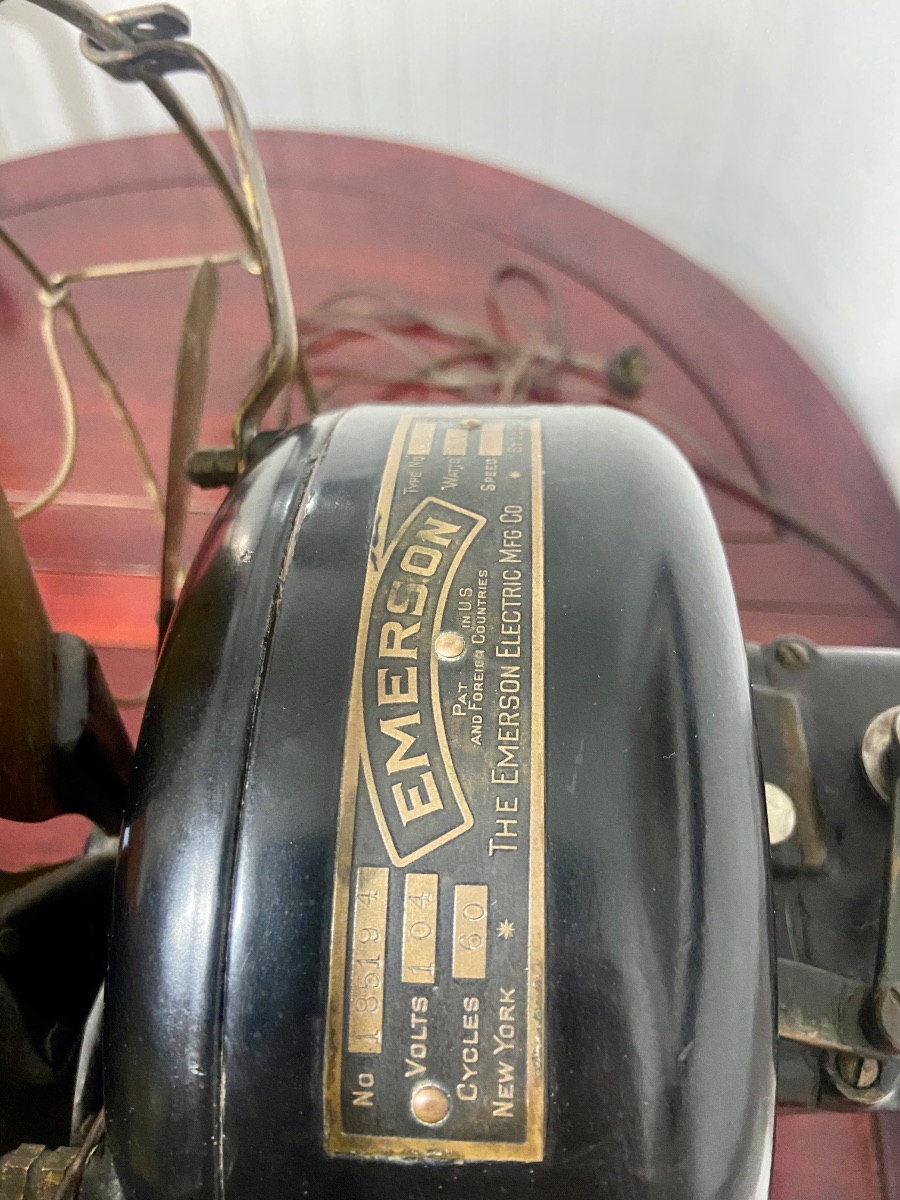
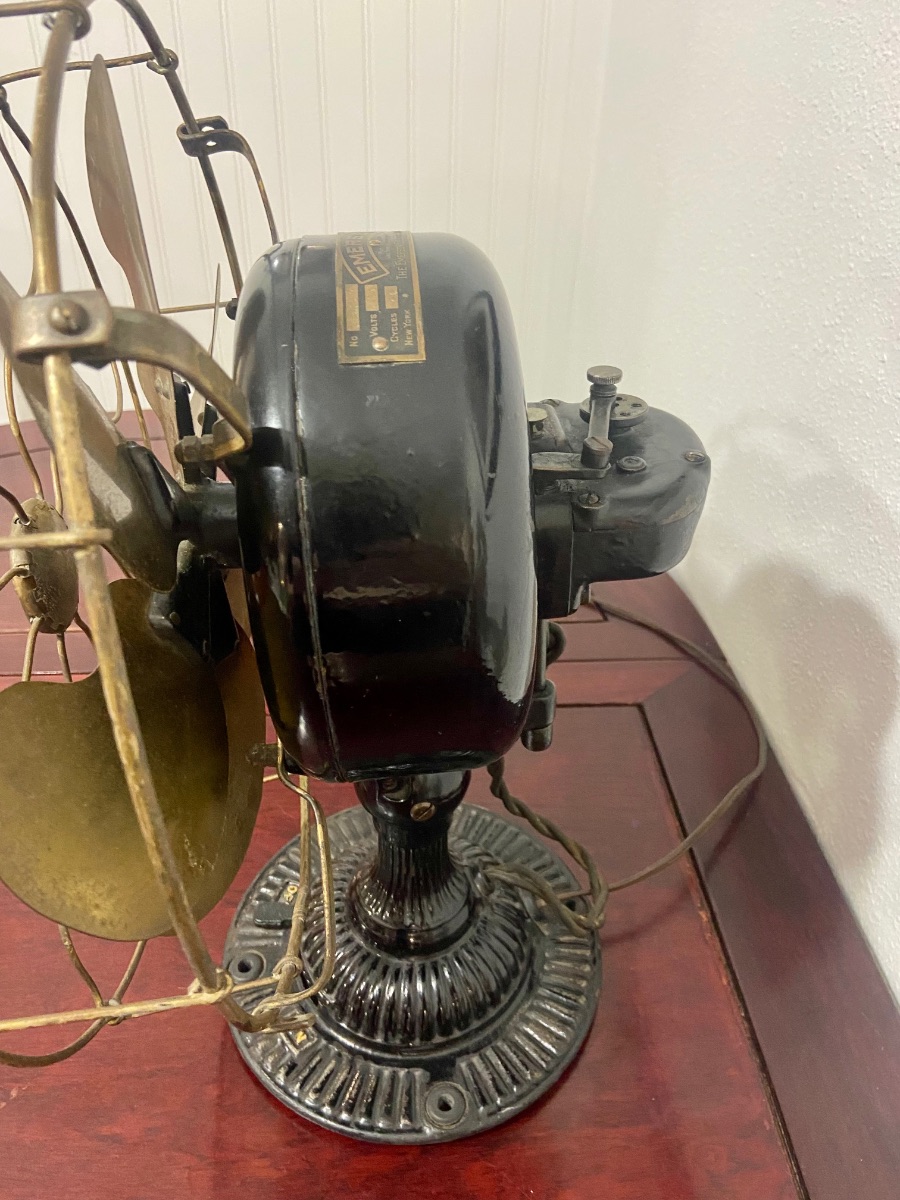
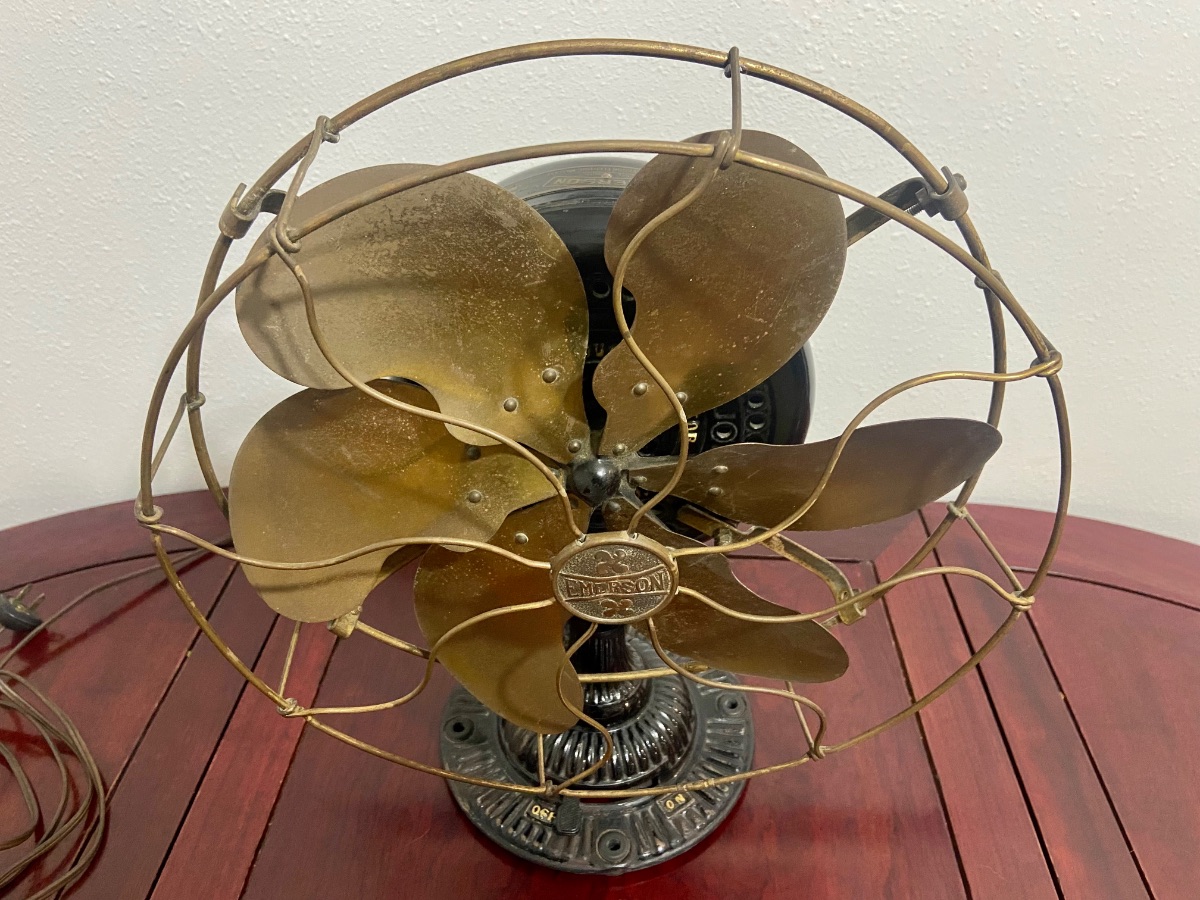
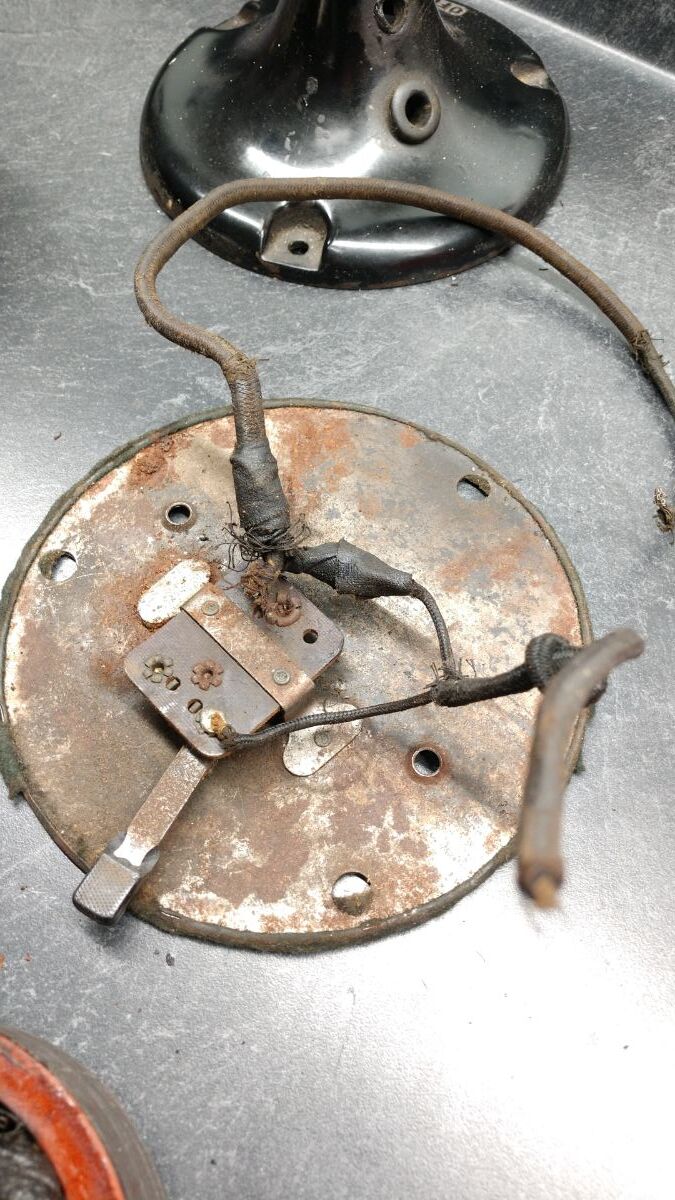
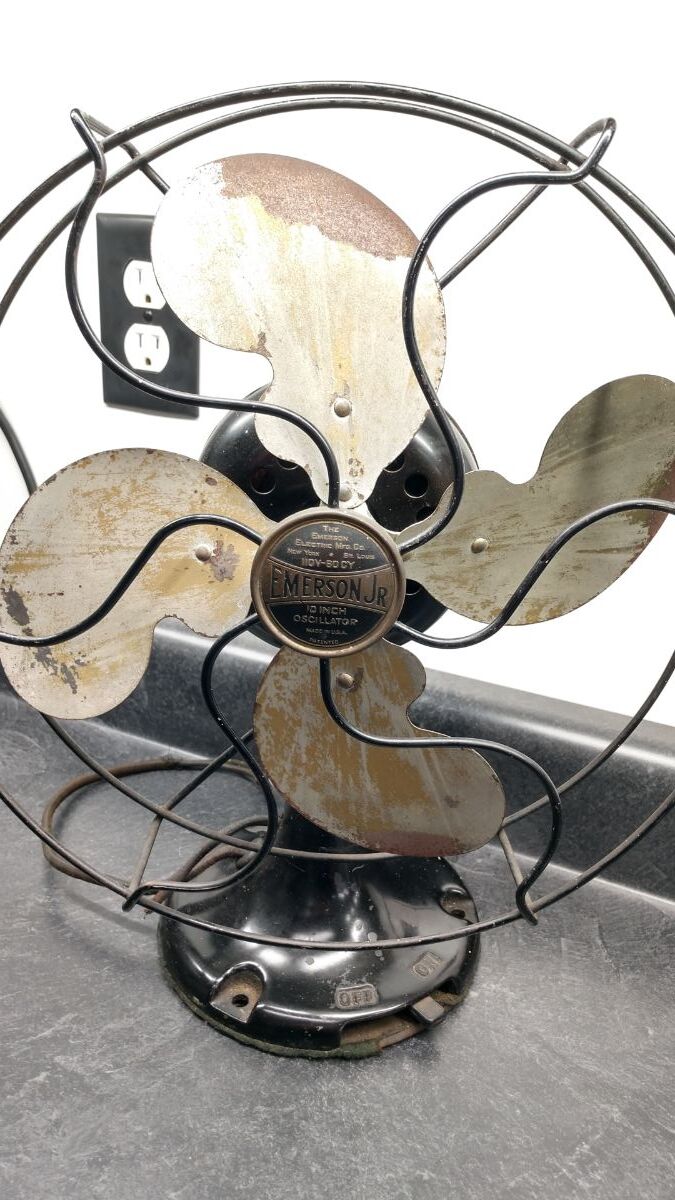
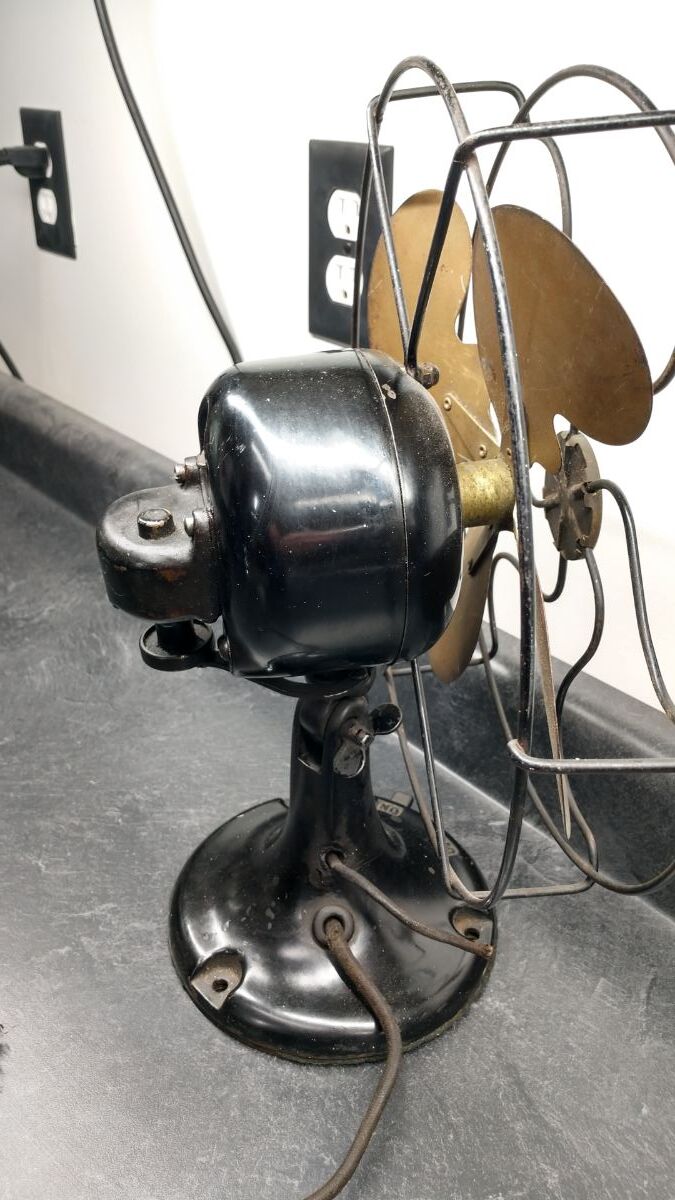
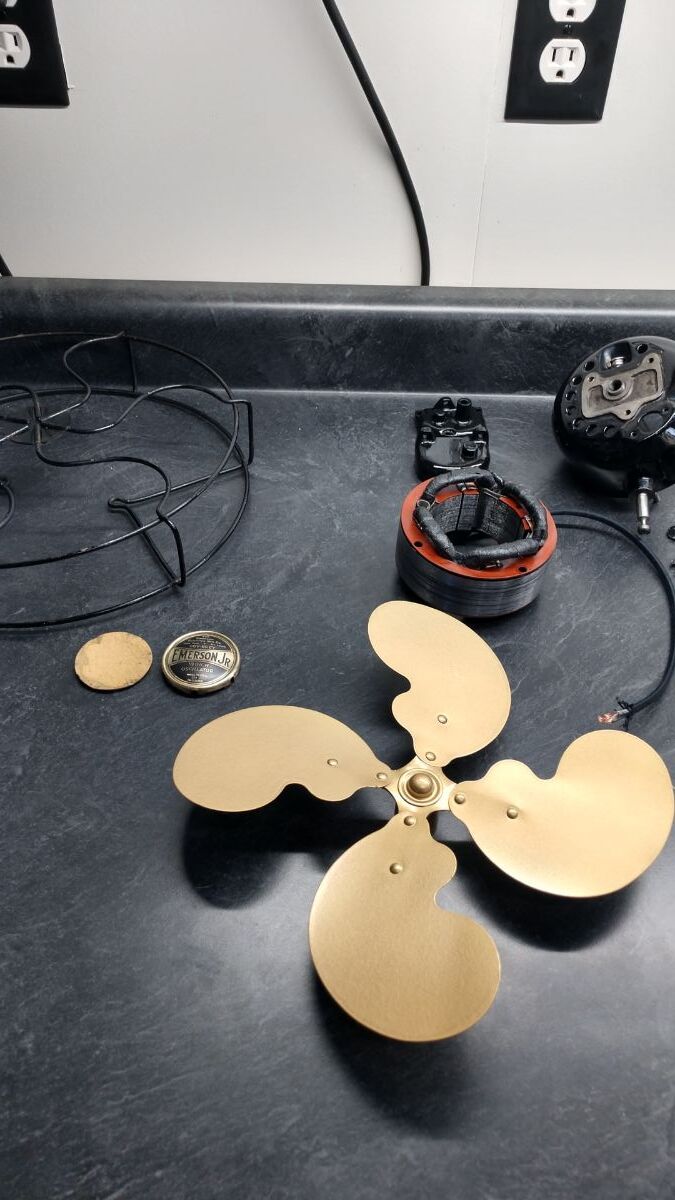
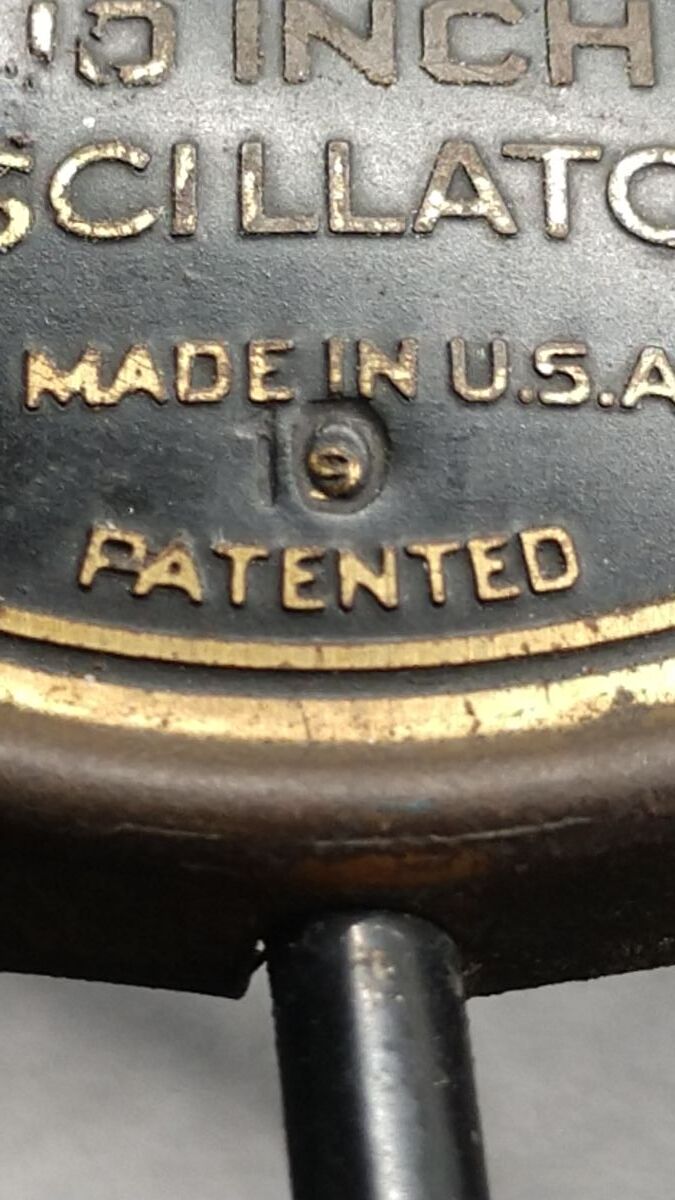
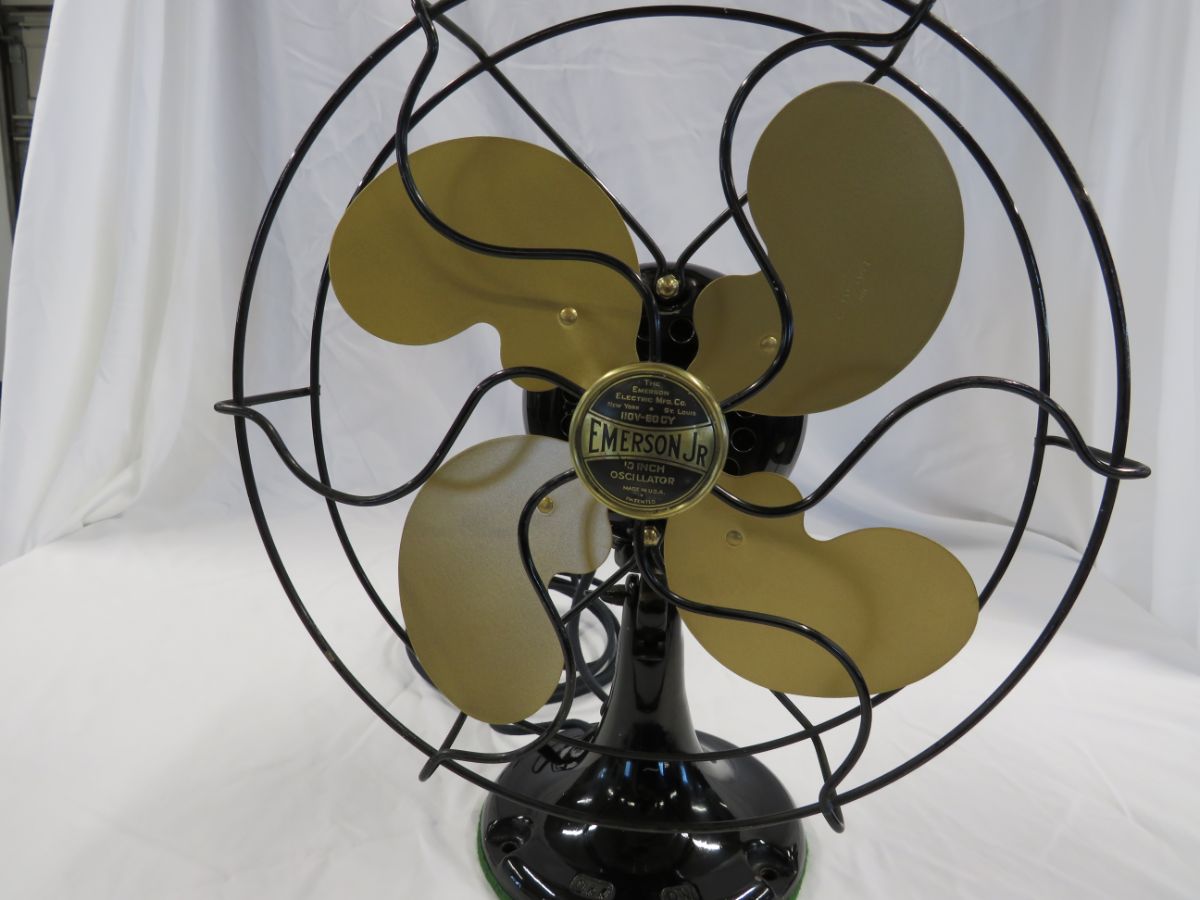
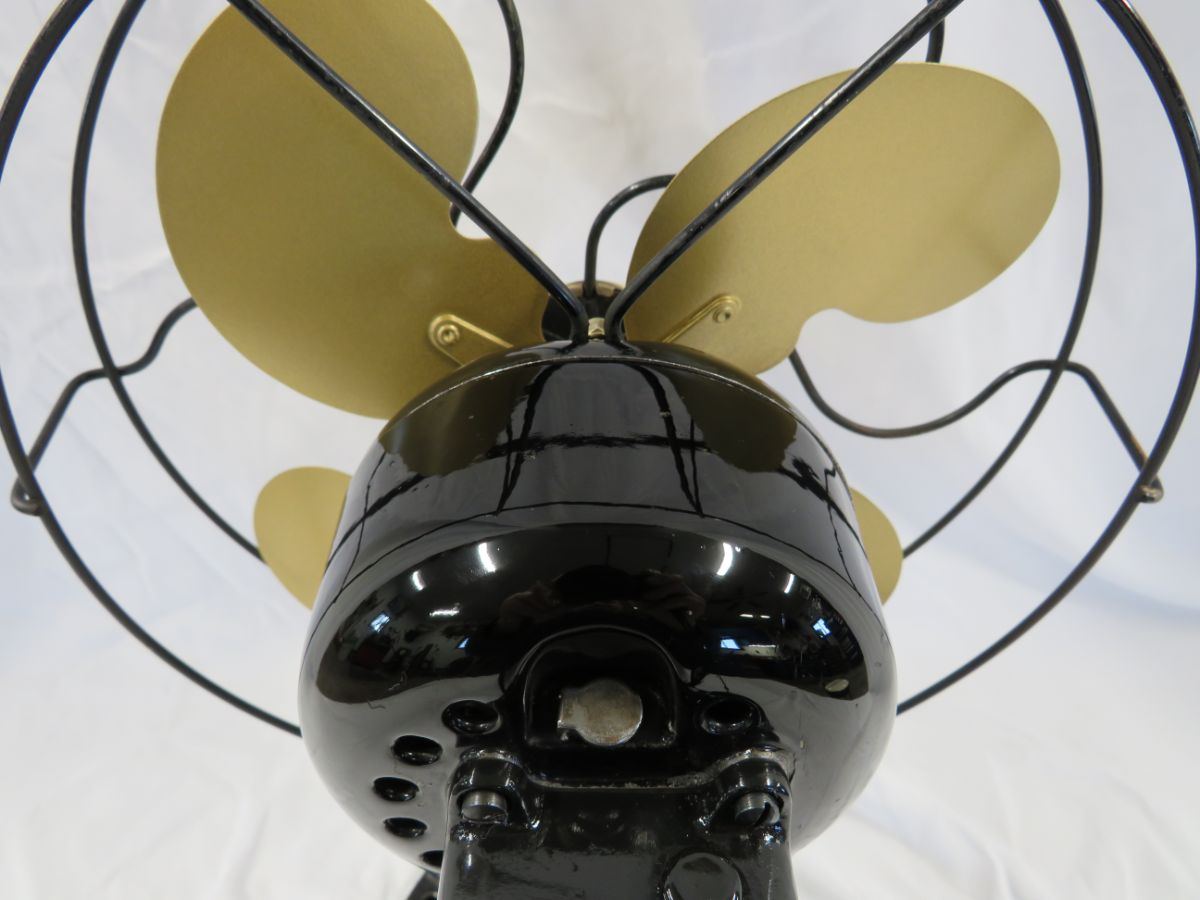
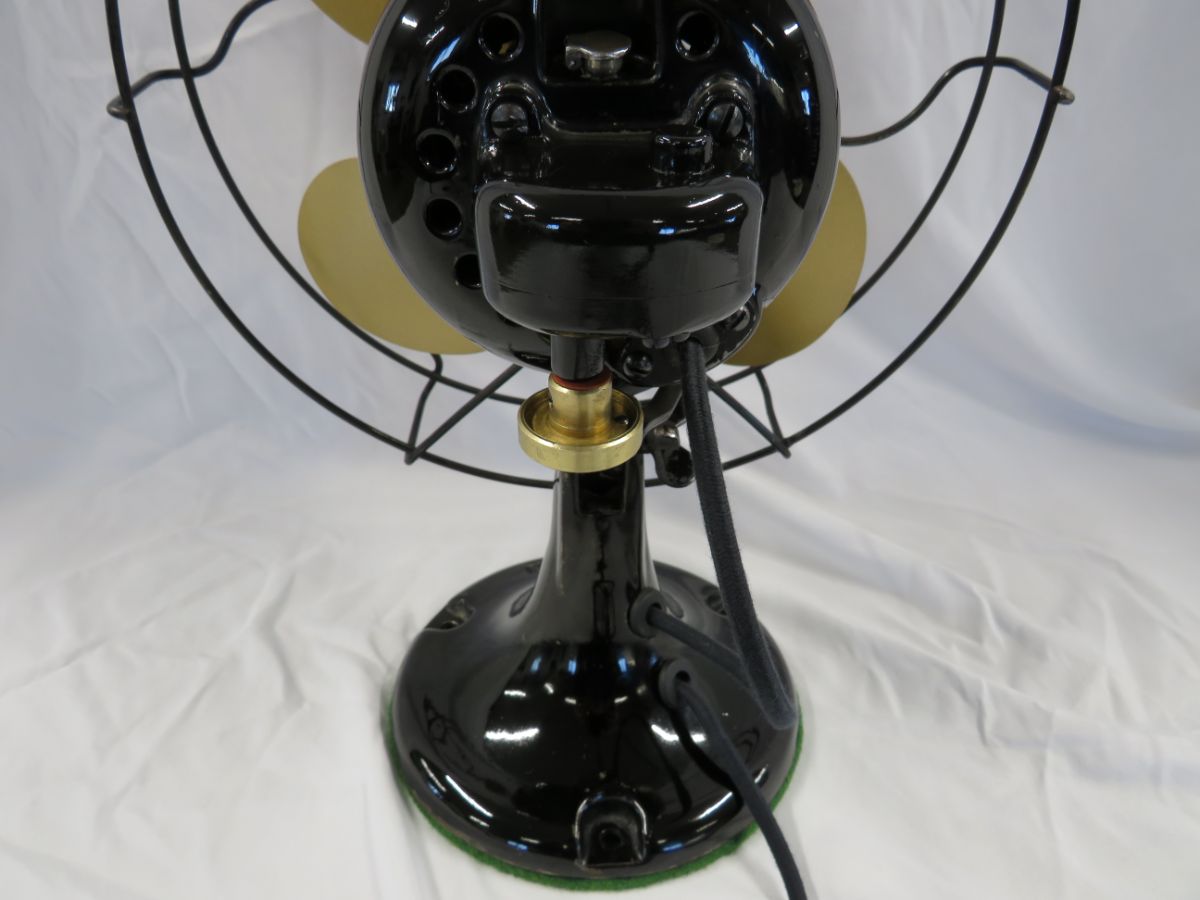
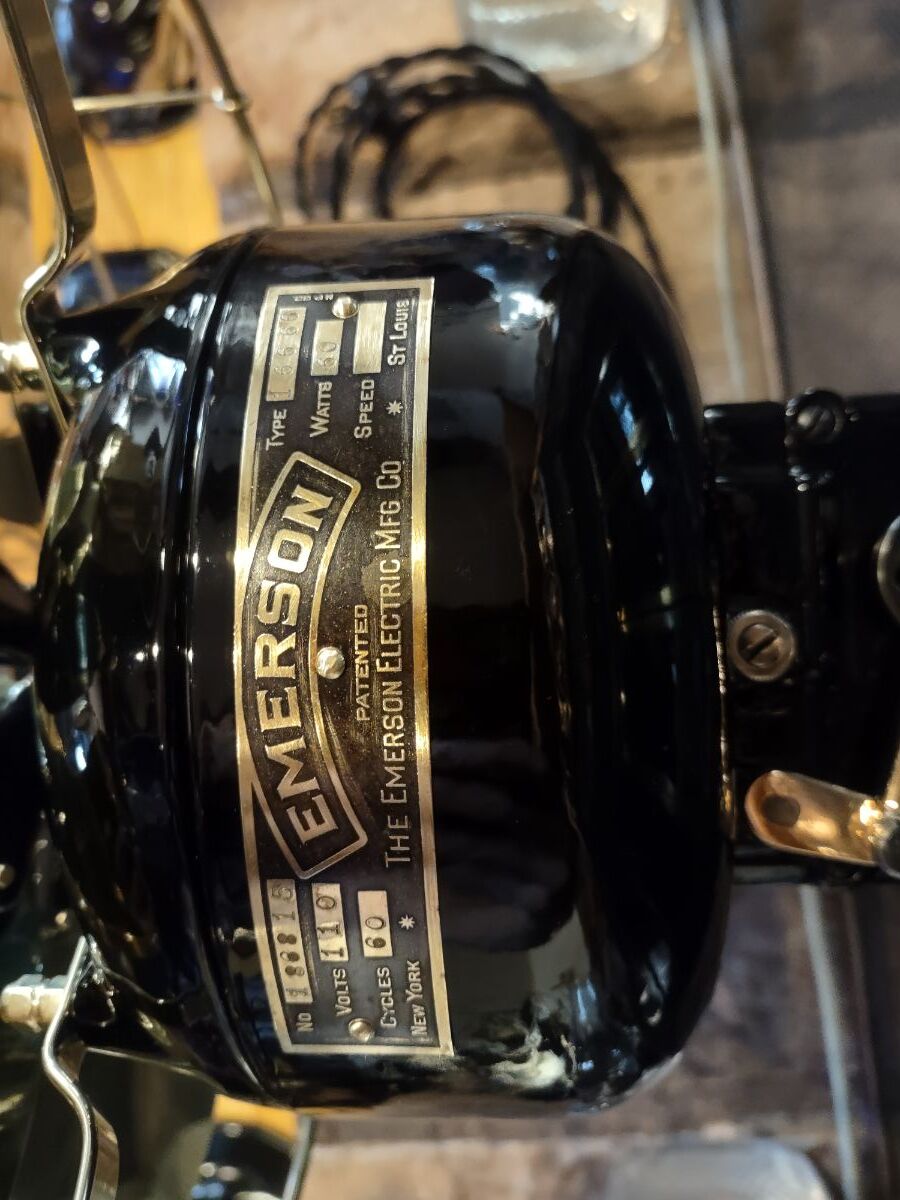
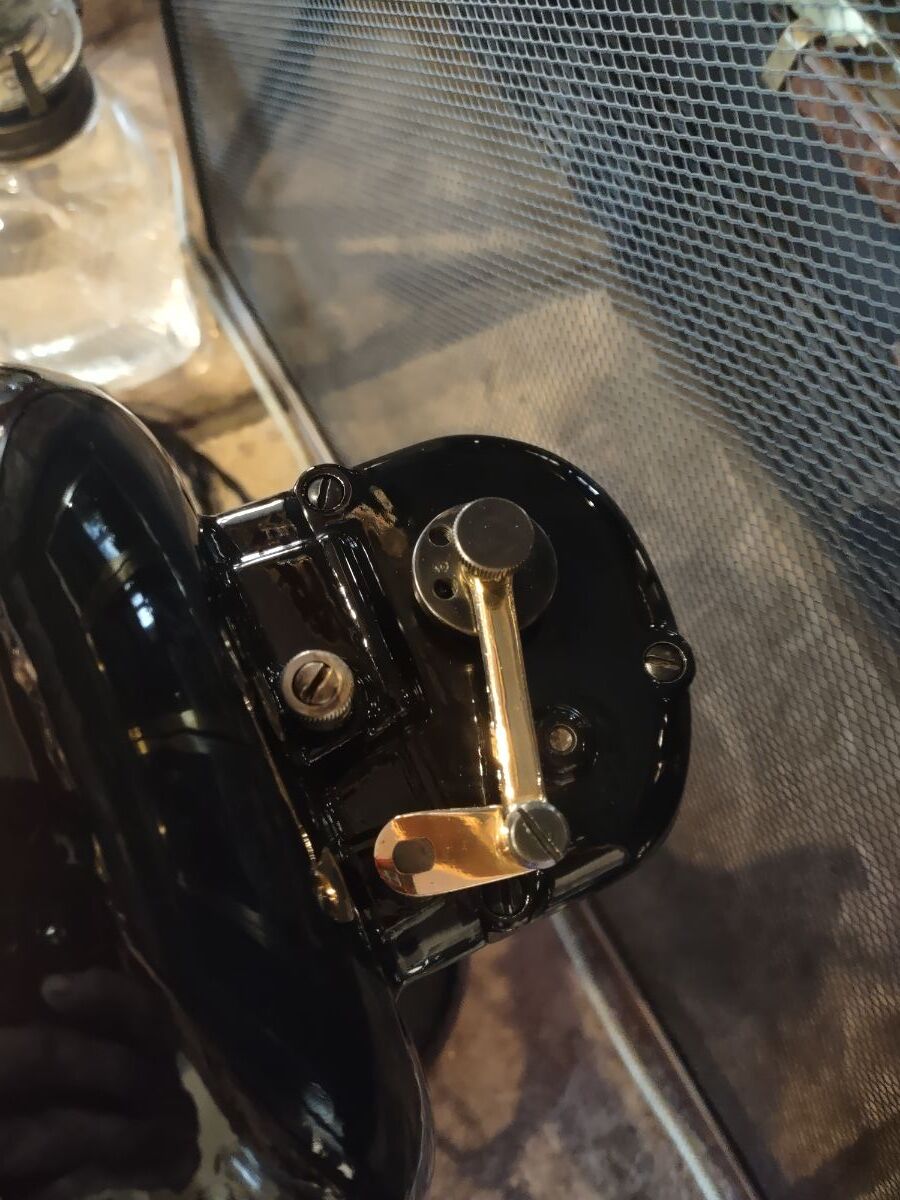
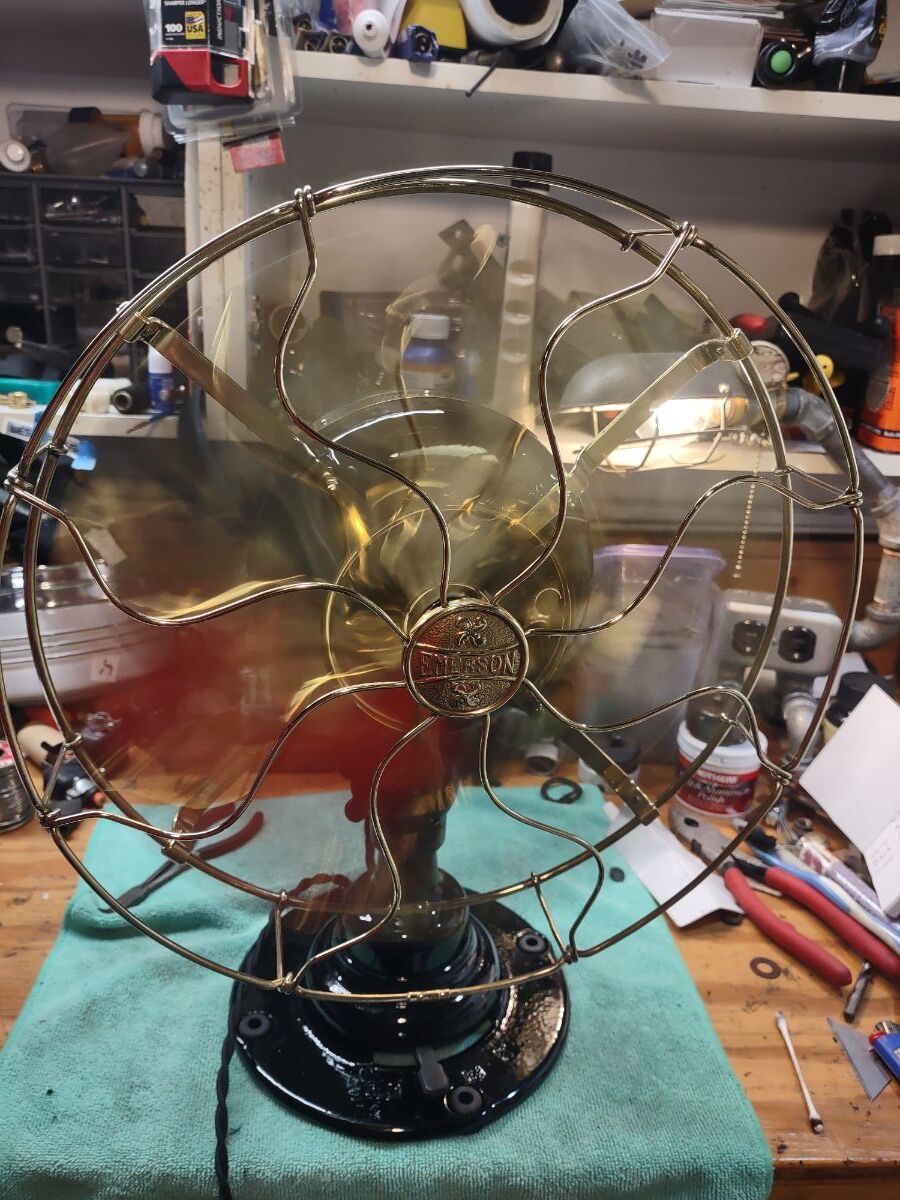
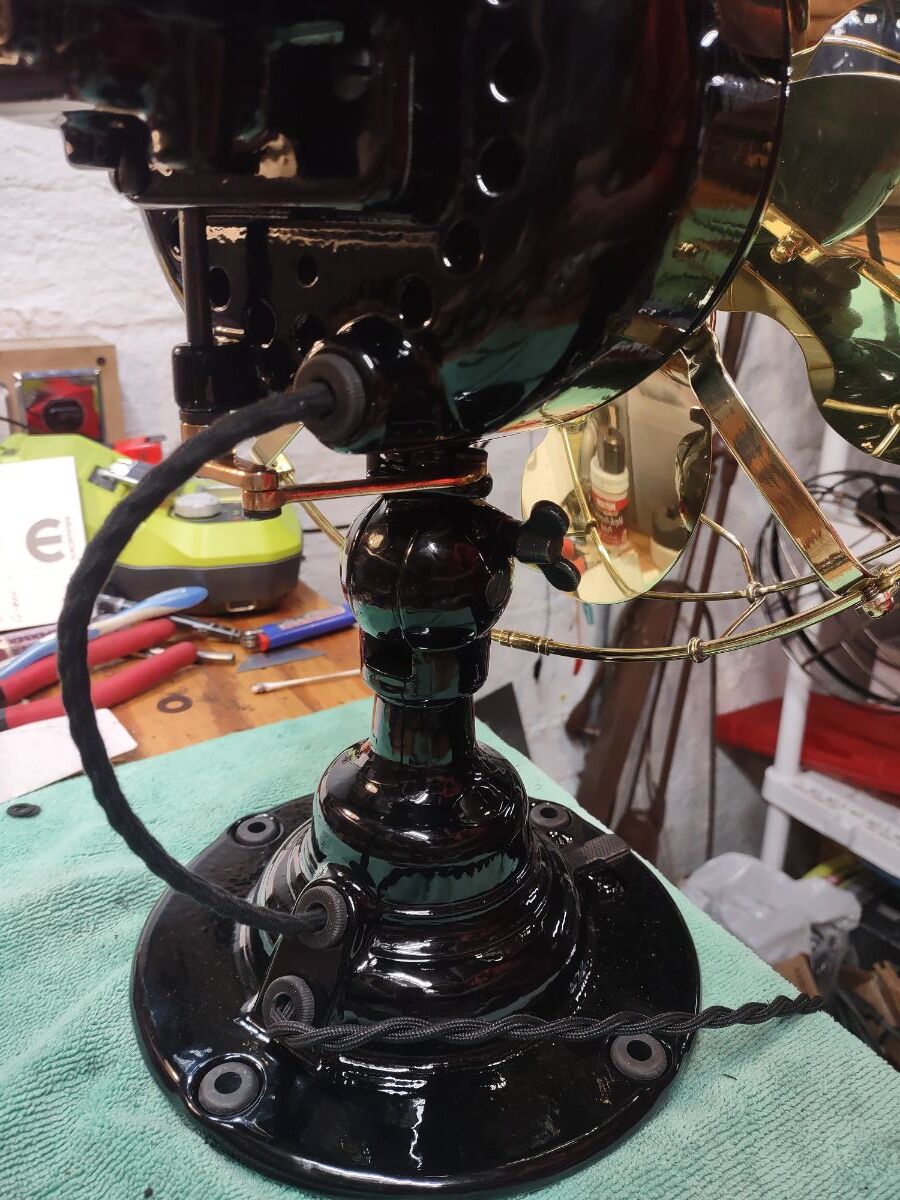
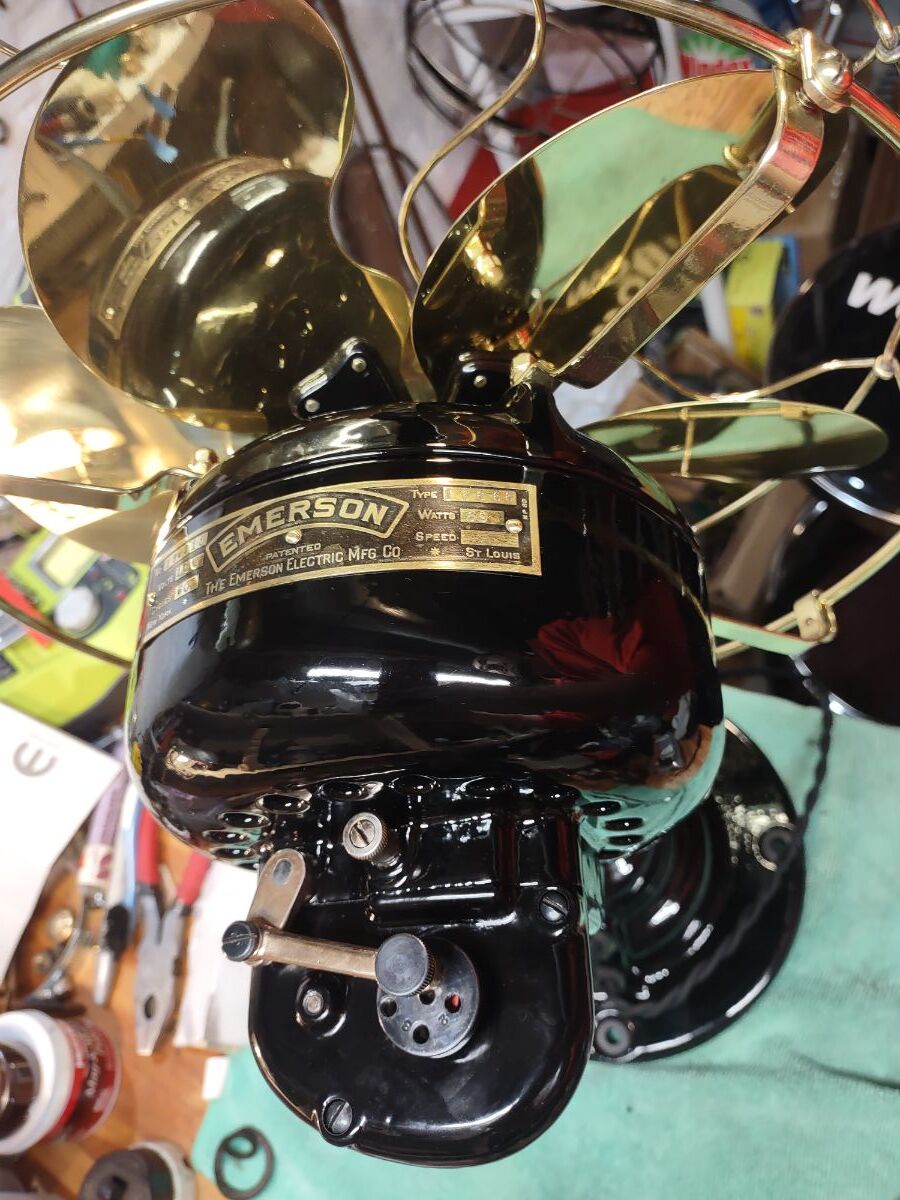
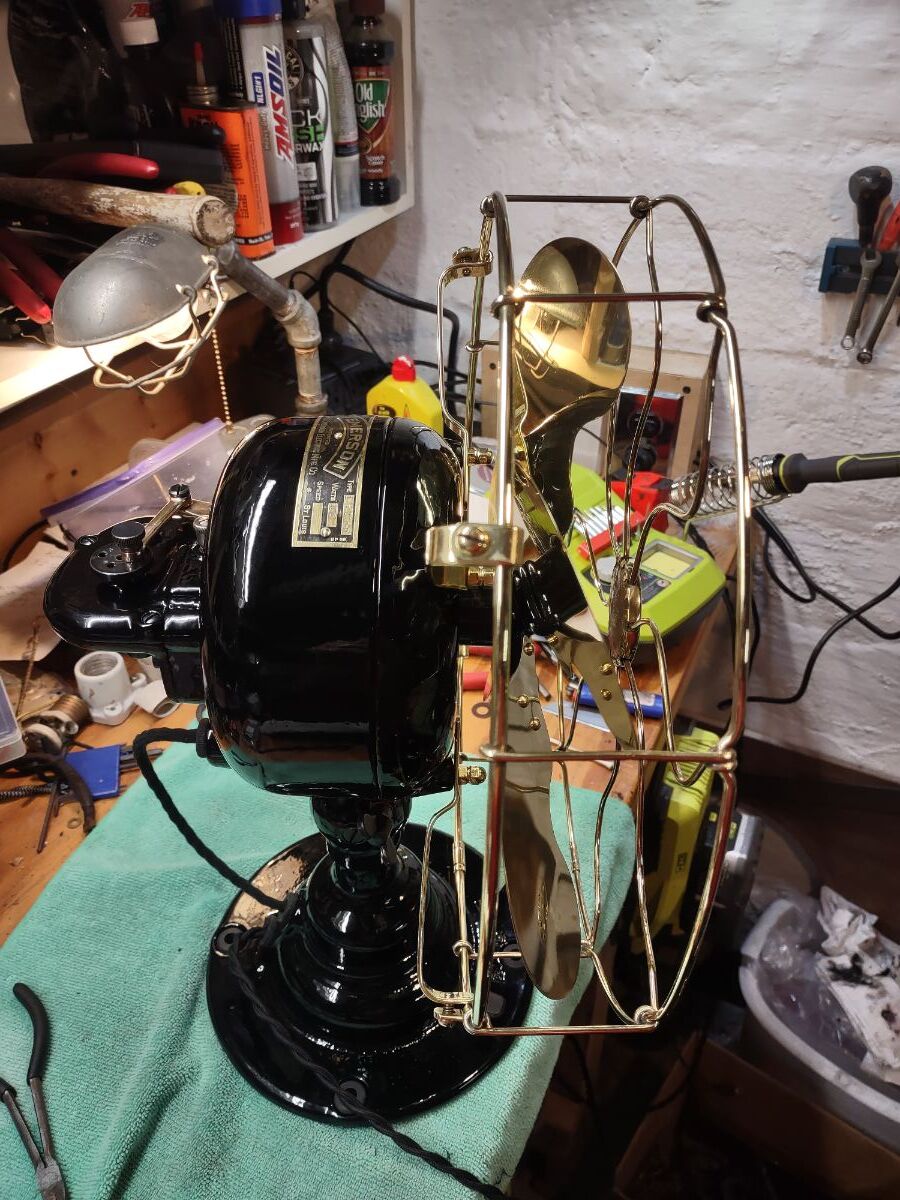
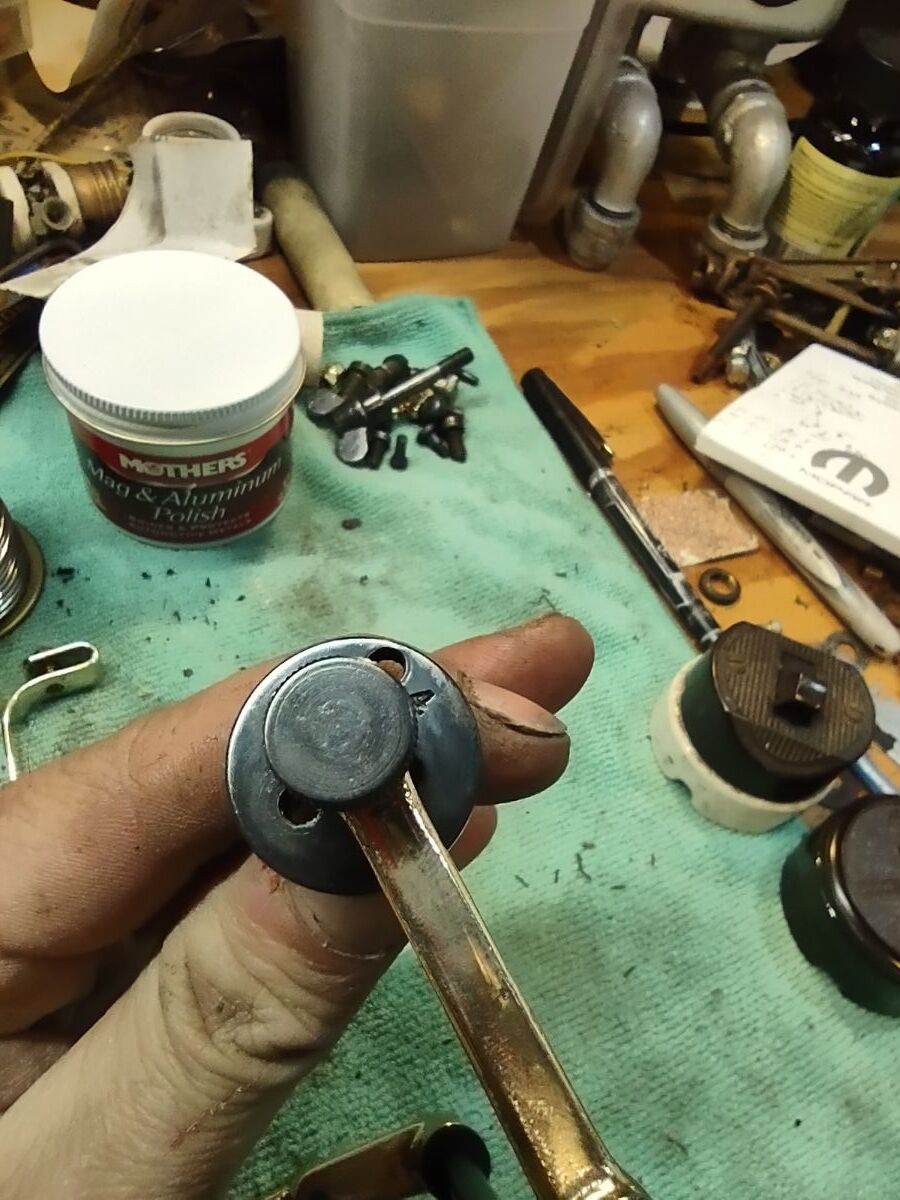
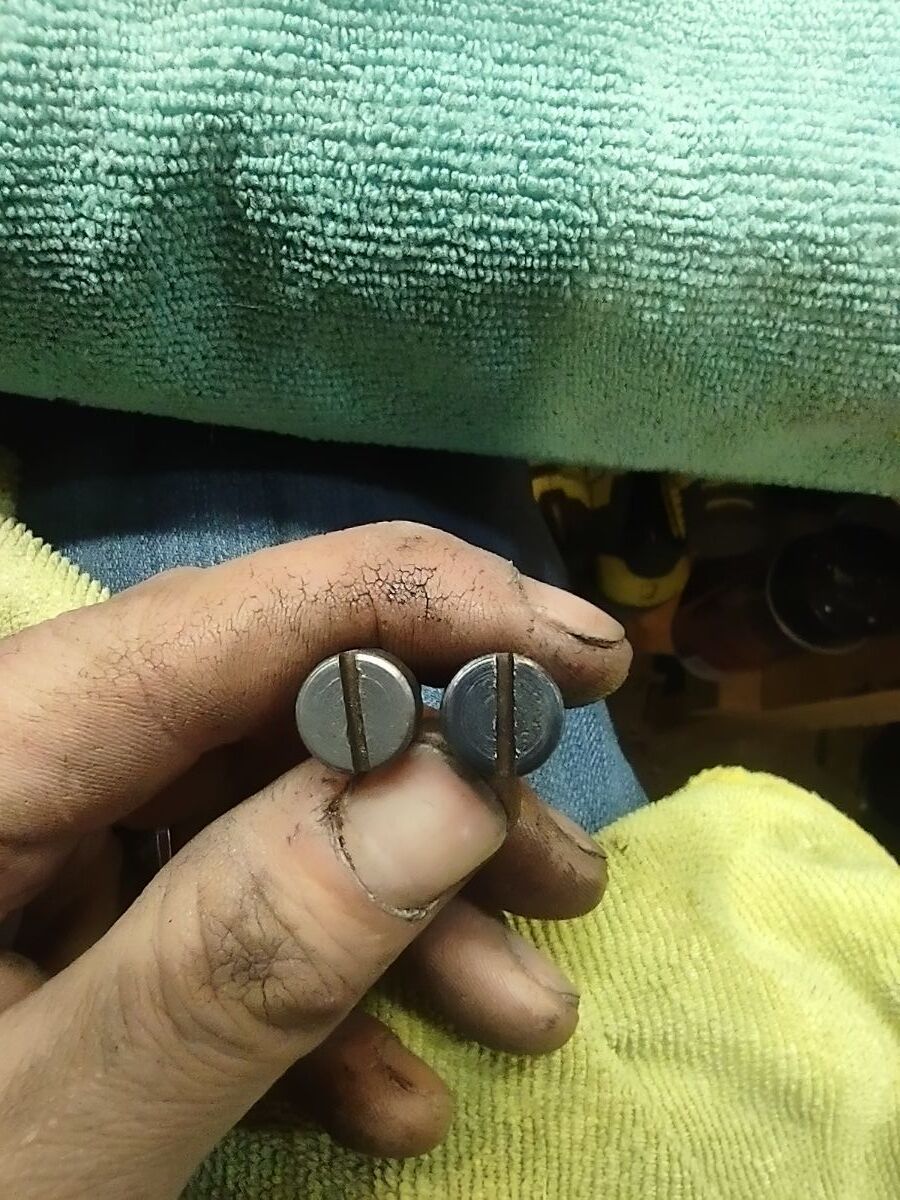
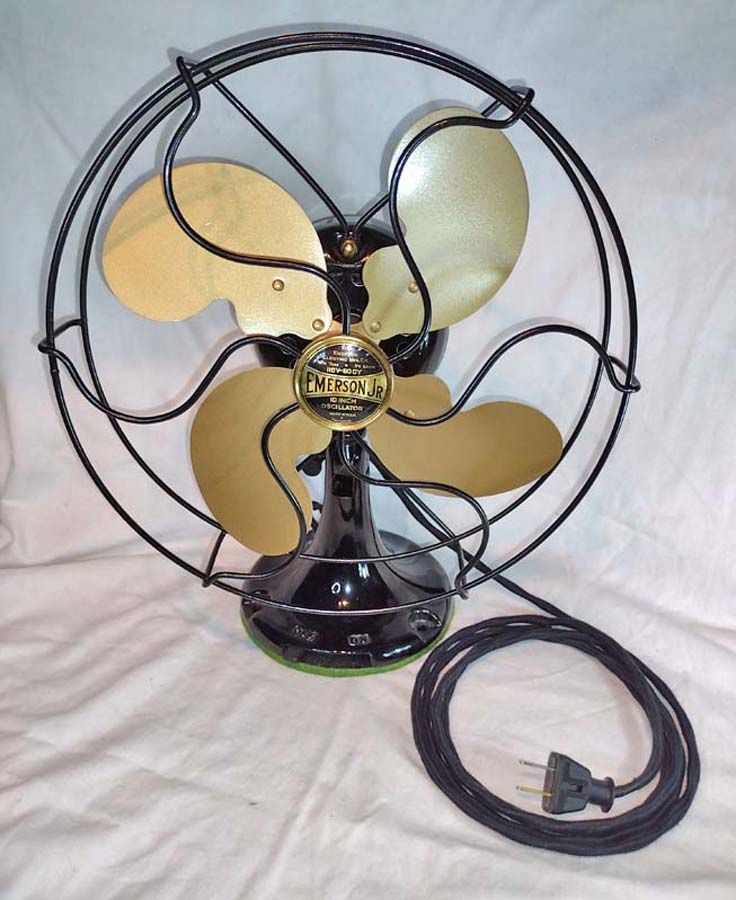
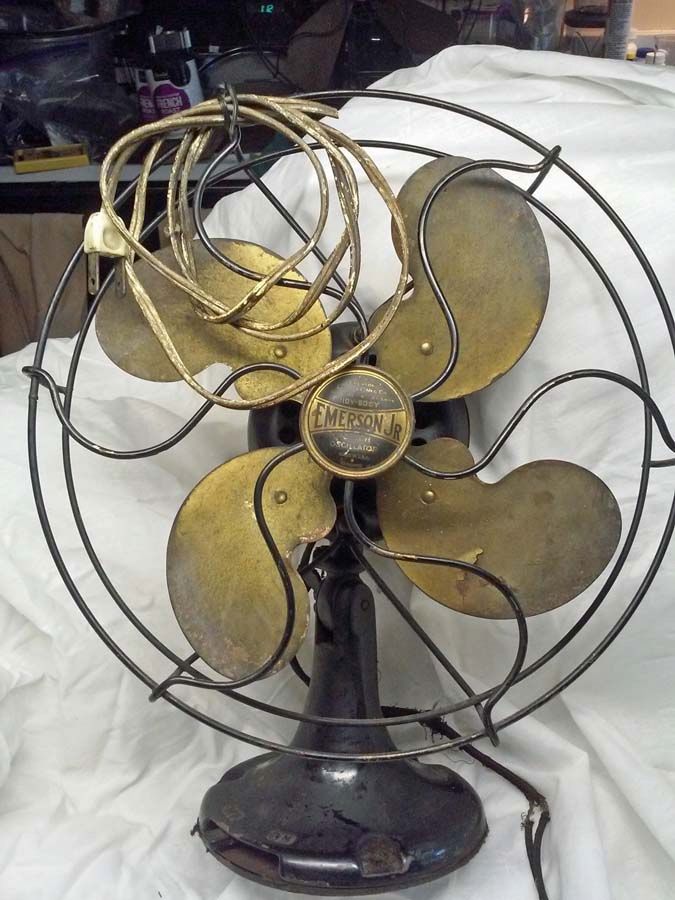
This post is a SEMI-narrative overview OF HOW the fan was re-conditionED This post may seem unnecessarily long & tedious for the regulars, but perhaps it will help someone who finds this forum searching for answers and encouragement. My apologies to those who prefer fewer pictures and words. * Caveat: I’m just a sometime tinkerer, and I've simply consolidated the info gleaned and used from posts on the old forum. (AFCAFORUM.COM) Many thanks to those who posted so much information! If errors or misinformation are found below, please let me know and I’ll edit. It should be noted here and up-front that there are many opinions on how and when a fan should be re-conditioned. The steps below worked for me. Front - Renewed Side & Back - Renewed Brass knurled thumb screw - replaces lost oscillator screw. Front - Original Condition When I picked the fan up, the white cord was attached to the mangled wall cord by a couple of twists of the wire ends. To my surprise the seller plugged it in to show it worked, sparks and all! Once home, an intact temporary wall cord was attached so the fan could be fully assessed. Back - Original Condition ==================================== I’ve read these Emerson Junior fans were entry level for their time, and are still fairly common and still fairly inexpensive. Of course, this little fan is a chunk of coal compared to the many amazing restorations shared by forum contributors. Still, this little Emerson fan is a very nice utility air mover for the size and was relatively easy to work on. This fan now has a permanent place in my office area and gets nearly daily use. Even though this 90+ year old fan is/was simple and inexpensive, it’s light years better (visually and functionally) than most of the plastic fans I’ve owned in the past. And, the plastic ones only lasted a few years. This fan is now ready for another 90+ years of service! Maybe. DATING THE FAN The badge has a tiny number 9 towards the bottom. Using the generally (but not universally) accepted Emerson dating method of adding 20 to this number, the fan should be a 1929 model. Yet, the base doesn’t seem to match the one in the old forum gallery – so it may be a franken-fan, or maybe it was cobbled together with leftover parts at the end of a model year. INITIAL RUN Before full disassembly, the fan was plugged into a Kill-A-Watt meter and then to a GFCI outlet and turned on briefly, so any obvious operational issues could be identified. Although clearly dry, it ran fine except for slightly misaligned blades which I remedied by eye. Mechanically, the biggest issue was the missing oscillator screw. Note: After final assembly the blades were more-effectively aligned using a strobe. DIRTY, DIRTY FAN I bought this single speed Emerson Jr. locally and it ran OK with the exception of the missing oscillator arm-wheel screw. Also, the base pan and bottom of the base were very rusty, and the replacement power cord was dangerous. The fan looked like a stray, with about 90 years of hard grime covering everything. The surface grime was so bad I at first thought all of the paint was shot. The wings on the wing-bolt for the tilt knuckle didn’t have the right shape or color (gray) and looked and felt like severe corrosion had taken over. This bolt was my test piece to see how bad the grimy paint really was. So before dropping the wing-bolt into an electrolysis bath I tried cleaning it to see if ANY of the original paint remained. The cleaning rag began to change color dramatically so I continued cleaning, expecting to hit bare metal. It took a while but the wing-bolt eventually cleaned up nicely with only one very small nick that needed attention (with black fingernail polish). The rest of the fan cleaned up with about the same amount of effort - with the paint largely intact, but with several small nicks, and with rust all the way around the bottom. Where does all that hard grime come from? You’d think it spent its entire life sitting above the deep fryer in a fast food restaurant – without even one cleaning. Lesson learned: Never assume the paint is shot until the dirt and grime is entirely removed. RECONDITIONED THOUGHTS\OBSERVATIONS Overall I’m happy with how the fan turned out. For a 90+ year old fan, it looks pretty good to me and moves a respectable amount of air for its size - which makes it a daily runner during the dog days of Summer. For the most part I can only hear wind moving through it. The only thing I don’t like about this fan is that it very slowly leaks oil down the oscillator shaft. Perhaps that oil is a result of overfilling, as I don’t see how oil can find that path. I have two Emerson Jr.s and both have or had a hard layer of dried oil or grease on the bottom of the oscillator wheel, completely obscuring unused oscillation screw holes – so maybe the oil migration is normal? CURRENT MEASUREMENTS - .67 amps, 54 watts - Temp: 110° F (Ambient Temp 87° F) (IR thermometer pointed at top center of rear motor cover) ================================================================================================== A. DISASSEMBLY\REPAIR 1.) Blade Removal: When facing the fan front, the blade is removed by turning it to the right. (righty is NOT tighty when removing the blades on Emerson fans.) But the rotor must first be secured in place. On this fan, what worked for me was to screw a 10-32 SS bolt through the top left gearbox mounting hole until it engaged the rotor. Be careful, only screw the bolt as tight as is necessary, and it’s highly recommended you search the forums for additional info. Yes, there are ‘several’ threads on this procedure. If you stick your bolt\screwdriver\pointy object in the wrong place you can ruin the stator, so be very, very careful. (Elmer Fudd comes to mind, for those old enough to remember.) 2.) Where did that washer come from? As you take any old fan apart, it’s helpful to take notes on where every nut, bolt and washer came from. Maybe take pictures. You’ll probably be glad you did so later on. Notably, these old fans usually have multiple very small metal or fiber washers on every round shaft in the oscillator box (and elsewhere). Before removing any parts from the oscillator box, I recommend cleaning out as much of the old grease as is possible with Popsicle sticks, Q-tips, and whatever else necessary, so the tiny washers can be seen and set aside as parts are carefully removed. If you don’t first remove the old grease, some of those tiny washers may get lost in that old black and hardened grease, and even if you find them it may be impossible to determine exactly where they came from. (Can’t tell you how I know this.) 3.) Removing the Stator: In many cases it may not be necessary to remove the stator from the motor housing, but doing so will likely make it easier to make new head wire connections and to then protect those connections with heat shrink wrap or friction tape. Removal also allows for cleaning and applying varnish to the windings which may allow the motor to run cooler, may lessen or eliminate fan hum, and may also eliminate the always popular ‘old fan odor’ that comes from generations of built up oil and grime in the windings. This is all optional, and many people don’t remove the stator. * If the stator is a press-fit (like this Emerson) and doesn’t want to come out, and it probably won’t - search the forums for ‘stator’ and ‘PVC pipe’ for the most recommended method of removal I’ve seen in the forums. It’s what I used on this fan. * If you decide to pull the stator and clean the windings, be sure to use a technique and product that won’t cause damage to the fragile wires and their original varnish. Harsh techniques and cleaning products might damage wires or remove the original varnish – causing shorts which will turn the stator into a paper weight. Mineral spirits and a soft paintbrush are suggested in the forums, as is CRC Lectra-Motive Electrical Parts Cleaner. After cleaning, allow the stator to dry completely, for at least 24 hours before reassembly or applying new varnish. * After removing and cleaning the stator, new insulating varnish can be applied to the windings before reassembly, if desired. Not everyone does this. ONLY USE insulating varnish made for electric motors to avoid ruining the stator windings. Sprayon Insulating Varnish is one of the popular products used for stator windings. It seems that most people tape off everything but the windings before spraying on the varnish, to avoid binding the rotor and for a better appearance, but that’s your call. Follow product instructions for drying time, or wait 24 hours before re-assembly. 4.) Cleaning and Removing Rust: The base pan was a rusted mess inside and out, and the attached switch was covered with grime and corrosion. -- The rivets were drilled out and the switch removed so it could be thoroughly cleaned with mineral spirits, Krud Kutter, a toothbrush and electronics cleaner. The base pan got an electrolysis bath before painting. Base Plate & Switch in original condition The rotor was scrubbed with sparing amounts of mineral spirits and then Krud Kutter using 0000 steel wool, until it was clean and shiny. All bare metal innards received the same treatment to remove ancient oil and grease deposits. (When using steel wool, it’s important to to thoroughly remove all traces of steel wool debris! Twice!) For this fan, the stator was removed and only dusted with a dry paint brush and compressed air, as it was surprisingly clean. The motor housing and fan body seemed to be in fairly good condition, but were very dirty so their condition couldn’t be fully assessed. Krud Kutter was first used to remove the years of built-up grime. Working gently, it took a while - but once the parts were clean it was clear that most of the original paint was intact and in relatively good condition. There were several scratches and wear marks needing attention, along with the rust around the base. The rust on the bottom of the body adjoining the pan was lightly wet-sanded, then lightly treated with plain Rust Reformer and then touched up with black nail polish along with the other blemishes. Nail polish was also used to touch up two or three nicks on the body. B. PAINTING Overview: The cage, blades, oscillator cover and base pan required stripping and repainting. The body was thoroughly cleaned, touched up, lightly wet-sanded (to blend the touch-ups) and waxed. This process probably took much longer than just stripping everything and repainting, but I like knowing that much of the original paint on the body is original. 1.) Body The body had its share of rust and nicks, especially towards the bottom - but I wanted to first try touching it up, instead of repainting everything. Once the rust was removed, glossy black nail polish from Dollar Tree did a surprisingly good job at covering the bad spots and blending with the original paint. 2.) Base Pan The base pan received an electrolysis bath before spray painting with black Rust Reformer which surprisingly, matched the original paint. But the Rust Reformer can only be seen when the pan is removed anyway. Once the paint was baked, the switch was reattached with pop-rivets. 3.) Cage & Oscillator Cover The cage didn’t need any straightening but the paint was in very poor condition with significant rust, so it got an electrolysis bath and several light coats of Rust-Oleum black Appliance Epoxy. The paint on the oscillator cover was heavily scraped and corroded so it got the same treatment. 4.) Baking Note: Baking the paint speeds up the drying and curing process, but it does not seem to be very popular. Appliance Epoxy can be problematic as the can directions (as well as several forum contributors) recommend waiting a week between coats, but I didn’t want to wait that long. The oscillator cover got three light coats about 30 seconds apart and then baked at 170° Fahrenheit for 40 minutes. After three more light coats and two more bake-offs the next day, it turned out reasonably well. The cage received two light coats, was then baked and left to sit overnight, and then painted/baked again. The process was repeated for the other side. The second coat for both sides of the cage resulted in very light bubbling. The bubbling is irritating to me but not visible unless you’re looking for it with a magnifying glass, so it was then left alone. Clearly I need more practice, and may need to change my process. Maybe one or two more bake cycles and a day of rest between coats. 5.) Blades The true color of the gold paint on the blades was hard to see as they were covered with hard, caked on dirt and grease. The paint was also beginning to sheet off on three of the blades and all leading edges were fully corroded. Once thoroughly cleaned, the gold paint on the hub behind the blades still looked new and amazing. To me, it looked like gold leaf, with the kind of color depth and sheen that pictures can’t capture. But since the paint on the blades was in terrible shape it all had to be removed - so I gave it an electrolysis bath. Removing the last of the corrosion on the leading edges of the blades required some elbow grease with Krud Kutter, Brasso and 0000 steel wool. Finally, the blades were hit with Rust-Oleum Clean Metal Primer and then with Rust-Oleum Metallic Champagne Bronze. Rust-Oleum recommends the primer for this paint, so I figured why not – especially since there were surely some teeny-tiny un-seeable pits of corrosion left on the leading edges. The only real downsides to using the primer is some extra time, and the ‘Parker’ stamp is more difficult to read. But the final color is very nice. Blades first received one light coat of primer with two baking cycles. Then, two light coats of paint and two baking cycles – twice. Note on Rust-Oleum’s Metallic Champagne Bronze: This paint has an appealing brightness to it, but don’t expect metallic flake. Although, I think a high-gloss dark candy apple red, with gold metallic flake would look amazing. Blade Color – Comparing the original blade color to Rust-Oleum’s Metallic Champagne Bronze. Picture taken on patio, in natural light. The blade on the right comes from another Emerson Jr. waiting for a beauty treatment. It appears that someone tried removing those blades with Vise Grips. C. RE-ASSEMBLING & ASSORTED REPAIRS Family Portrait. Wing bolt missing. 1.) Blade Hub – Leather Washer Was Original: Emerson placed a leather washer behind the blade hub threads, and I found that washer to be dry-rotted into pieces, much of which was missing. New leather washers are sold by at least one AFCA forum member, and you can find him (and possibly other sources) by searching the forums. The other option is to use a neoprene Buna-N O-ring instead of a leather washer, which is what I did. (Find the part # below.) I also applied a very light coat of Red ‘N Tacky grease on the neoprene washer, and then wiped nearly all of it off with a lint-free towel. What remains is nearly undetectable, but it makes blade seating and removal just a little bit easier. (Buna-N material is specifically formulated to be very resistant to petroleum products.) 2.) Oscillator Wheel Arm Screw Replacement: The screw that attaches the oscillator arm to the oscillator wheel was missing. It seems to be a rather unique screw, with no similar new parts currently being sold anywhere local or on-line (that I could find). Rather than buying a 2nd -hand screw pulled from a parts fan I decided to use a knurled thumb screw – which also makes changing the oscillation sweep a little easier. The most appropriate ones I found were made of brass, were too long and had shoulders that were too wide. I chucked the thumb screw into my drill and used the edge of a metal file to reduce the shoulder to the proper width as measured with a Harbor Freight micrometer. Cutting it to length was straightforward. My original plan was to paint the thumb screw black to match the painted oscillator wheel, but I instead opted to polish the brass oscillator wheel and leave the thumb screw as shiny brass. Glossy clear finish was applied to both. The color of the brass thumb screw matches the brass oscillator wheel exactly. Brass Thumb Screw: Original and Modified (Part # listed below) Note on the brass thumb screws: When I bought them, the online description said they were not coated or sealed – whatever the verbiage was. If you want to delay the aging patina on these thumbscrews, be sure to clean them with acetone or the like and then coat them with a clear finish. 3.) Attaching Felt to the Bottom Plate: Gluing felt to the base pan with properly aligned holes for access to the pan screws was easy enough, using a very basic jig: (a.) Using the base pan as a template, the hole openings were marked on a piece of scrap plywood AND on the replacement felt. (b.) Using an old cheapo ball point pen that fit the screw hole openings in the base pan, pieces about an inch long were cut and then super-glued in a vertical orientation at the hole locations previously marked on the wood. Those plastic dowels then served as alignment guides. (c.) Using a paper hole punch, the previously-marked holes were cut out of the felt which was then threaded onto the dowels. (d.) The edges of the base pan were taped off so only the flat bottom of the base pan could be sprayed with glue. The bottom of the pan received a light coat of glue and was then placed over the plastic dowels (glue side down) and lowered on top of the felt. The pan was pressed firmly into the felt and the masking tape was immediately removed. (e.) The pan was removed from the jig and the felt trimmed to the desired final overlap dimensions. (f.) A thin piece of cardboard was used to mask the edges of the base pan while spraying the remaining exposed felt. The now-sticky felt edge was then pulled tightly over the edge of the pan and smoothed out, removing any creases. 4.) Nylon Washers: Black nylon washers were used when attaching the cage, to protect the paint and to possibly help dampen any small vibrations. A nylon washer was also used on the knuckle wing-bolt so that when tightening it’s not metal on metal, even though that seems to be how the fan was designed. I like how the ‘give’ in the nylon washer makes it much easier to adjust the tilt while maintaining enough friction to keep the top of the fan from flopping over. Time will tell how fast that washer will wear out. (I wonder if there was originally a leather washer on the wing-bolt?) 5.) Grommets: Finding grommets with all the correct dimensions to fit the holes in the base was difficult. After buying a couple of assortment packs as well as visiting all the local hardware stores, I found some that were ‘good enough’ but not ideal, as they just barely fit and don’t seat properly – but they’re good enough. I have another Emerson Junior that needs to be spruced up, and for that one I may look for the Emerson grommet kit I remember seeing ‘somewhere’, likely from one of the forum members. 6.) Wires: The head wire and the wall cord had previously been replaced\patched with generic cords and electric tape, all of which which were disintegrating, but replacement was straightforward. Using my new electrical knowledge gleaned from the forum, I connected the wire from the narrow ‘hot’ prong of the polarized plug to the off-side of the switch - to prevent the possibility of a short elsewhere on the fan from electrifying the fan base. When connecting the wires in the base, pigtails were soldered to the switch contacts, while the other connections were made with wire nuts. (WAGO connectors would also work well.) A few more inches of wire than necessary were used. The wire nuts and extra wire length will make future maintenance much easier when the base needs to be opened. Period-appropriate wire and plugs can be obtained from many sources and can be found by searching the forums, Amazon, e-Bay... Base Plate & Switch - renewed The original Emerson wires were whipped on both ends and where passing through the grommets to prevent fraying of the cloth cover and to protect against wear. I did the same - just because it’s authentic, functional and could easily be done while watching Game of Thrones. (Given the black paint, grommets, plugs, wires and thread, it’s difficult to see the whipping in-person and impossible to see in photos.) 7.) Electric Wire - Strain Relief: As there was room for it, an underwriter’s knot was tied in the head wire after it enters the motor housing. A large, heavy-duty zip tie was attached to the wall cord just inside the fan base. 8.) Cage Badge: The cage badge was in reasonable condition, but was grimy enough that it was hard to read. And, it was partially flattened, most likely from falling on its face. The rounded end of a screwdriver handle was used to start recovering the original dome shape. Using a lot of pressure the dome shape was slightly recovered. However, I was afraid the badge would fold in half if any more pressure was applied so I left good enough alone. The heavy dirt build-up on the badge was mostly removed through gentle use of Krud Kutter and Q-tips. The last bit of stubborn grime (or maybe it was corrosion) was adjacent to some of the original letters and had to be removed with a tiny piece of 0000 steel wool. It was impossible to clean the badge without affecting some of the original black paint, and I eventually had to replace some of the original paint before clear-coating. There’s a very fine black ring just inside the outer edge of the badge that I had an extremely hard time filling in. Very frustrating, but after a loooong time and many attempts I eventually got it just about right. I can’t say I’m overly happy with the way the badge turned out, especially with the amount of time put into it. But it’s acceptable, and looks a heck of a lot better. I used a gloss clear coat to seal the badge and it’s very, very shiny - so at some point in the future I’ll probably top it with a satin clear coat. Cage Badge - Before and After Although not a high-level repair by any means, the cleaned and repaired badge looks better than the lighting glare and errant dust allow. The whole time I was cleaning and touching up this little monster I kept thinking that a water decal would have been so much easier, and likely would have looked better as well. 9.) Adding Oil: Once the fan was reassembled, Zoom Spout oil was added via the oil port on the back. These Junior fans have a small oil reservoir in the blade hub, and I’m unaware of any recommendations for the volume of oil to add to a dry Junior fan. And when you’re squeezing oil down the narrow oil port it’s near-impossible to have any idea of how much has been added. (A syringe is helpful here.) After adding what I thought was probably too much, the fan was run for a few minutes. Next, the fan was tilted forward and the blades removed where I found about ½ tsp of oil in the hub reservoir. So, I put the fan back together and added a couple more squirts of oil. D. PRODUCTS\TOOLS\PARTS USED * I was thinking about the products and tools used to revive this little fan and decided to try and list * them all. The list is probably not complete and all this stuff is not really needed to spruce up an old fan. But I had most of these things sitting on the shelf so… Spray Electronics cleaner (cleaned the stator & switch) Odorless Mineral Spirits (general cleaning) Acetone (soaked bare metal parts with hard to remove dirt and grease) Krud Kutter (excellent gentle, all purpose cleaner; oil, grease, dirt, etc.) Goo Gone (another excellent gentle, all purpose cleaner; oil, grease, dirt, etc.) Brasso (cleaned heavily corroded leading edges of fan blades) Mothers Mag polish (cleaned all paint, lightly applied) Turtle Wax – Super Hard Shell paste wax (final paint protection) Very fine wet sandpaper (blended new and old paint & nail polish, for cleaning, restoring badge) Steel Wool, 0000 (cleaned interior bare metal, removed blade corrosion from wings) (When done, be sure to remove all traces of steel wool debris.) Wire brush, handheld (cleaned screws and threads) ‘Airbrush Cleaning Brushes’, from Harbor Freight (perfect for cleaning small recessed screw\bolt holes like those on the oscillator wheel.) Zoom Spout Oil (added through oil port after reassembly) Red ‘N Tacky Grease (for oscillator) (Don’t pack the oscillator; Use just enough to ensure all movable parts remain covered.) Single strand wire, #18 (switch pigtails) Drill (removed switch from base; modified knurled thumb screw) Pop Rivet Gun (reattached switch to base pan) Soldering Iron (removed old wires from switch, attached new wires) General tools – screwdrivers, pliers, wire stripper Heat shrink wire wrap, wire nuts Heat gun (for heat shrink wire wrap) Kill-A-Watt meter (to make sure nothing is electrically amiss) 3M Super 77 Multipurpose Adhesive (for attaching felt to base pan) L.A. Colors Color Craze Black Nail Polish (Dollar Tree, #412 - touched up nicks and spots) Rust Reformer – liquid, not the paint version (For converting rust on bottom of base) Rust-Oleum 215215 - Rust Reformer, black paint (base pan) Rust-Oleum 7886830 - Black Appliance Epoxy (oscillator cover, cage) Rust-Oleum 334029 - Gloss Clear (cage badge, oscillator wheel, oscillator thumb screw) Rust-Oleum 7780830 - Clean Metal Primer (mfr. Recommends prior to applying Metallic Champagne Bronze on blades) Rust-Oleum 313142 - Metallic Champagne Bronze (blades) Electrolysis Bath – Only requires an ‘old’ car battery charger, a plastic bucket, Washing Soda, and some electrodes (like pieces of rebar). Google is your friend. E. REPLACEMENT PARTS * Looking for parts or restoration services? * Check out: http://www.fancollectors.org/info/restore.htm ~~~~ ~~~~ THESE ARE THE PARTS I USED: Head Wire, about 1 ft. (antiquefanparts.com) Electric Wire to wall outlet, 8 ft. (antiquefanparts.com) Grommets (from assortment packs & HW store bins; for wiring holes in base and head) Buna-N O-Ring, #209 (blade hub seal; Fabory brand) Brass Knurled Thumb Screw; mods required (Amazon #B07YCTHPWT) (8-32 x1/2 Solid Brass Diamond Knurled Thumb Screws) Felt (base pan cover; JoAnne Fabrics) Black Nylon Washers (from assortment packs; for cage bolts and knuckle wing-bolt) F. ORIGINAL OSCILLATOR SCREW MEASUREMENTS [As measured on a screw from a different fan with a micrometer, and confirmed with forum contributor posts.] Screw connecting the oscillator arm to the oscillator wheel: Head Length: 1/16” Head Diameter: 5/16” Shoulder Length: 1/8” Shoulder Diameter: 3/16” Thread Length: 3/16” Thread Size: 8/32” (RH) ------------------------------------ Many thanks to everyone in the AFCA forums for sharing their knowledge and expertise, and for having the patience to answer often basic, redundant questions – from me and from others. If you read this post and have questions, please be sure to first search the OLD forum and THIS forum. It’s amazing how much information has been recorded. And if the forum search engines can’t find what you’re looking for, try the Google Machine, using the following format: “emerson” “junior” site:afcaforum.com “emerson” “junior” site:new.afcaforum.com I wish I could, but there’s not enough time in a week to trace back and provide links to all the helpful posts that led to my post above. Thanks again. ------------------------------------
9 points
-
I get to show others my meager fan collection and maybe get them hooked on fans too! Geo...
9 points
-
Got the Dayton 31-16 all complete! I love these odd voltage fans. This one is 32VDC. Only thing I repainted was the knuckle and cage. Hardware gun blued. Also gun blued the oscillator wheel for a lil contrast. It's an older repaint, but I think it displays well. Now back onto Emersons! Have a ball motor that needs full buffing then rewire. I'm saving some very special wire for the Emerson!
9 points
-
Before...I made new bearings and replaced the old felt wicking . I wanted a complete restoration so I also rewound the stator and speed coil.After blasting and primer it got a few coats of metal flake. This is where the fun started!
9 points
-
My portion of this part of this project is complete. Possibly more to come.
9 points
-
Finished up on this 3 speed oscillator, BB/BC Circa 1911 ball motor. I installed a bridge rectifier and now it's running on 119vdc. This is my first attempt to powder coating. I probably should have done more prep on the cast iron but I think I came out pretty good. It runs smoothly in 3 distinct speeds. I want to thank Darryl Hudson for a great job making me an oscillator shoulder screw, rubber grommets and feet. I also want to thank Tony Clayton for an awesome job on the wire he made. Before Link: Three wires broken on the commutator. Luckly my repairs worked! Replaced wires and rewrapped. Fabricated a new lever with micarta. Added a bridge rectifier. Only place I could find to mount it.
9 points
-
..OK.. sadly not free to you, but it was to me.. So am I bragging or complaining? Well again sadly I’m bragging.. but there is good news.. FYI ...after a high polishing job the blade got out of balance so I made a custom arbor for my Du-bro prop balancer, then fire up the wife’s nasty hotmelt gun..So It was much easier than standard ones.. The best part you can add or take weight as needed from the inside of the dome.. just squirt hotmelt opposite the heavy side, until there is no heavy side...
9 points
-
This is an Emerson 33661. As it came to me, the blade was aluminum. I added a set of blades in brass, just to make it shimmer. Working perfect!
9 points
-
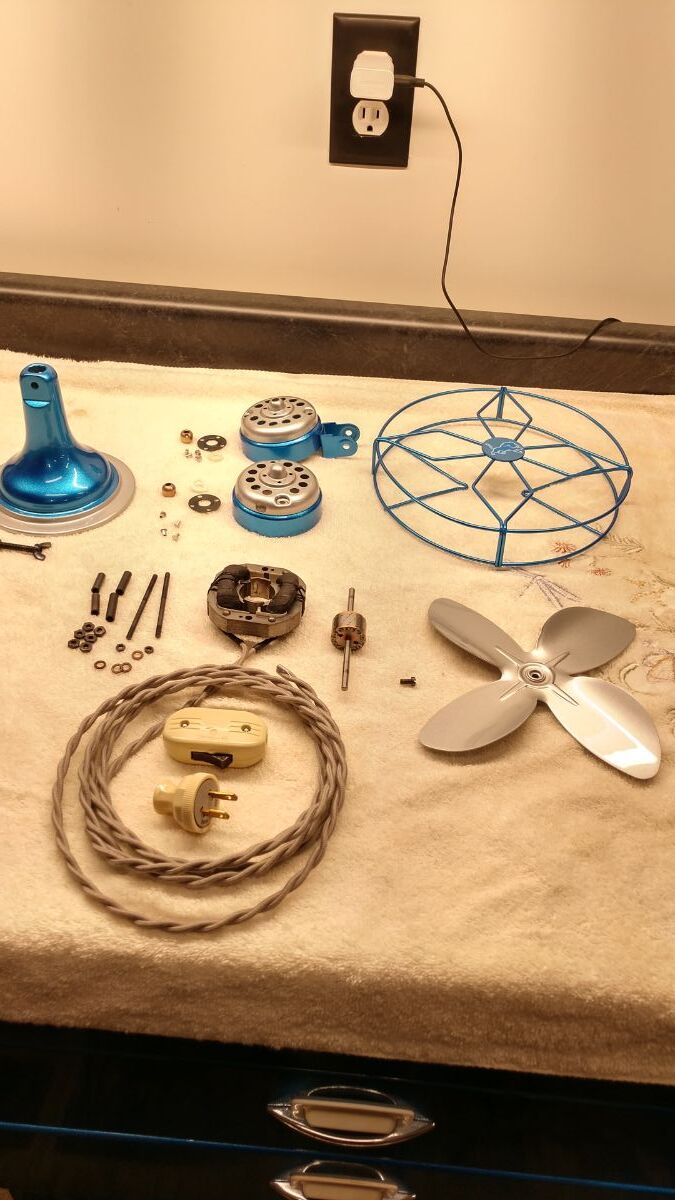
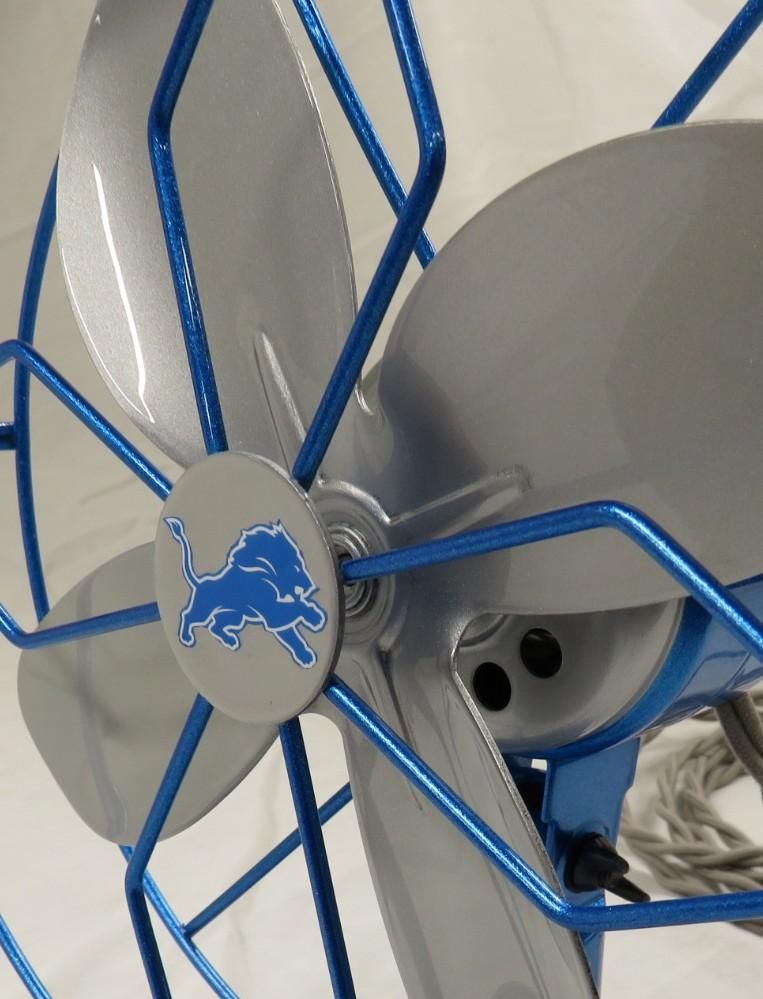
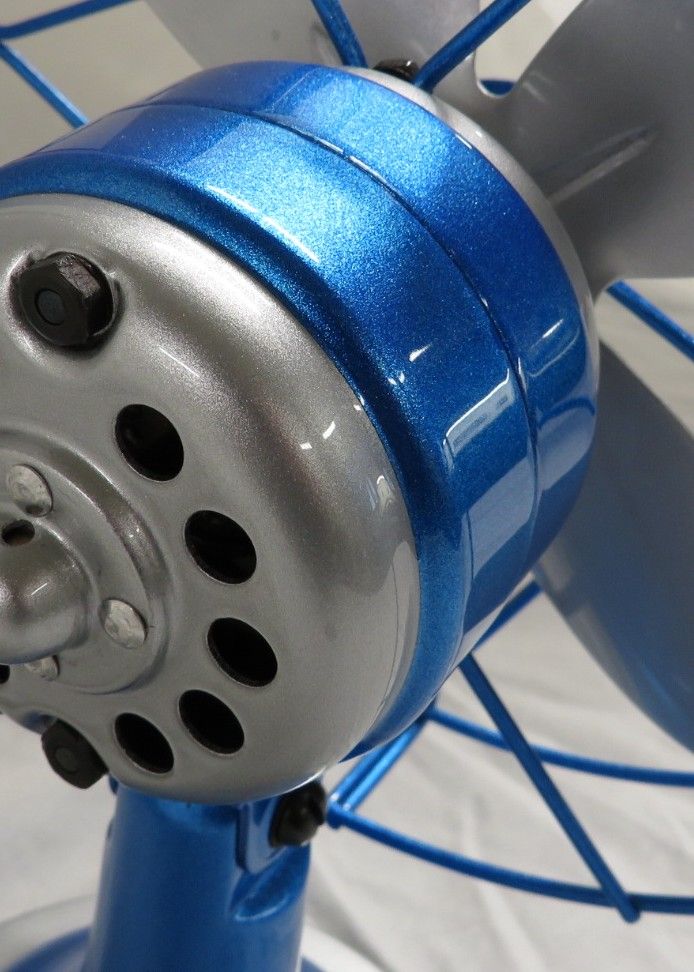
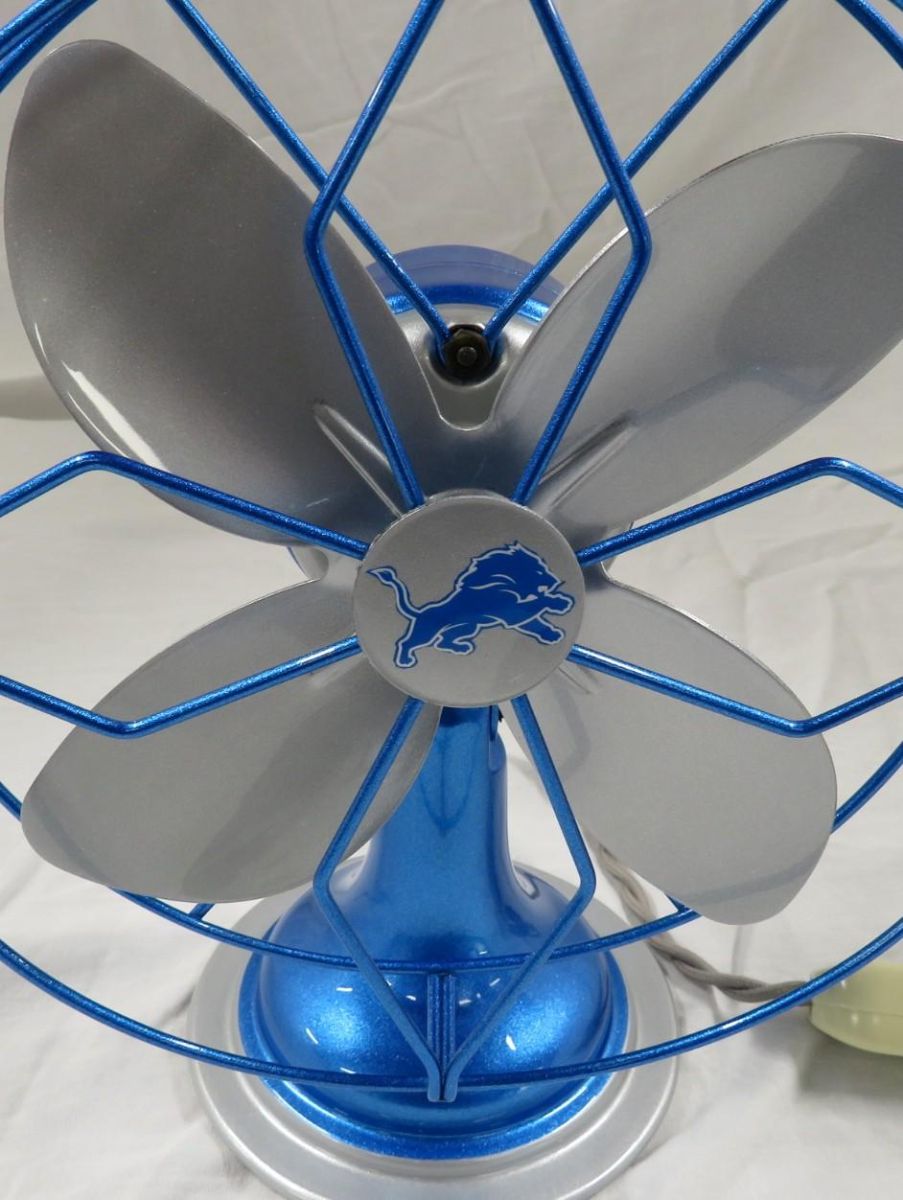
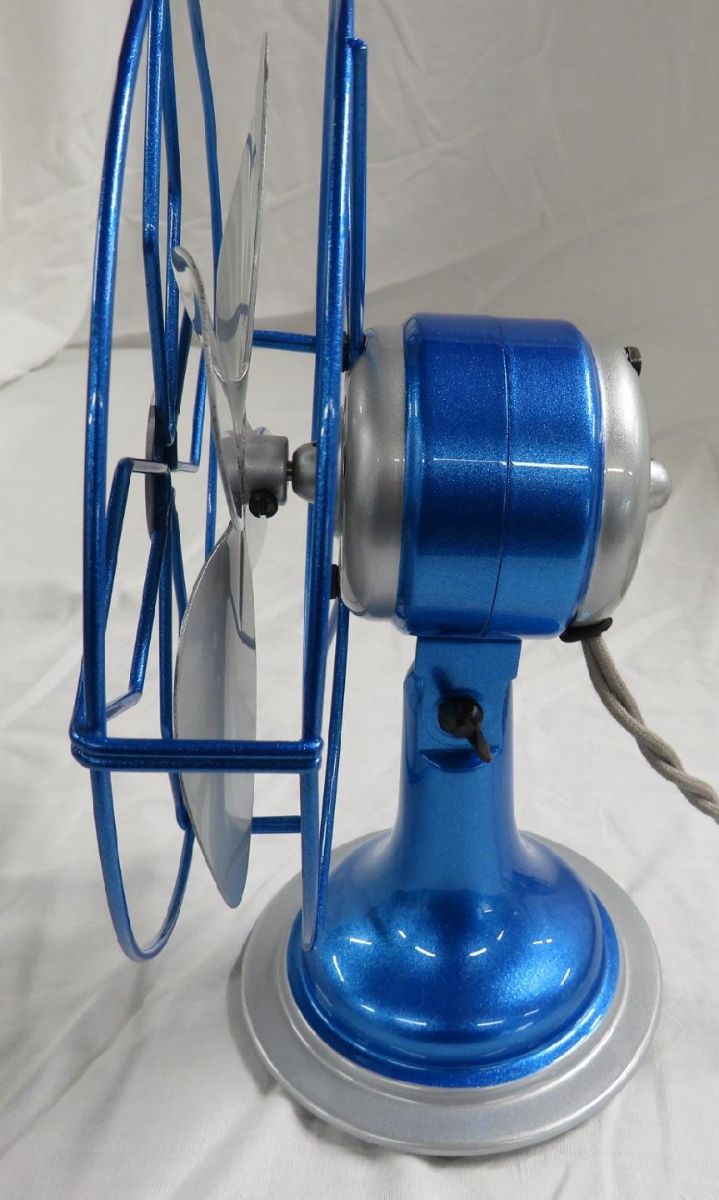
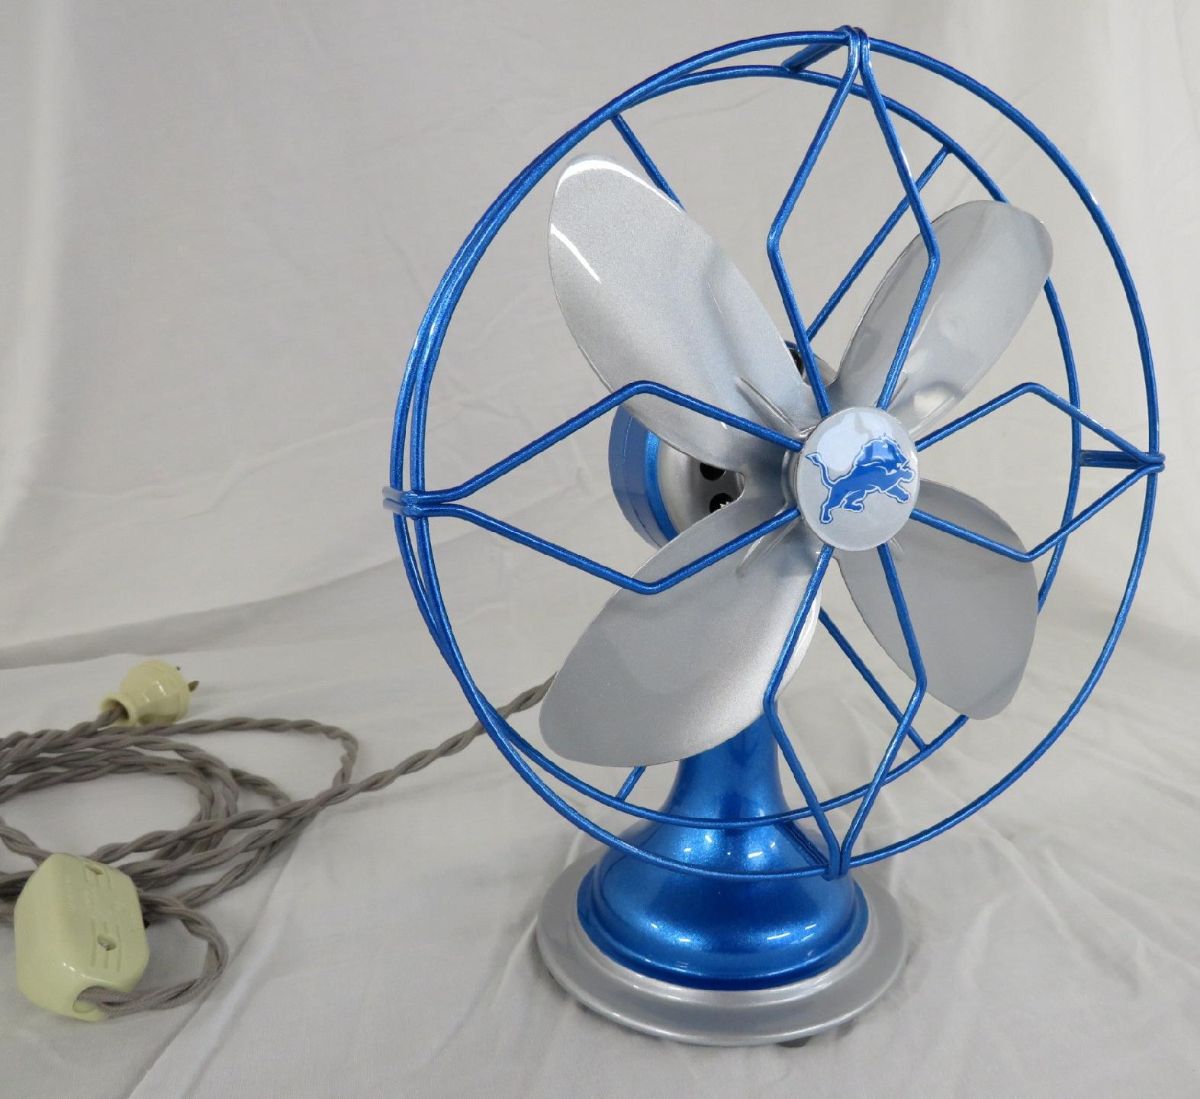
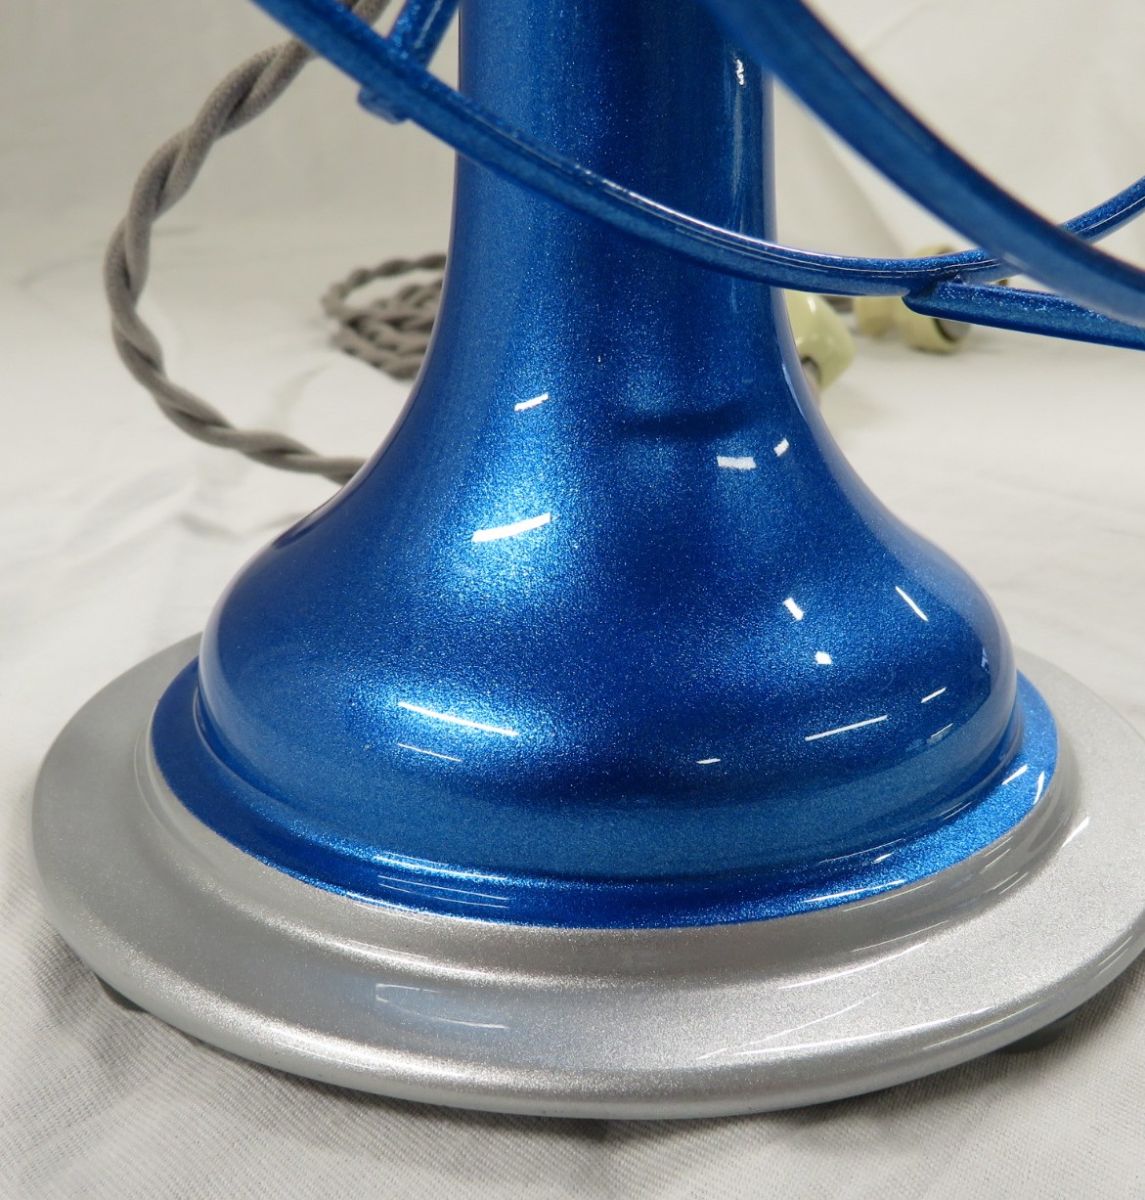
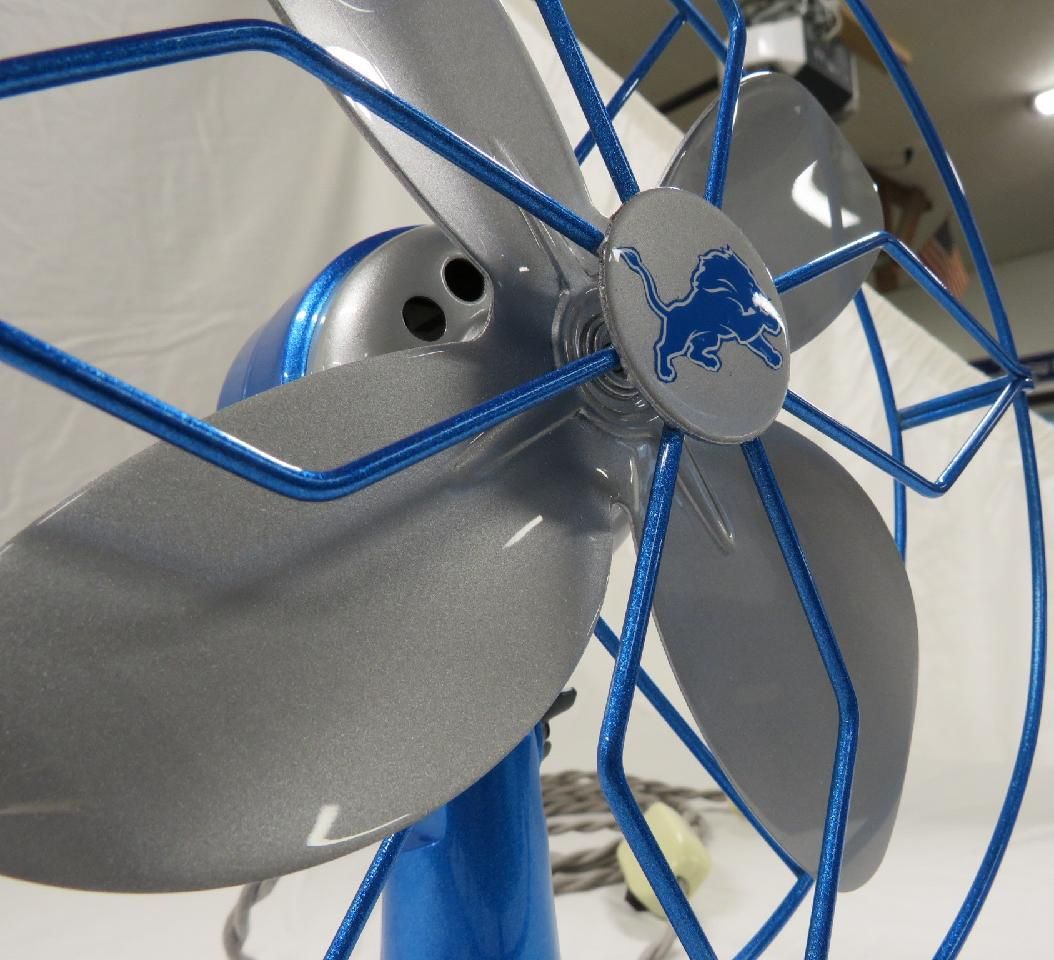
My girlfriend wanted to restore a fan on her own. It'll be a Christmas gift for her dad who has a huge collection of Detroit Lions stuff. She disassembled it, drilled out the bearing retainers, blued all of the hardware, sandblasted everything and did the bodywork. Then she stripped and rewound the stator. I sprayed the epoxy primer and she did all of the wet sanding and got it ready for paint. I sprayed the base/clear urethane and did the final wet sanding and buffing. Here's some before and after pics.
9 points
-
Wrapped this 9” up over the weekend.
9 points
-
U R correct.; don't remember but certainly believable. I have some projects under the benches that have been collecting dust maybe that long. I went by the home furnishings store today to see if the carpet for the basement had come in. A pretty blue eyed blonde haired lady greeted me at the desk. I introduced myself and why I was there. She looked up at me and said " I dont know that you remember but 30 years ago tomorrow, you delivered me". All I could say was My how you've changed !!! , and Happy Happy Birthday tomorrow. Wow does time ever fly by.....9 points
-
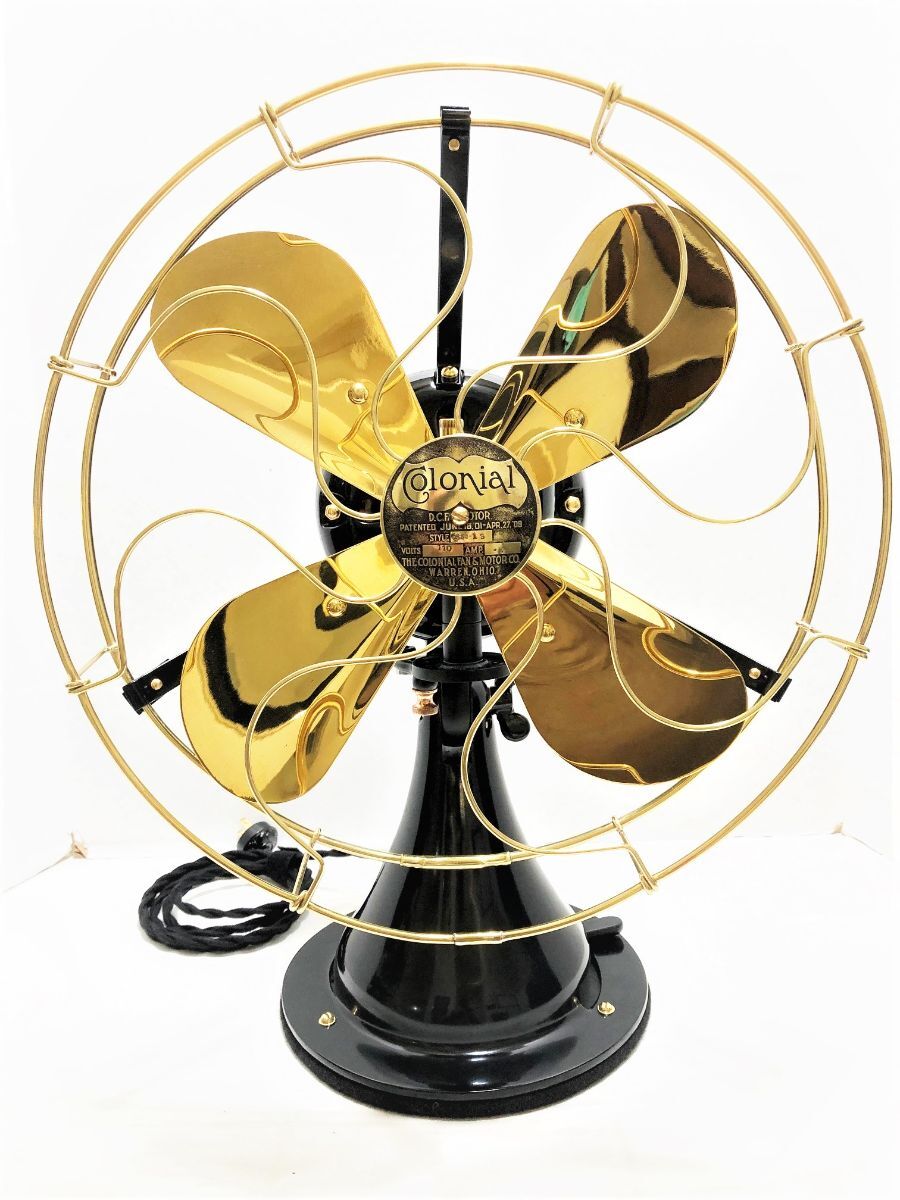
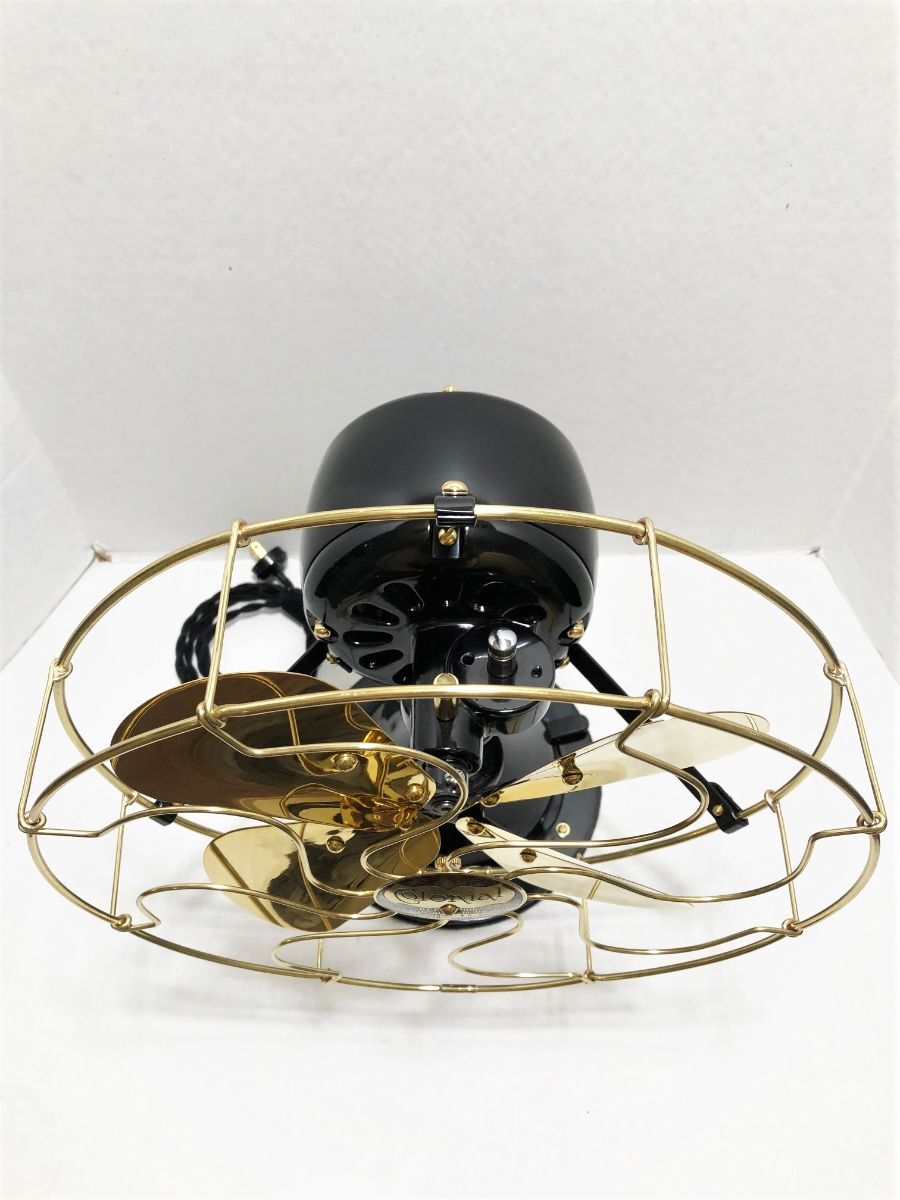
Finally finished My Colonial front oscillator, When I first got it about a year and a half ago I thought all I needed to do was replace the broken pot metal neck( so I fabricated one out of carbon steel). Then I found the bearings needed replacing so I sent to Darryl Hudson, Then I found that the rotor worm gear had some flat places on it. Stan Adams had one and sent it to me. Then it was running very hot so I sent it to Rick Huckabee , rewound it called me and told me the rotor would not fit in stator. So I picked up at Stan's meet in Houston. I got with Darryl and he told me to run a drum sander in . The stator had a dented place on out side I started there on the inside. It Worked! Runs great now. I had almost gave up two times. But with a lot of help from my friends got it done.
9 points


.JPG.20e36f906e8a2681e3837c96858d16ab.JPG)
.JPG.067fdc9e95697691a34b26239cf5fcbc.JPG)
.JPG.7b0ddb7122377770cc19c67b7fa280eb.JPG)
.JPG.4a970f82a0ba6e5916340373b15d203b.JPG)


-F2.jpg.7d4bddaa5ce37e18a218cdfd5362b762.jpg)

-F.jpg.92c4f1896ab4ab21417e58932181a272.jpg)

-F.jpg.b2c60971bba6051dbe010e9244294b22.jpg)
-F.jpg.309e5e7afdc944938885171e51ef5220.jpg)