Leaderboard


Popular Content
Showing content with the highest reputation since 07/11/2024 in all areas
-
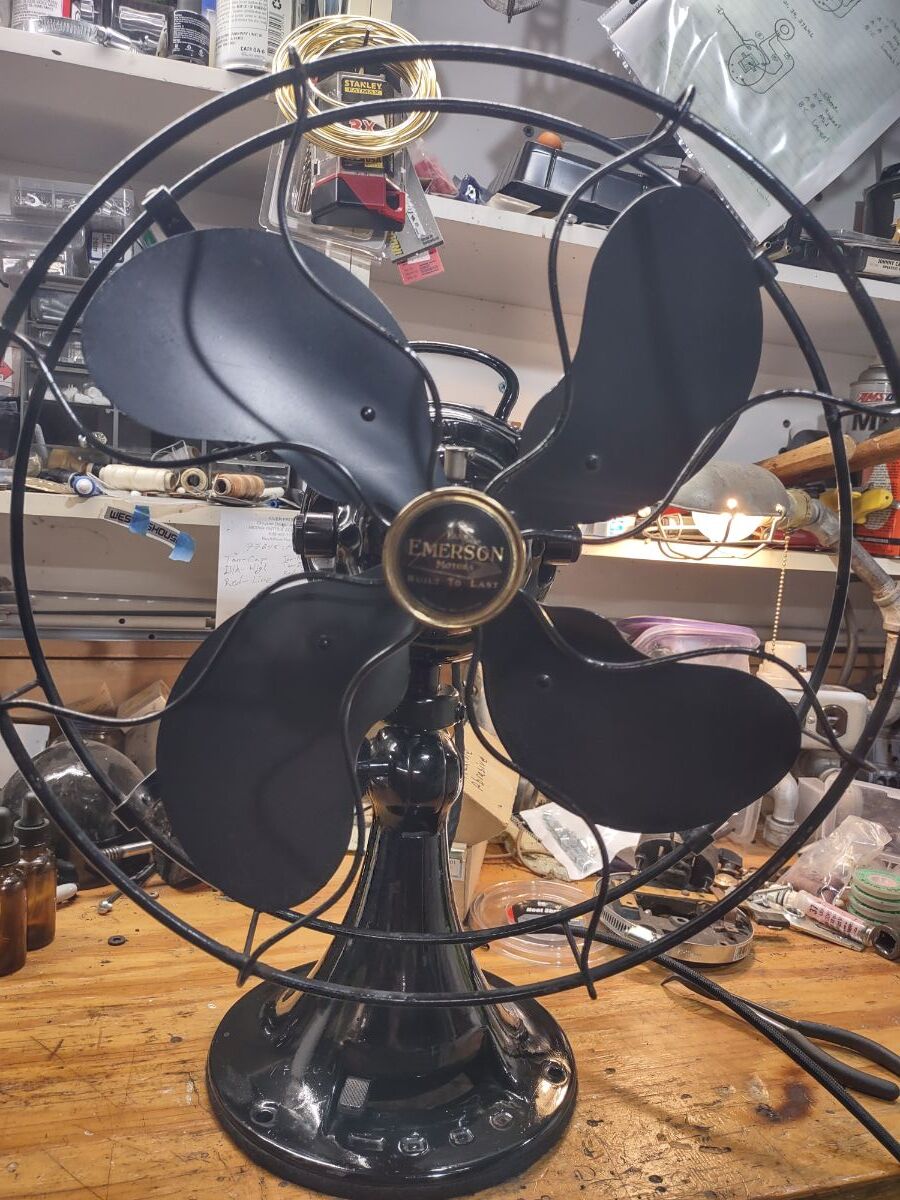
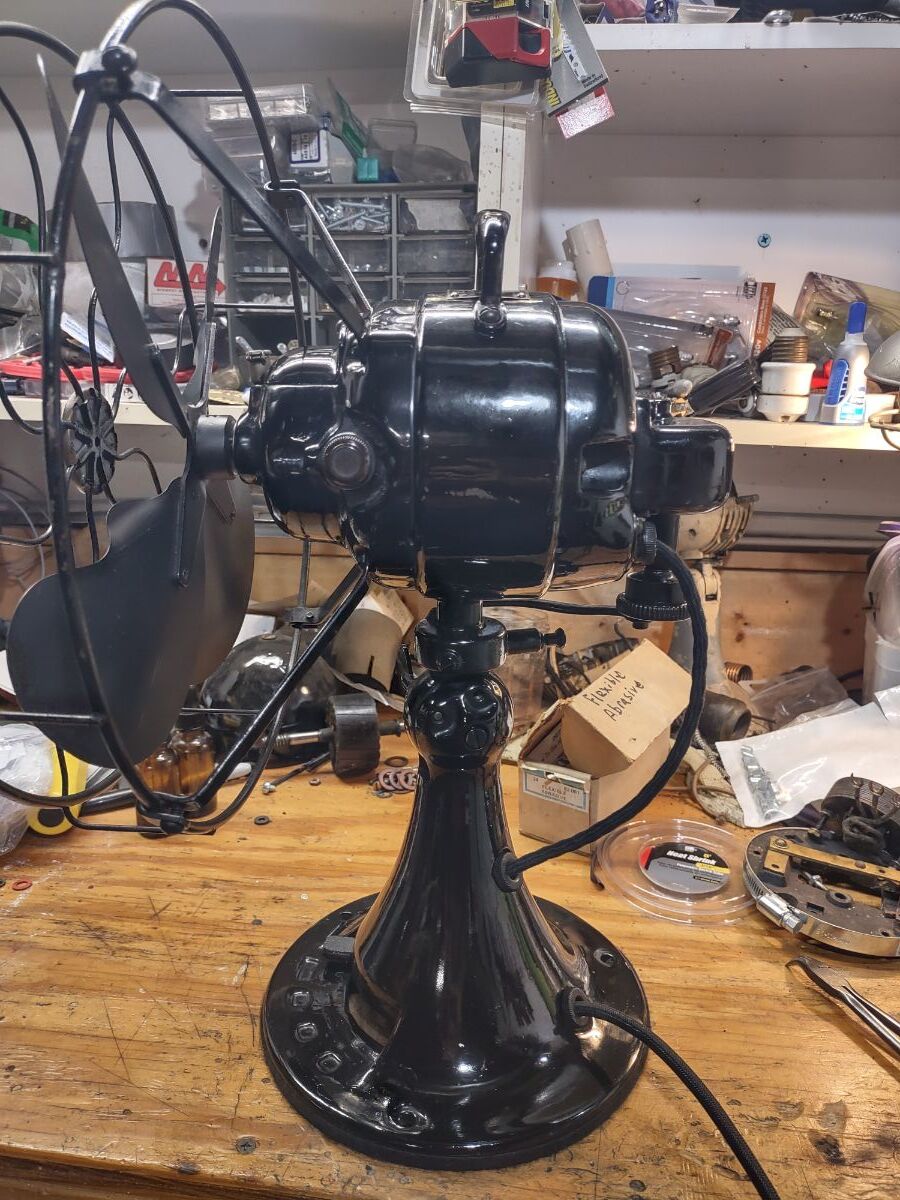
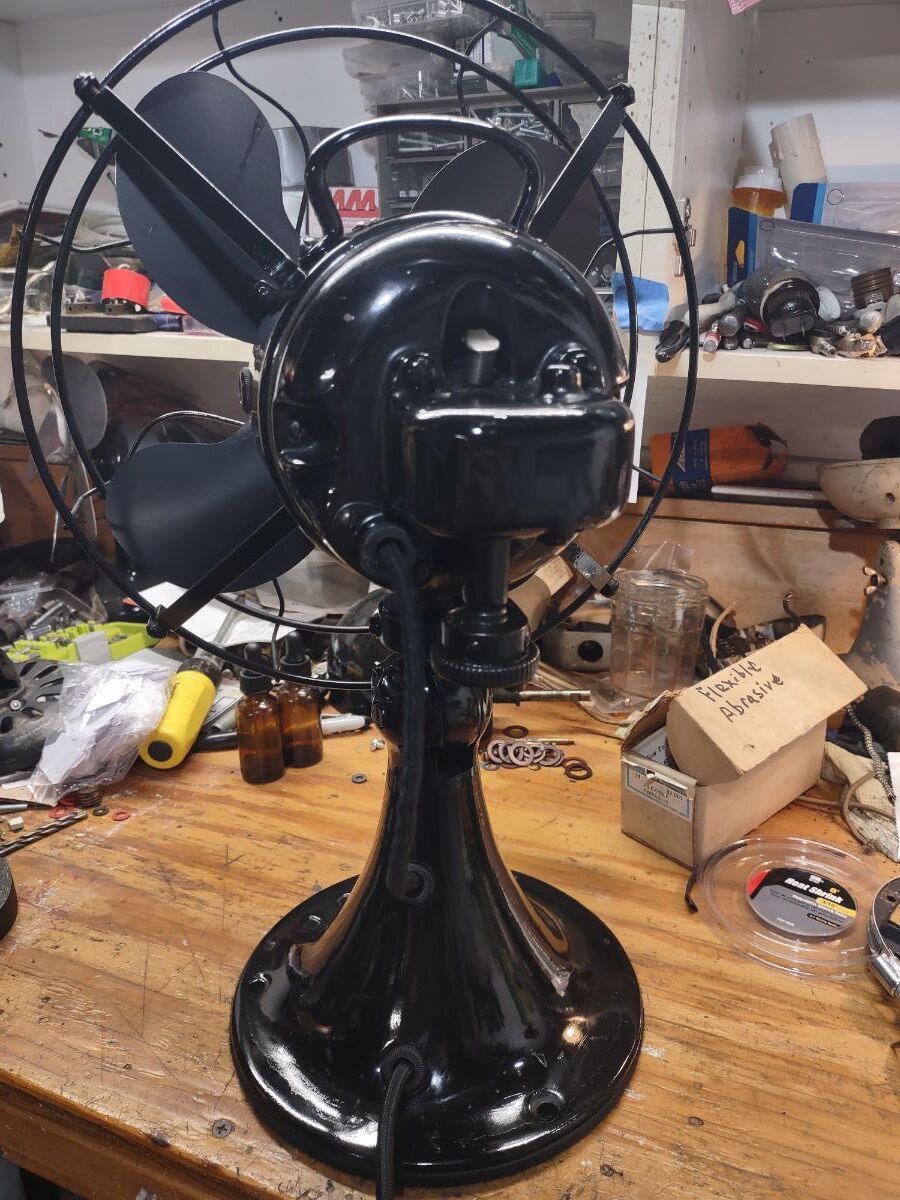
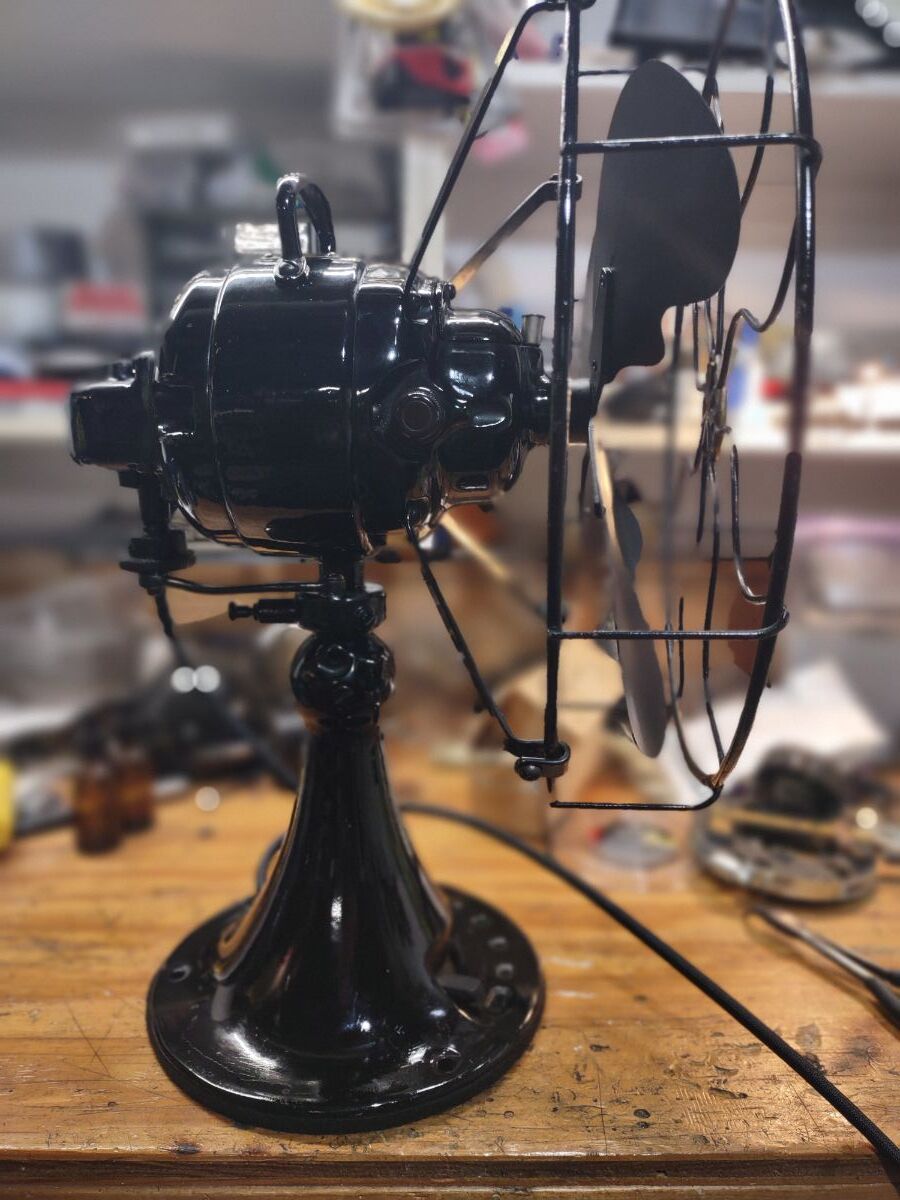
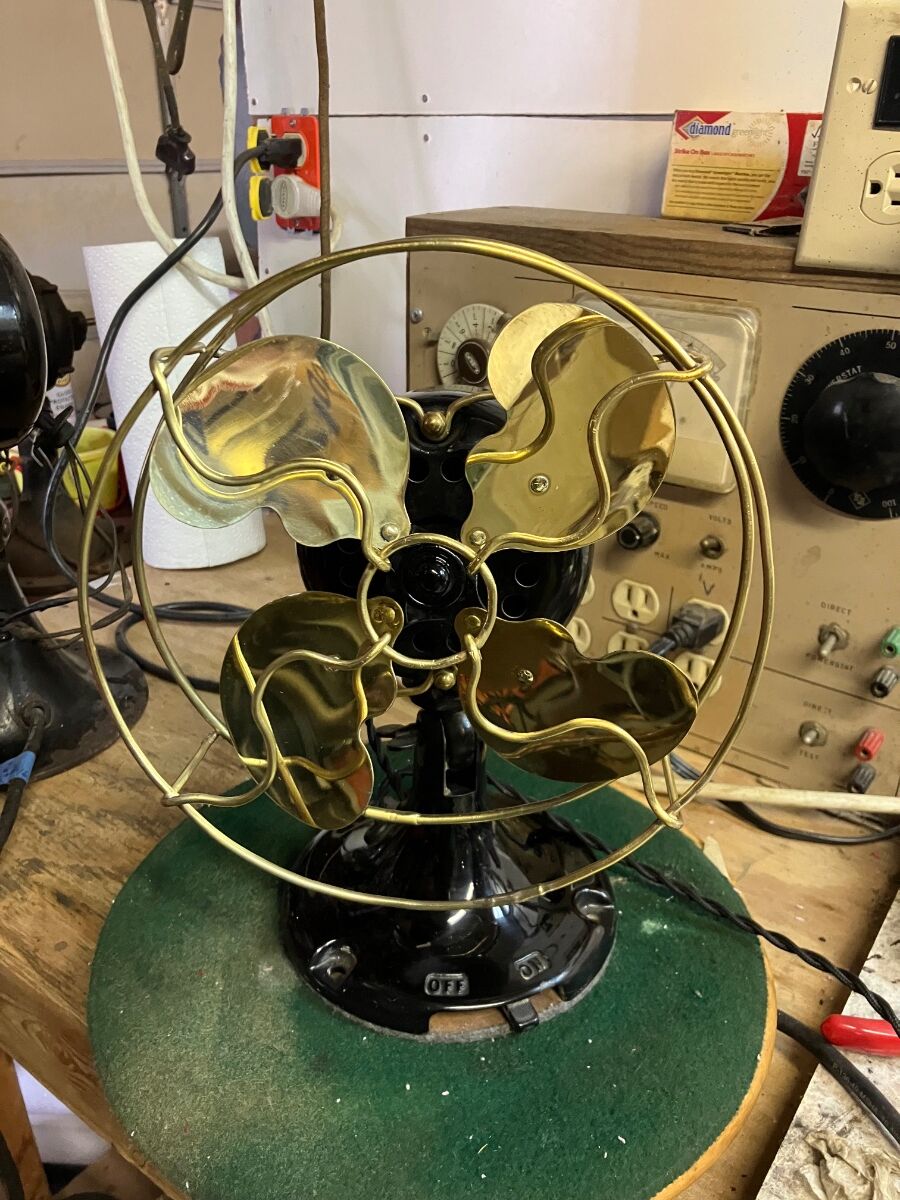
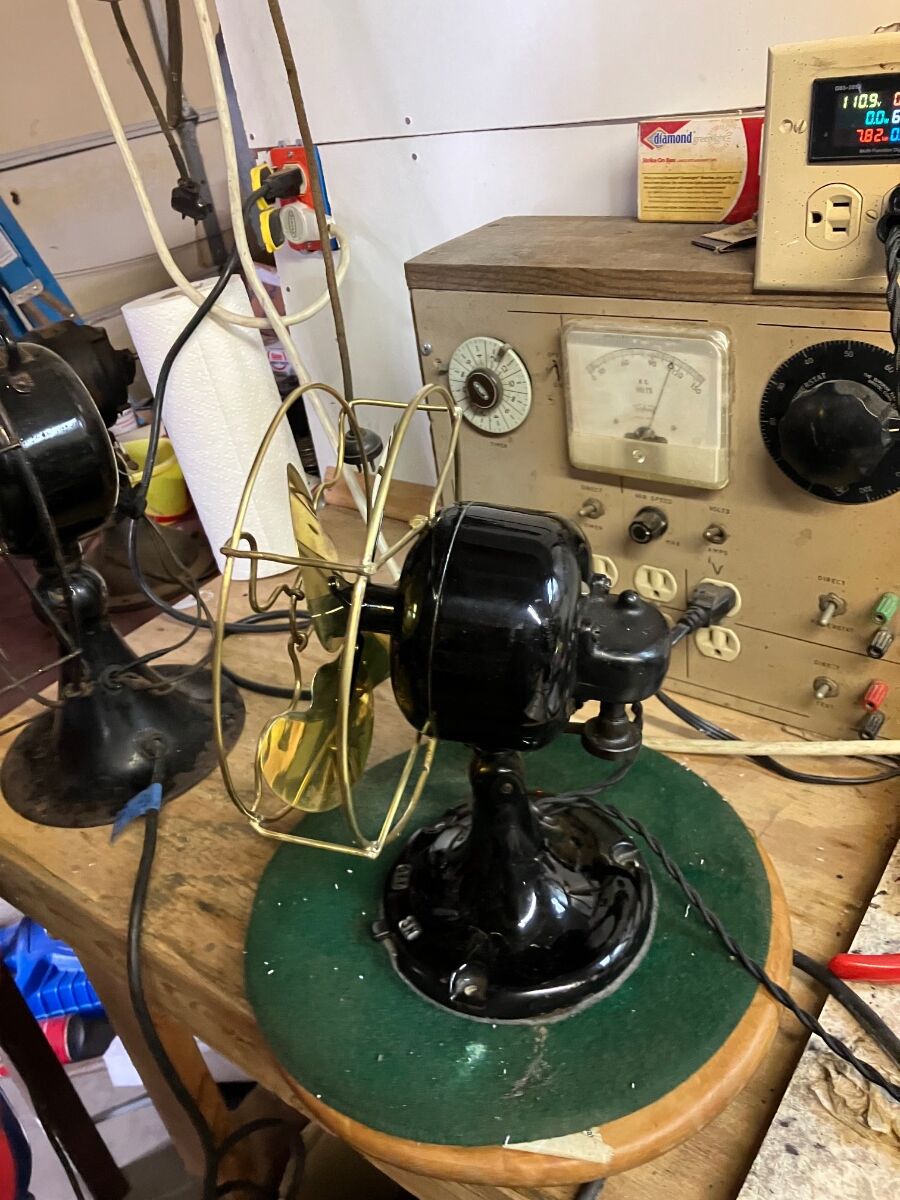
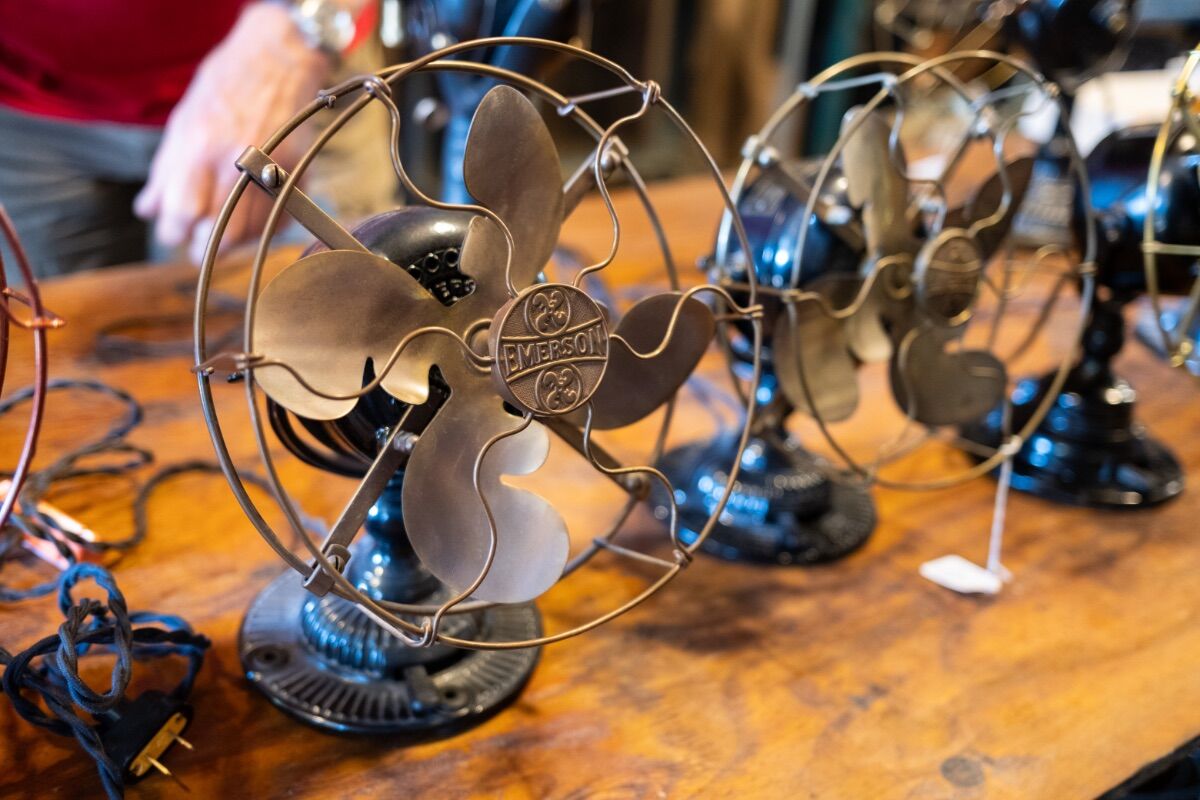
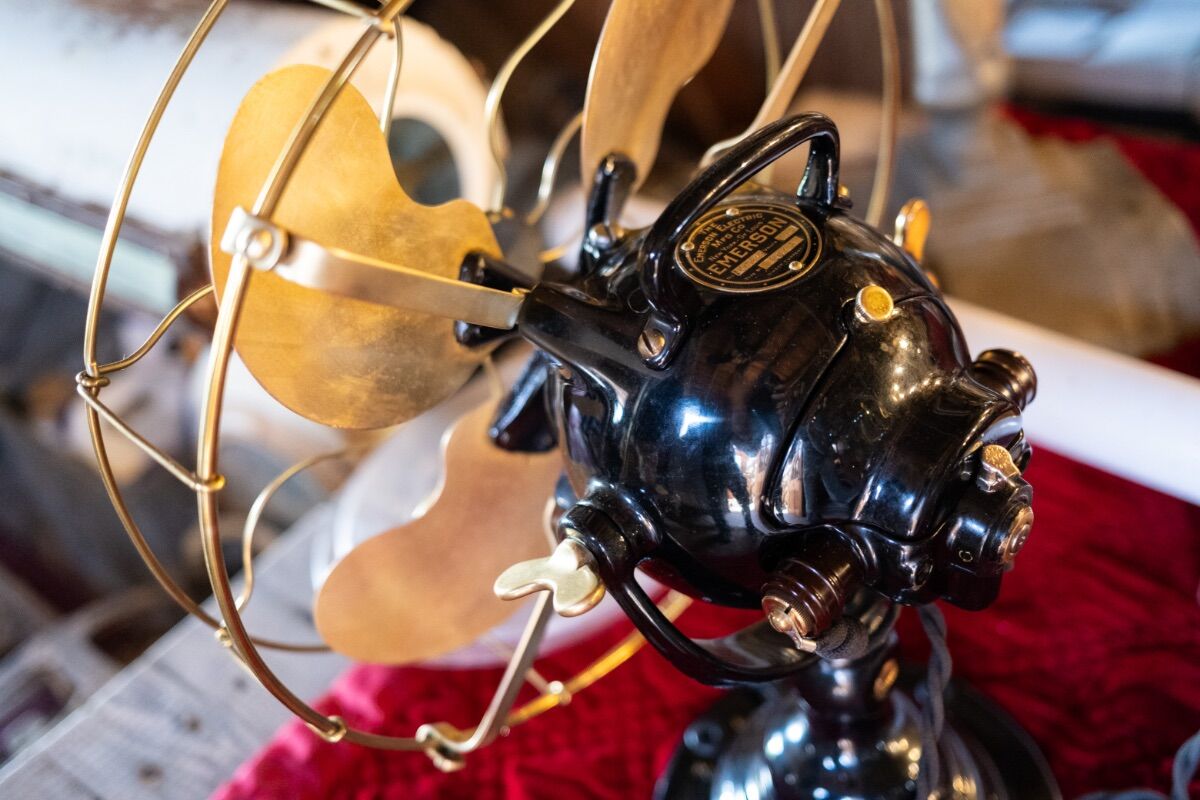
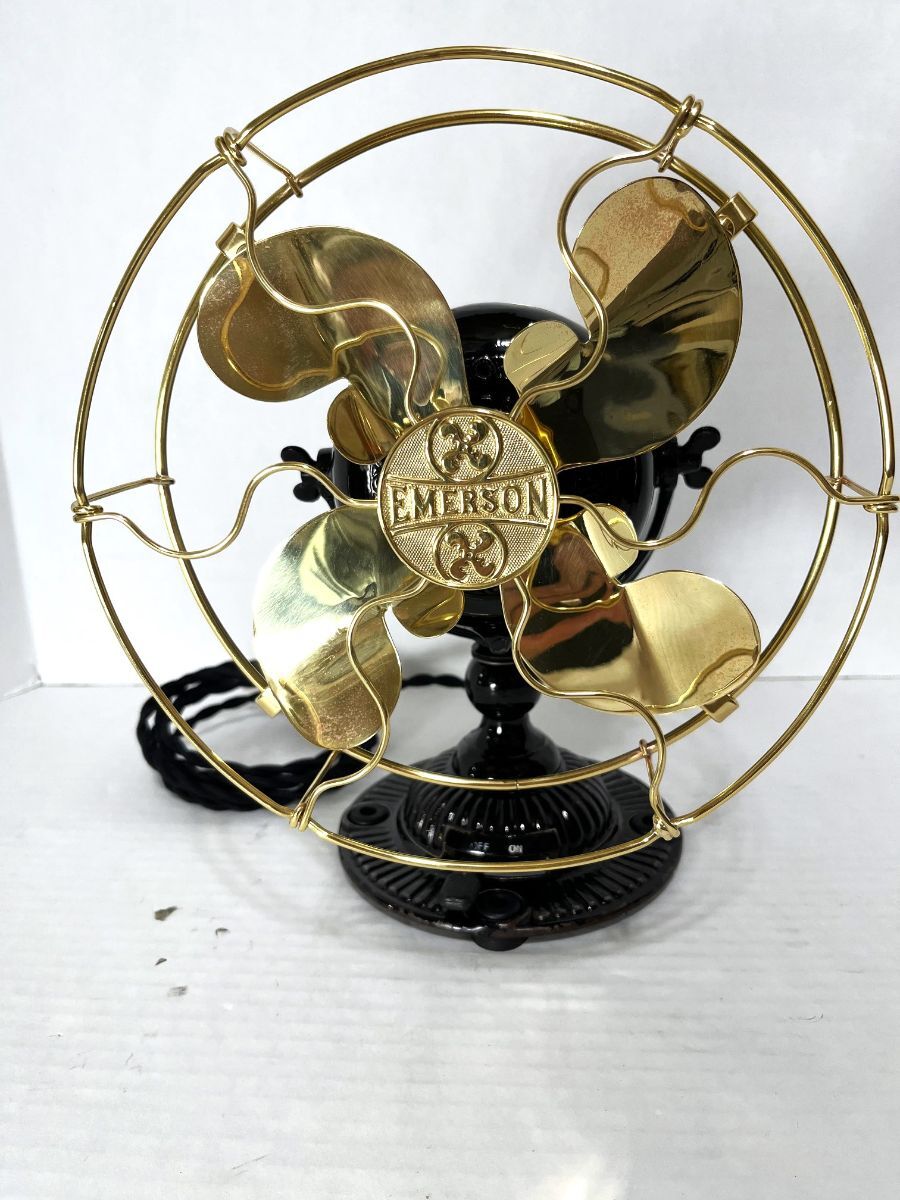
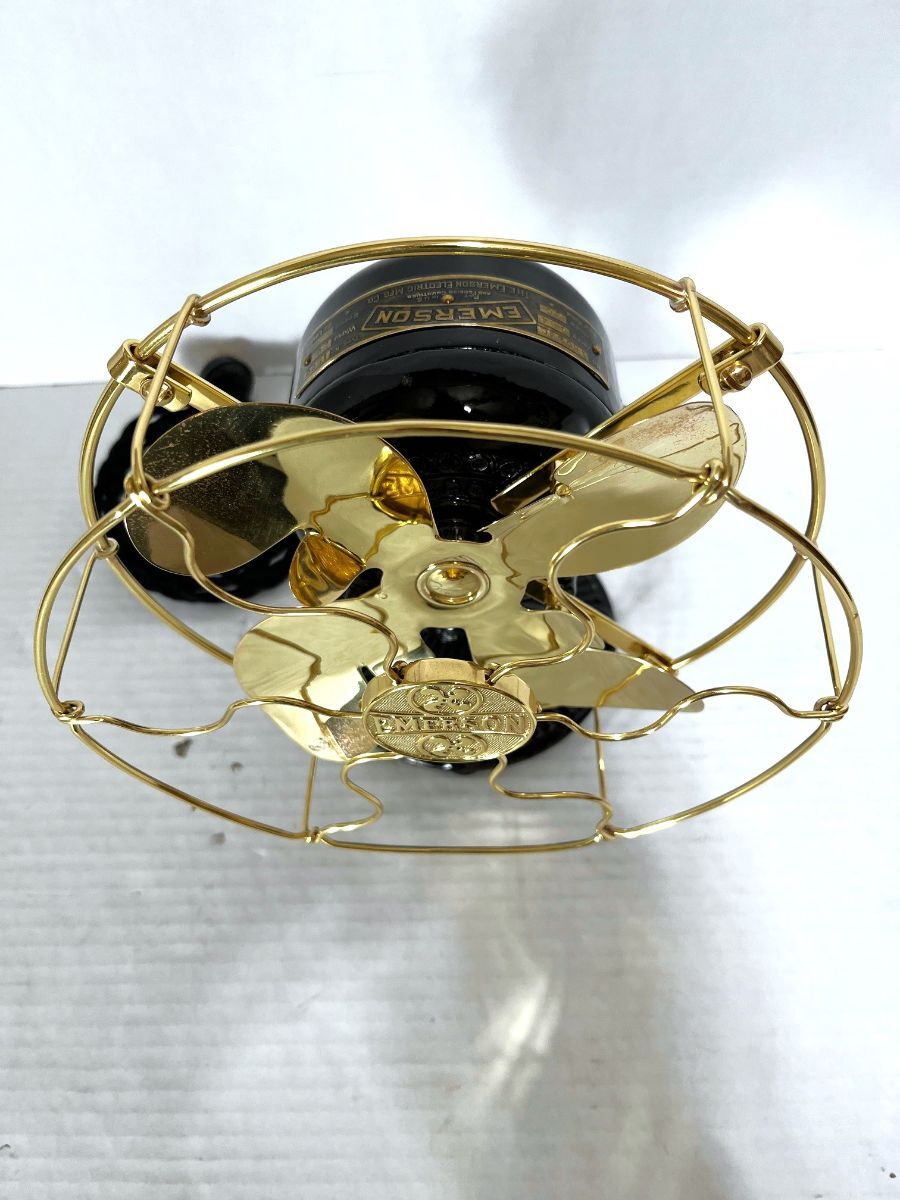
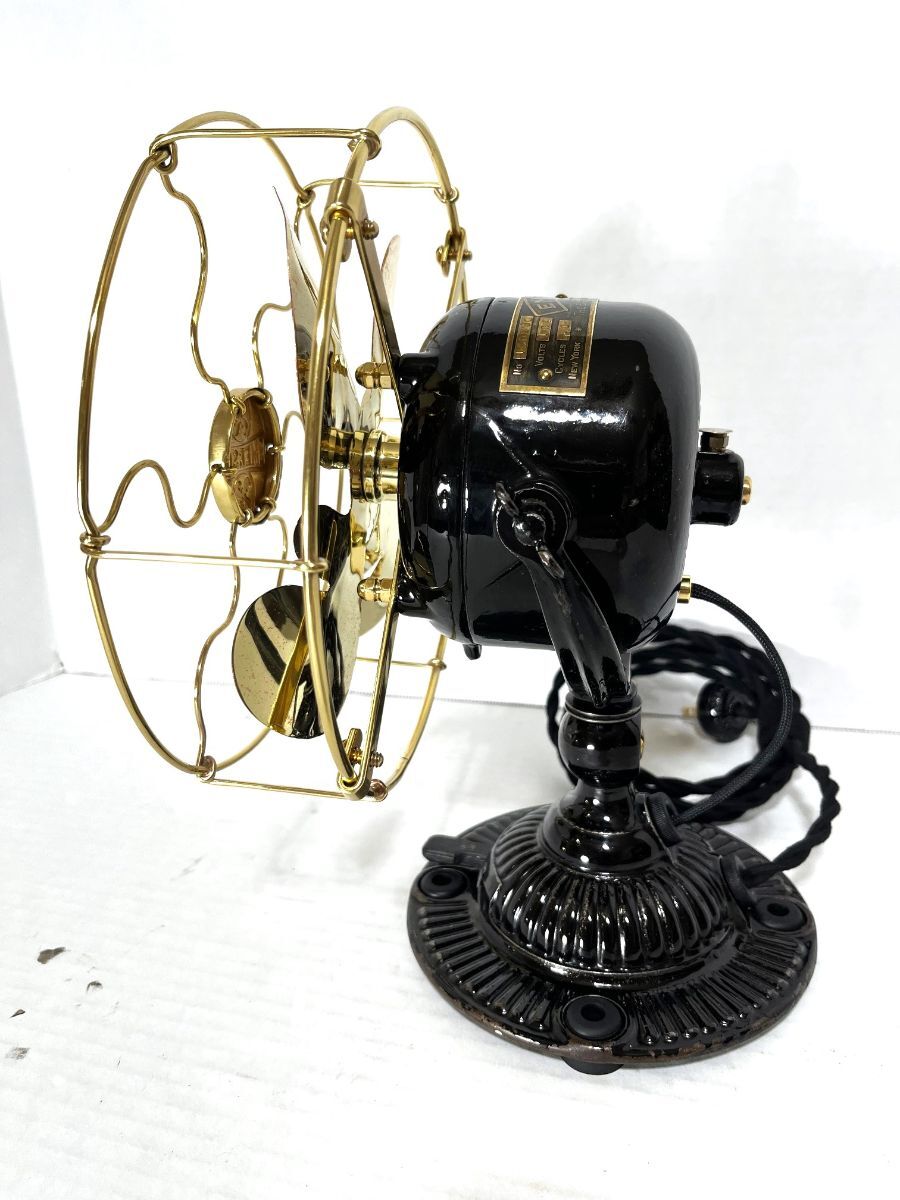
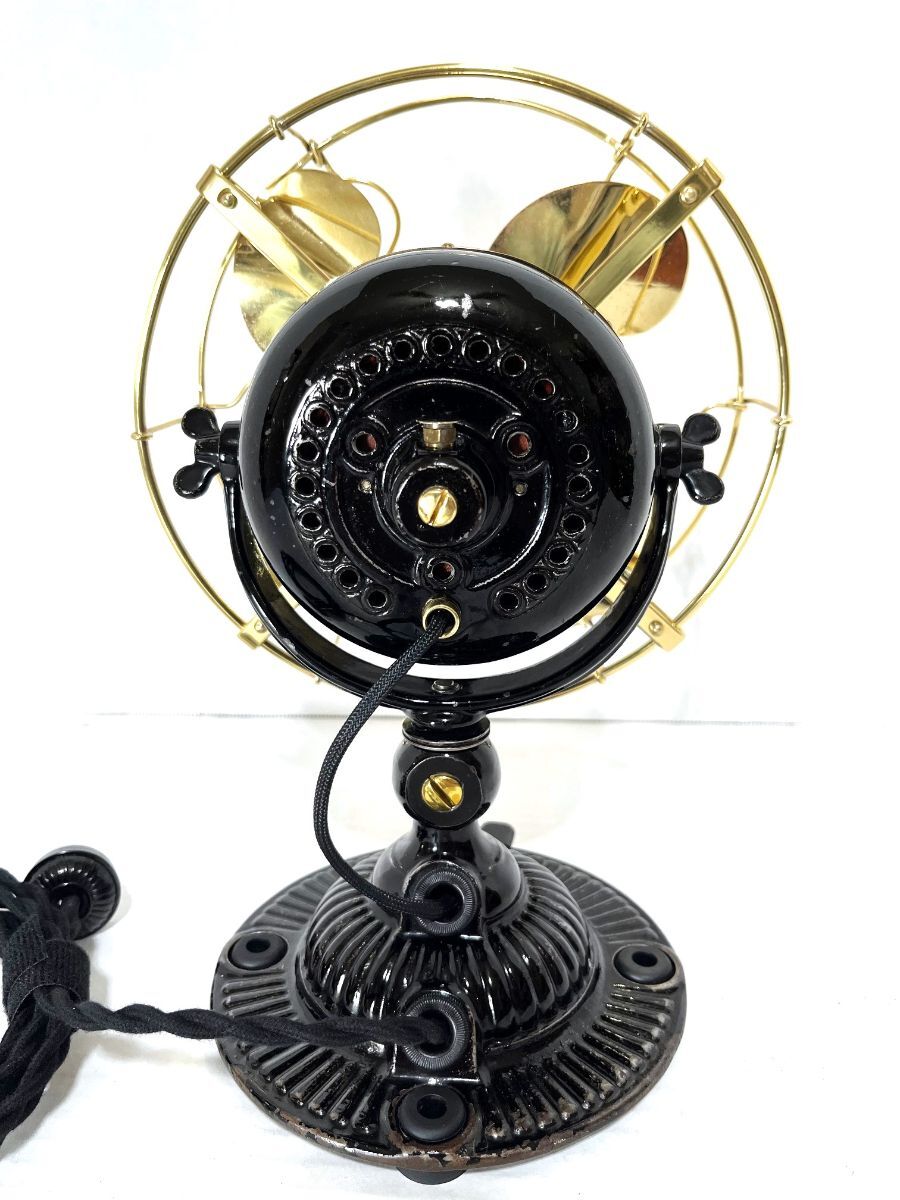
Test run to see if I can actually function on this computer ( with the help of my daughter Alexis) This is a combimation of rotor & motor case from 54648, stator from 17666, gearbox & cage from 54646, base from 16646, Blade by Jerry Bravi, Switch coil from Tom Newcity. Had this been a production fan, it would likely have been tagged a 54666. It is a beautiful & quiet runner and a great utilization of old emerson stumps & parts. Hoping to put together e " 52666 " at the workshop next month.
 17 points
 -
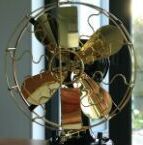
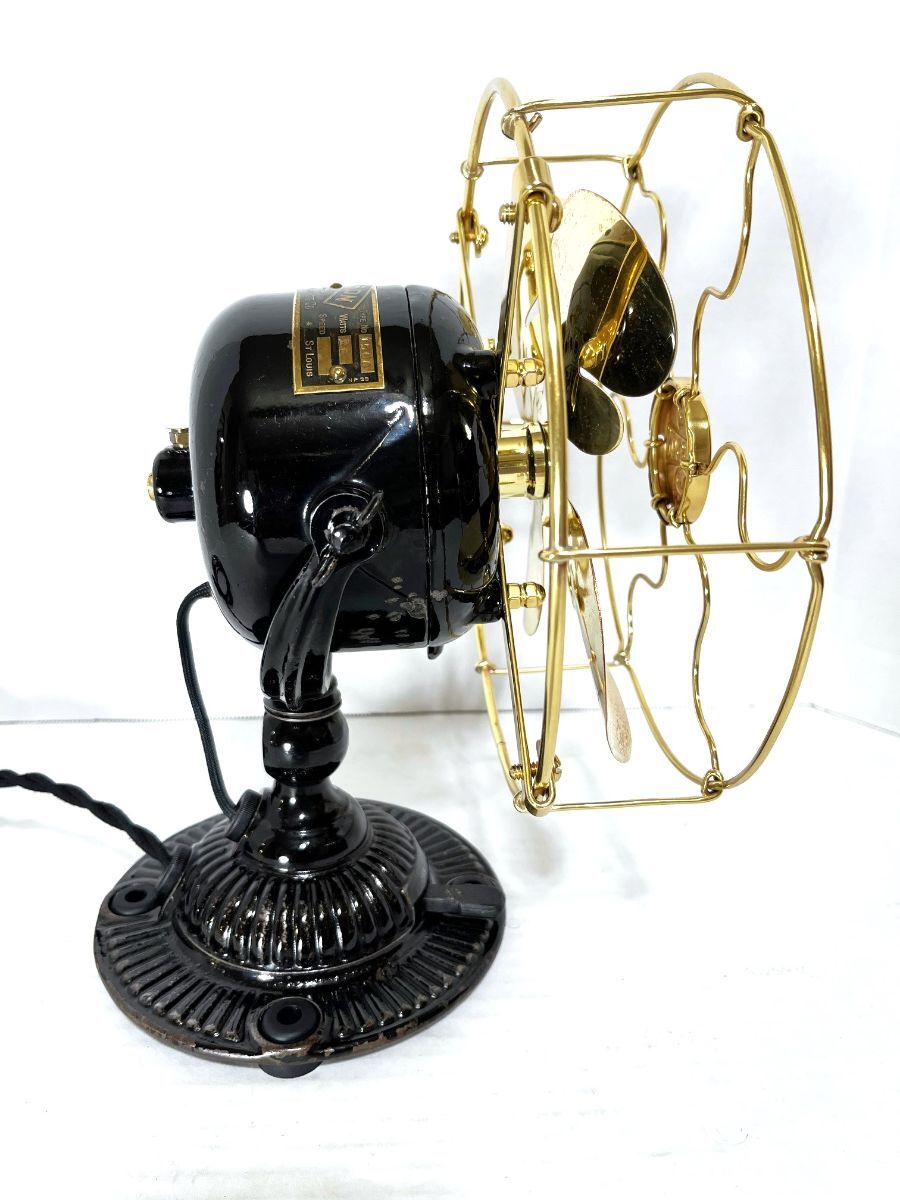
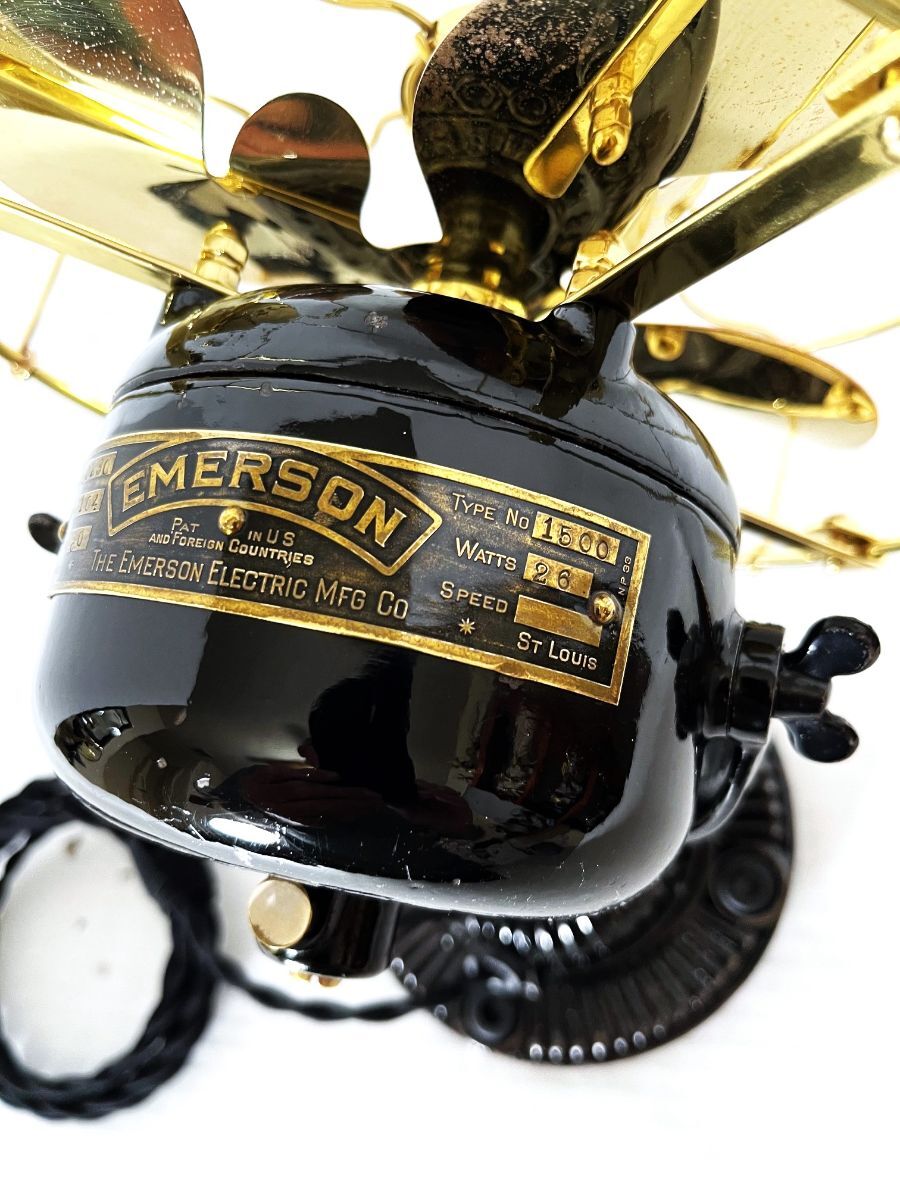
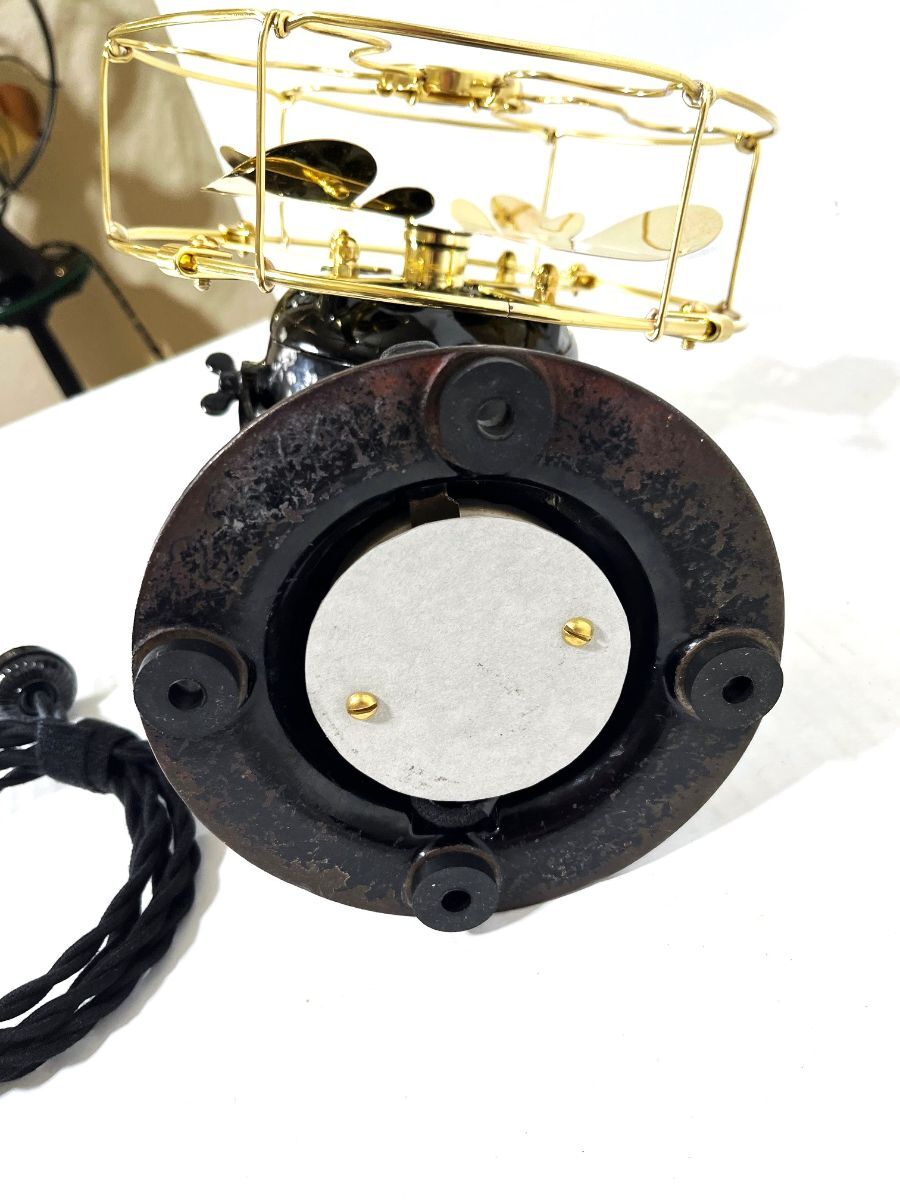
After all the gifts were opened my son in law had to run home and get something. He returned with a box and I was told to close my eyes. I was speechless when I opened the box. Donna gave me an Emerson 1500 which would have been more than I imagined BUT, there was also a Western Electric bipolar in the box. I couldn’t be happier and more mad at the same time. She shouldn’t have spent that kind of money on me but I do appreciate it.
15 points
-
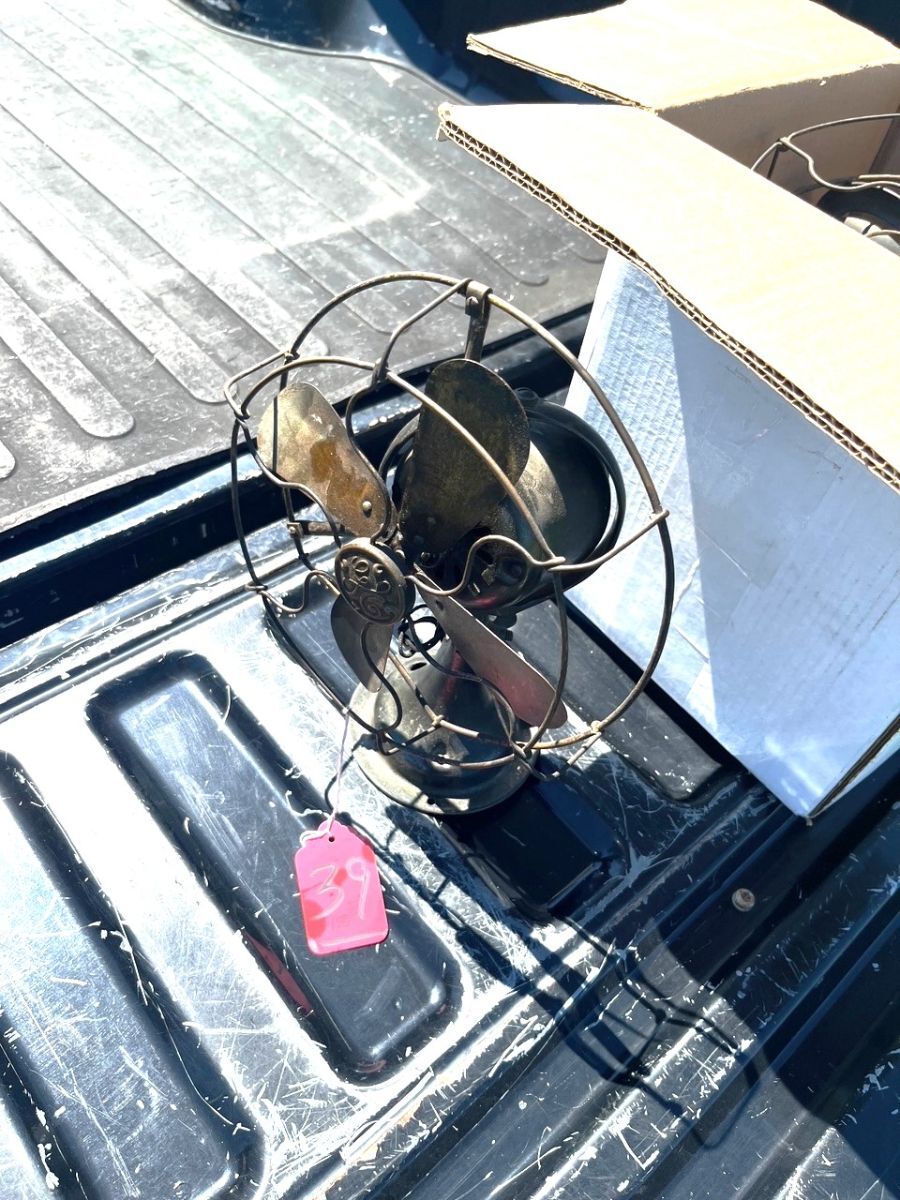
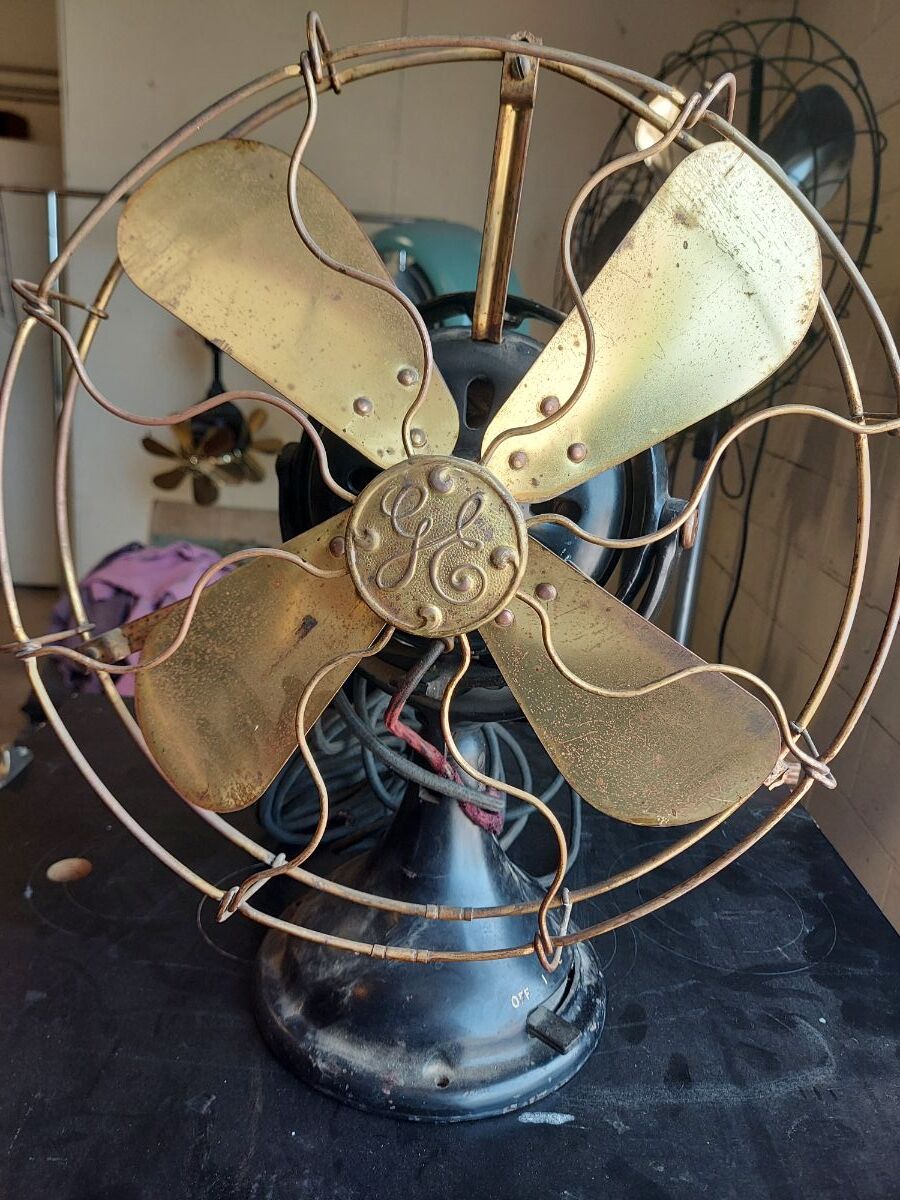
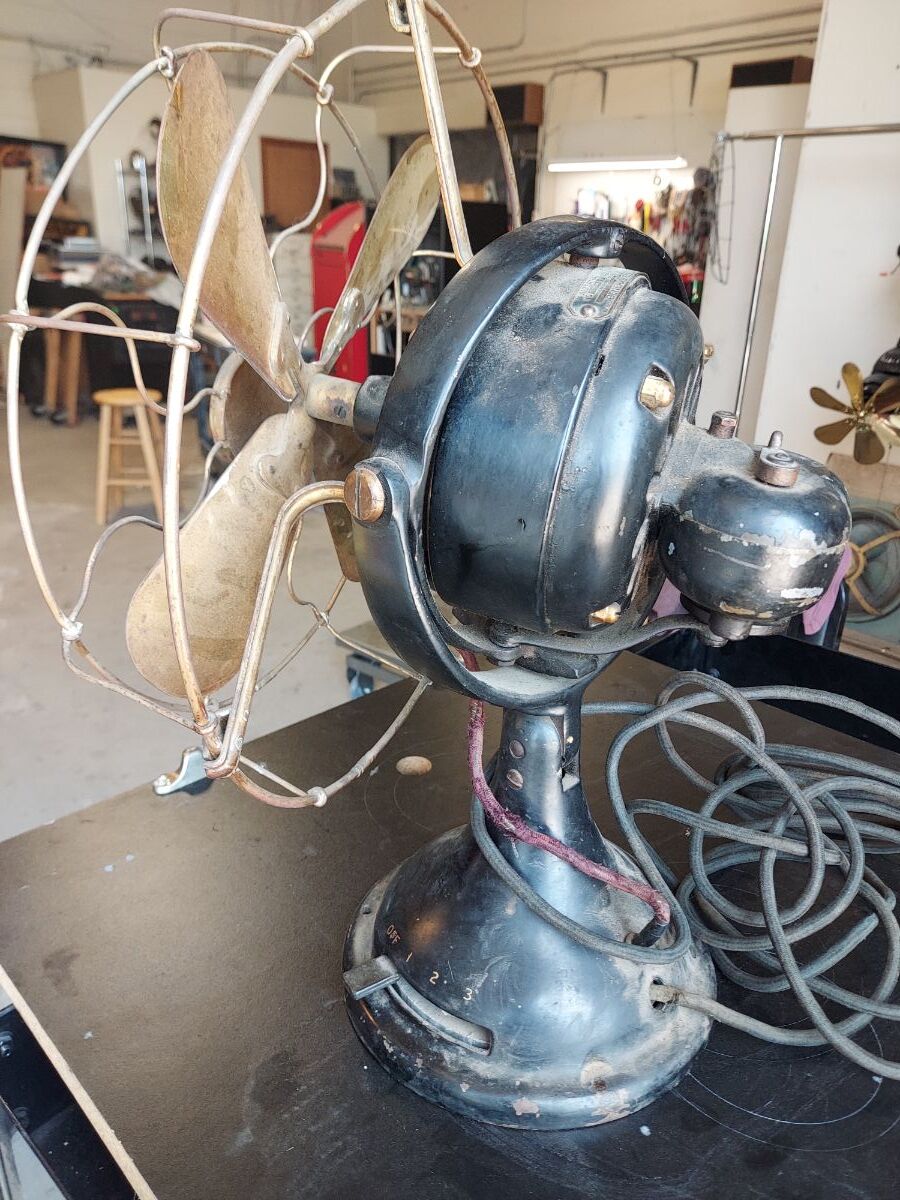
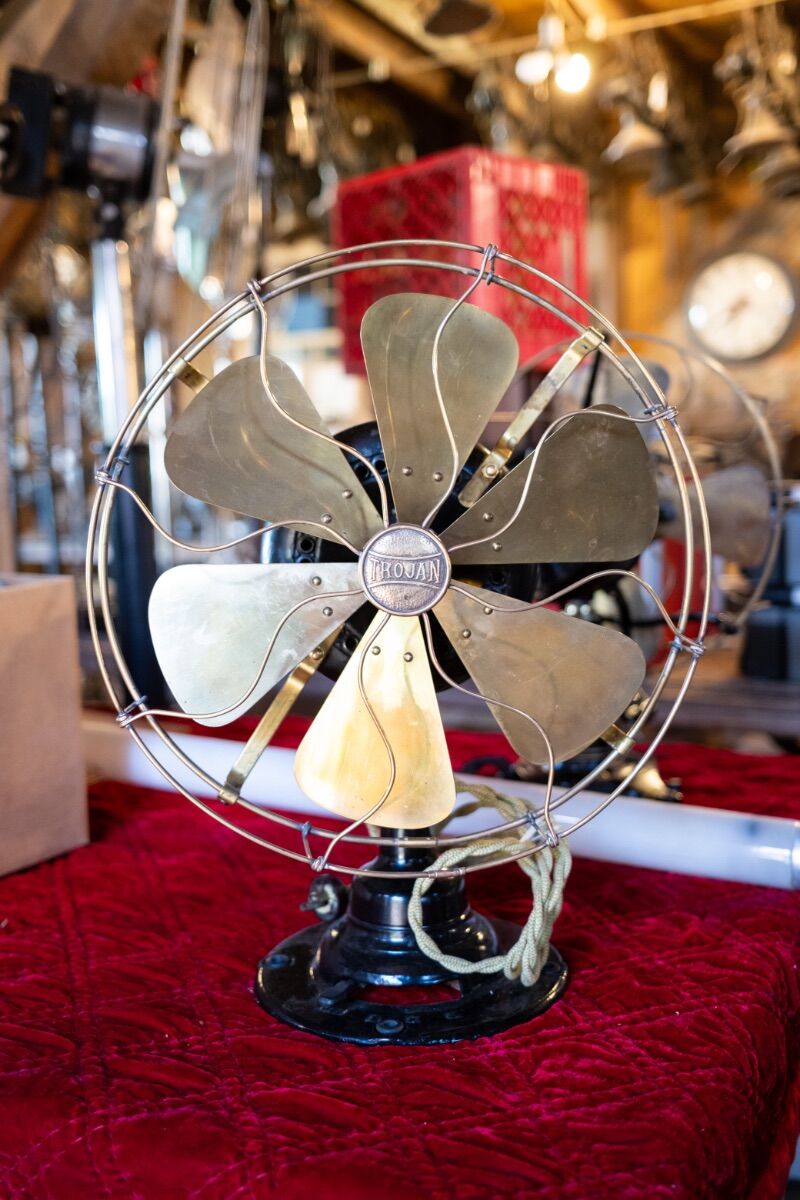
I was experiencing a little sellers remorse after Fan Fair. I sold a very nice 16” tank and a couple tank stumps that were taking up too much space. Fortunately tanks tend to accumulate. I got this Saturday at a live auction, no internet bidding or buyers premium. It’s in really nice shape and runs smooth on both speeds. I like the blade and badge patina.
15 points
-
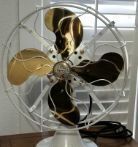
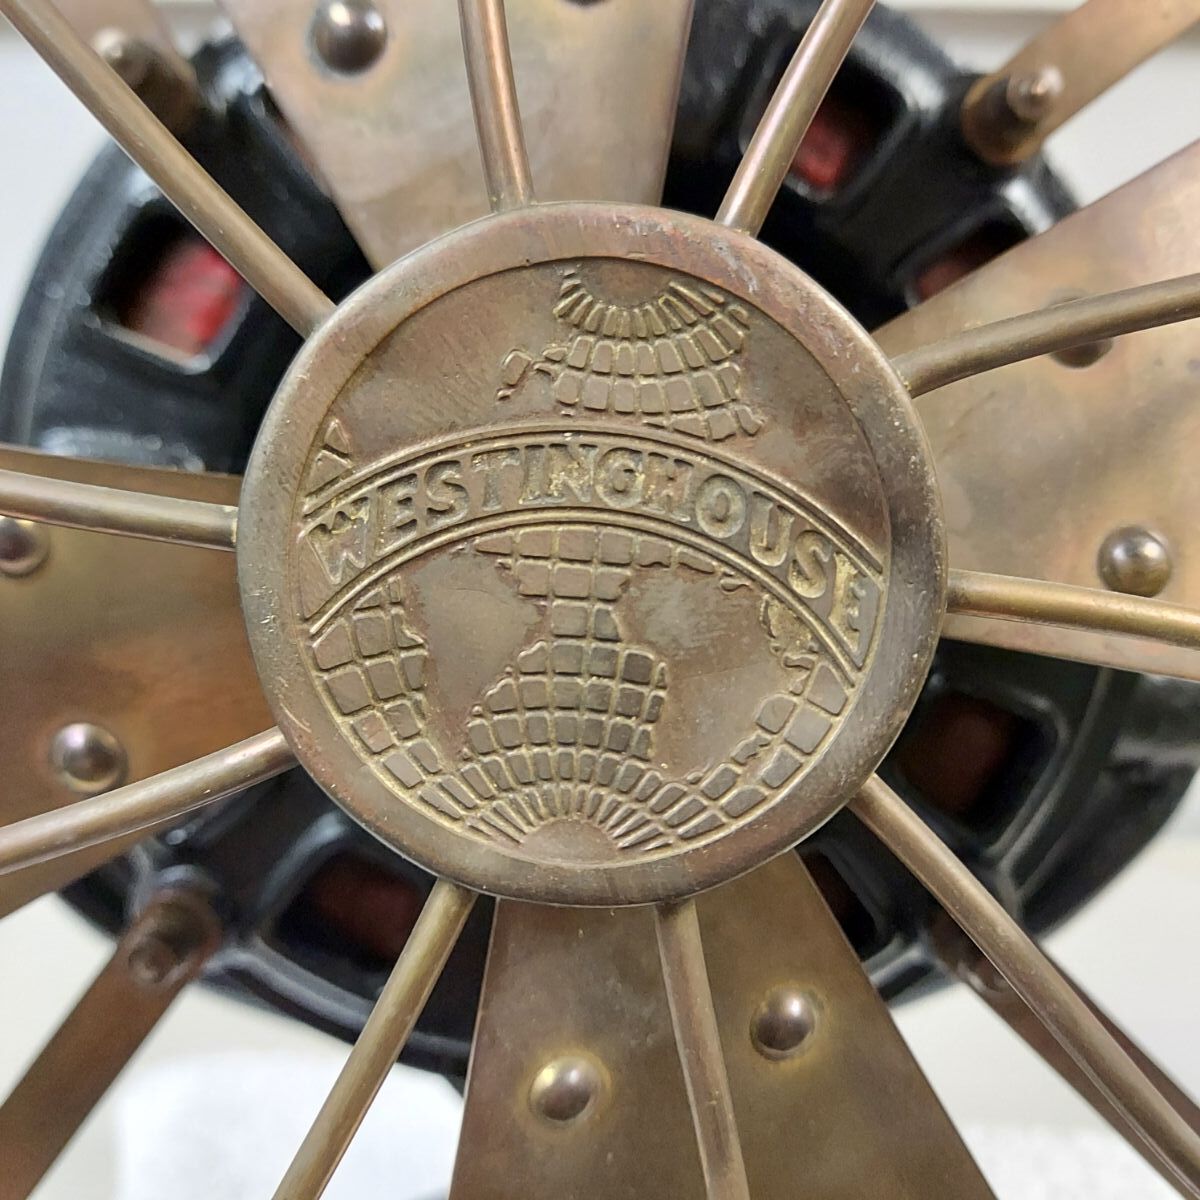
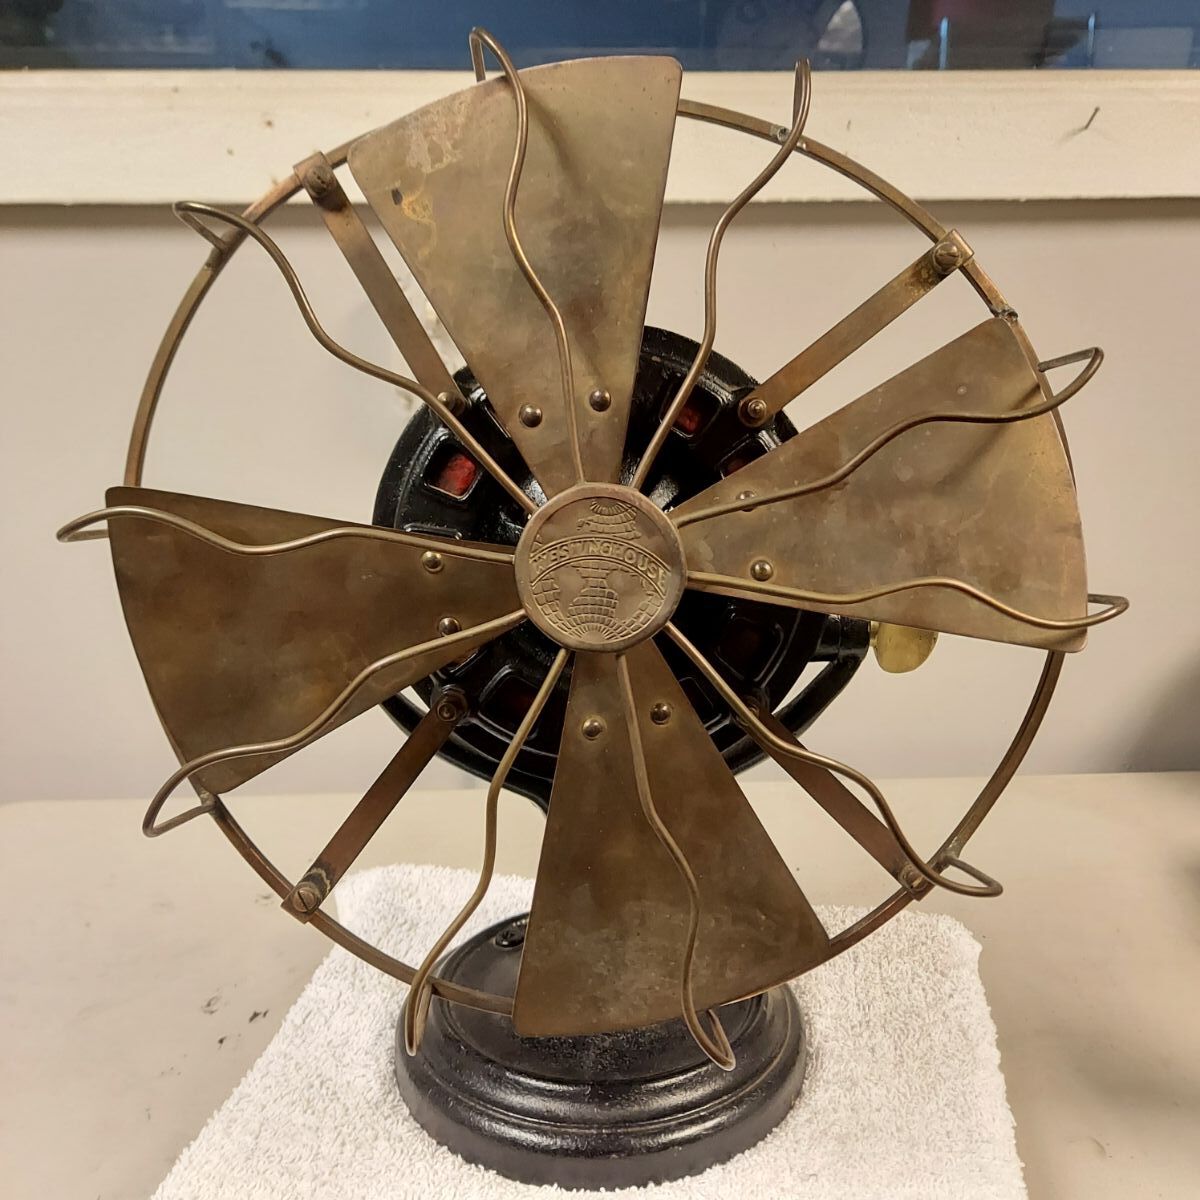
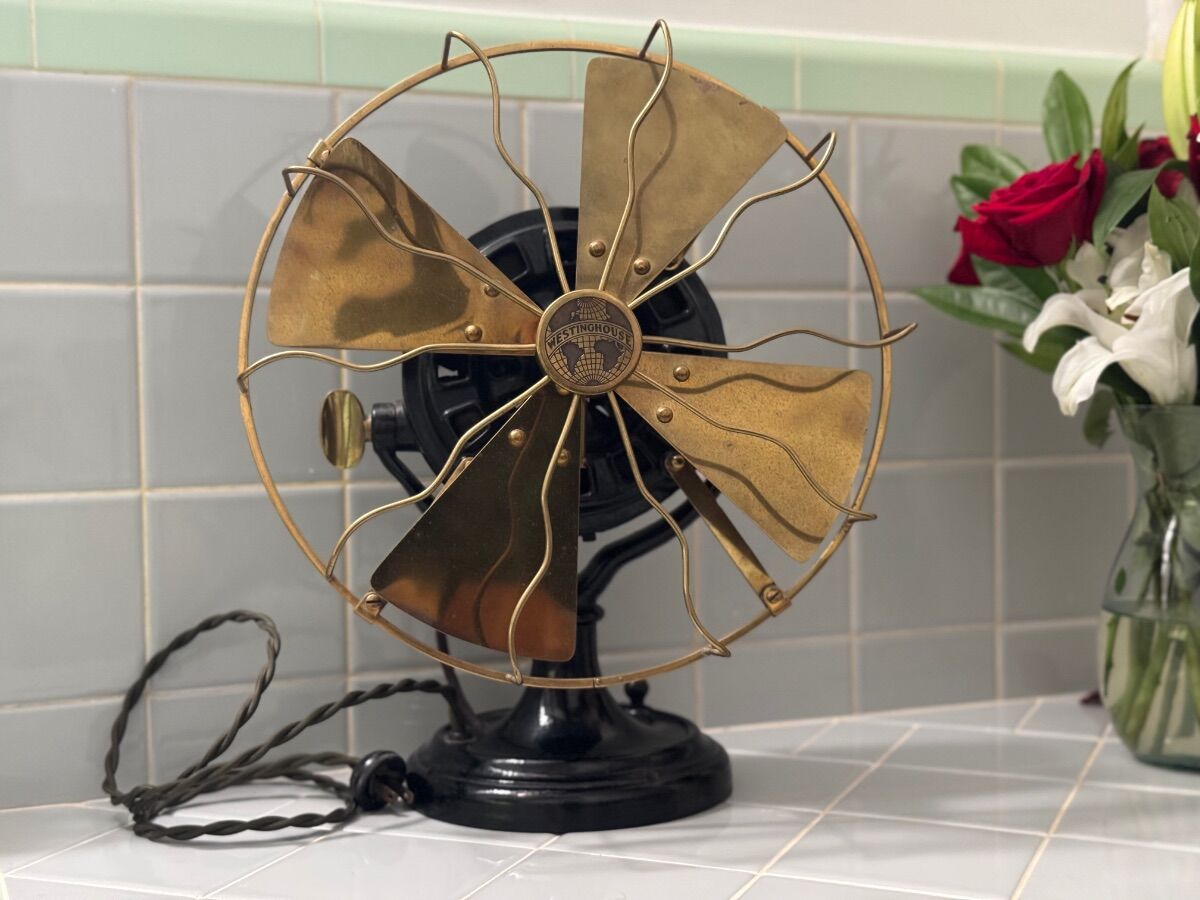
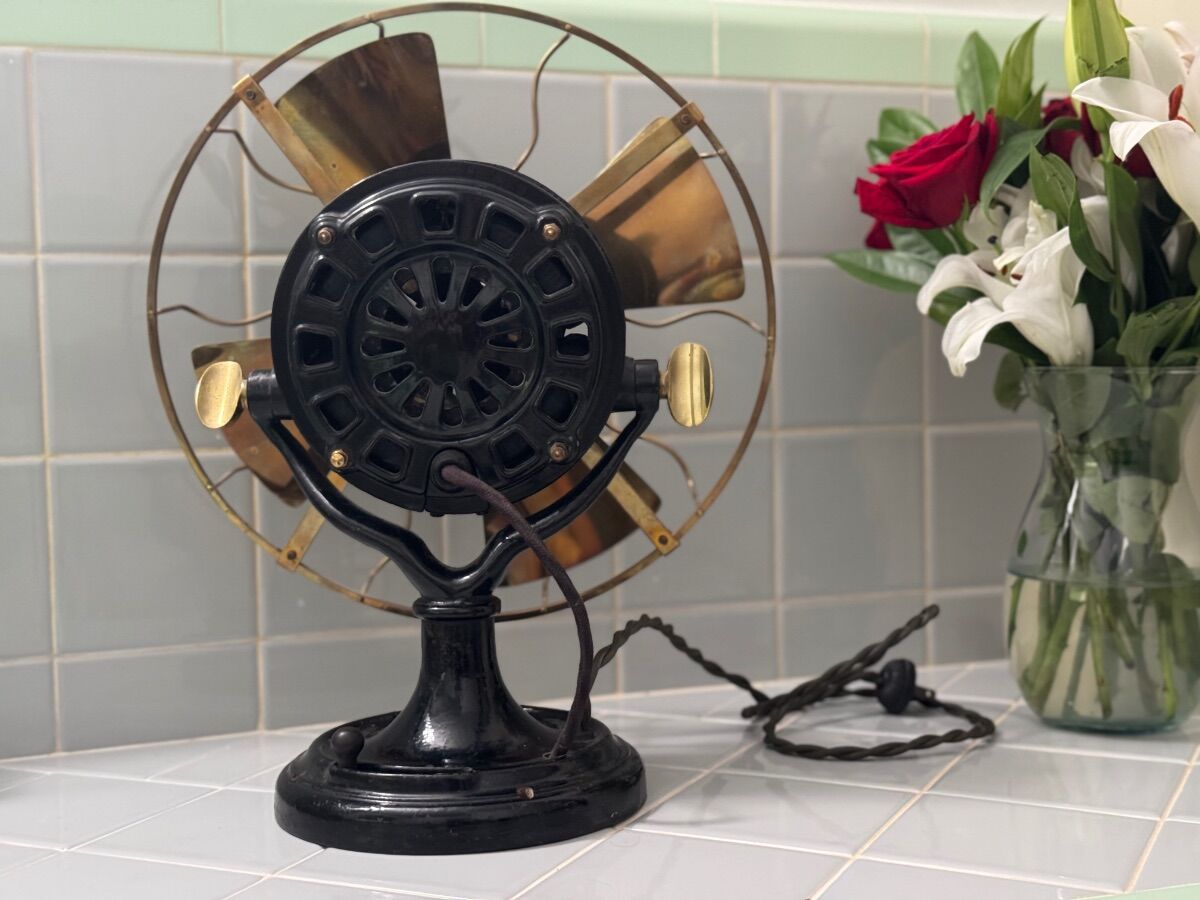
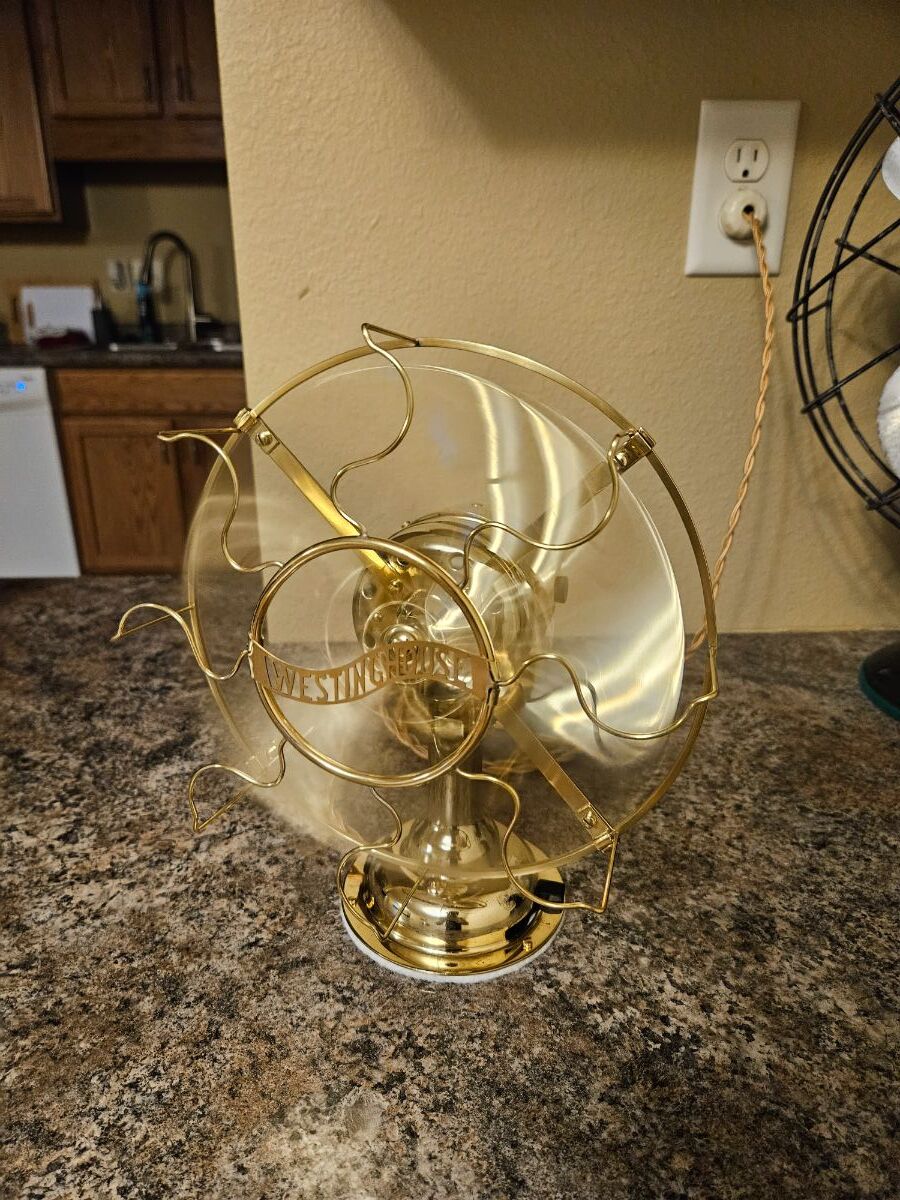
Hi fan friends, I brought this Westinghouse Pancake home from Harrison, Arkansas this past weekend. I’m over the moon. Beautiful original paint and she runs like a top. The flowers were bought just before I got home to distract my wife from the car full of fans that followed me home. It worked hehe. Jack
14 points
-
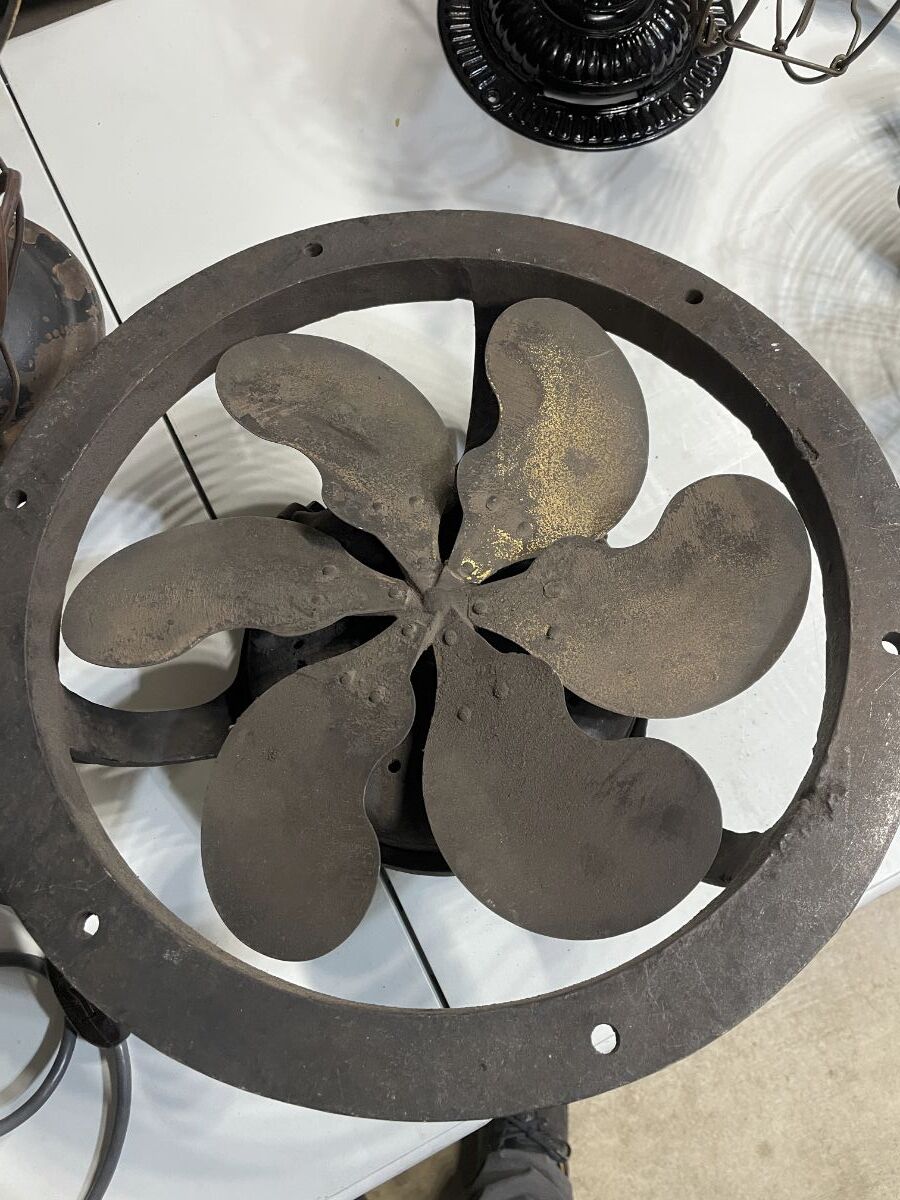
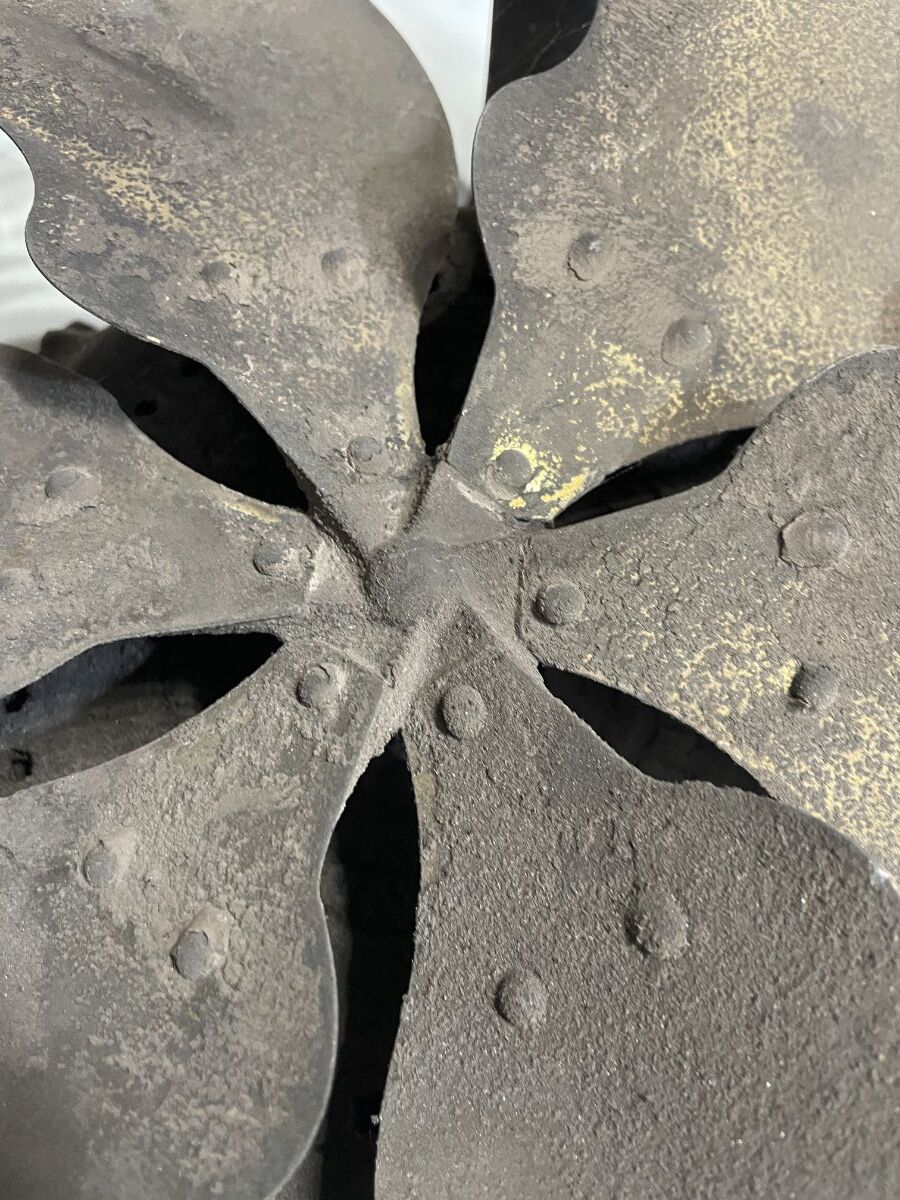
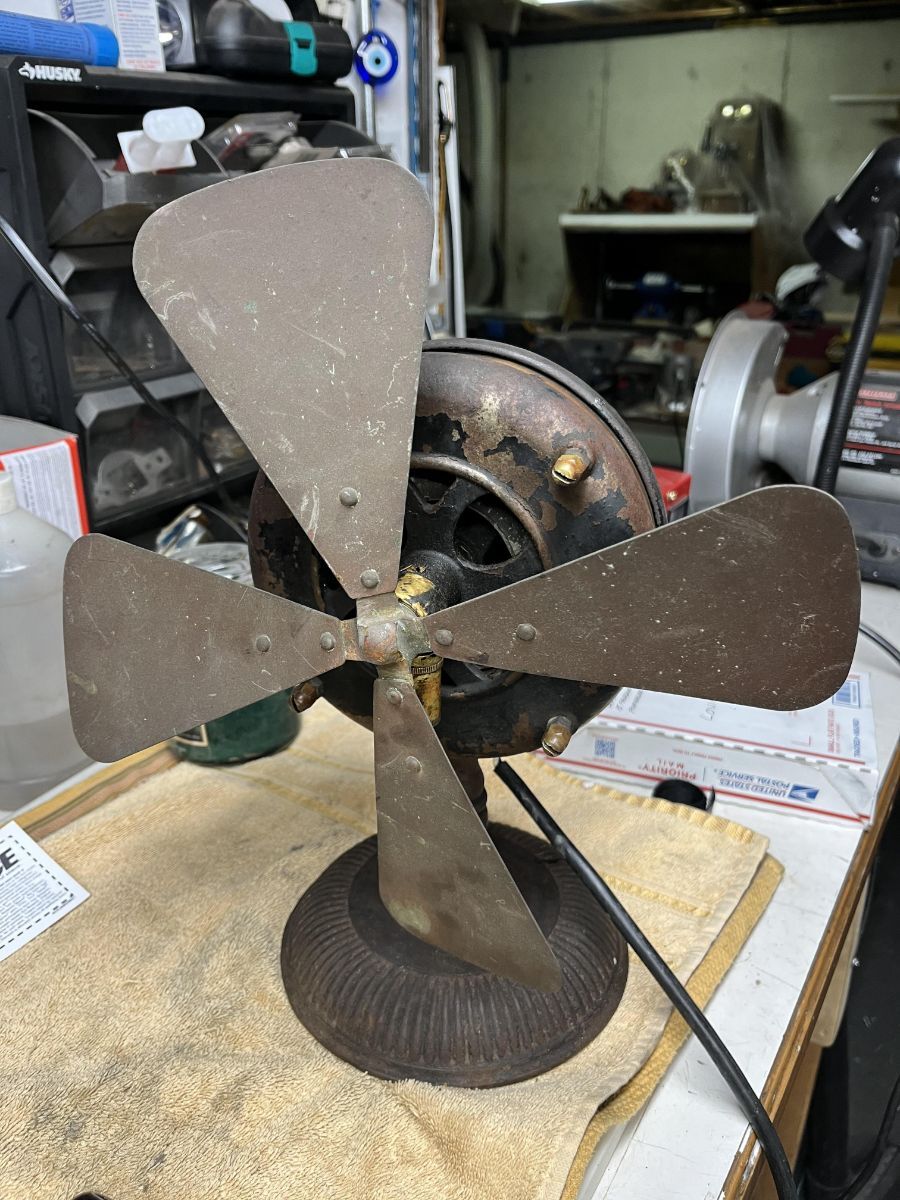
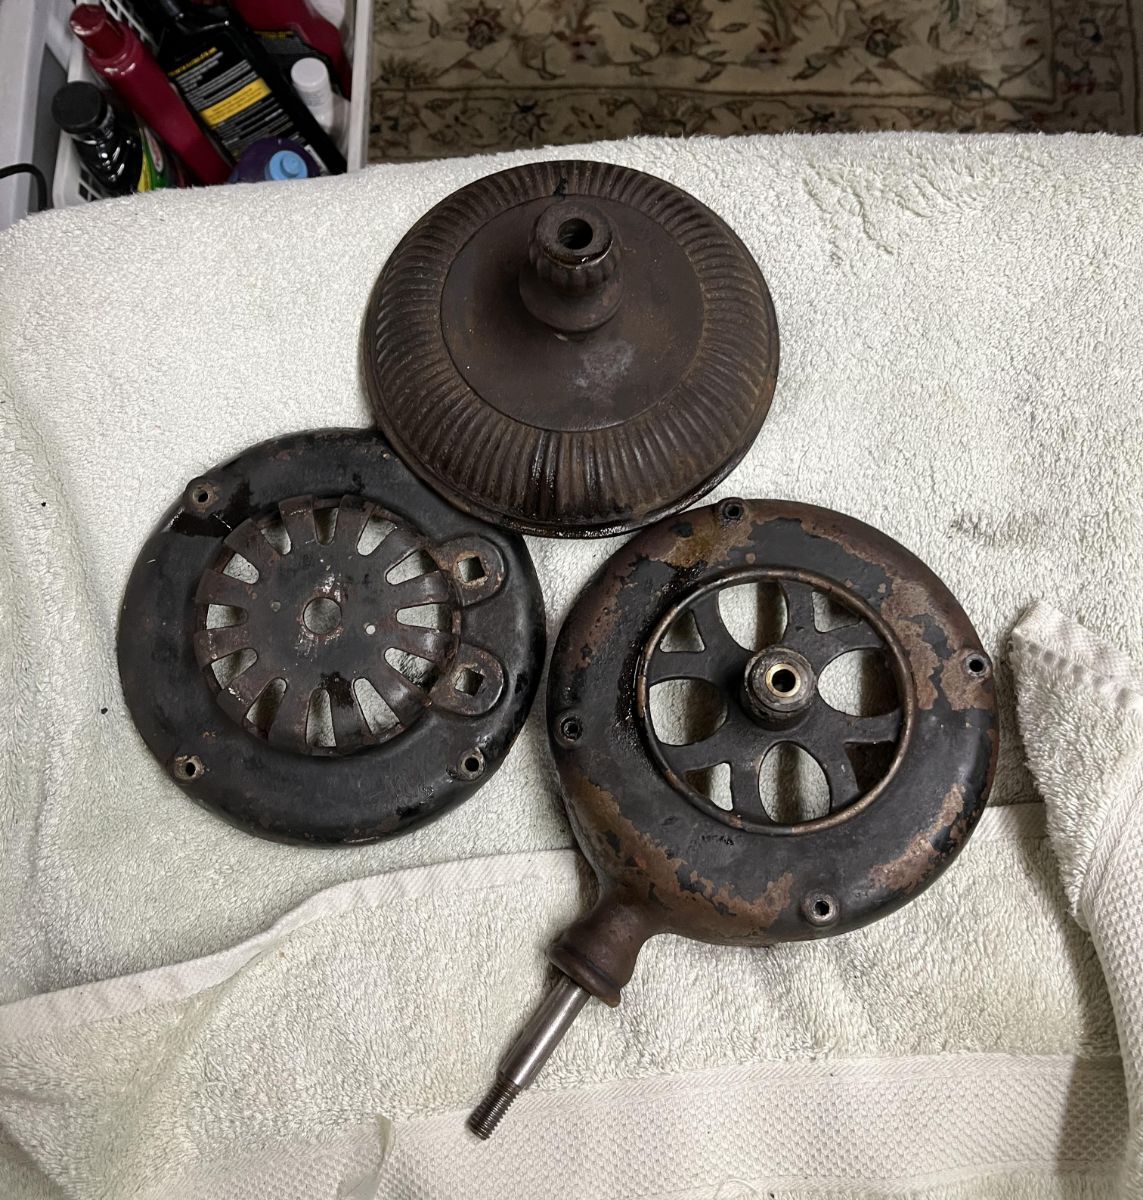
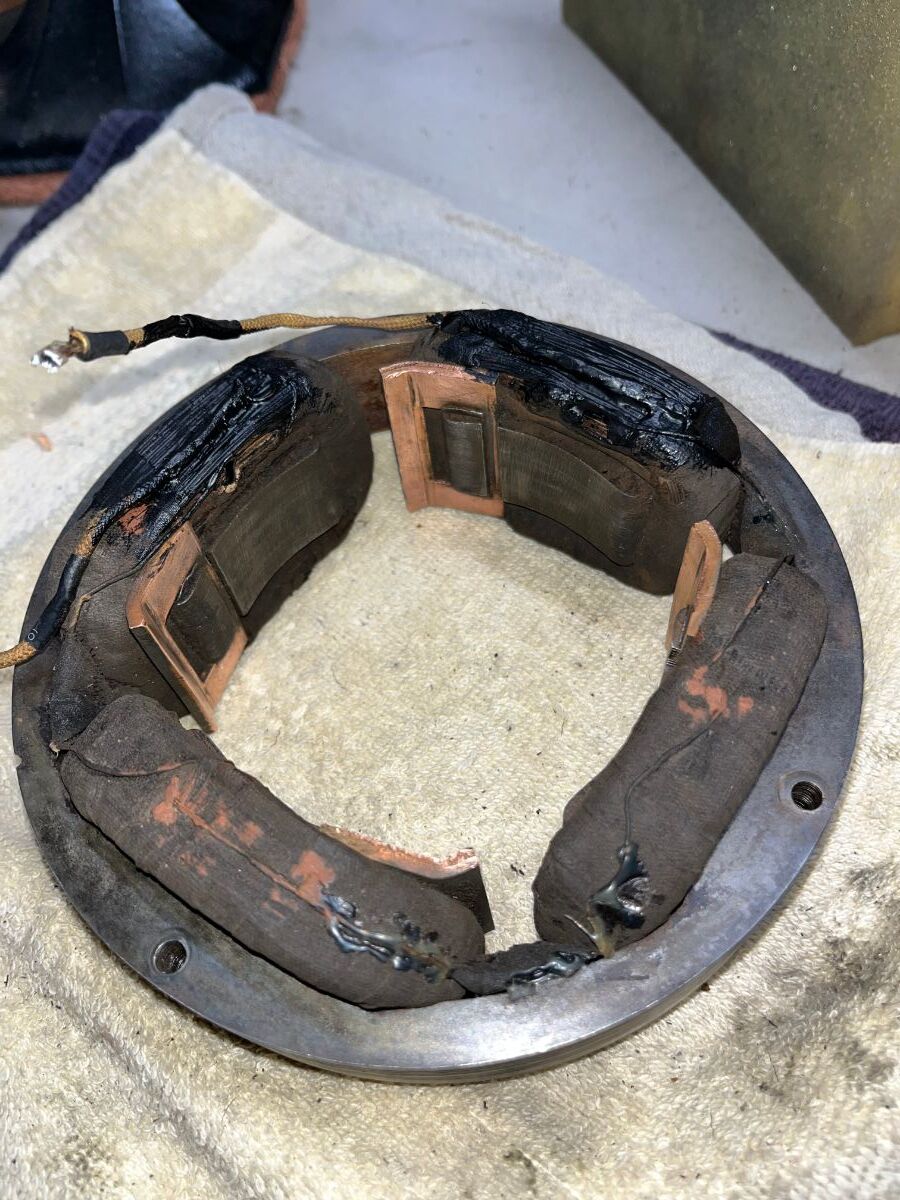
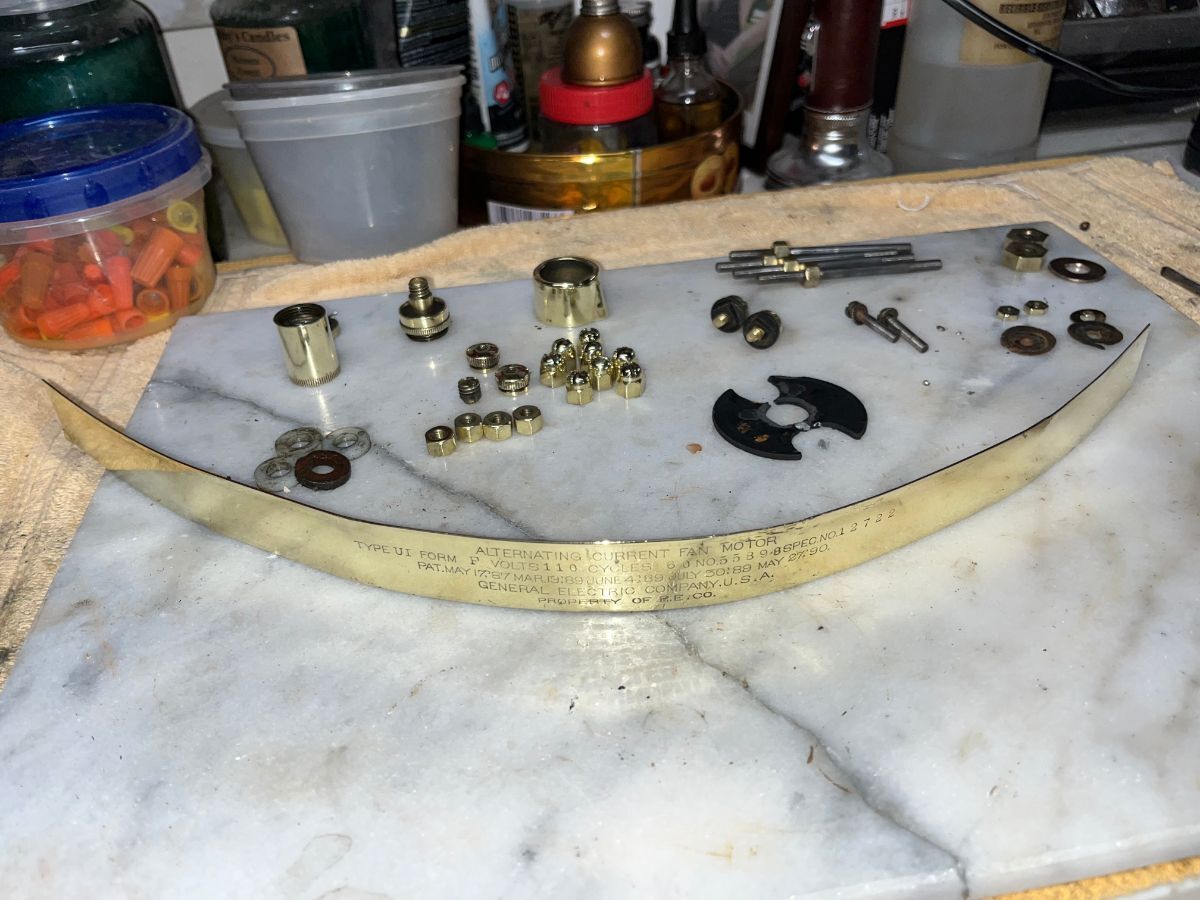
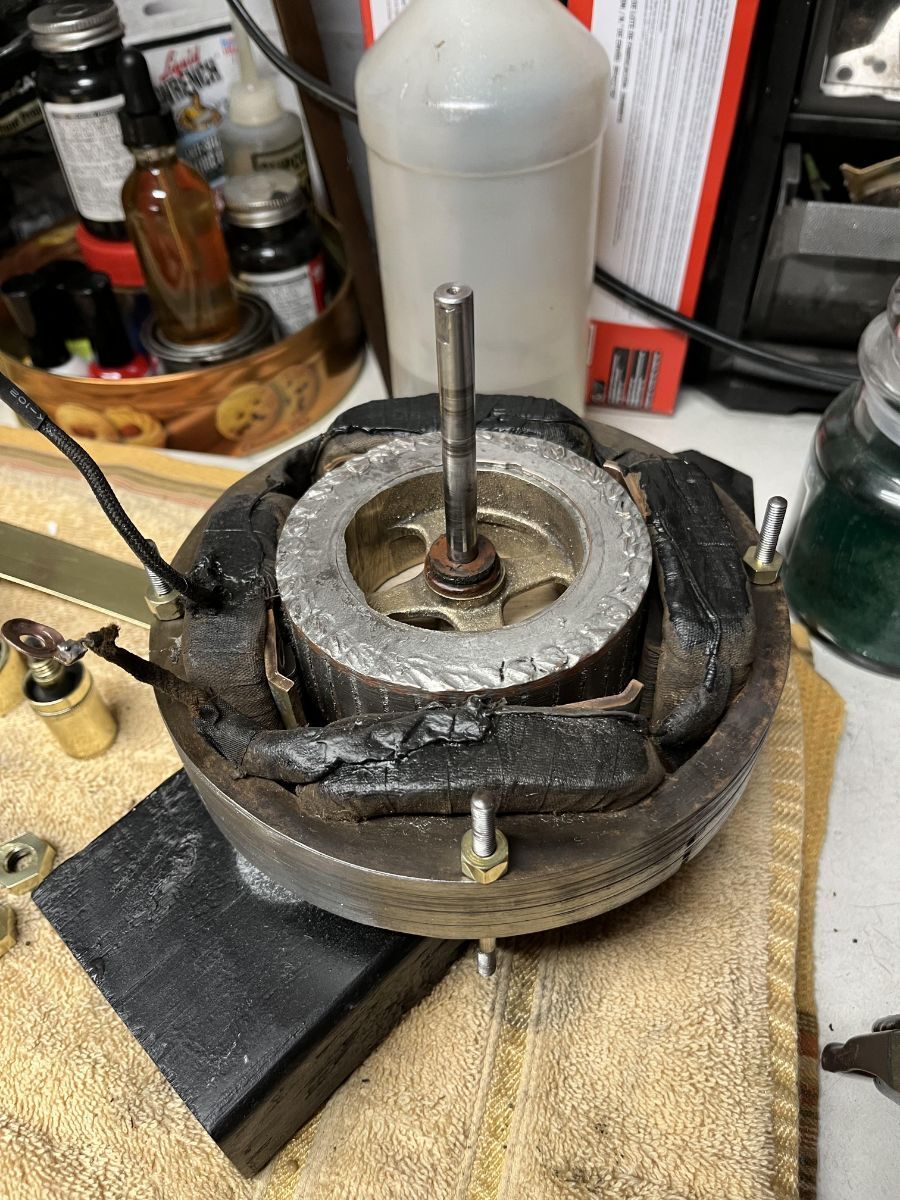
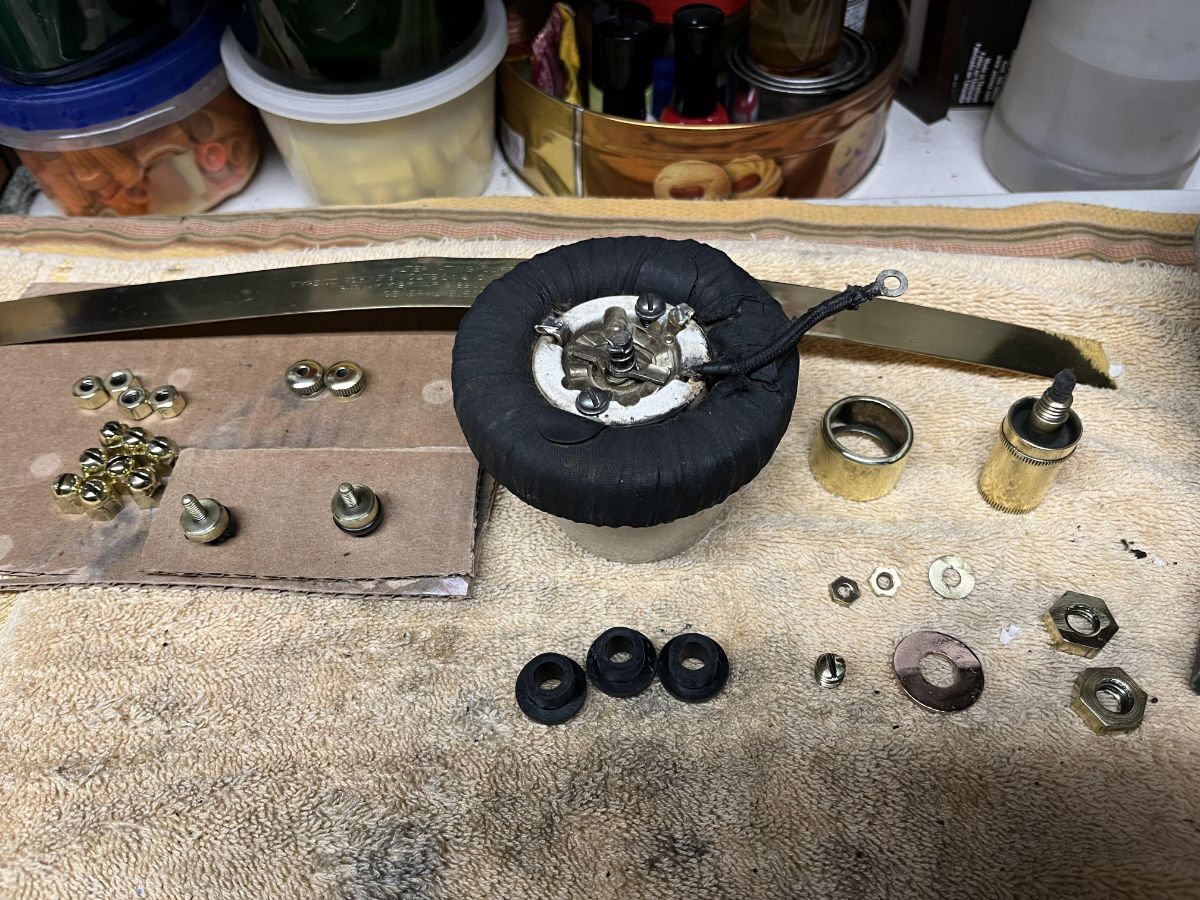
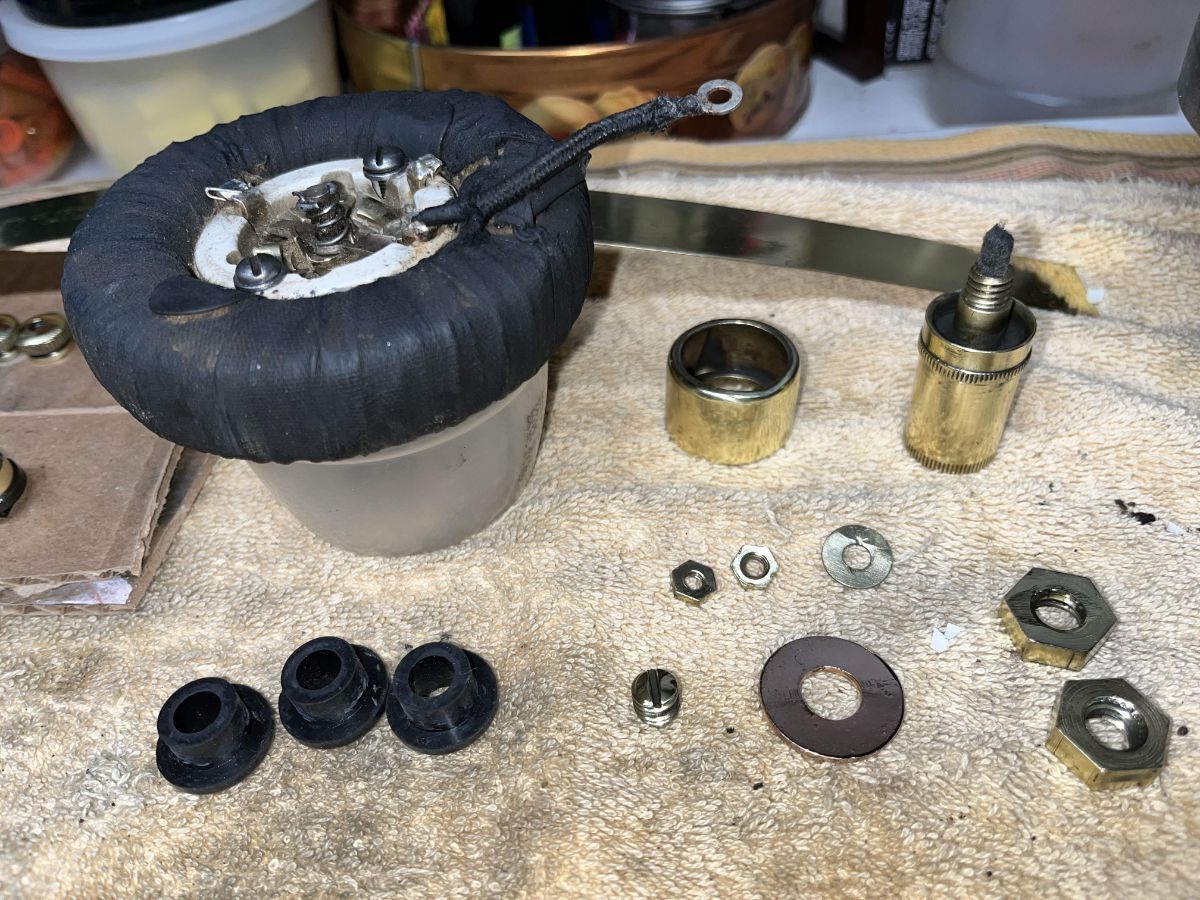
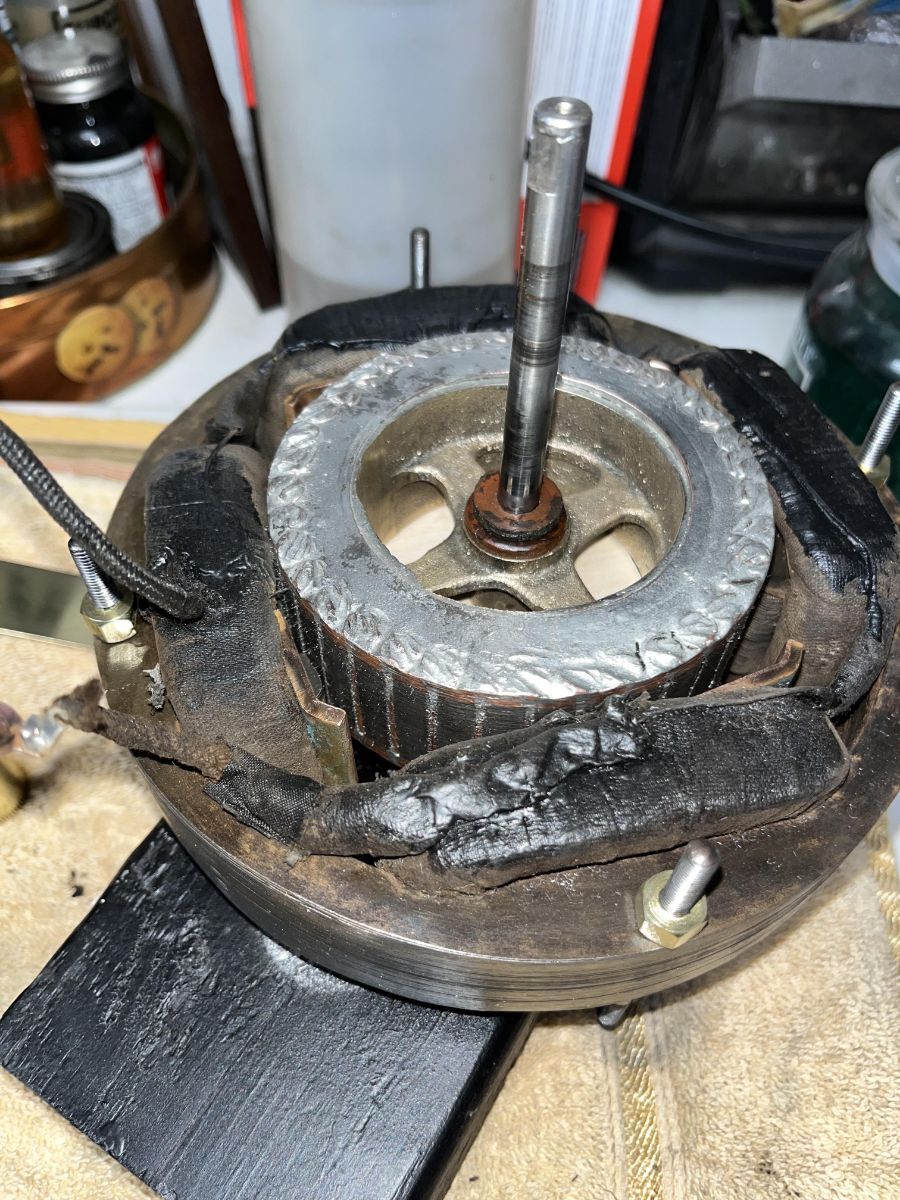
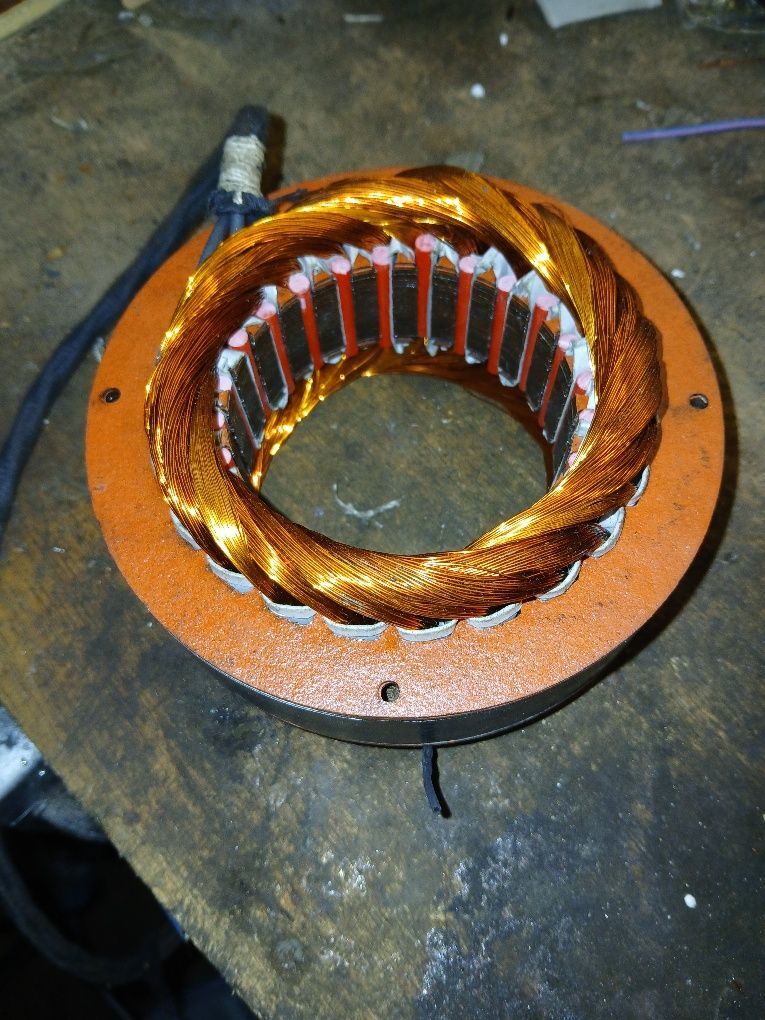
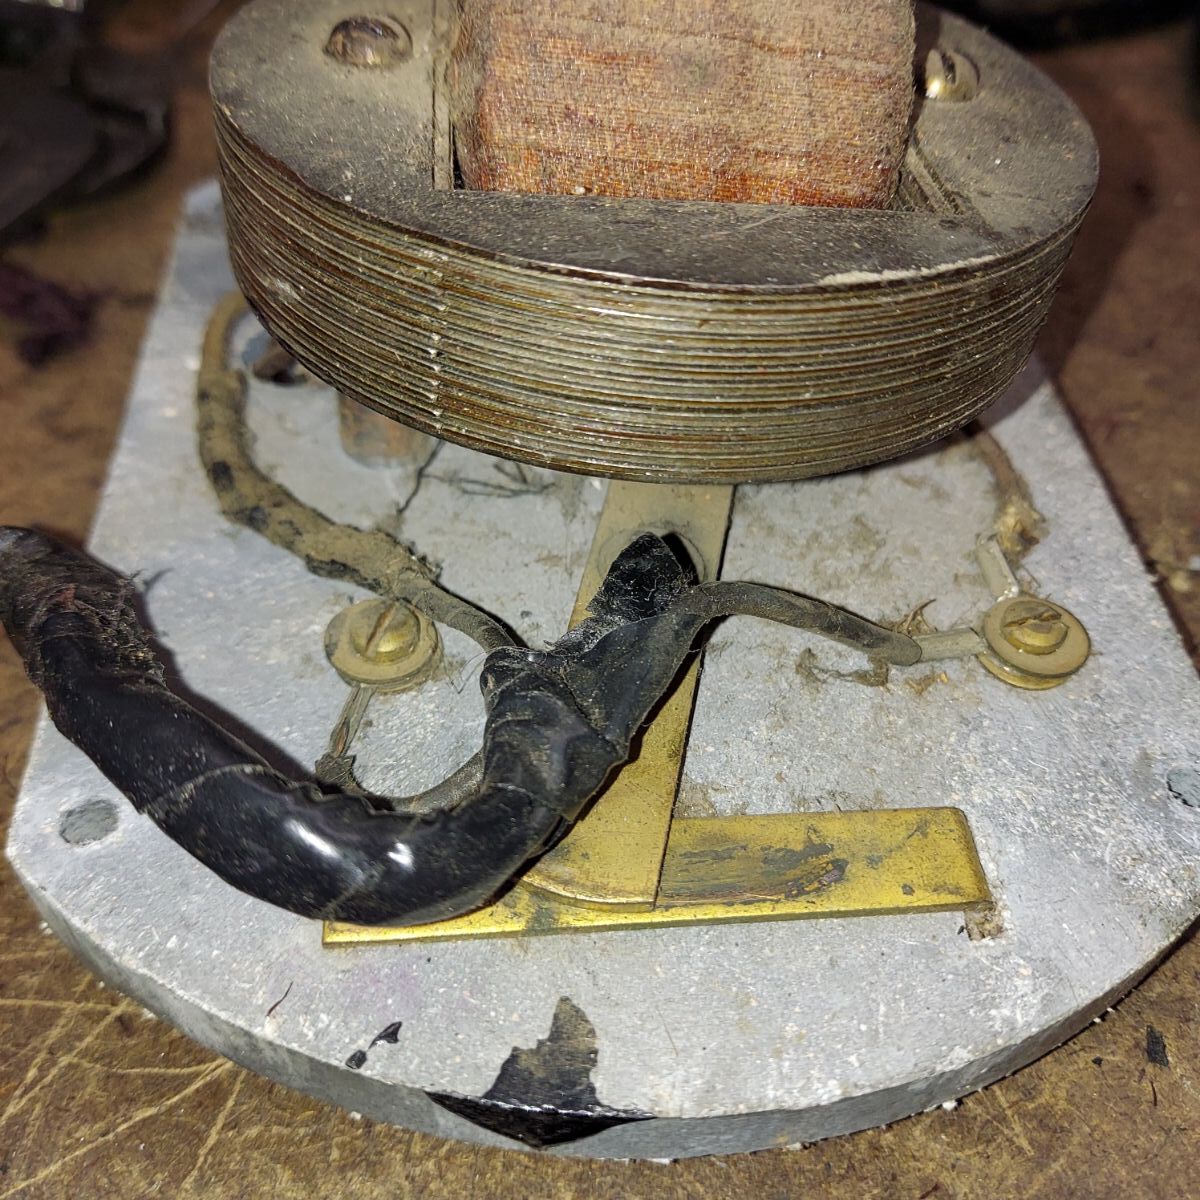
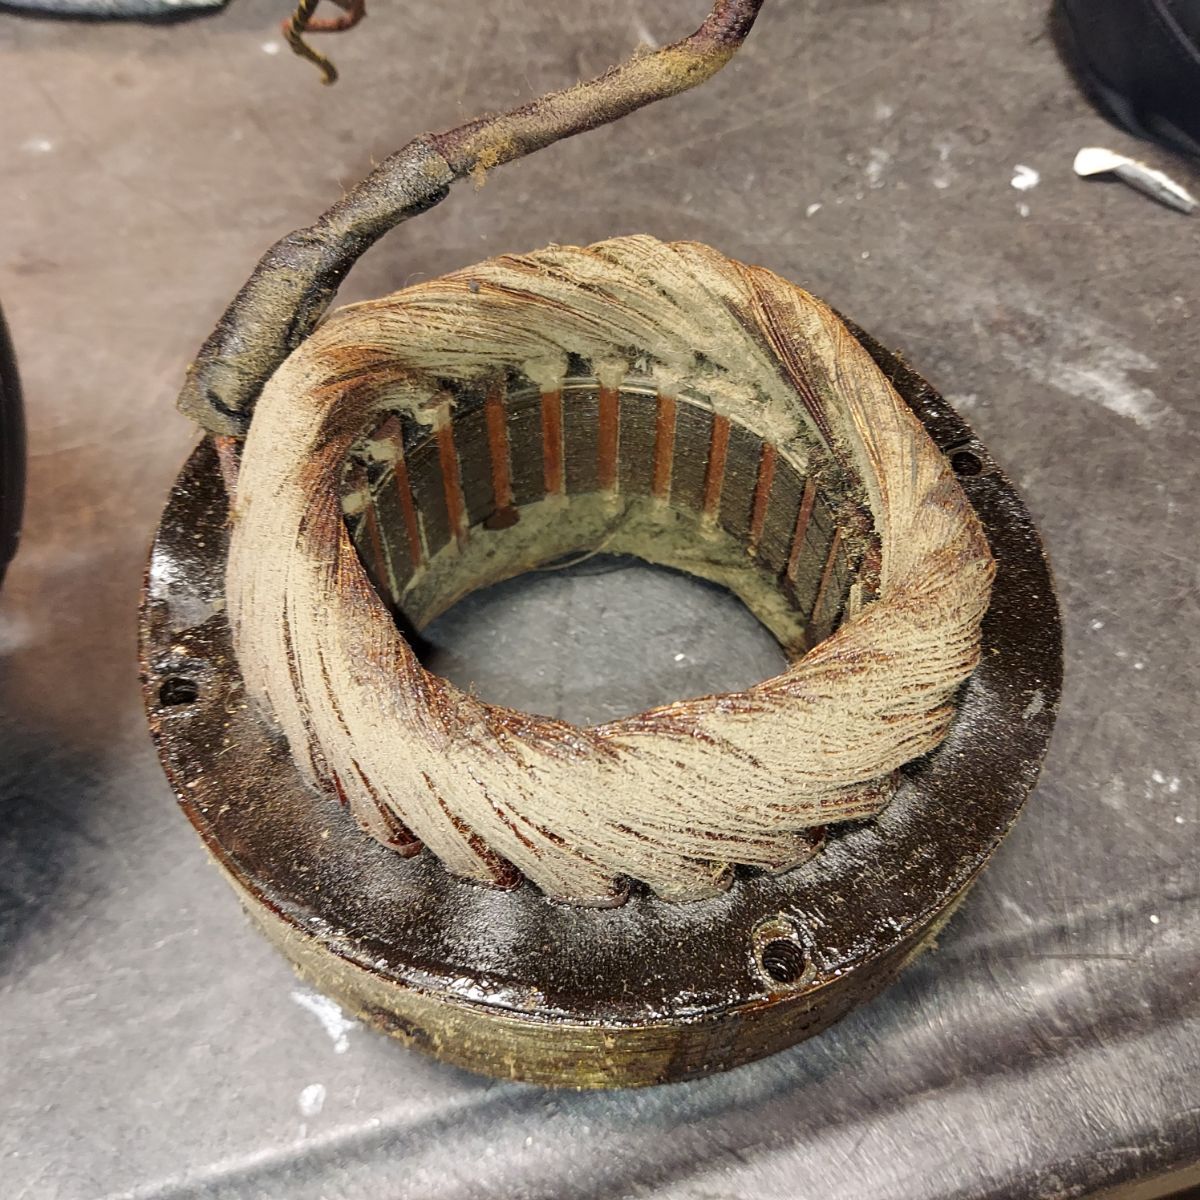
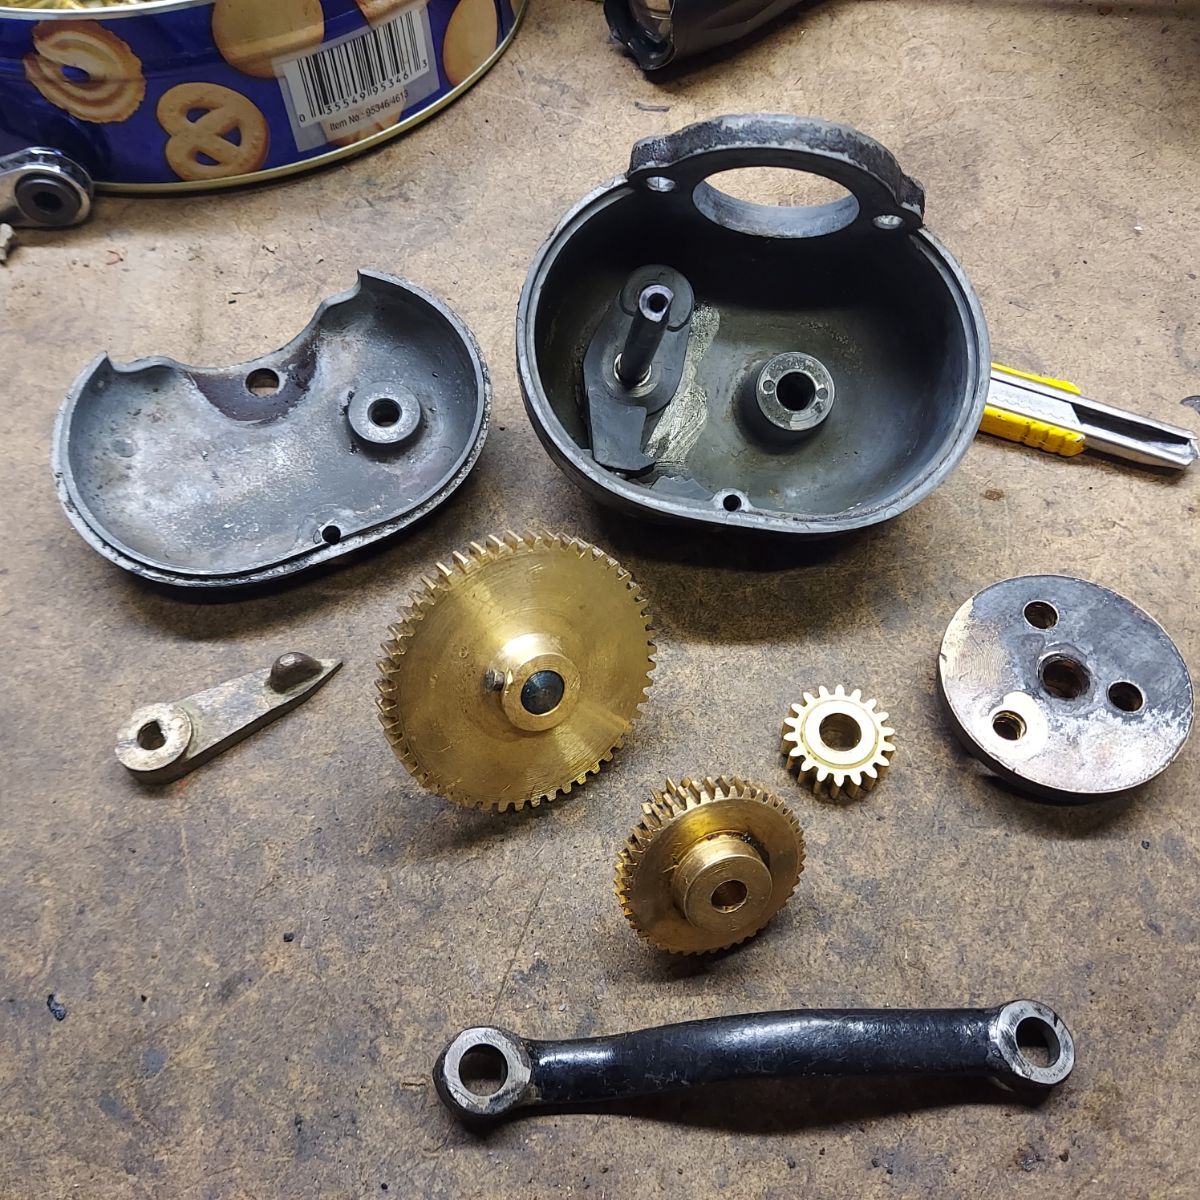
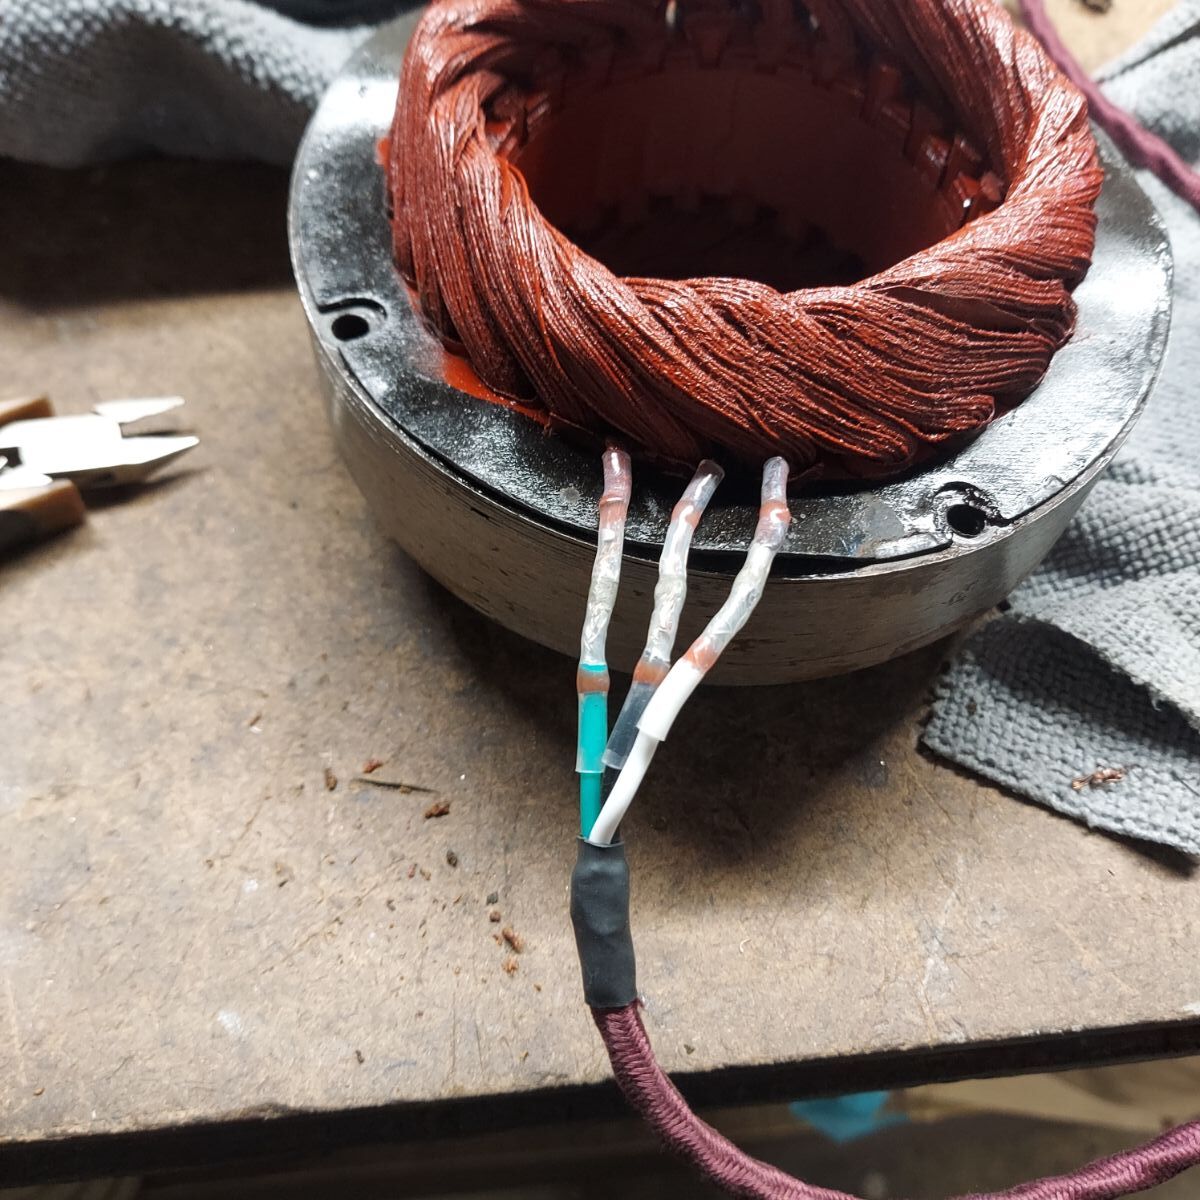
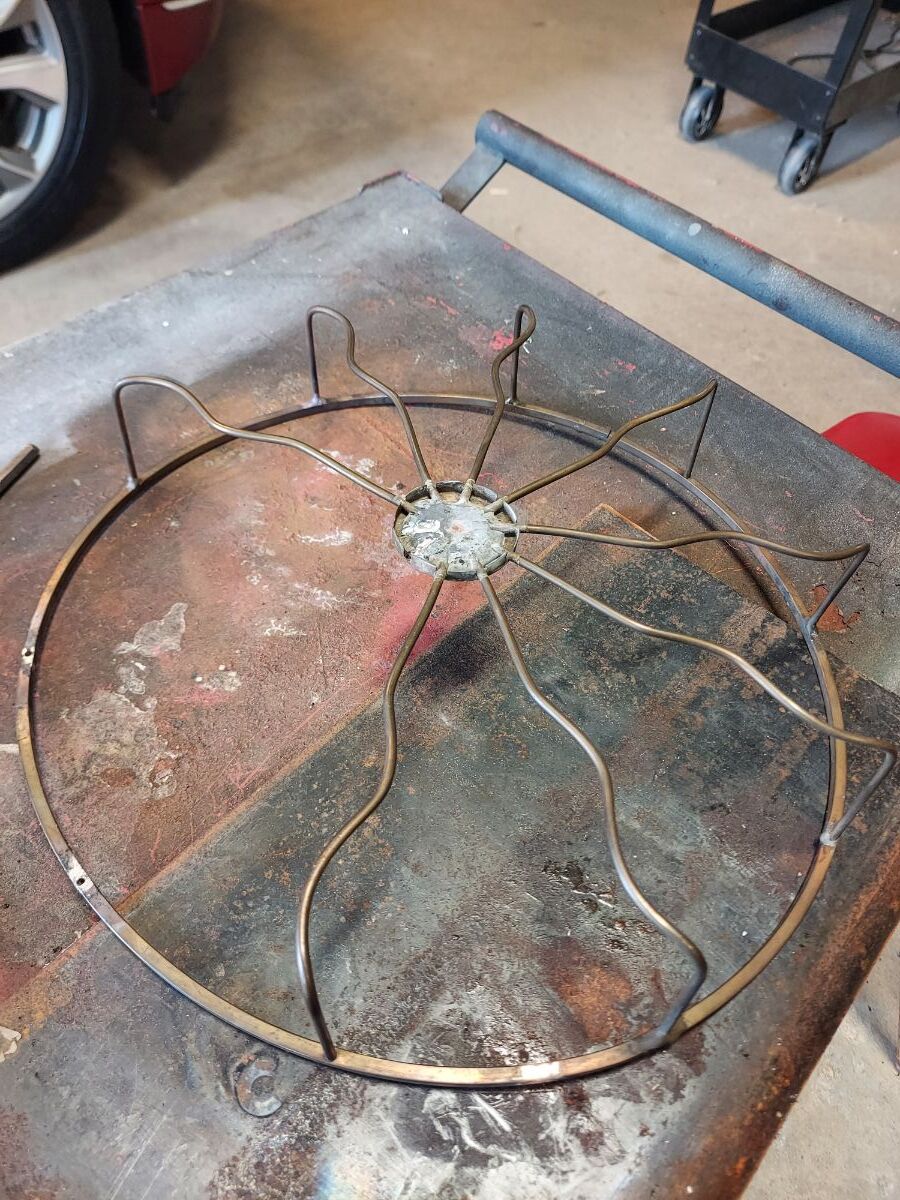
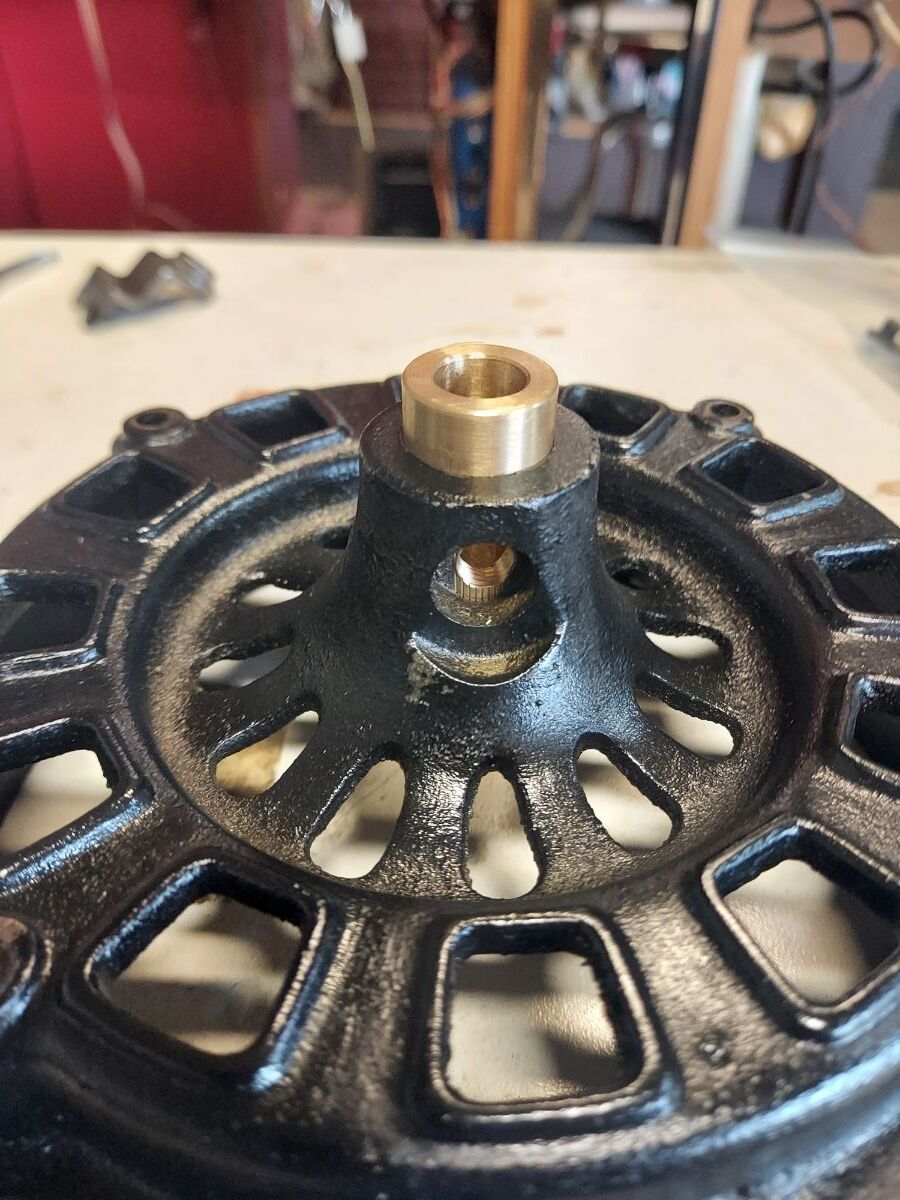
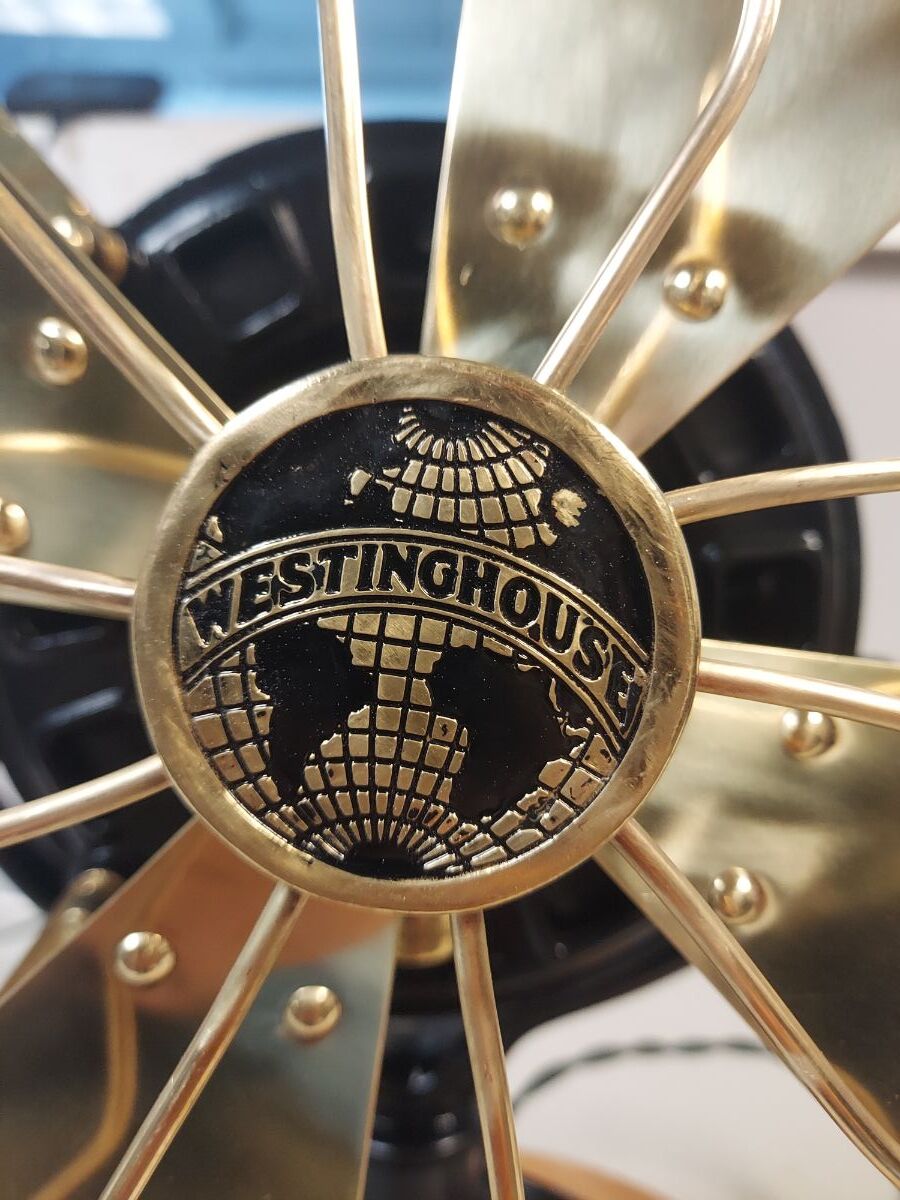
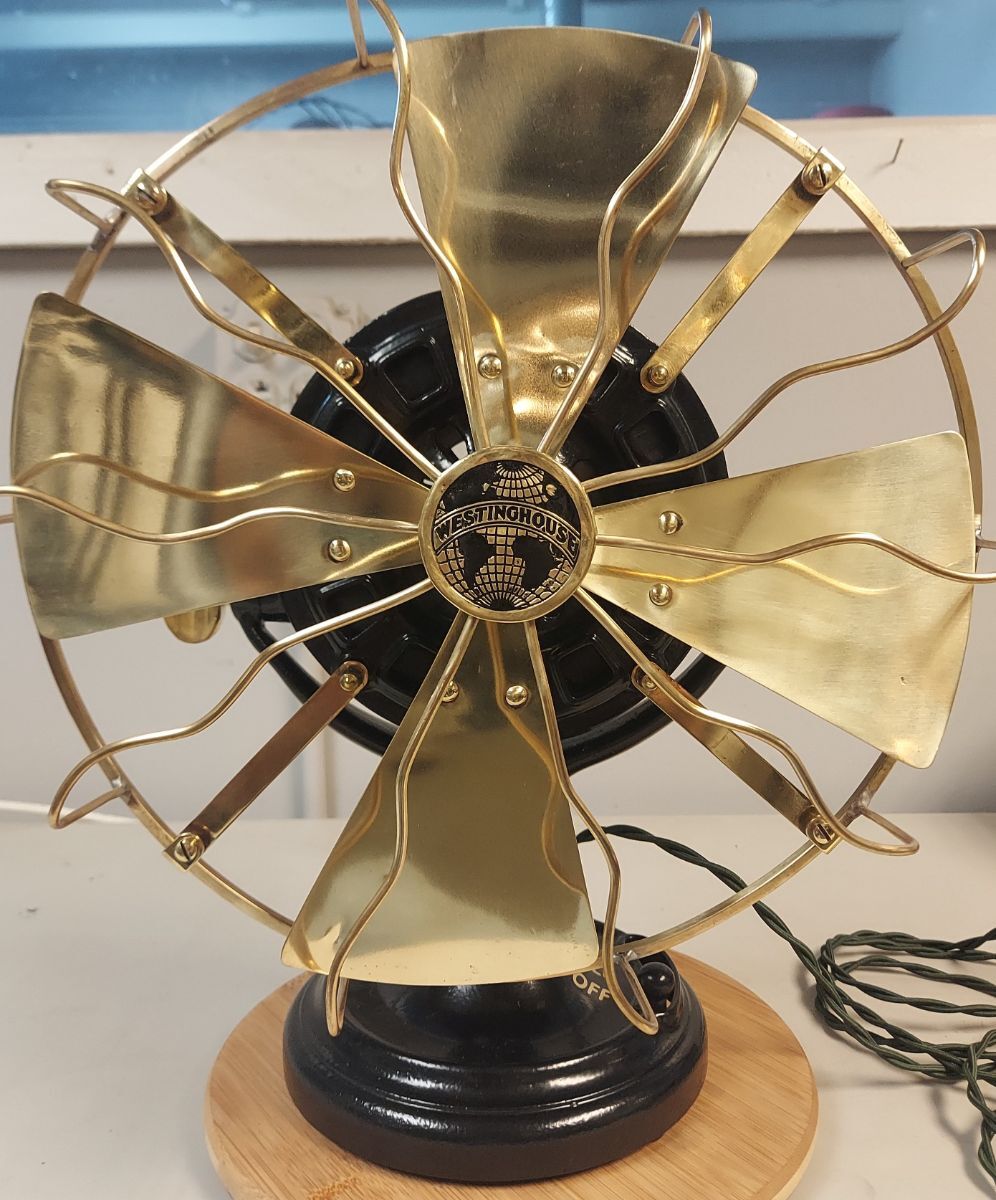
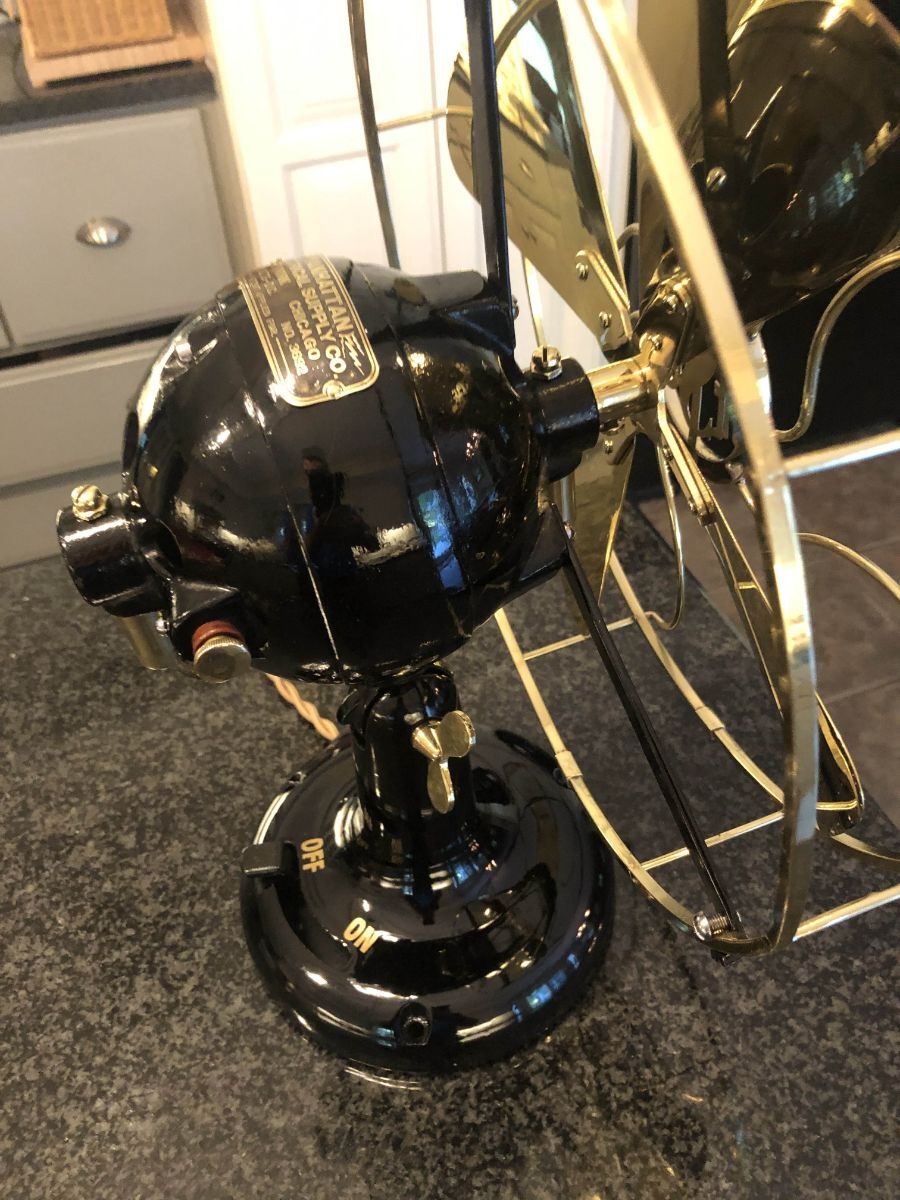
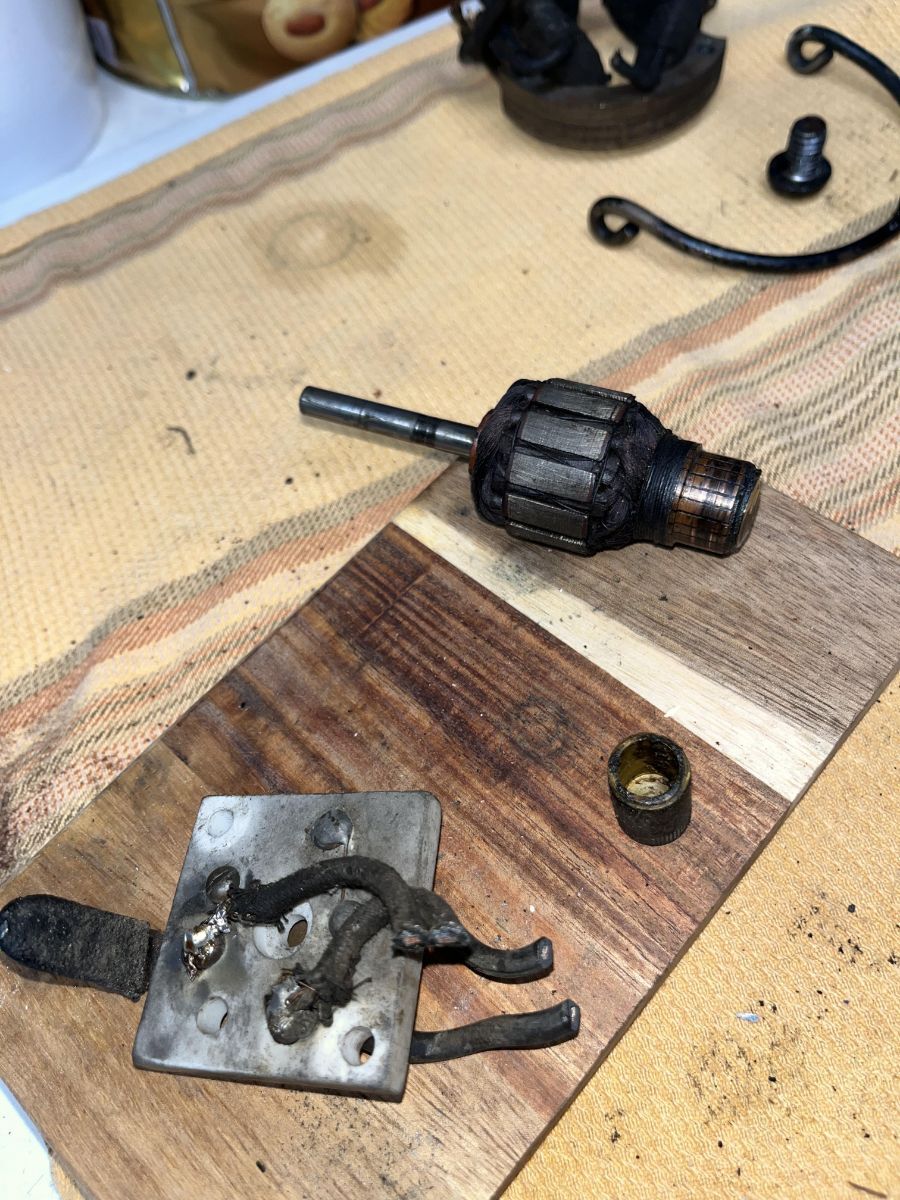
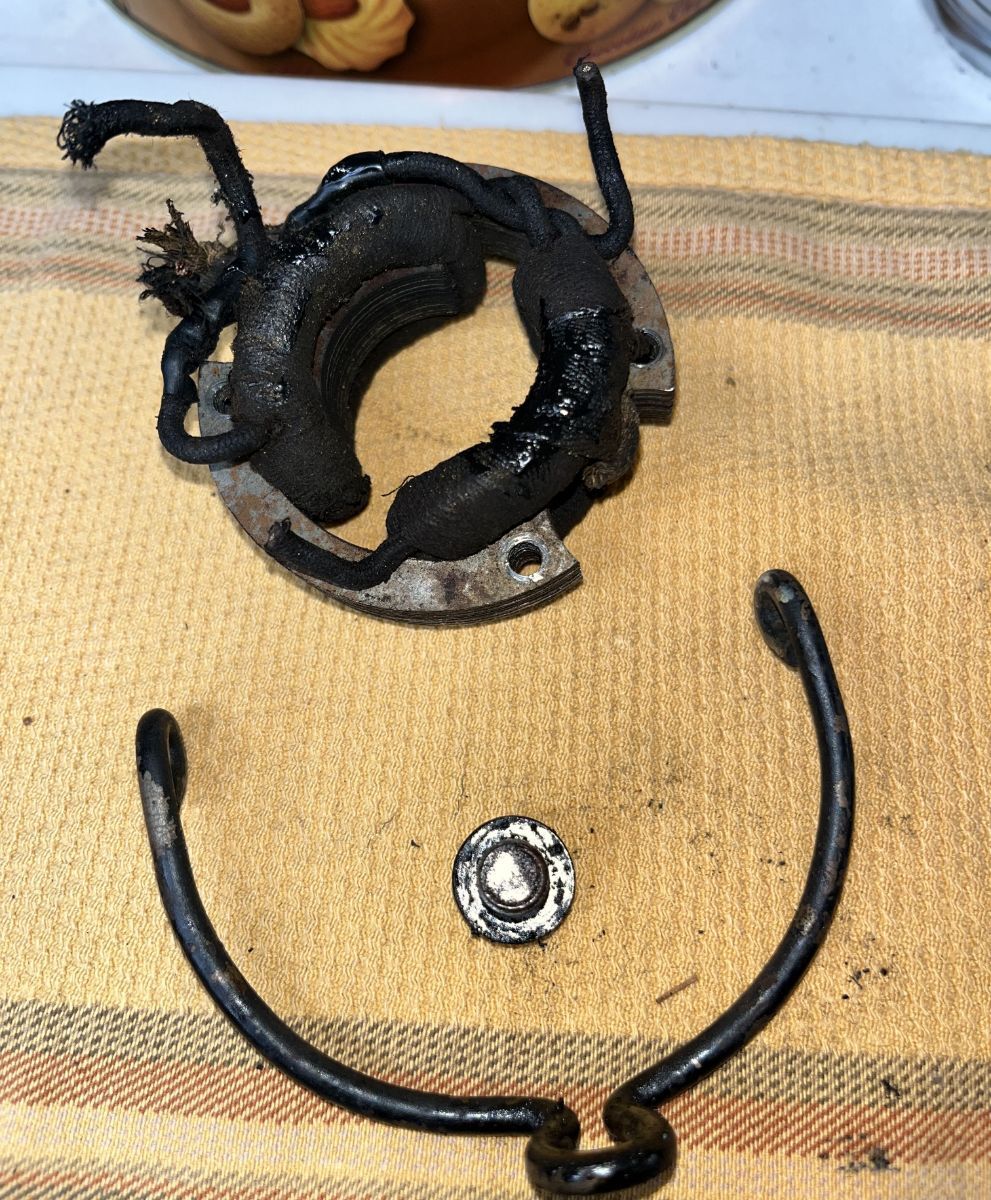
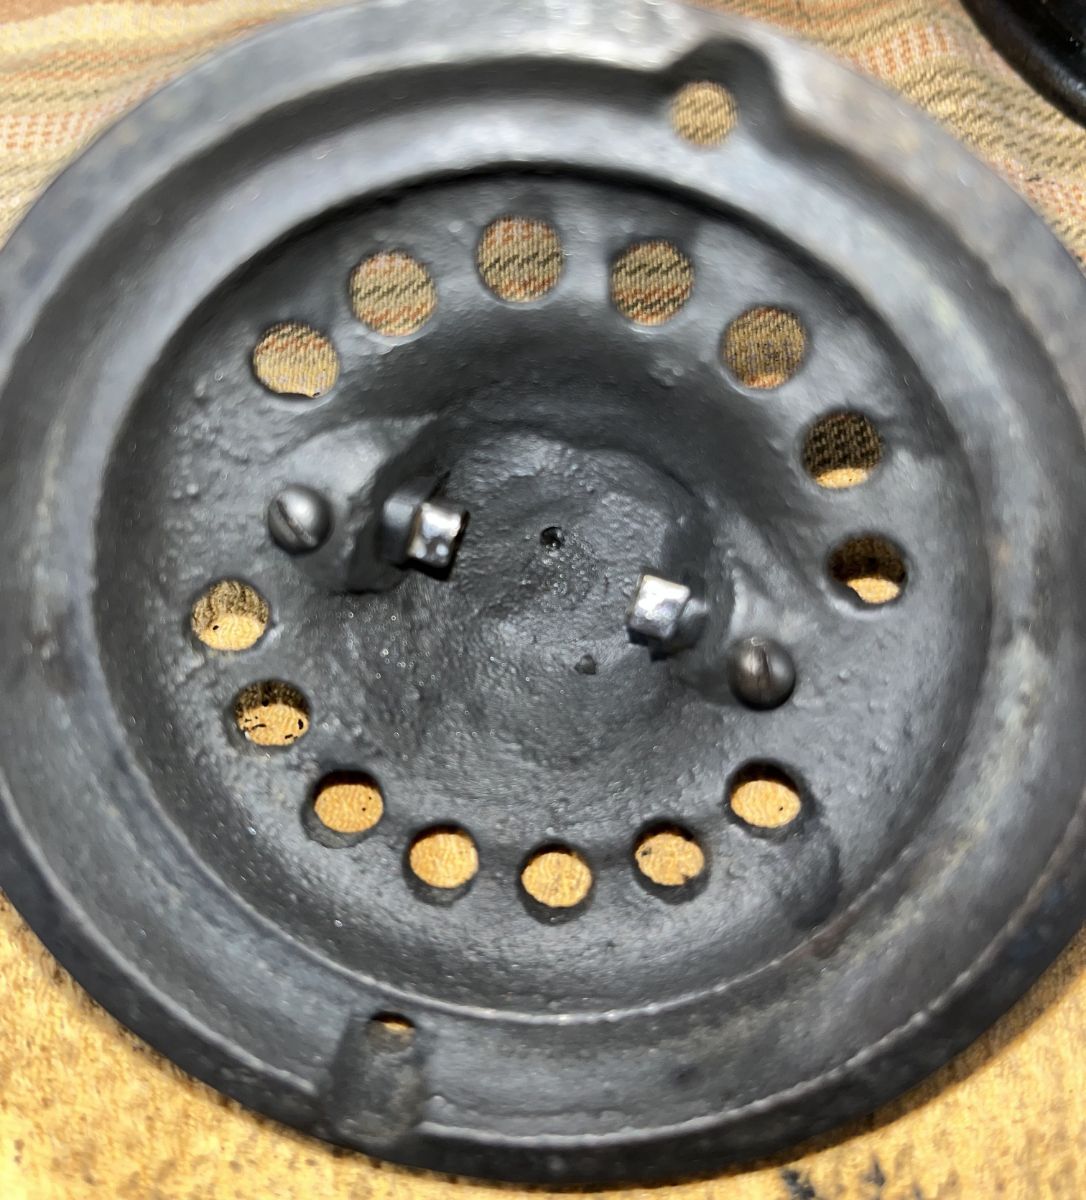
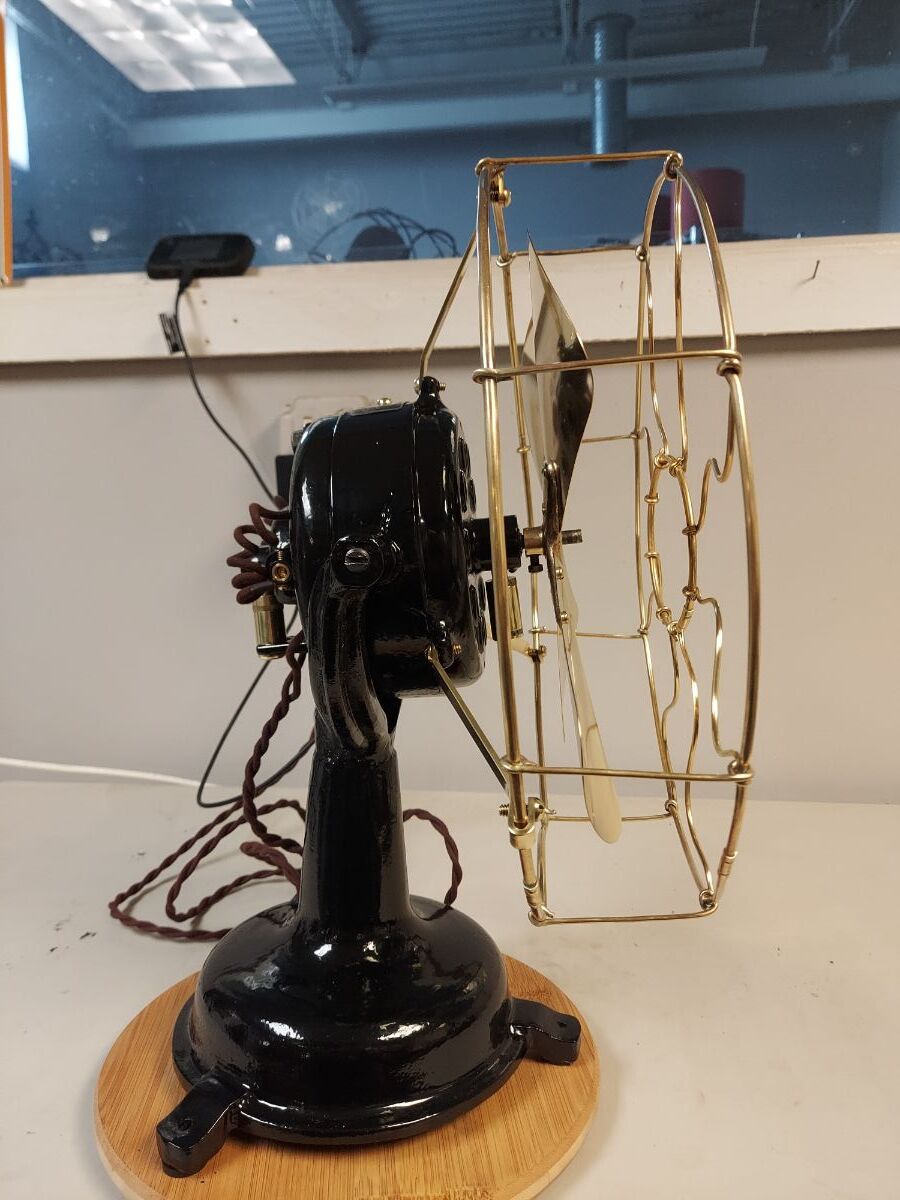
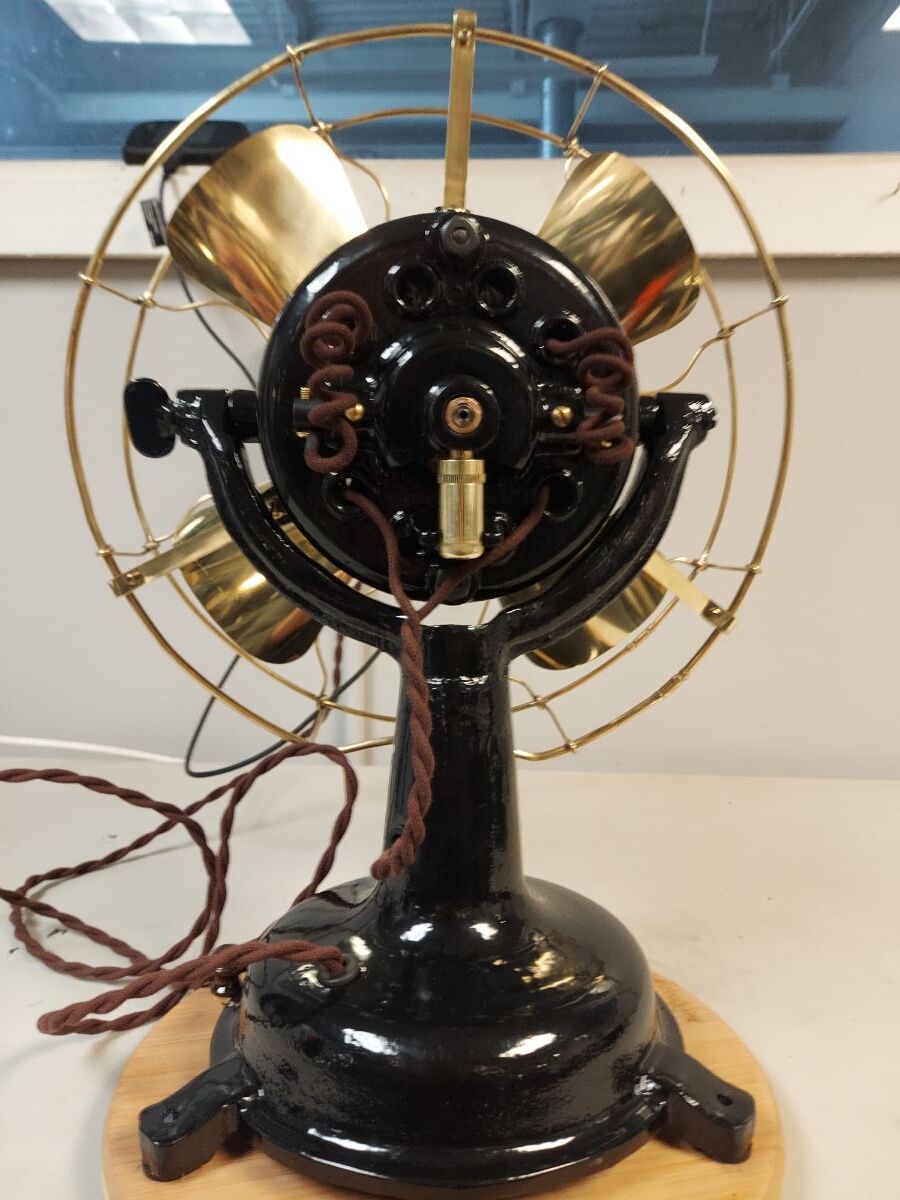
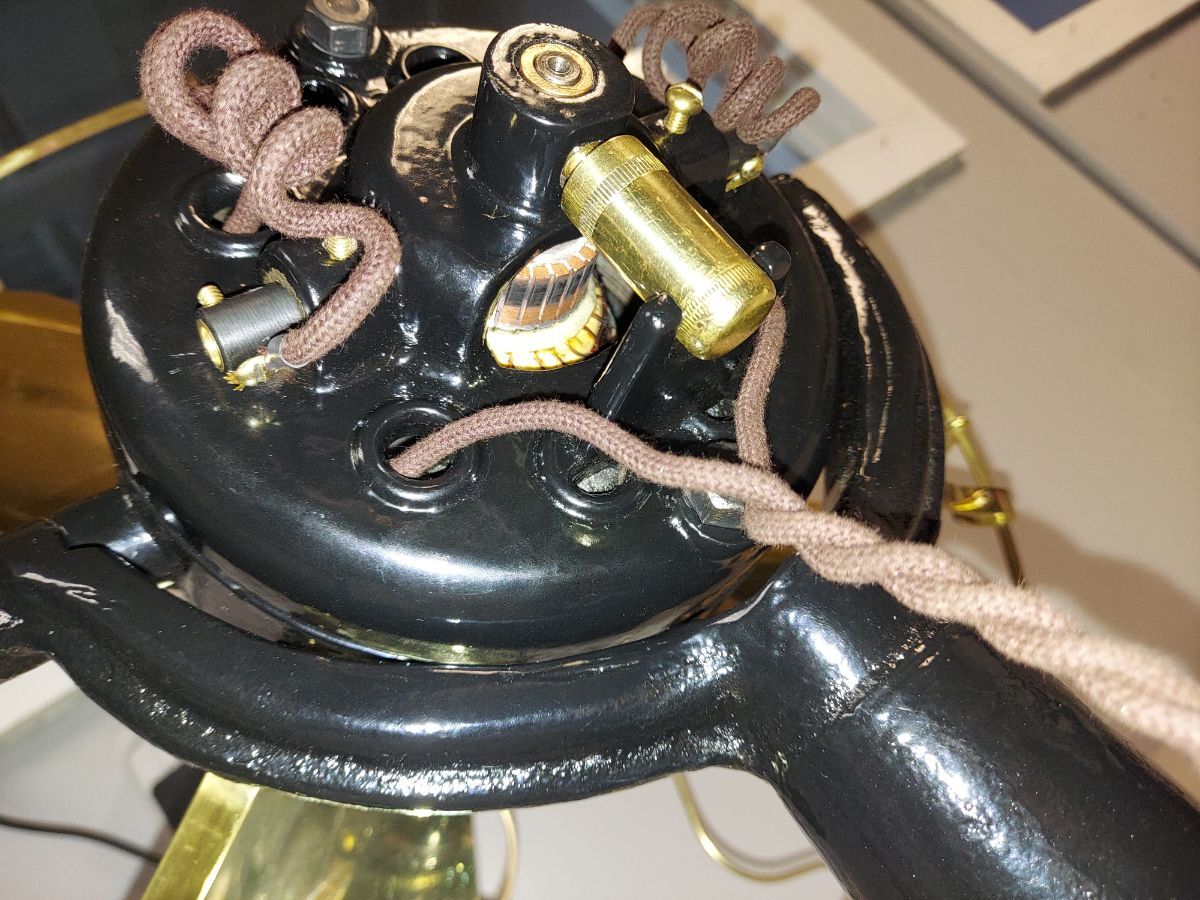
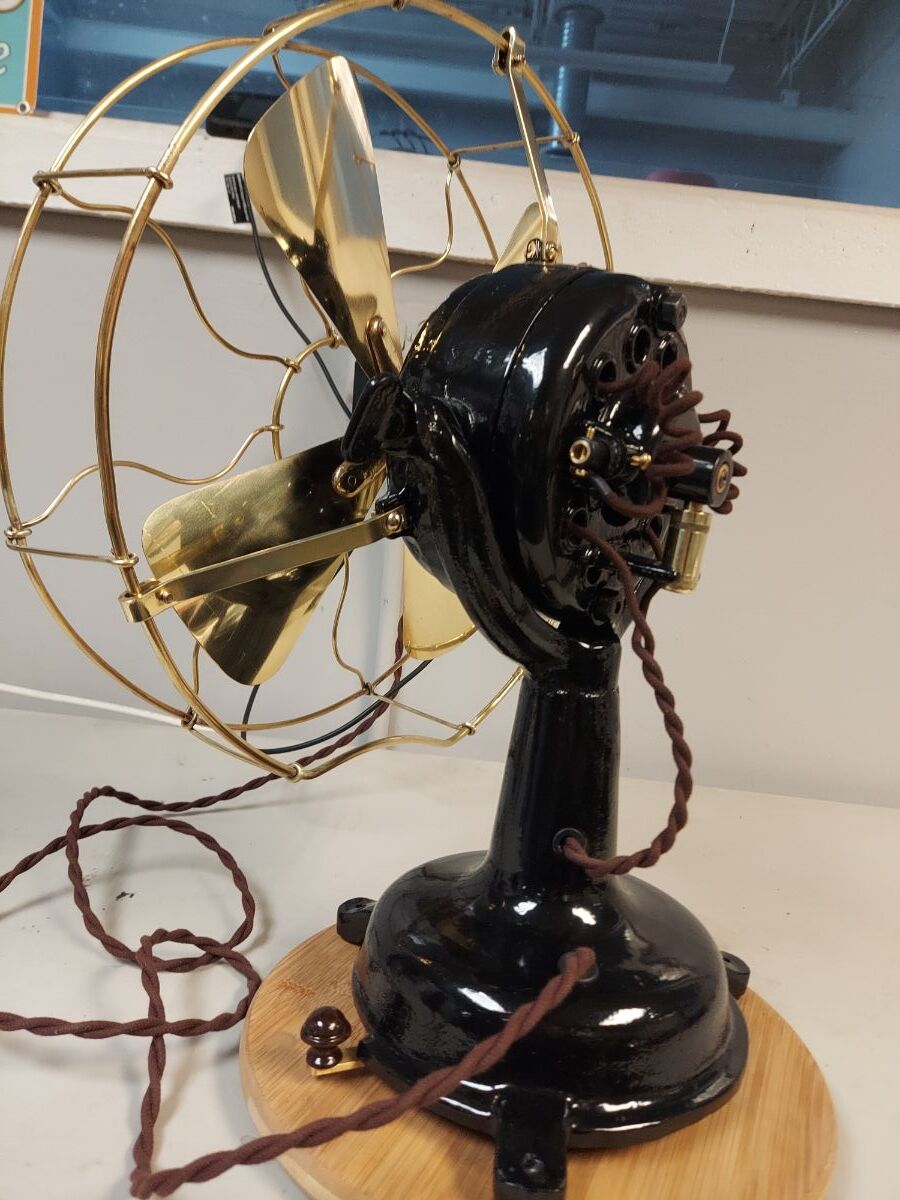
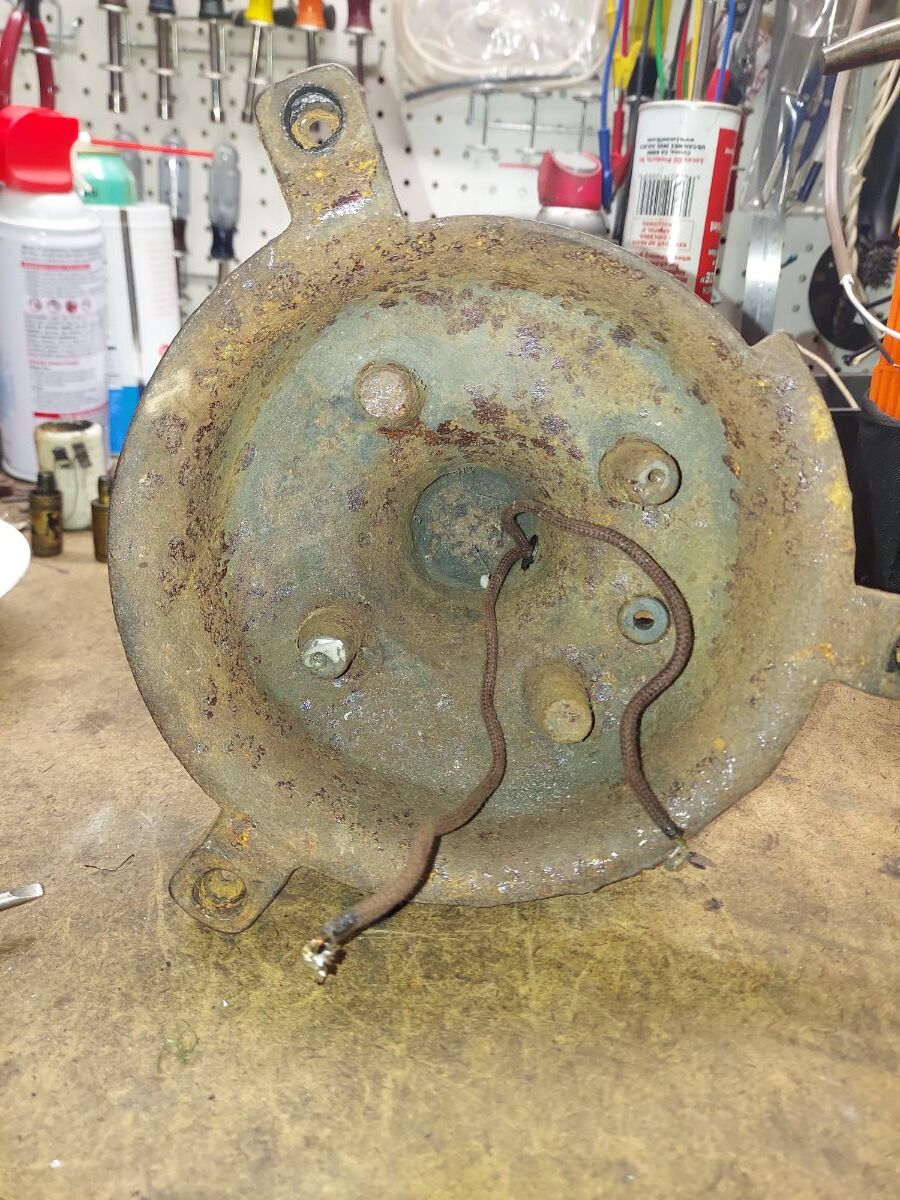
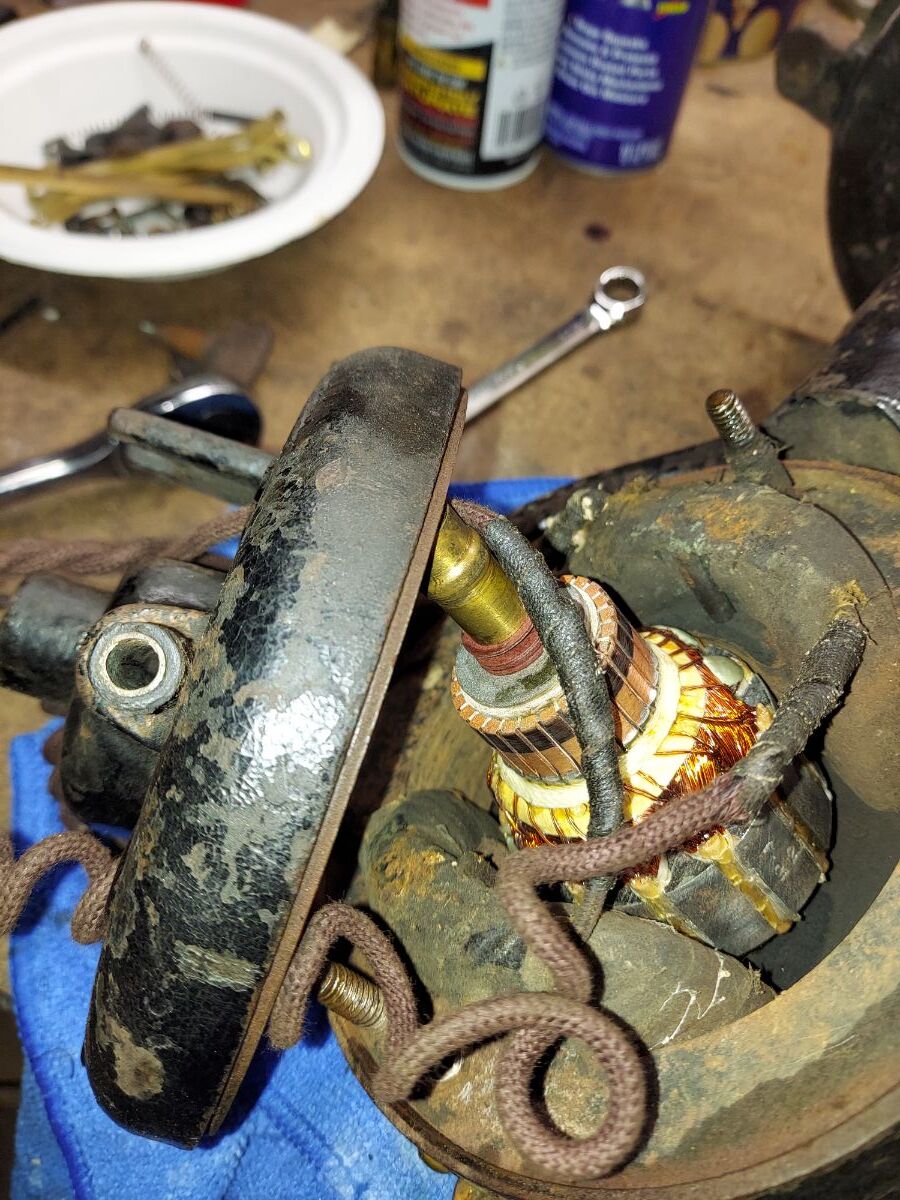
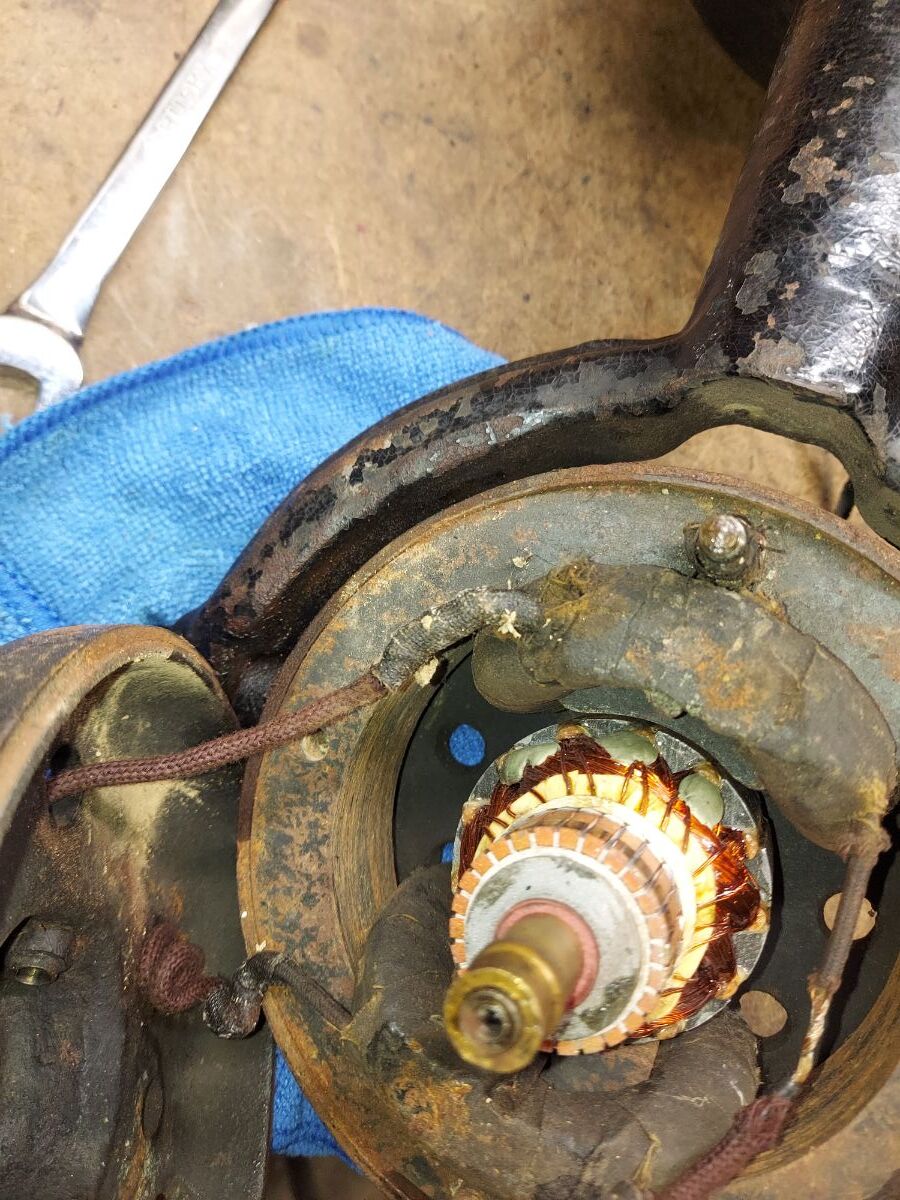
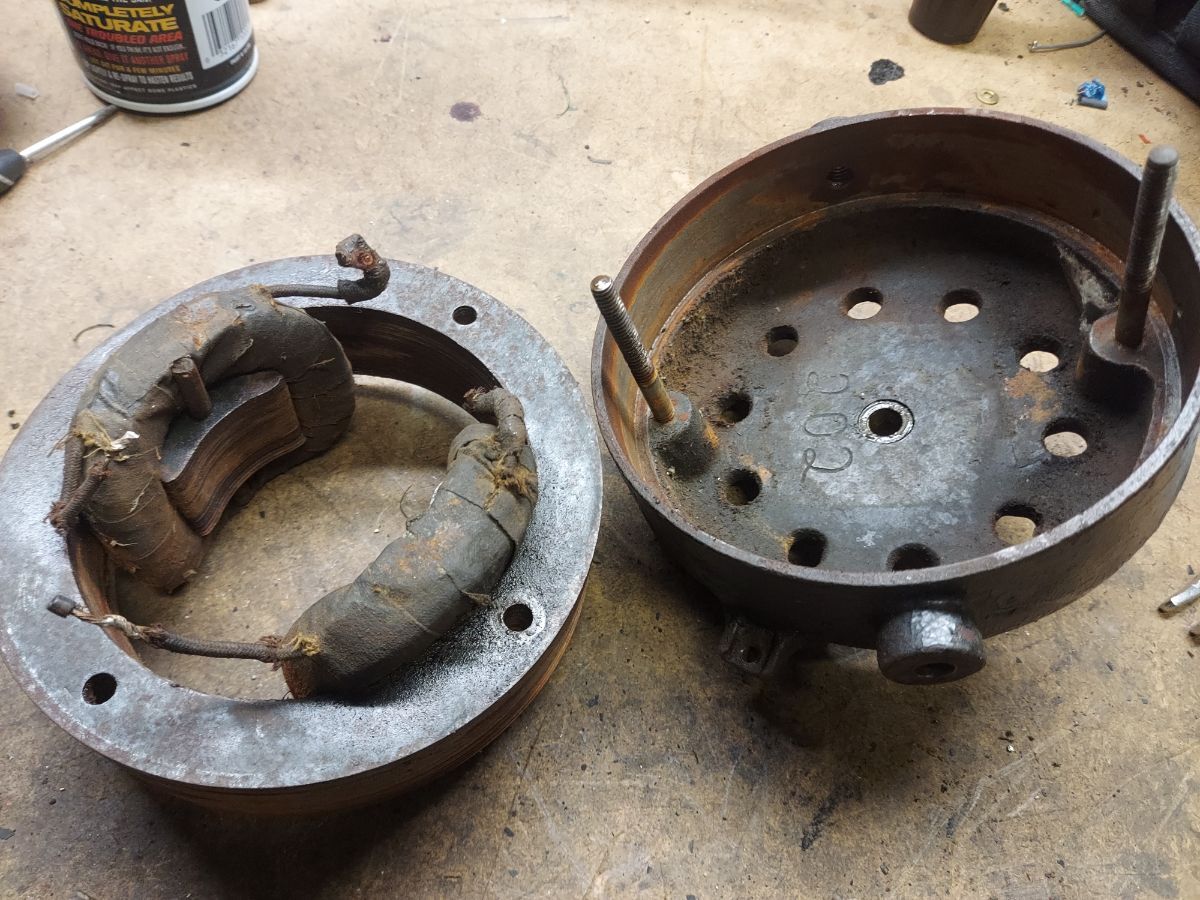
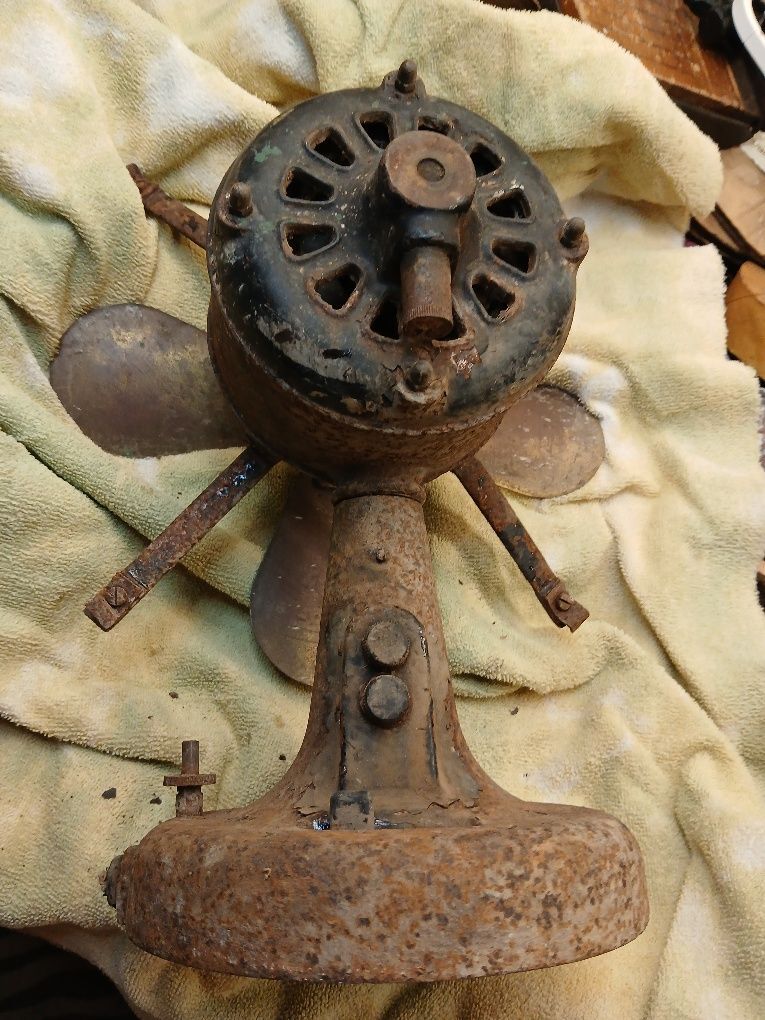
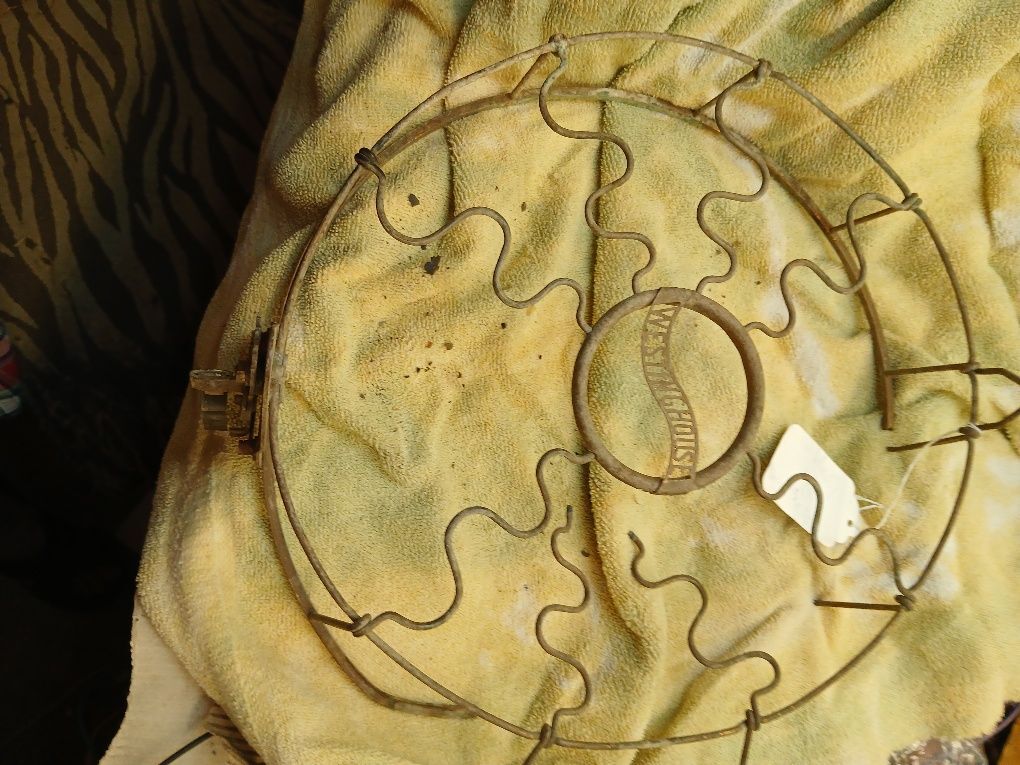
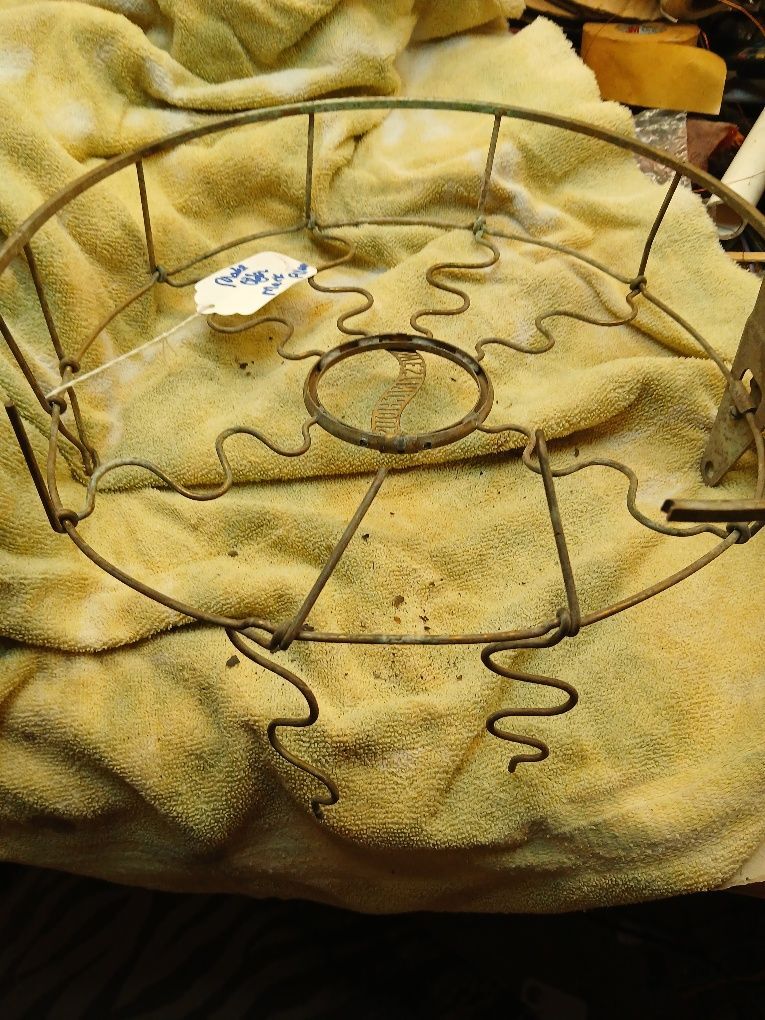
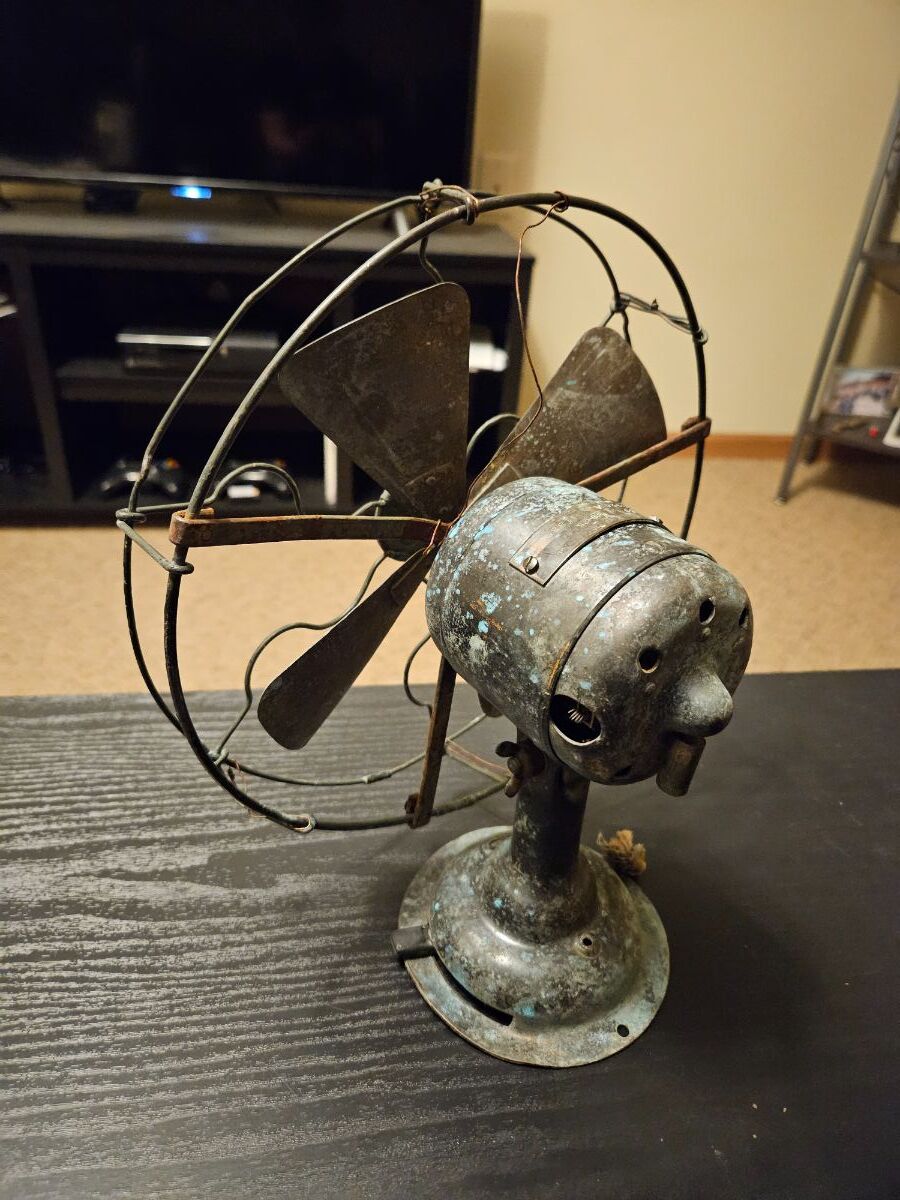
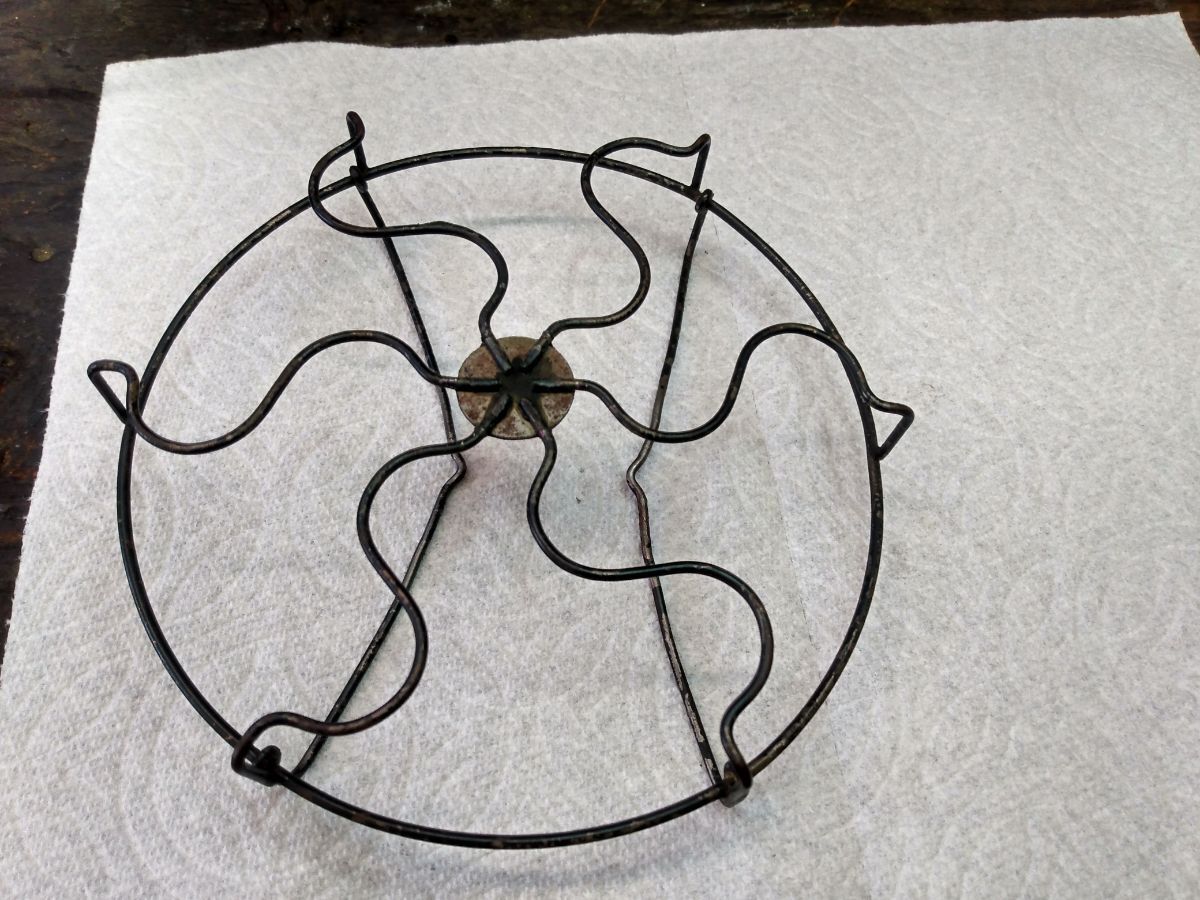
There are a few "before" photos at the end. This fan was in very poor condition. The motor was rusted stuck and needed to be rewound. The speed coil was rusted down and had to be rewound (I added the third speed). The cage was broken and missing part of the back ring, I made a section and welded it back together (not easy to weld brass, it turned into a nightmare). The slip rings and brushes were missing/broken. The oscillating bearings were replaced with modern bicycle bearings. The vane shaft and wings were missing. I japanned the iron parts. 20250202_124256_14777634778265.mp4
14 points
-
Here is one variation of BMY. It is a four pole wound with three lap wound coils per pole and a conventional start winding. BMY.mp4
13 points
-
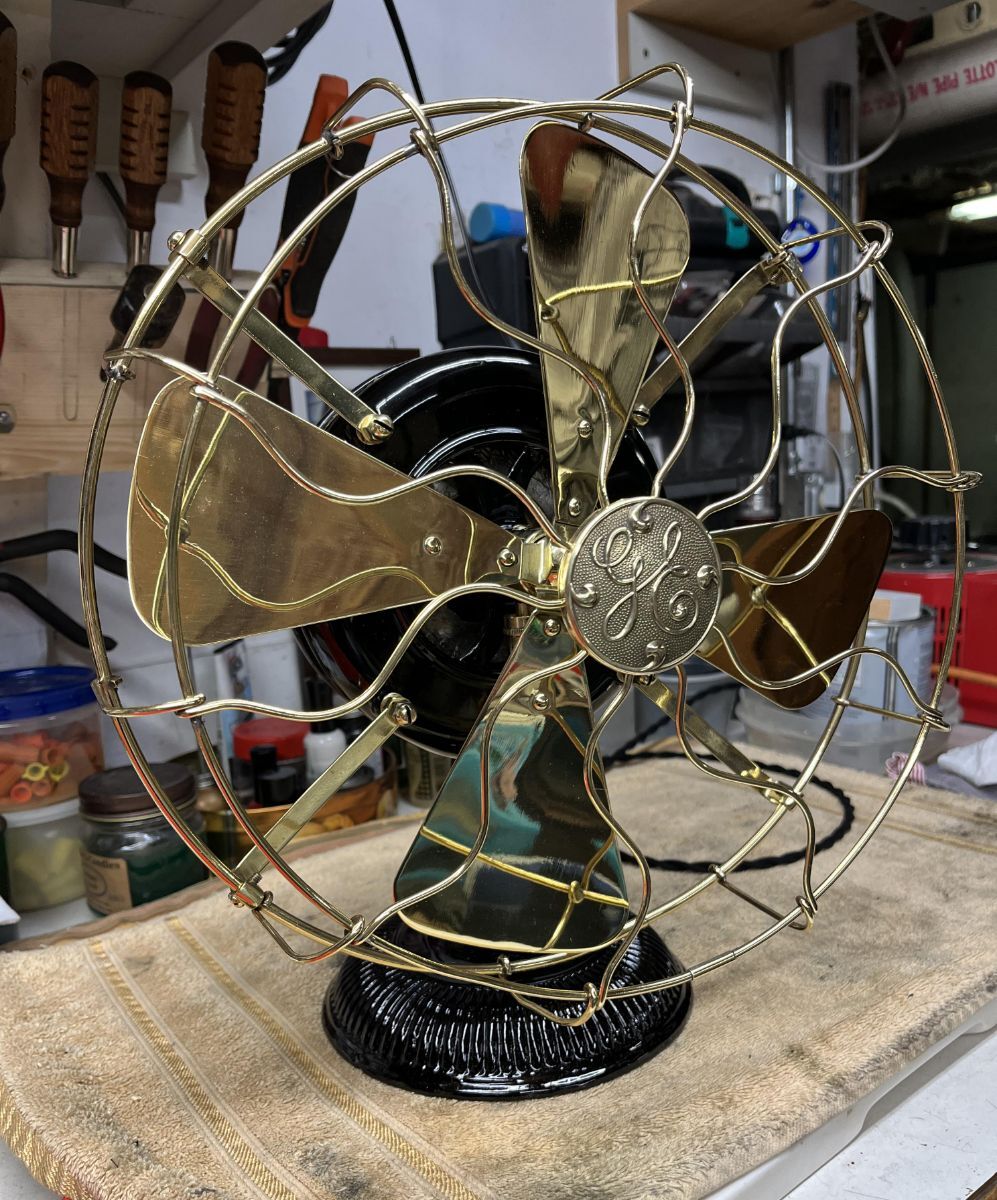
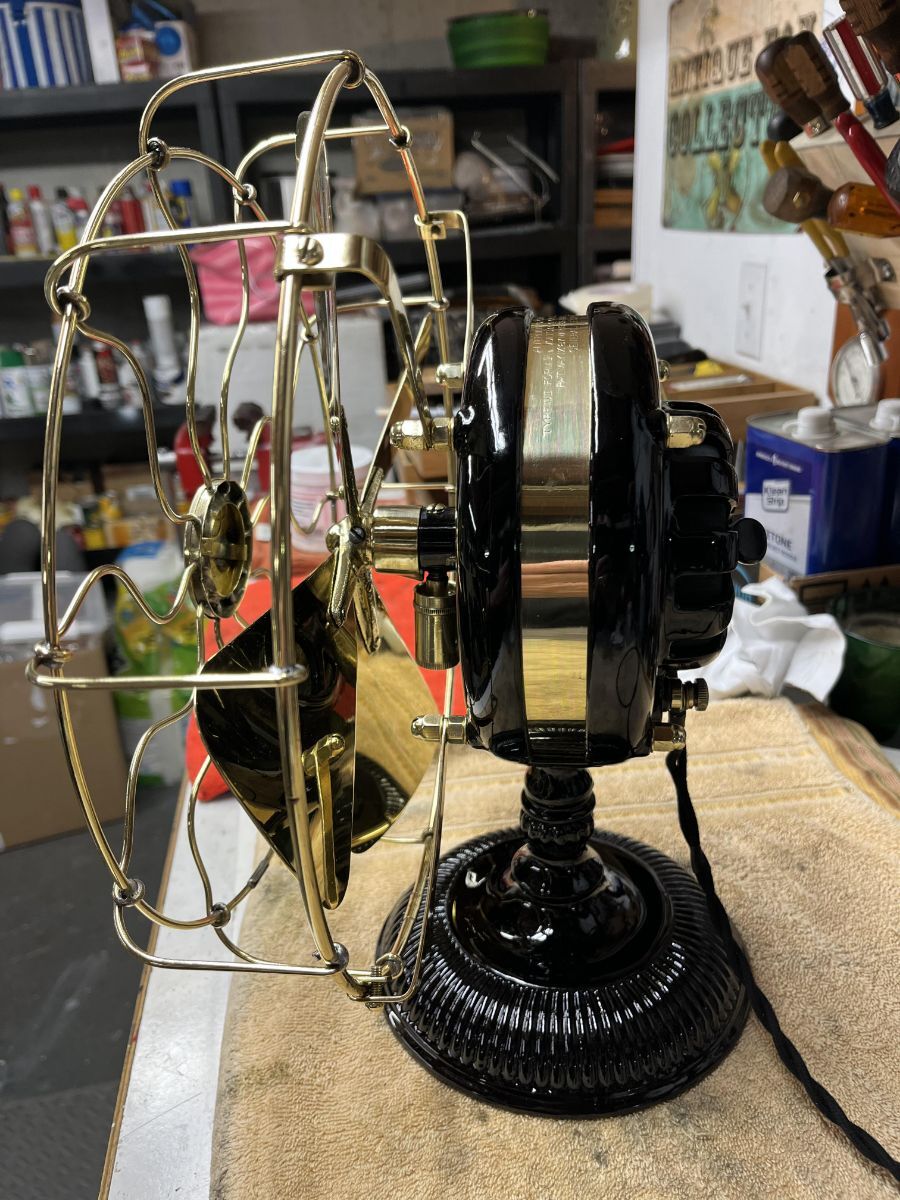
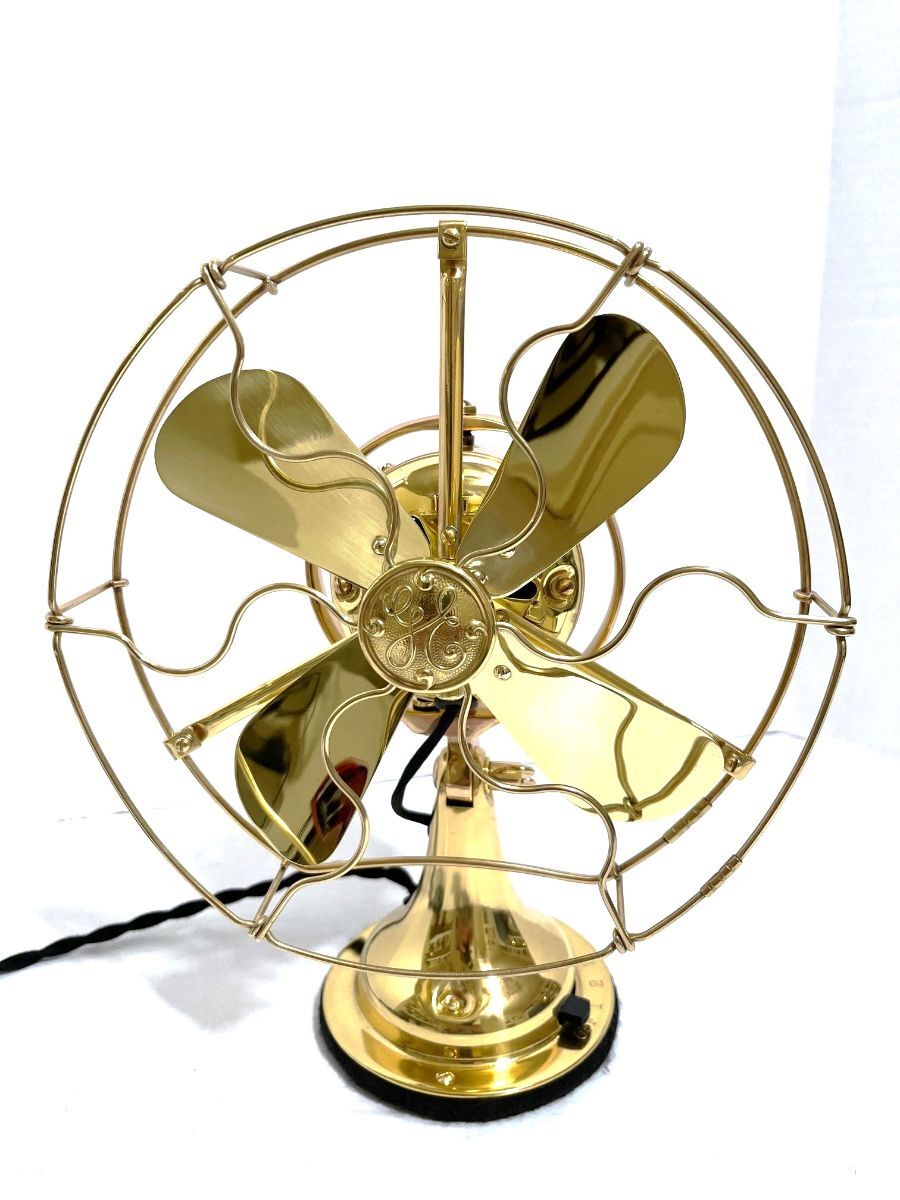
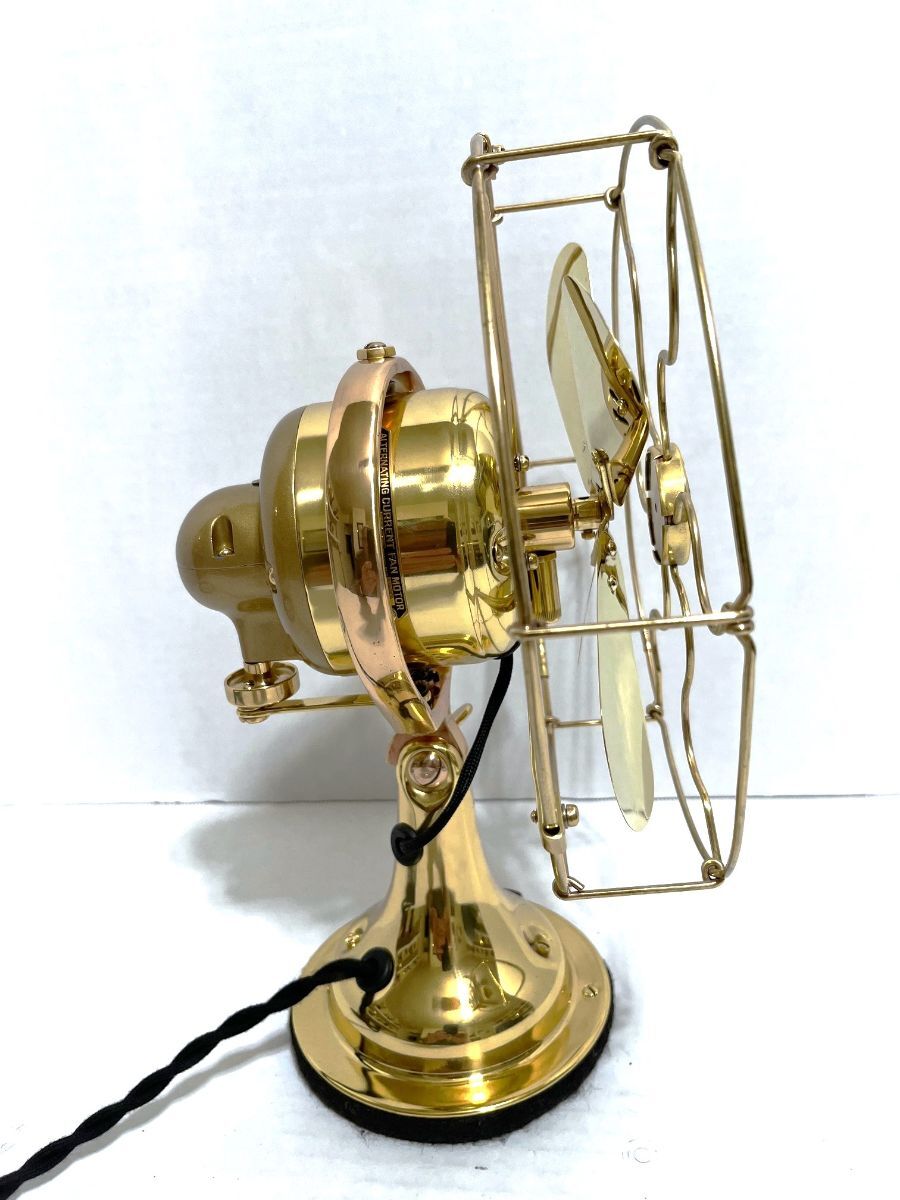
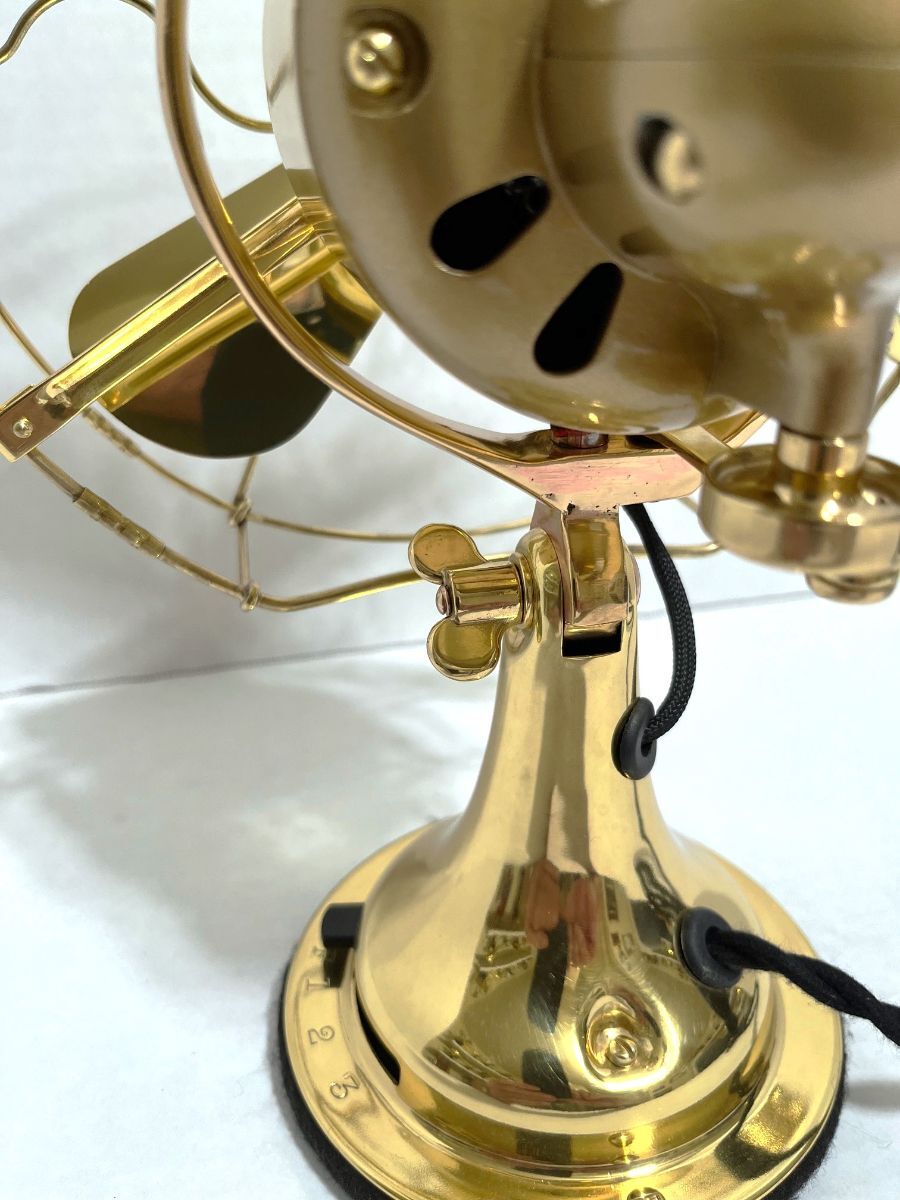
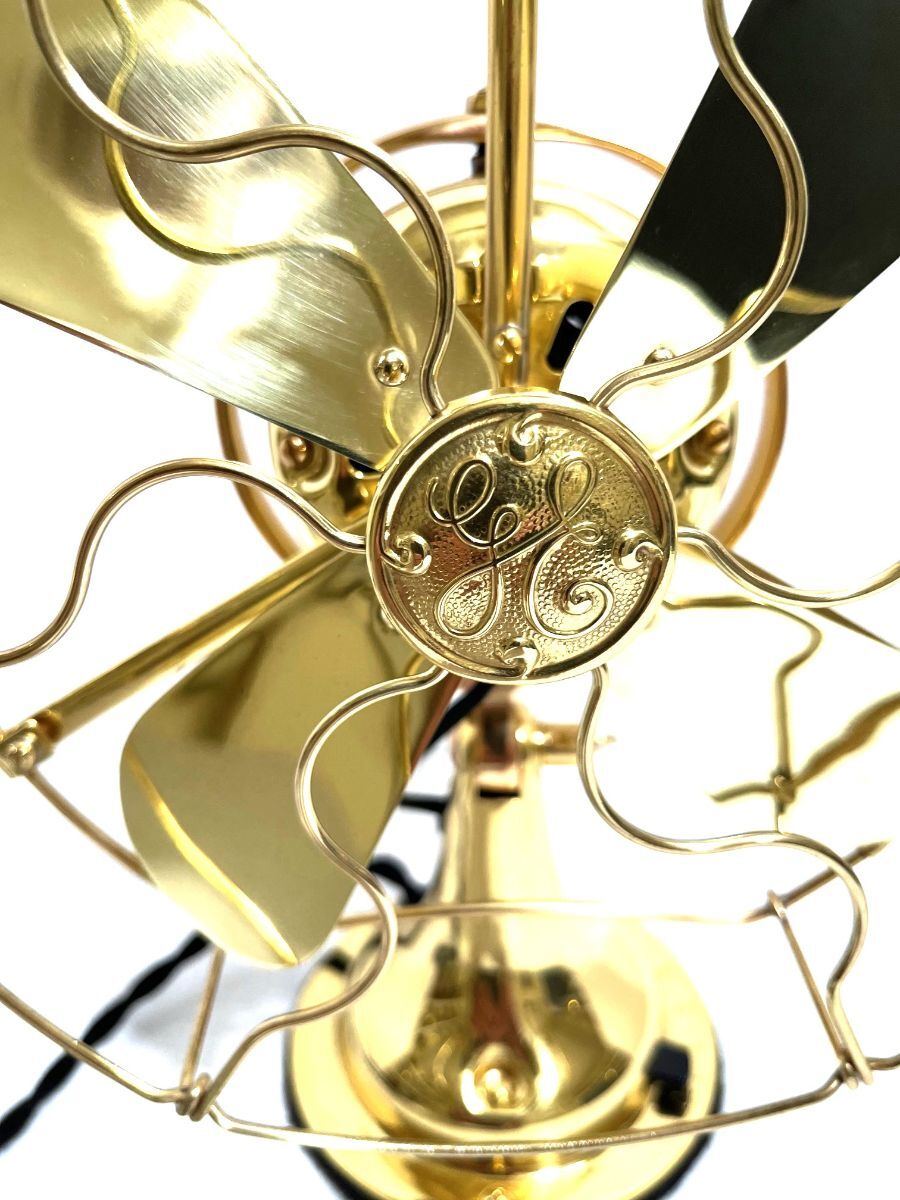
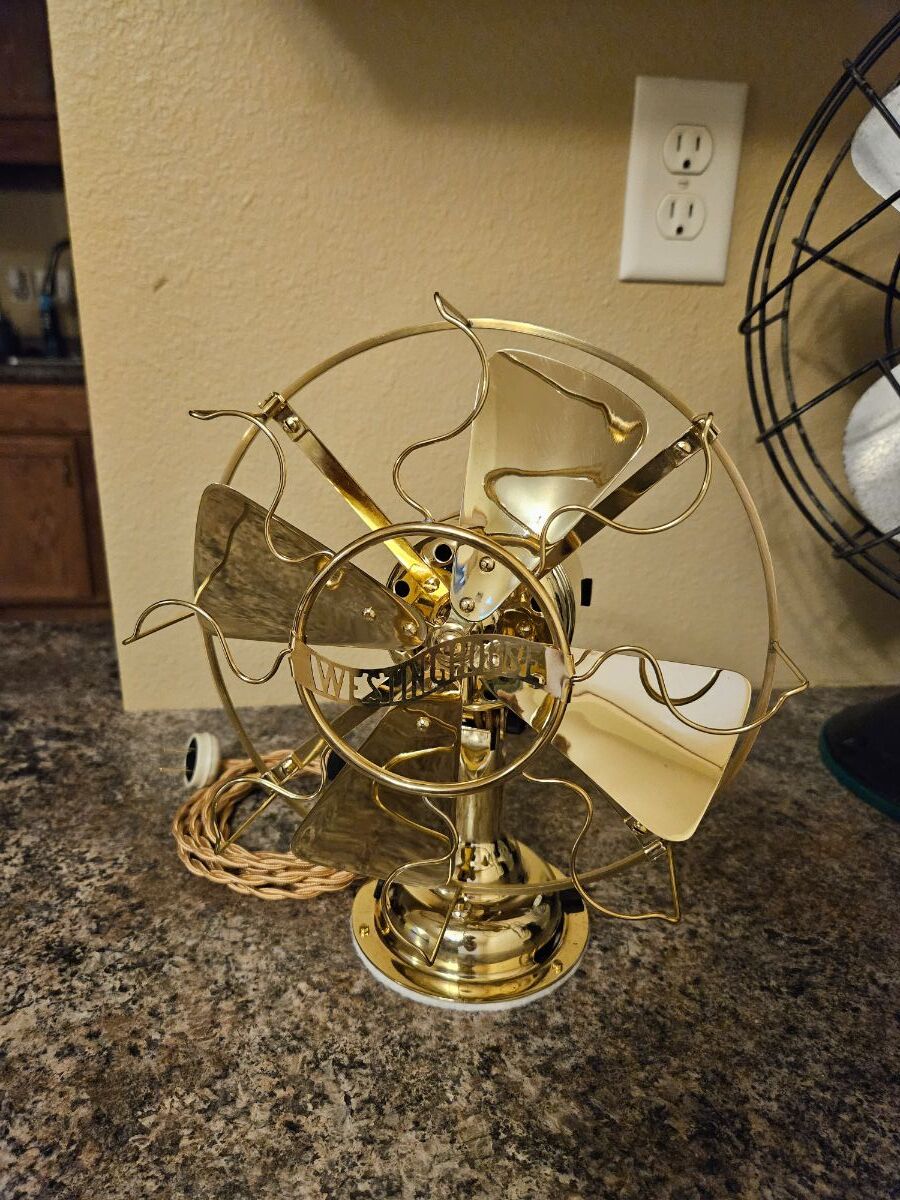
I don't believe I ever posted this one, but I completed my All Brass project back in August. Thank you to Lane Shirey for the cage, Jerry Bravi for the blade, Darryl Hudson for the brushes and brush holders, and Chad and Linda at AFP for various hardware and the struts, I could not have completed it without all their help. I had to rewind the field due to a short, but I'm happy to have kept one of these from being relegated to the parts pile.
13 points
-
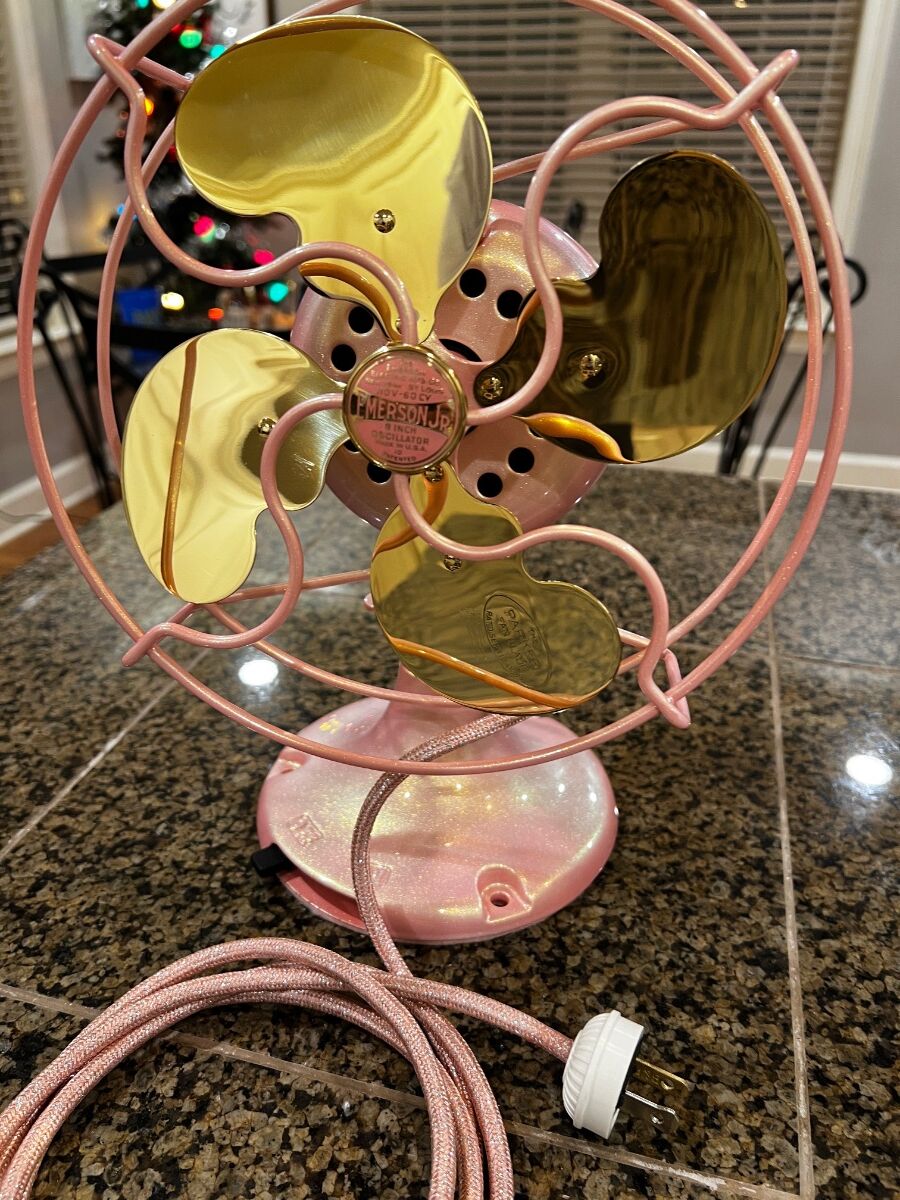
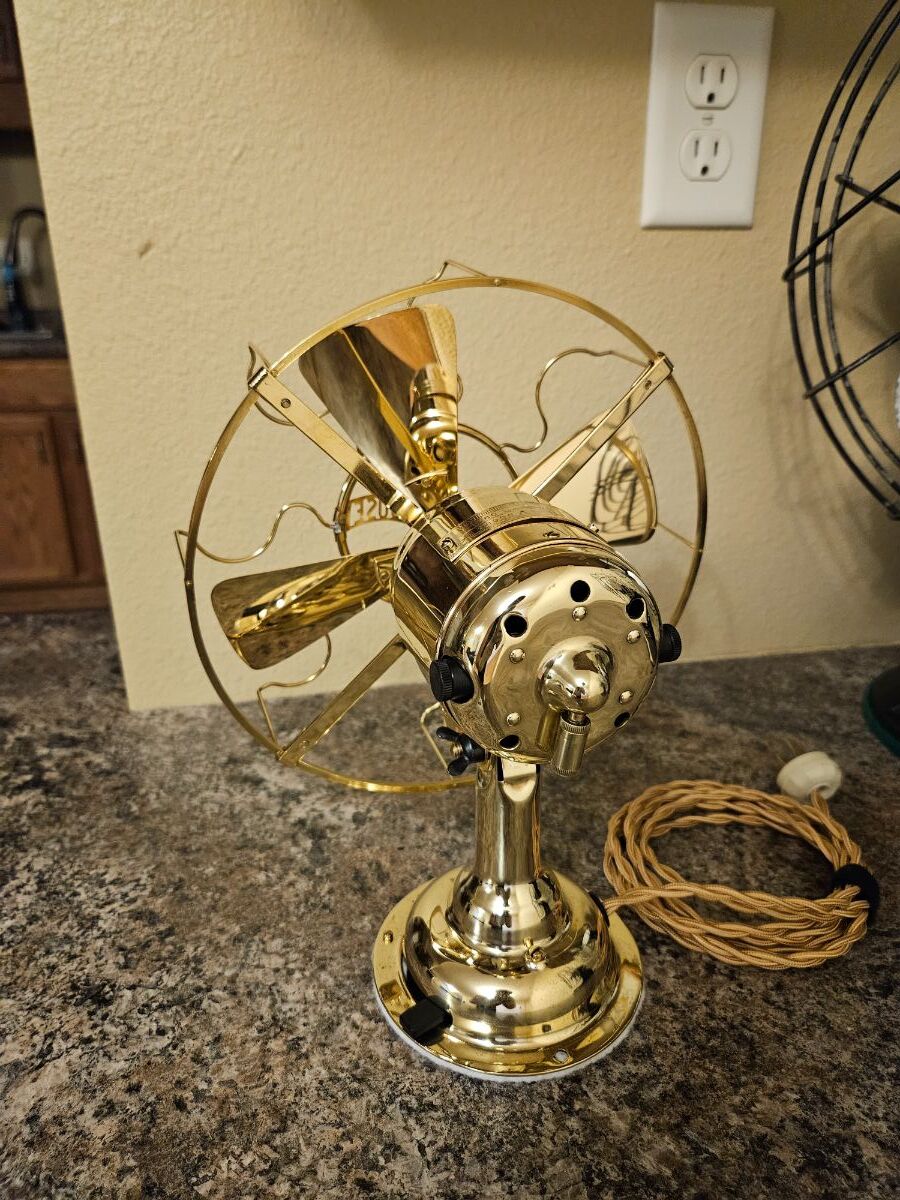
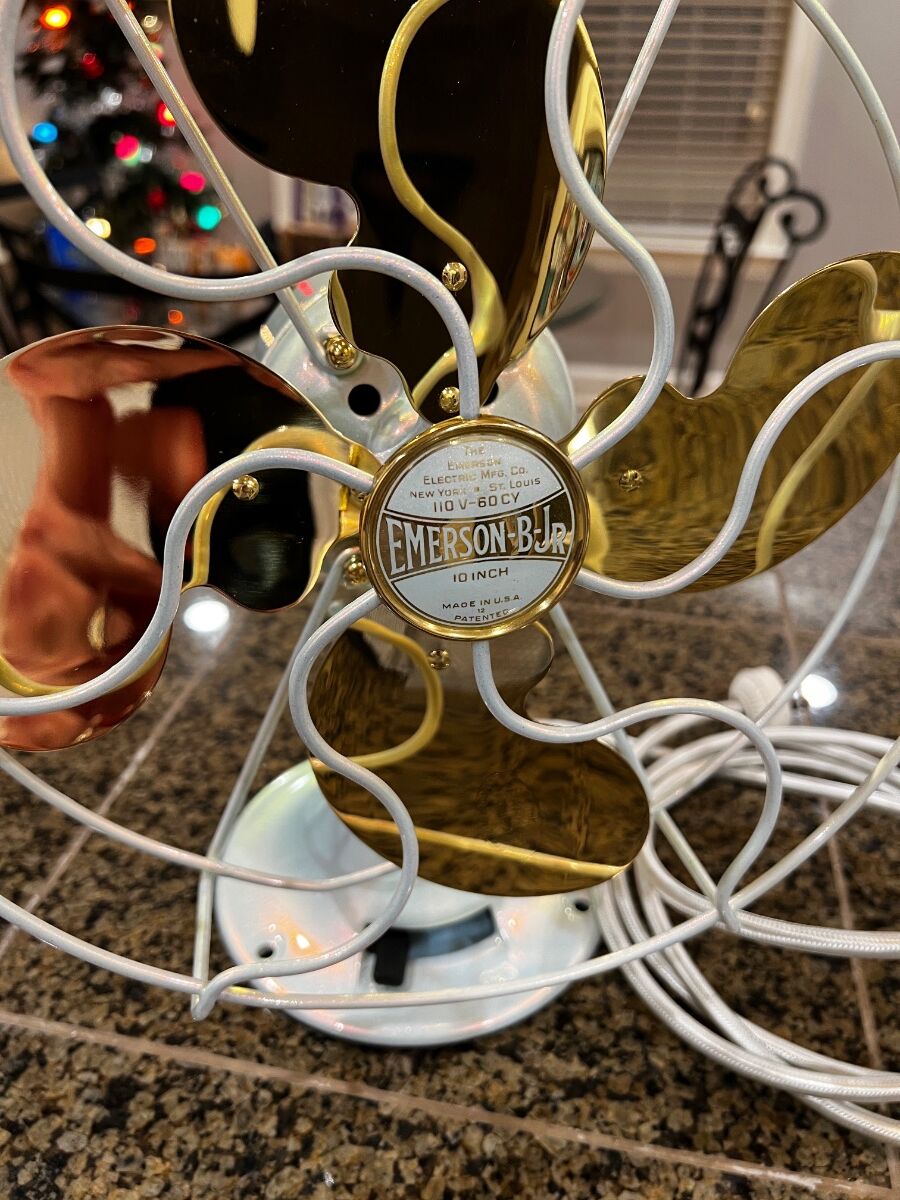
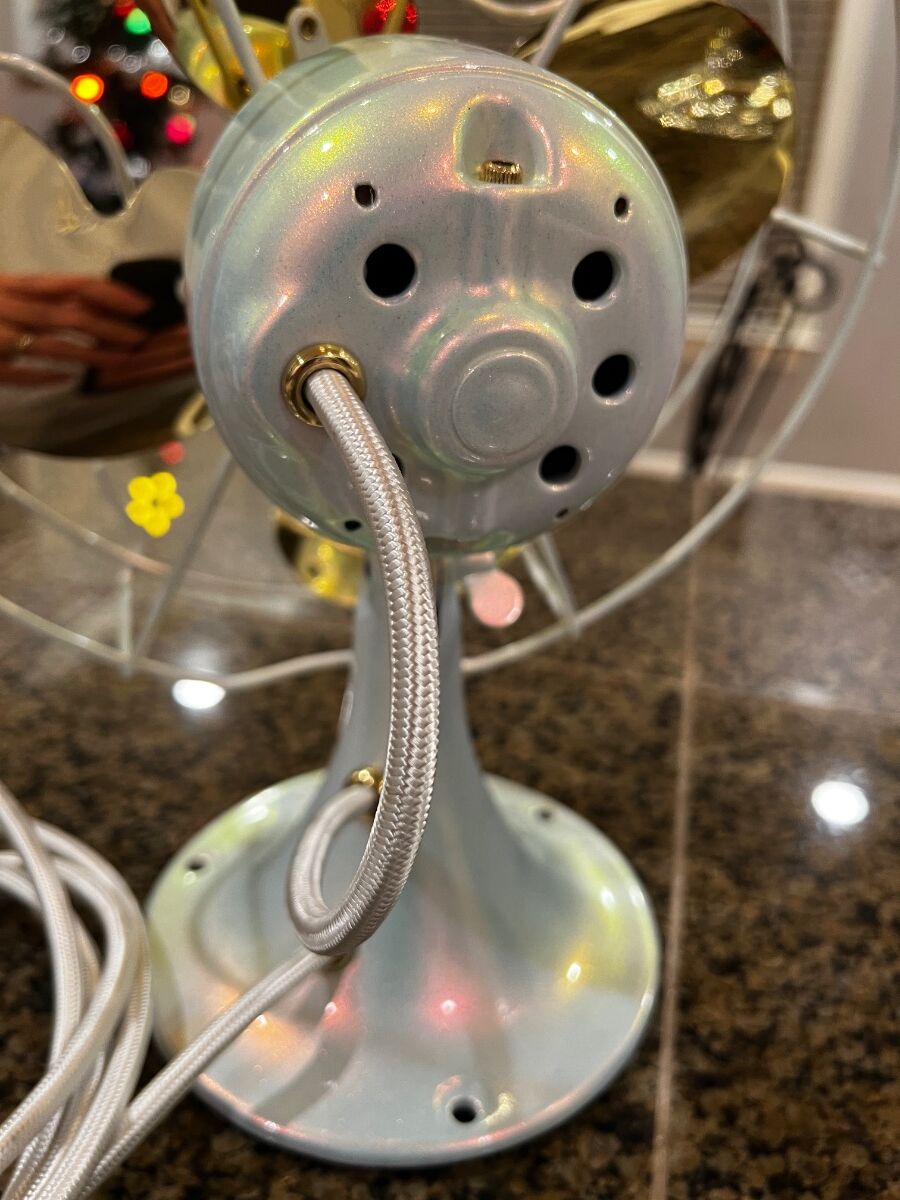
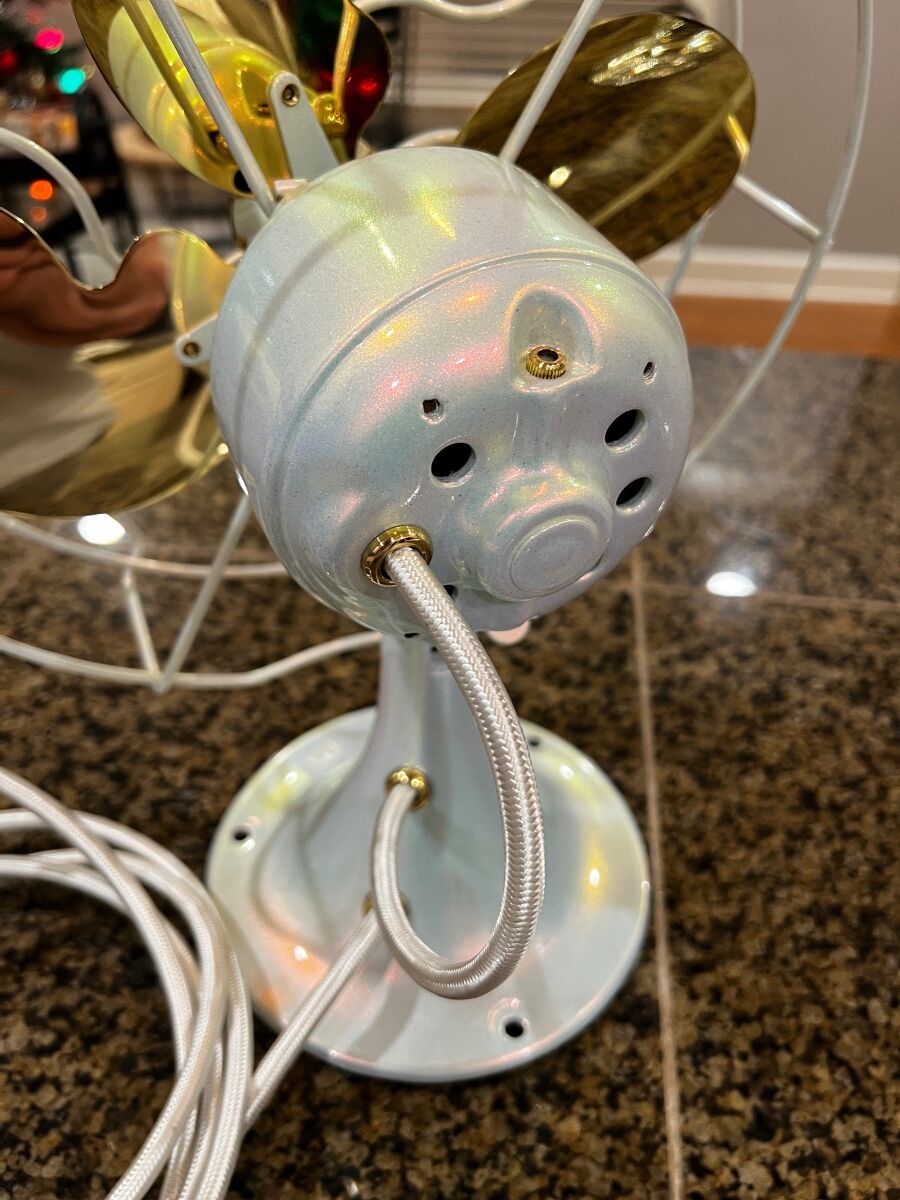
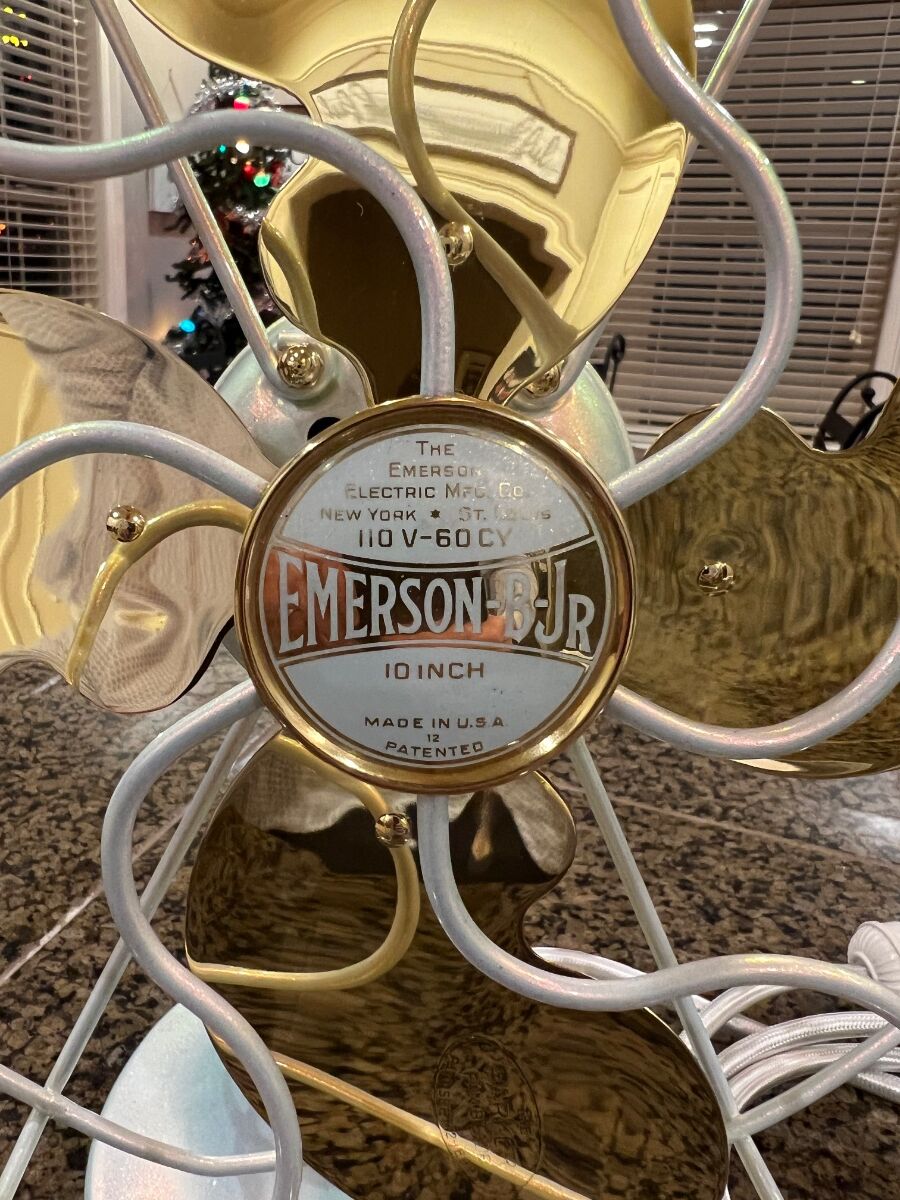
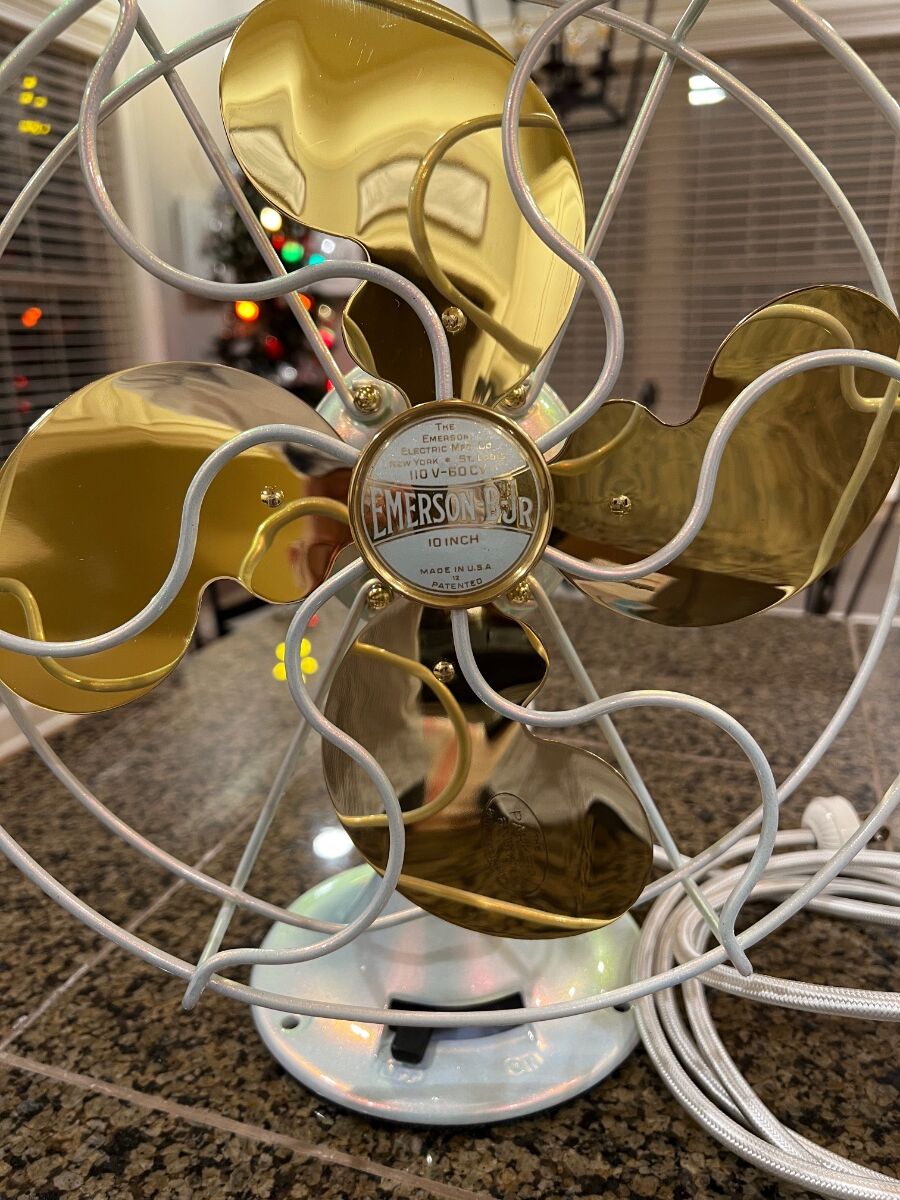
Thought post a few pics before wrapping these. Both are for my kids and they picked the colors. Primer, base, pearl, colorshift pearl, then clear. I have long been an advocate for using an airbrush with lacquering brass blades. Along with blade lacquering used an airbrush on the badges which would not have been possible with the paint gun as used for the body. The thin layers provided by an airbrush allowed painted badges to match rest of fan. These two fans were a first for me to use colorshift. The first is a 10” non-oscillator B-Jr. in white with a green to red to blue colorshift pearl along with gold micro pearl. Hard to capture but the white has an iridescent glow with the shift in colors listed. Overall pretty happy with it. The badge has one aspect that is not correct and kudos to first to spot it.
13 points
-
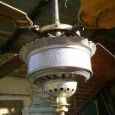
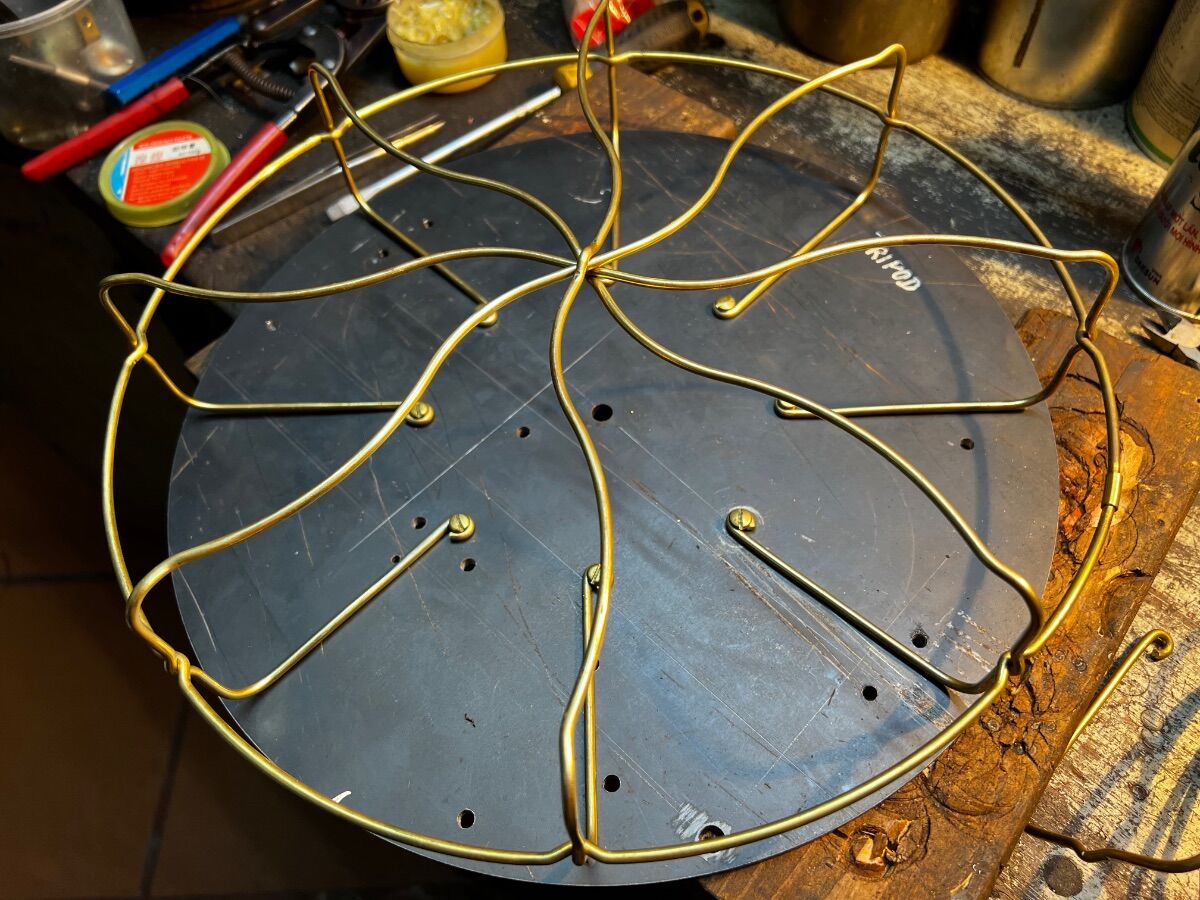
I built the Emerson tripod cage. This cage was quite difficult to make and required a lot of tools to shape it. After many days of hard work and meticulousness, the result is beautiful!
12 points
-
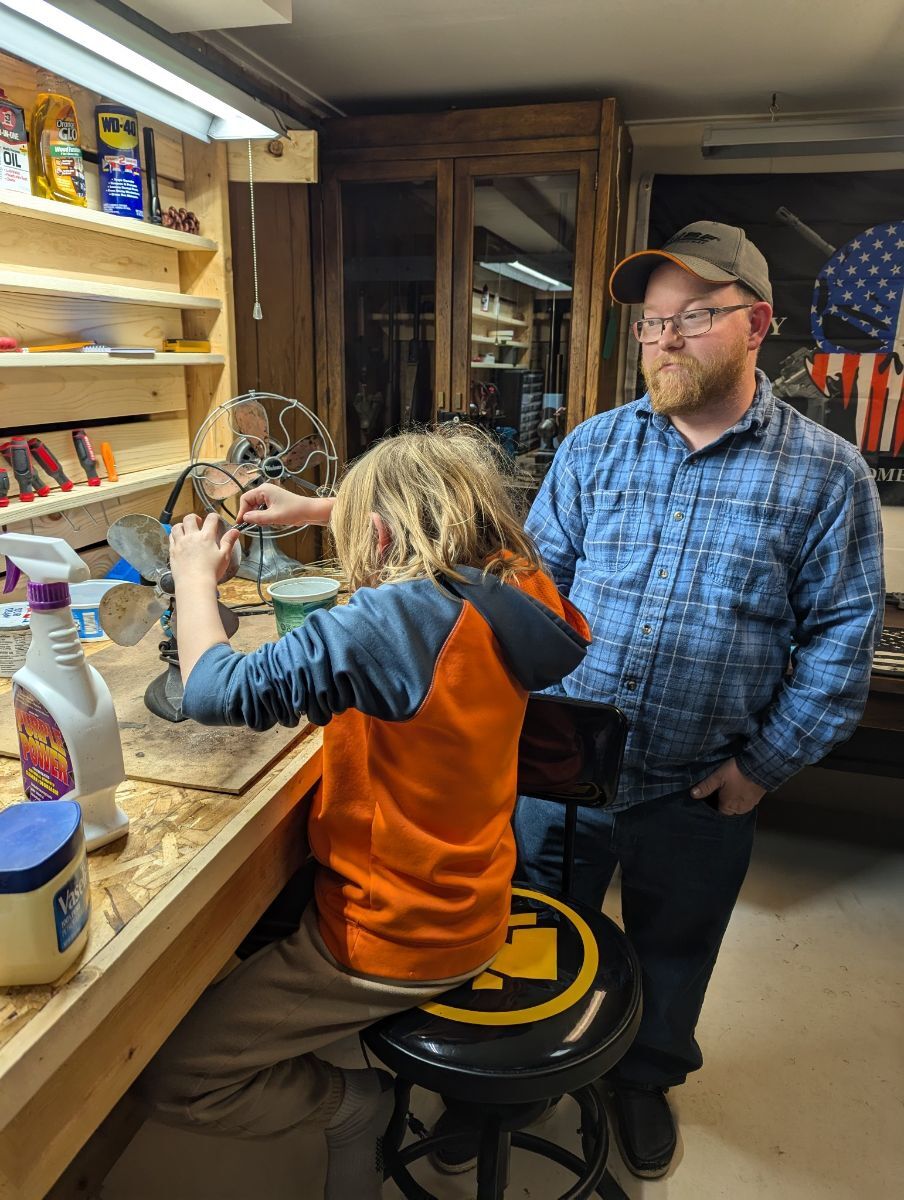
My son age nine and his first fan. Vintage mastercraft 1100J.
12 points
-
5 hours work using hands, hammer and dolly, wire wheels, coarse and fine, 400 wet or dry paper and one hour on the polishing wheel. One spoke replaced without dismantling the cage. VID_20241102_091003674.mp4
12 points
-
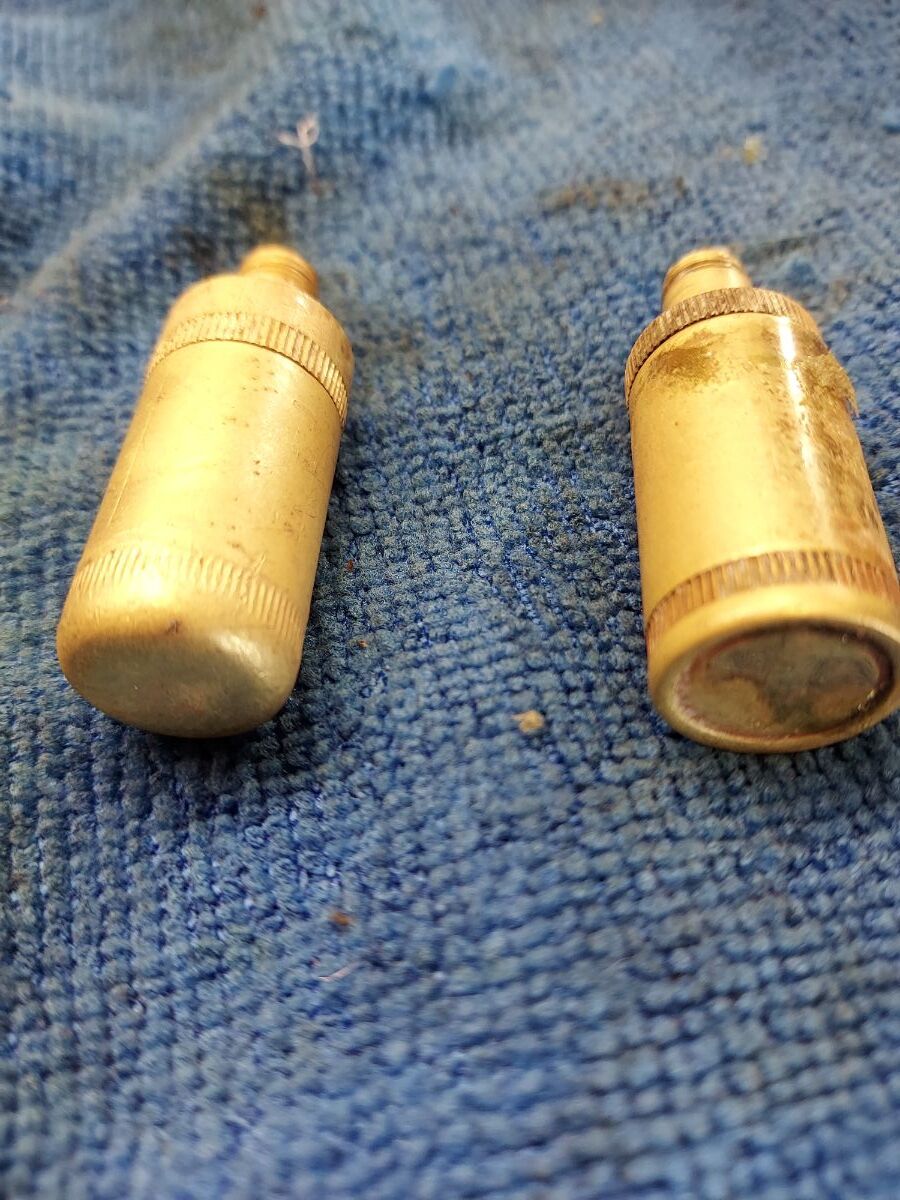
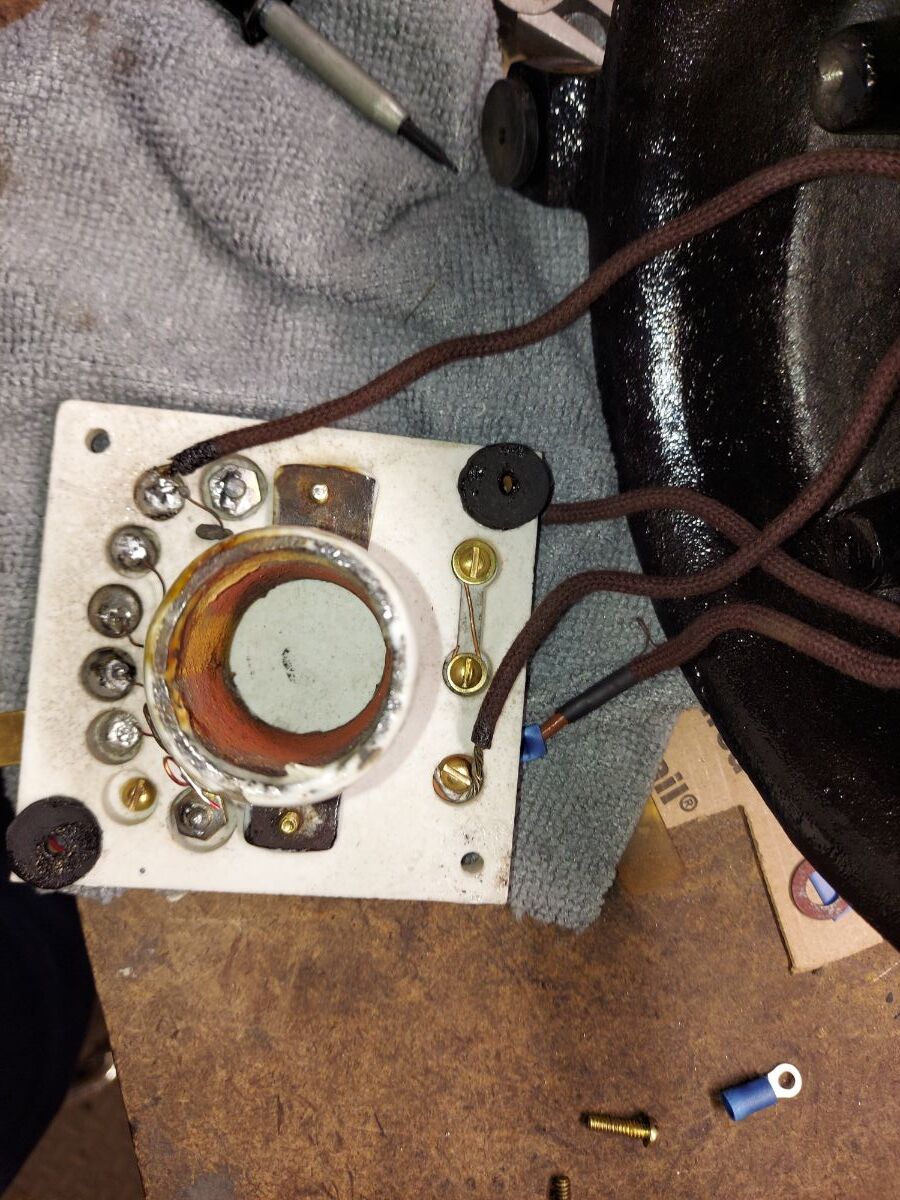
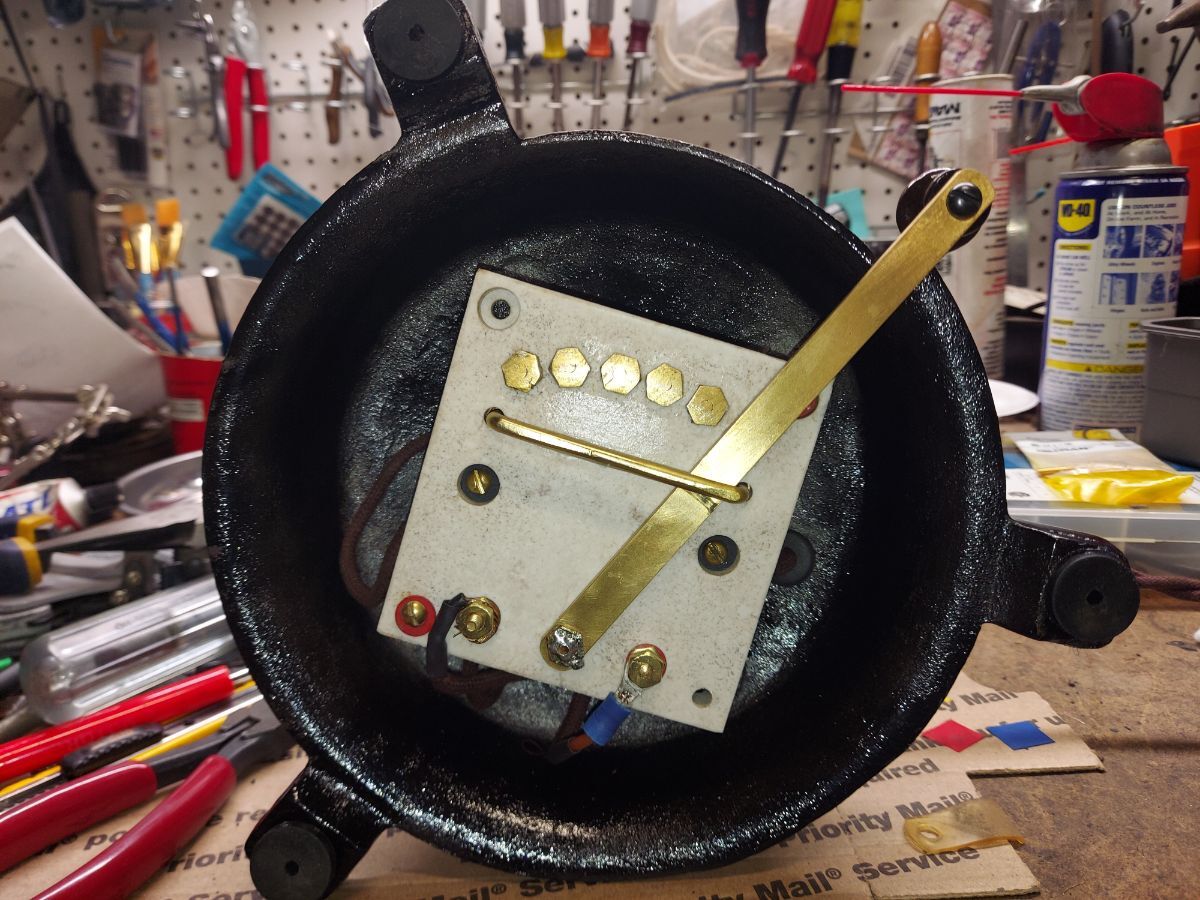
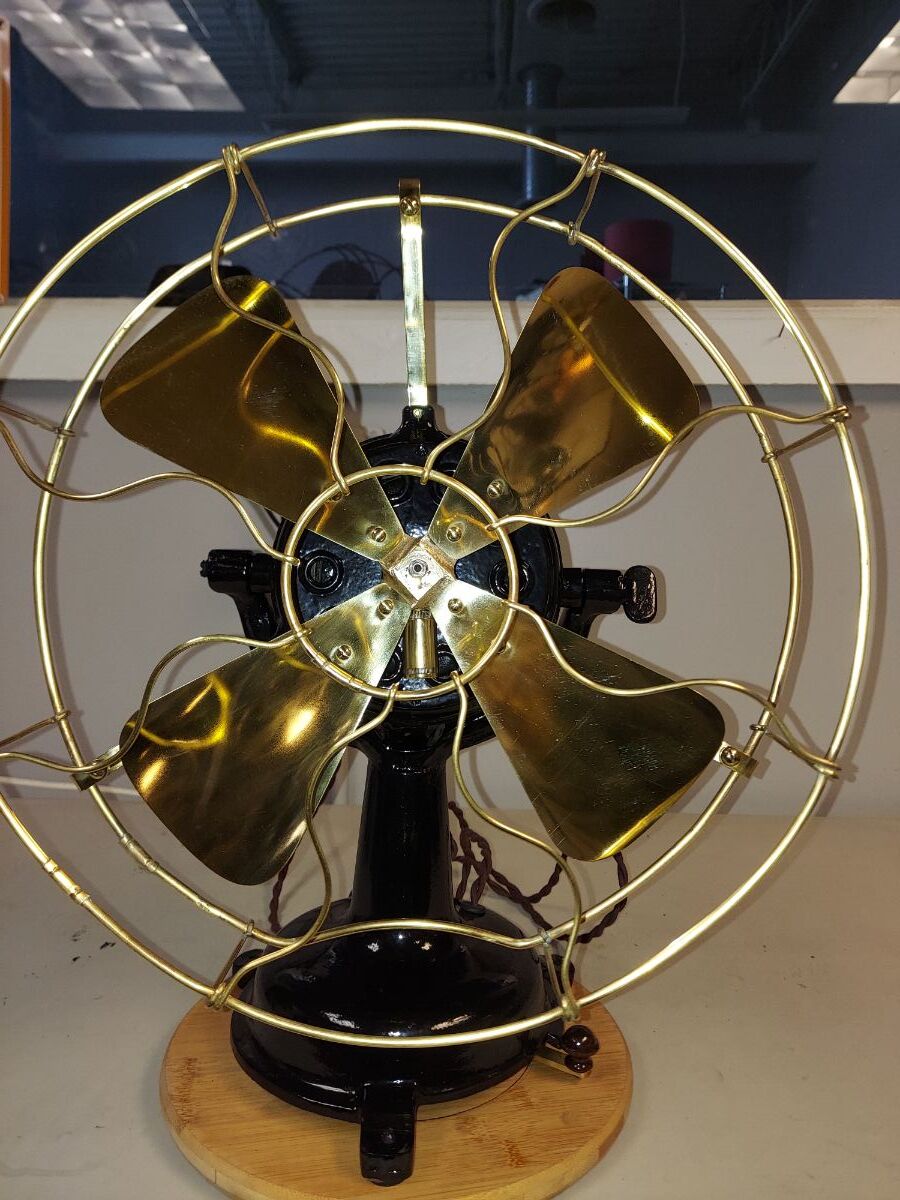
Got this a couple years back and it's been in pieces for a while. Finally got it all back together! The bullet was pretty dented up as they typically are. Had to hammer those out then sand it smooth. Paint was Rust-Oleum Burnished Amber. Left the original paint on the motor but repainted the rest. Cage was pretty bent up from a fall sometimes in its life. But he it is all back together and running!
12 points
-
A great time, as always! Ideal weather made for comfy camping on the grounds as well.
11 points
-
EMERSONCAGEFABVIDEO.mp4 Here's the majority of the steps in making a cage from scratch. Not included are things like searching for and ordering the correct material, obtaining detailed info concerning dimensions or obtaining a sample in good condition. Several details like the crimping function, wrap tightening, polishing and ageing were left out. Also packing a cage for safe, timely and economical shipping is not included. All of these add time and effort to the build, so if this looks simple and quick, well certain parts are, but all the steps added up equal the majority of a working day to accomplish. Cheers, Bill11 points
-
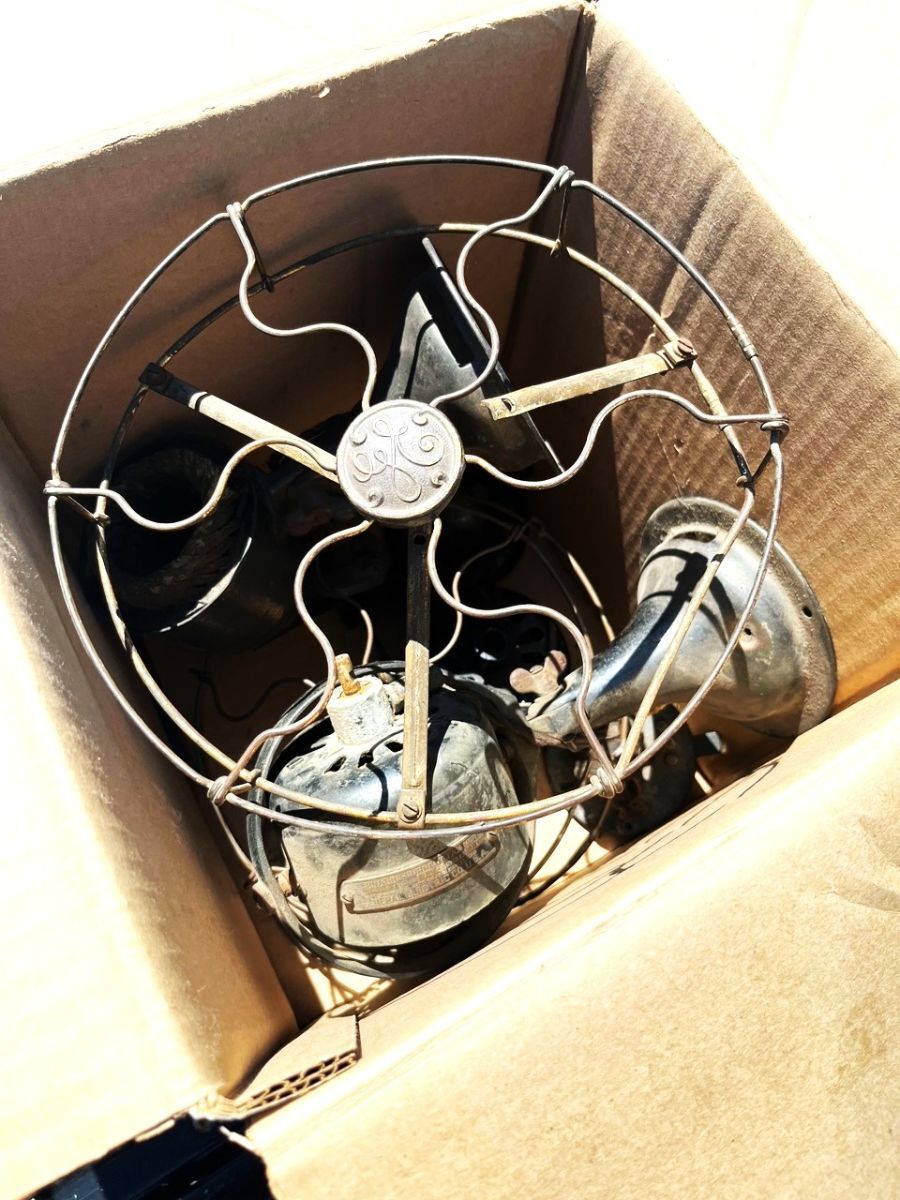
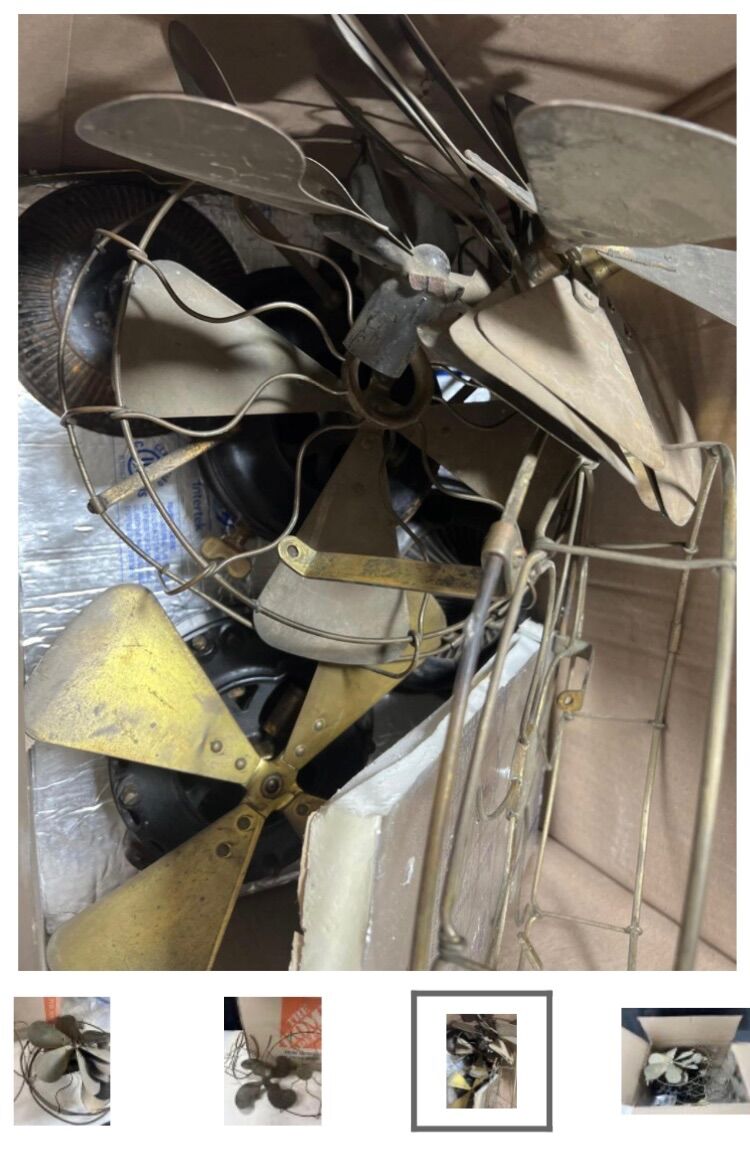
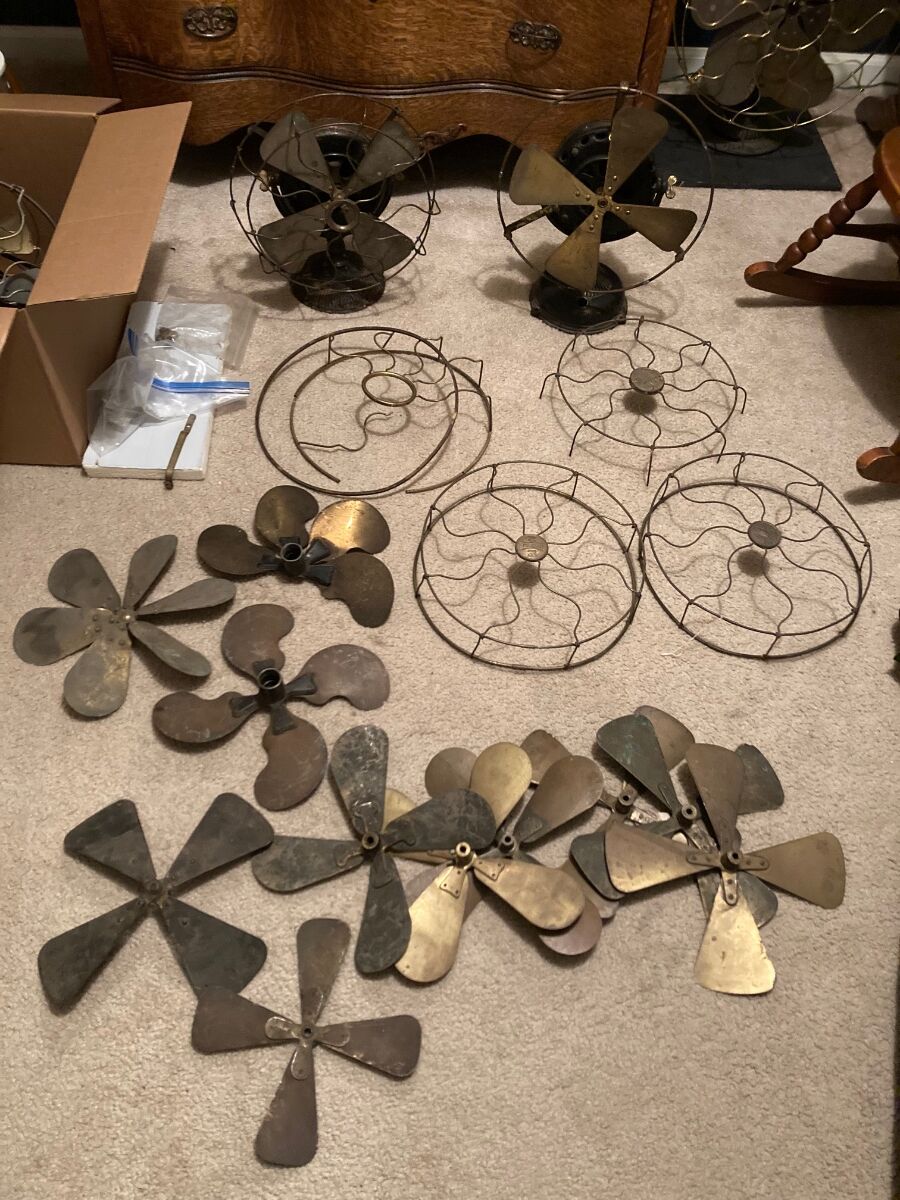
A box of fan parts was at an online auction a half hour away from my house. Here’s the best picture inside the box. I saw what looked like an early pancake base and decided to bid. I won and got more than I hoped for. Inside was a bunch of blades and cages along with two motors, bases, and cages for two pancakes. I matched up the parts and have two running 12” cakes.
11 points
-
Finally got some pics and video together.I had to finish another fan for my daughter’s birthday.This ones big sister.Wait until you see that one. The other post was becoming long so here is the conclusion video.Hope you enjoy.10 points
-
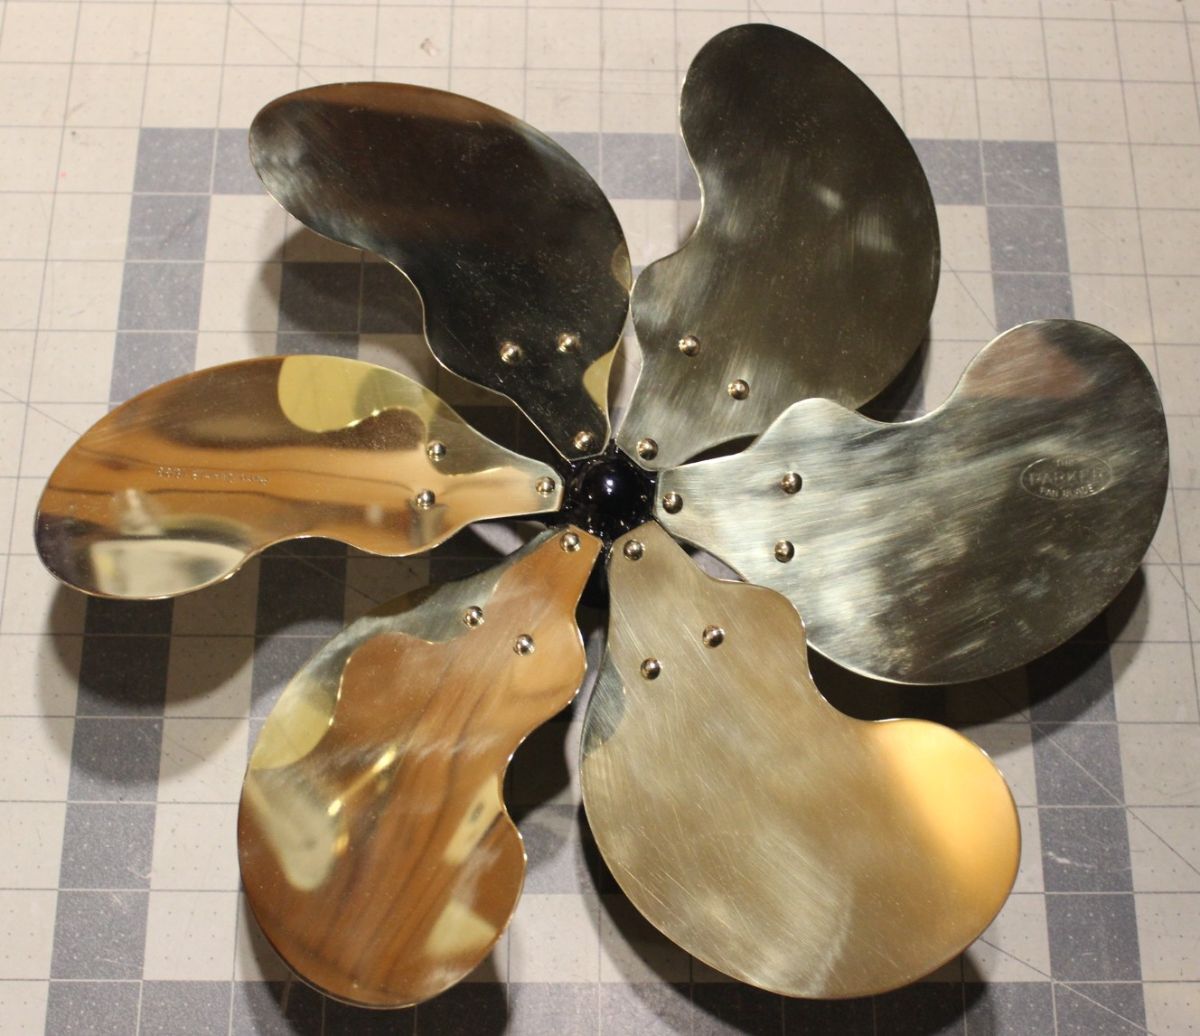
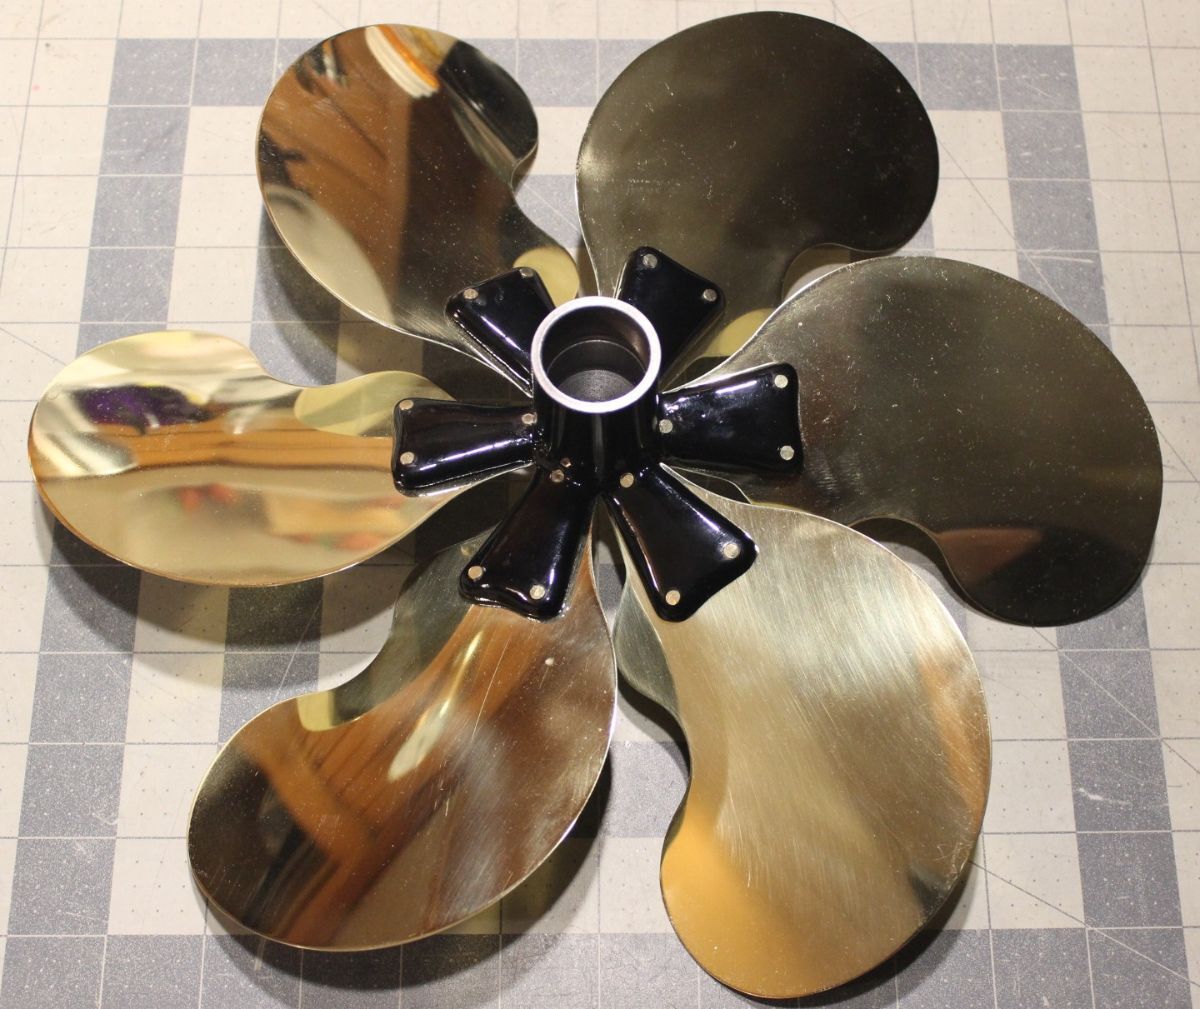
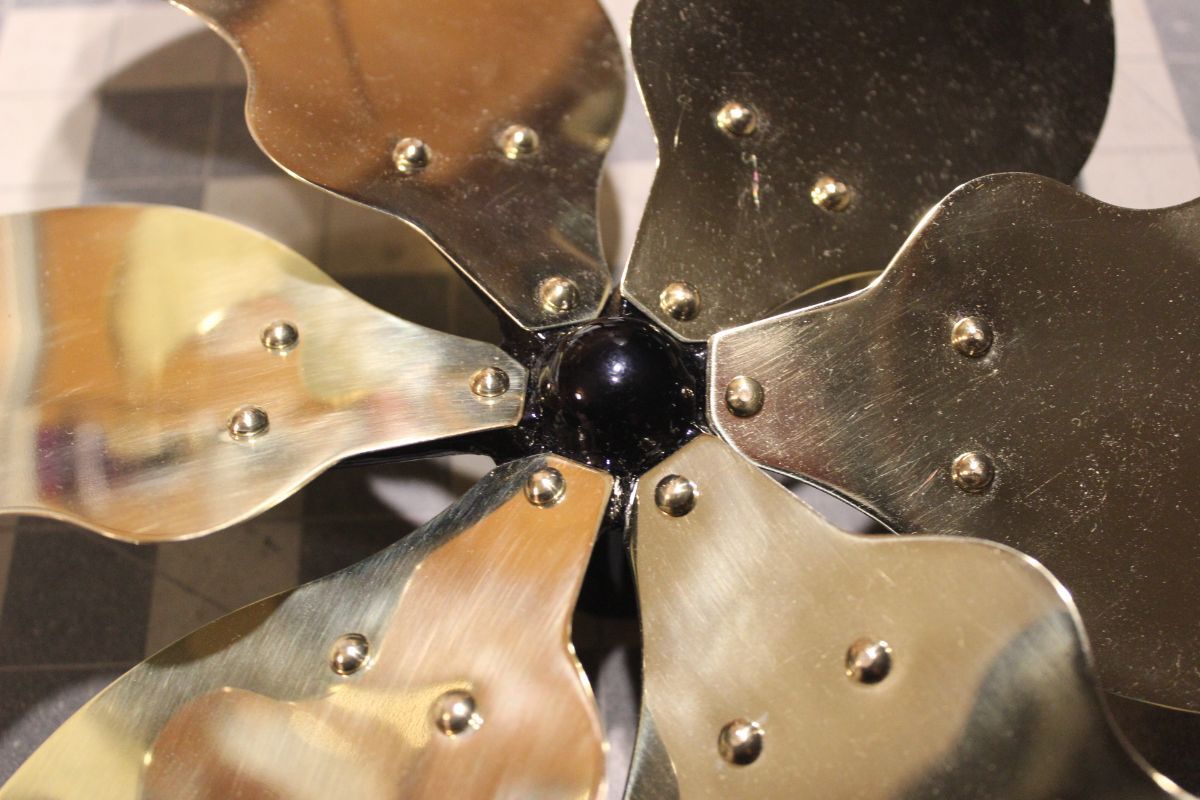
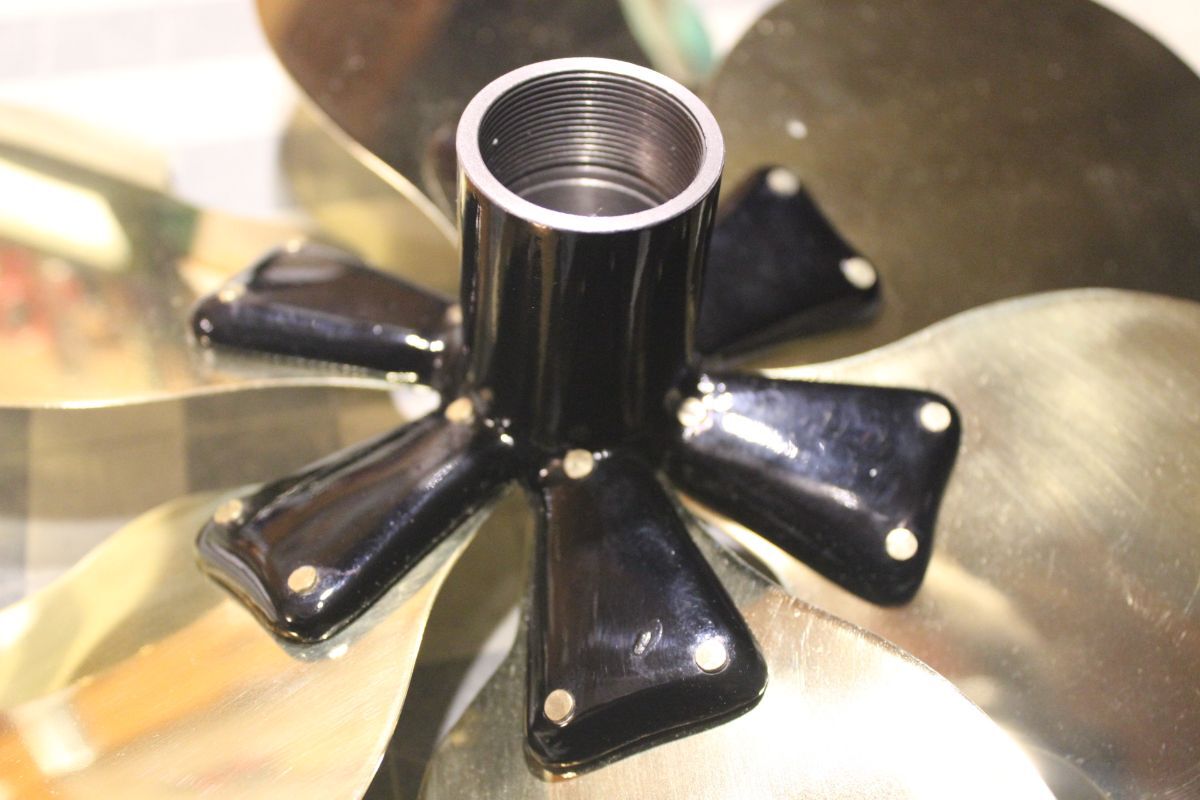
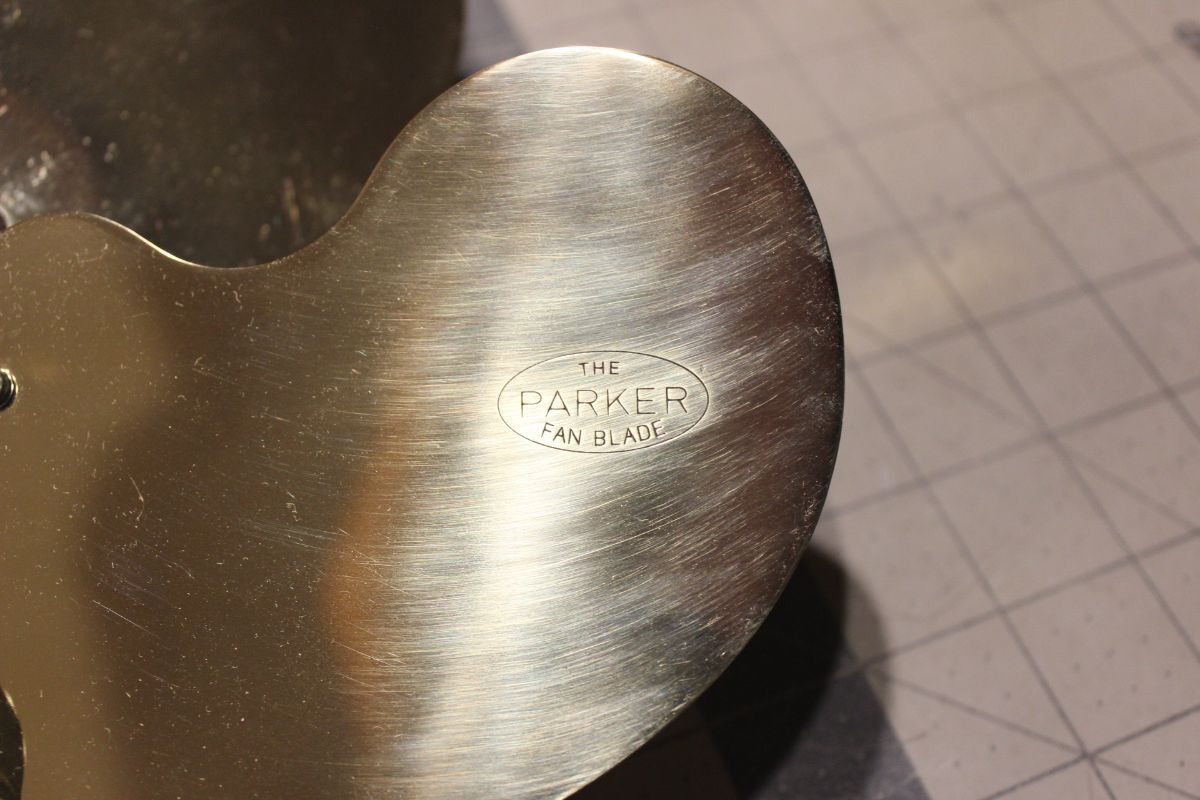
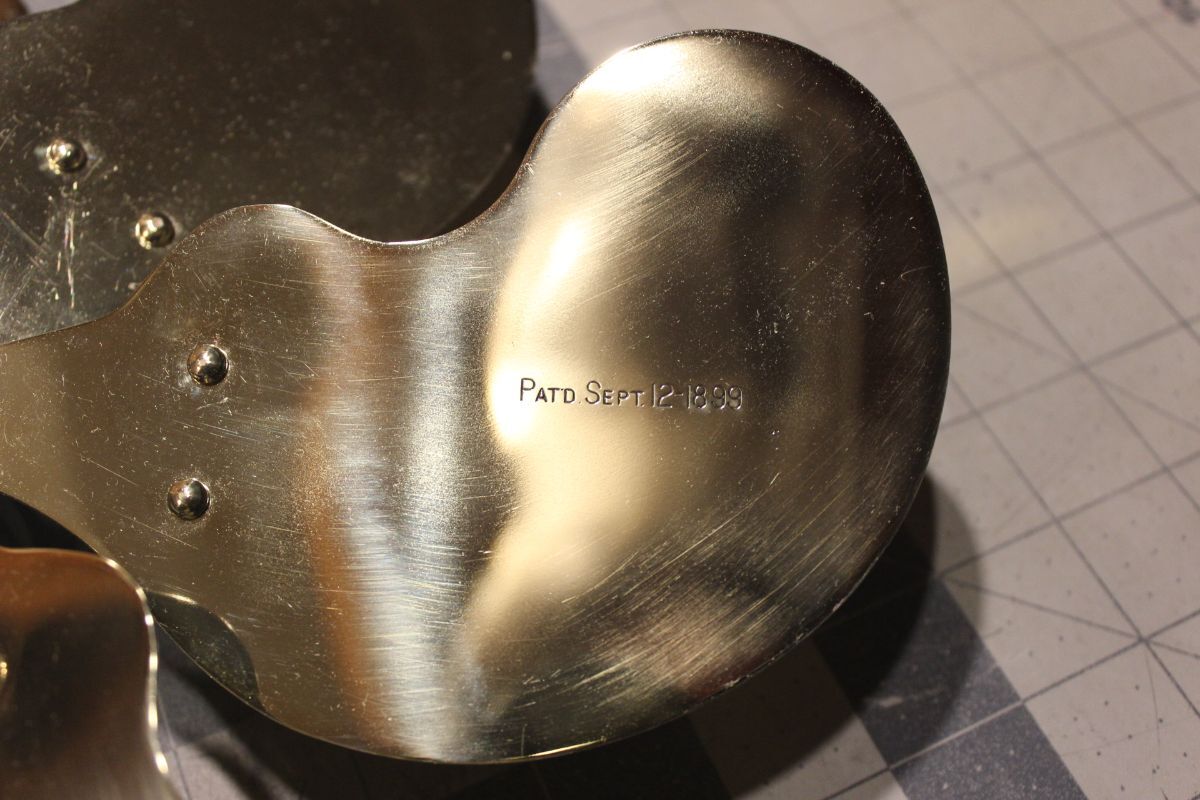
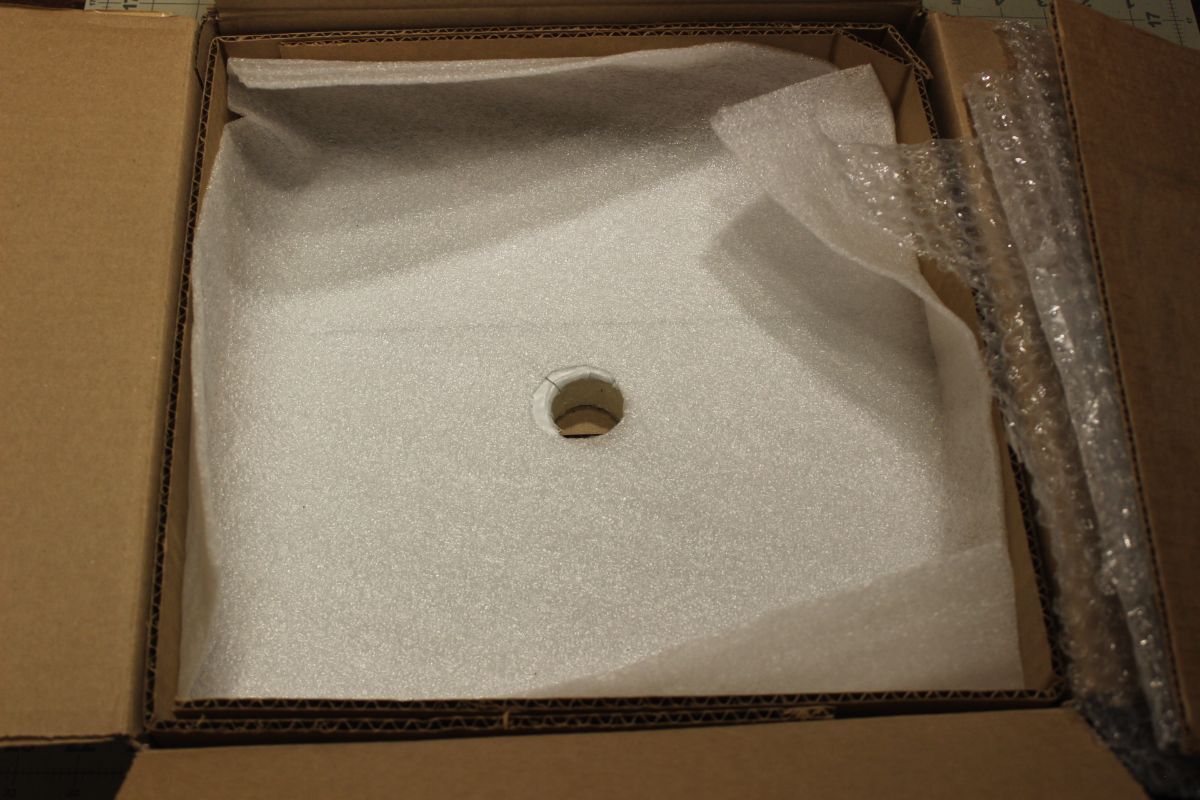
Received today with package intact and fresh out of the box. The blade was well packed. Wings are a hardy thickness, and the reproduction hub appears to be like factory.
10 points
-
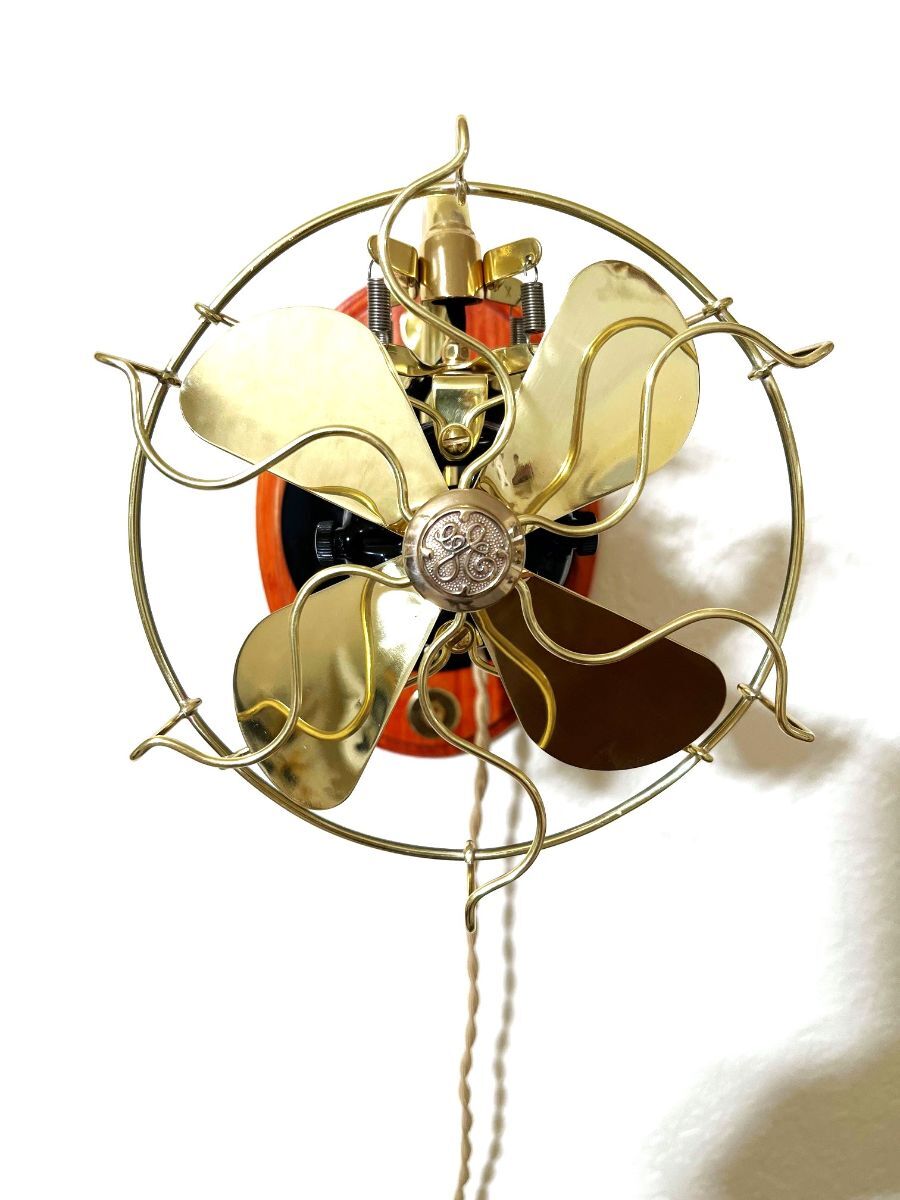
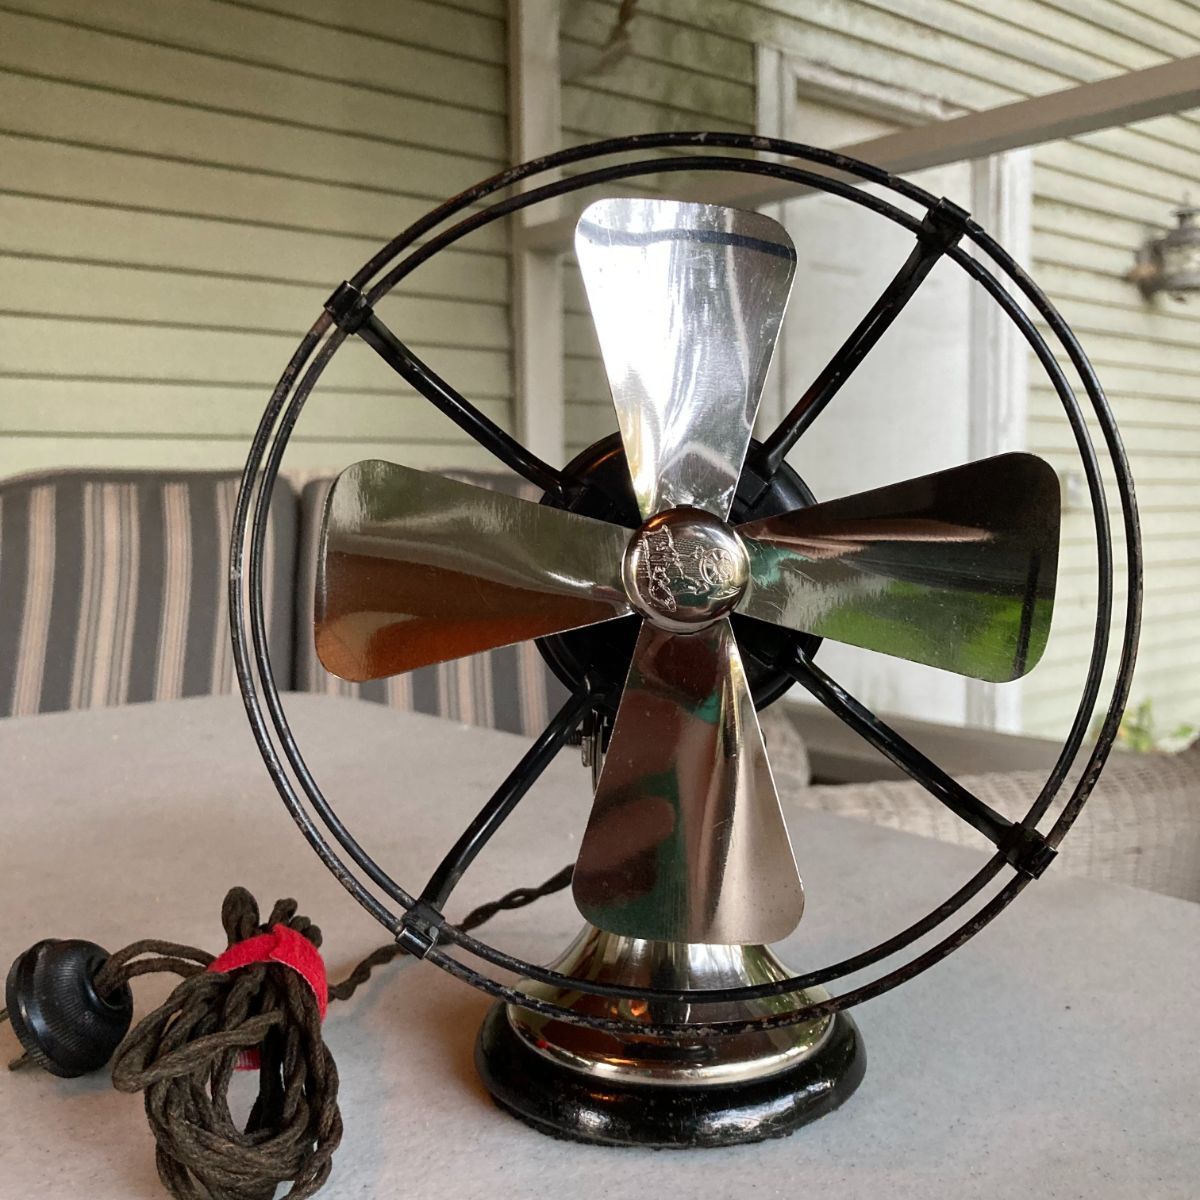
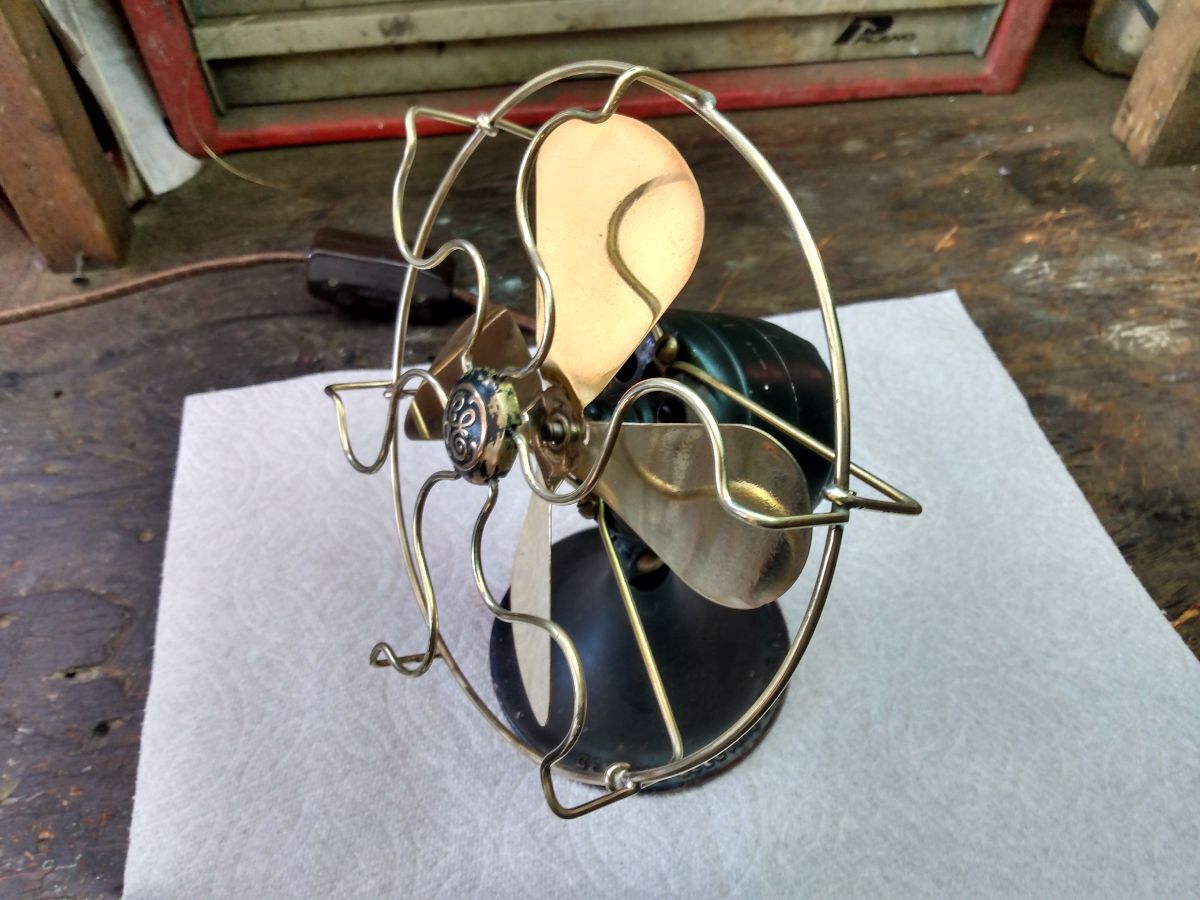
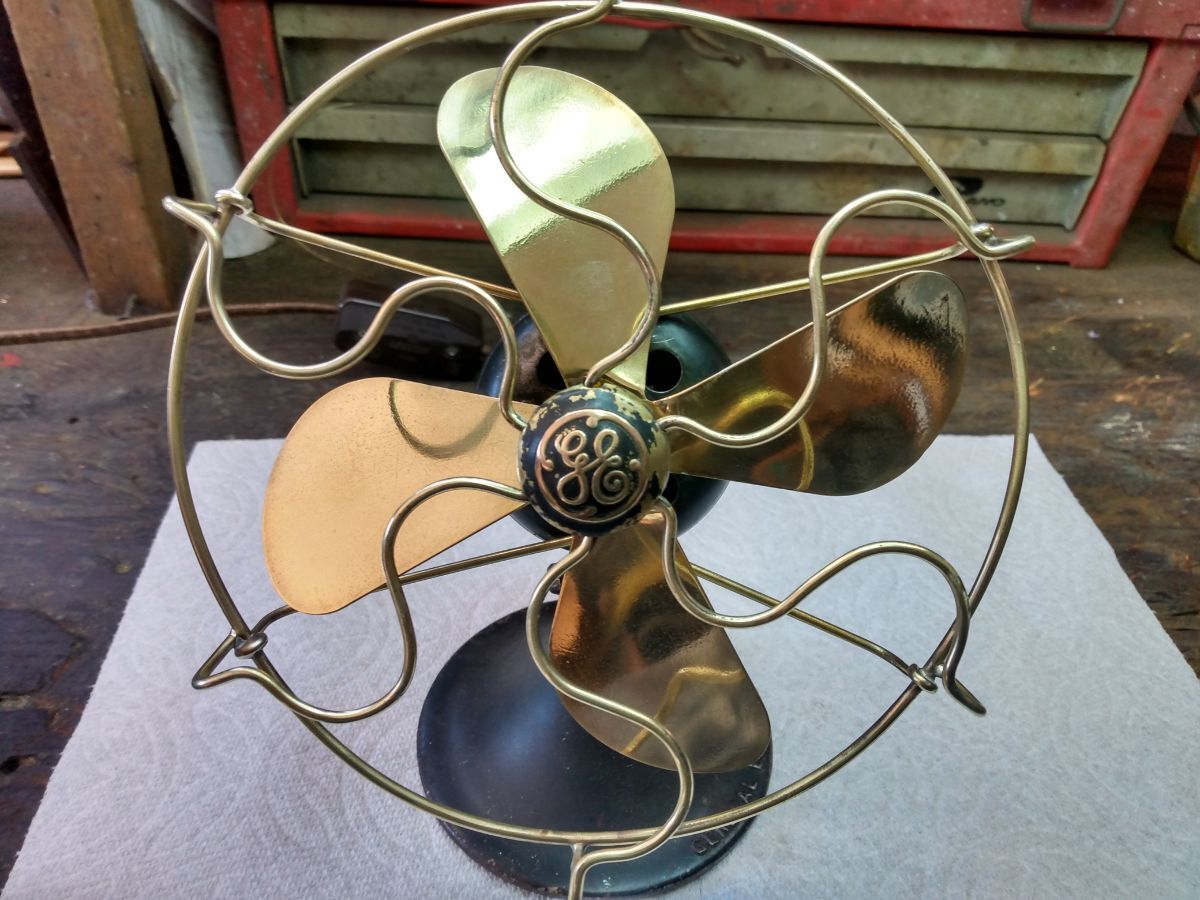
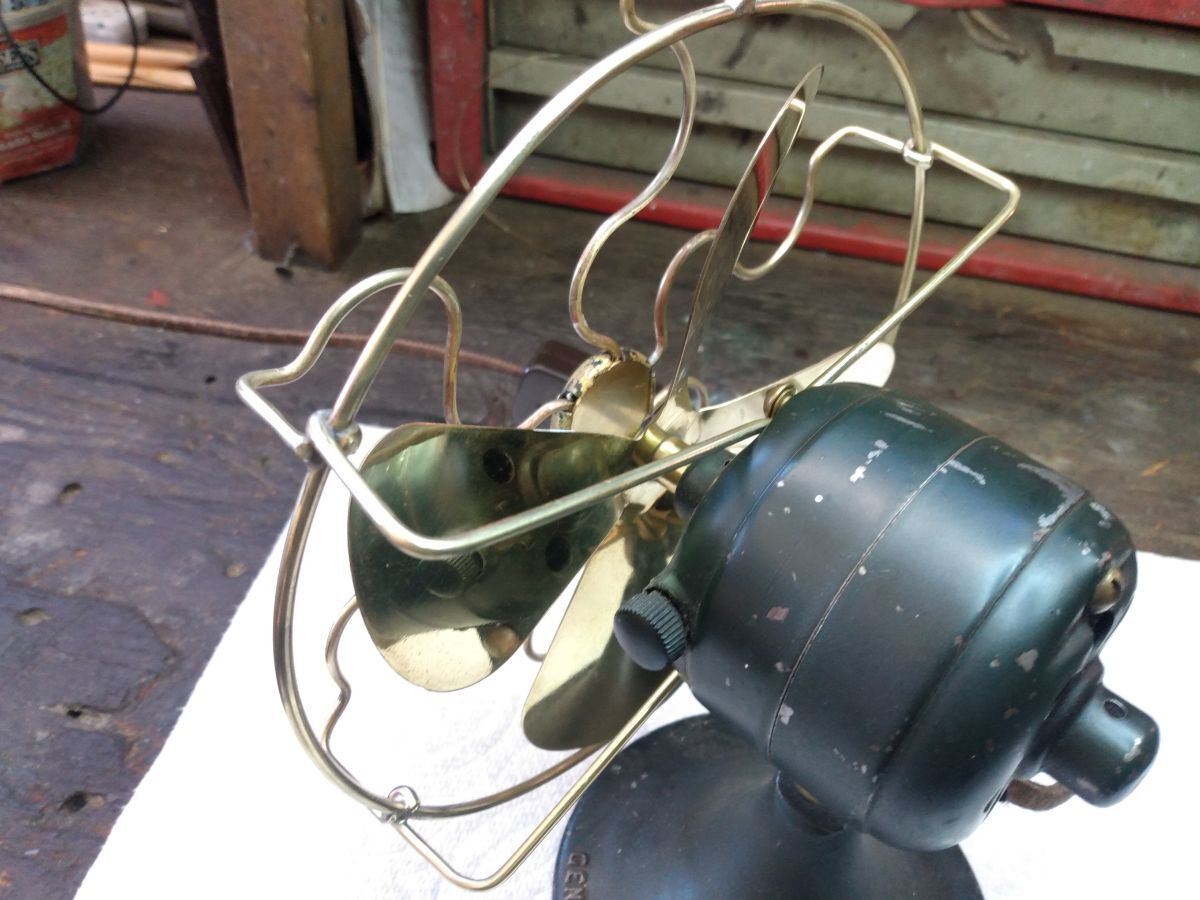
I think I've mentioned the unreliable power grid we have here on Maui before. Well we had storms this last week and lost power for most of one day. What to do? I have some solar with battery backup, but it's not even powerful enough to run my hand drill. Computer runs, but no wifi until power comes back on. No motorcycle riding in this weather. So, I made a brass gaurd for this little guy, using bare hands and hand tools. My moto tool will run a bit, so I had that to use, but polishing was out of the question. This tiny fan sits on top of my amp for a cooling breeze while I play my guitar. 6 inch GE brush motor fan. Cheers, Bill
10 points
-
Just finished this little guy, I bought it from a member at Stan's Lake Houston meet. It was in great shape al I did to the paint is clean and wax. The cage needed some repairs so I when ahead and polished it and balanced and polished the blade. I did replace the head wire and power cord.
10 points
-
The best I can fing The best I can figure it date 1909 , If that's not correct please let me know (Russ)10 points
-
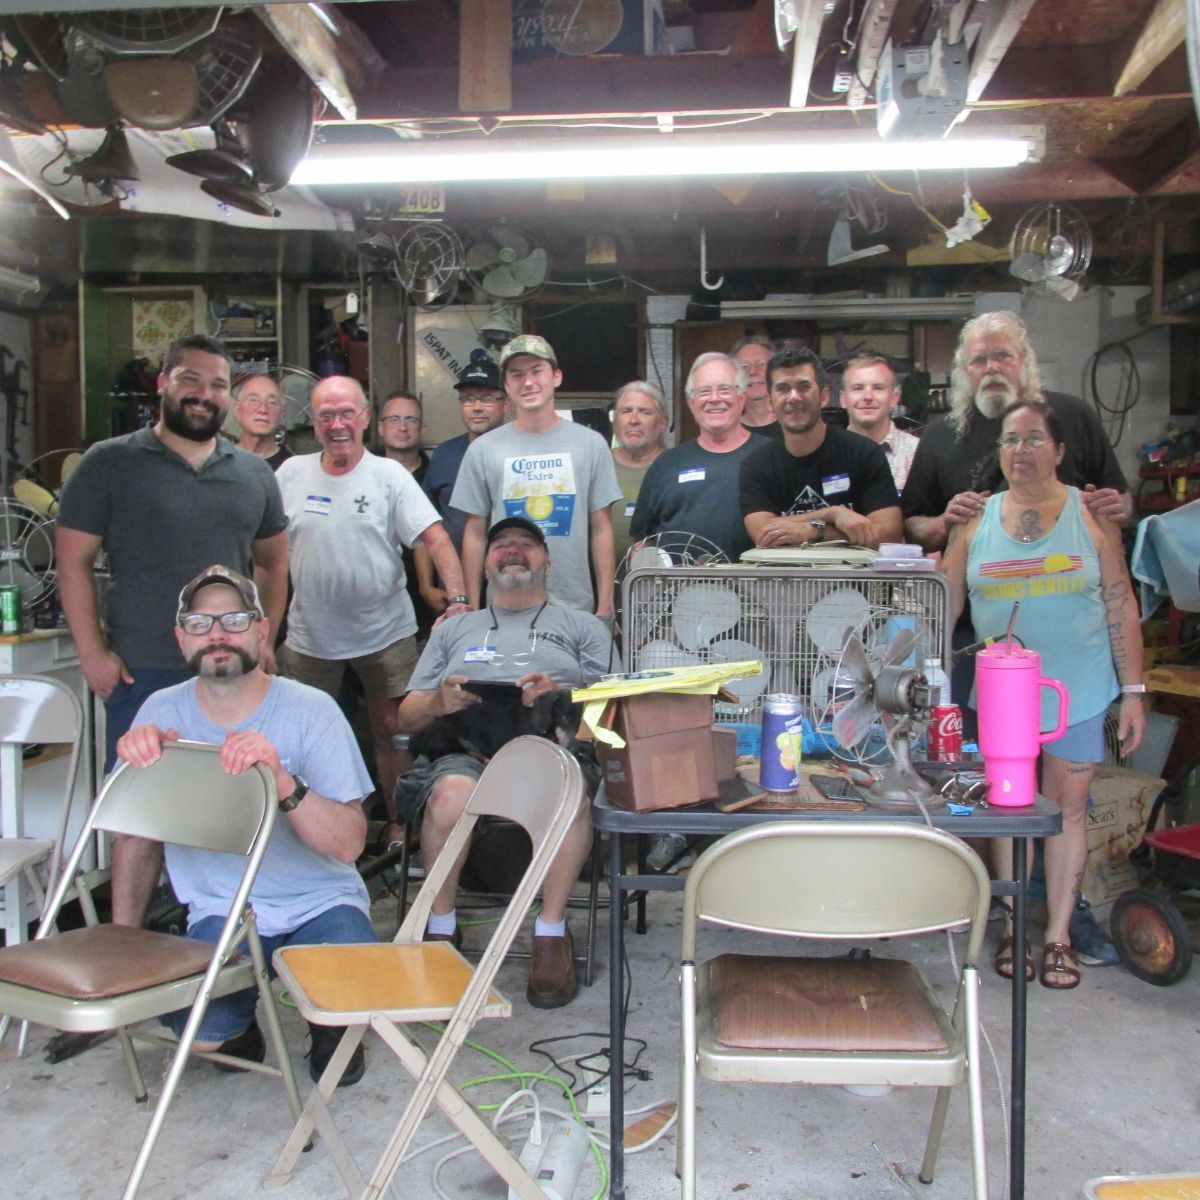
Thank you Geoff,Linda and Paul for hosting yet another fan workshop. Wonderful time. One of the best events of the year for AFCA members. Happy fanning.😊10 points
-
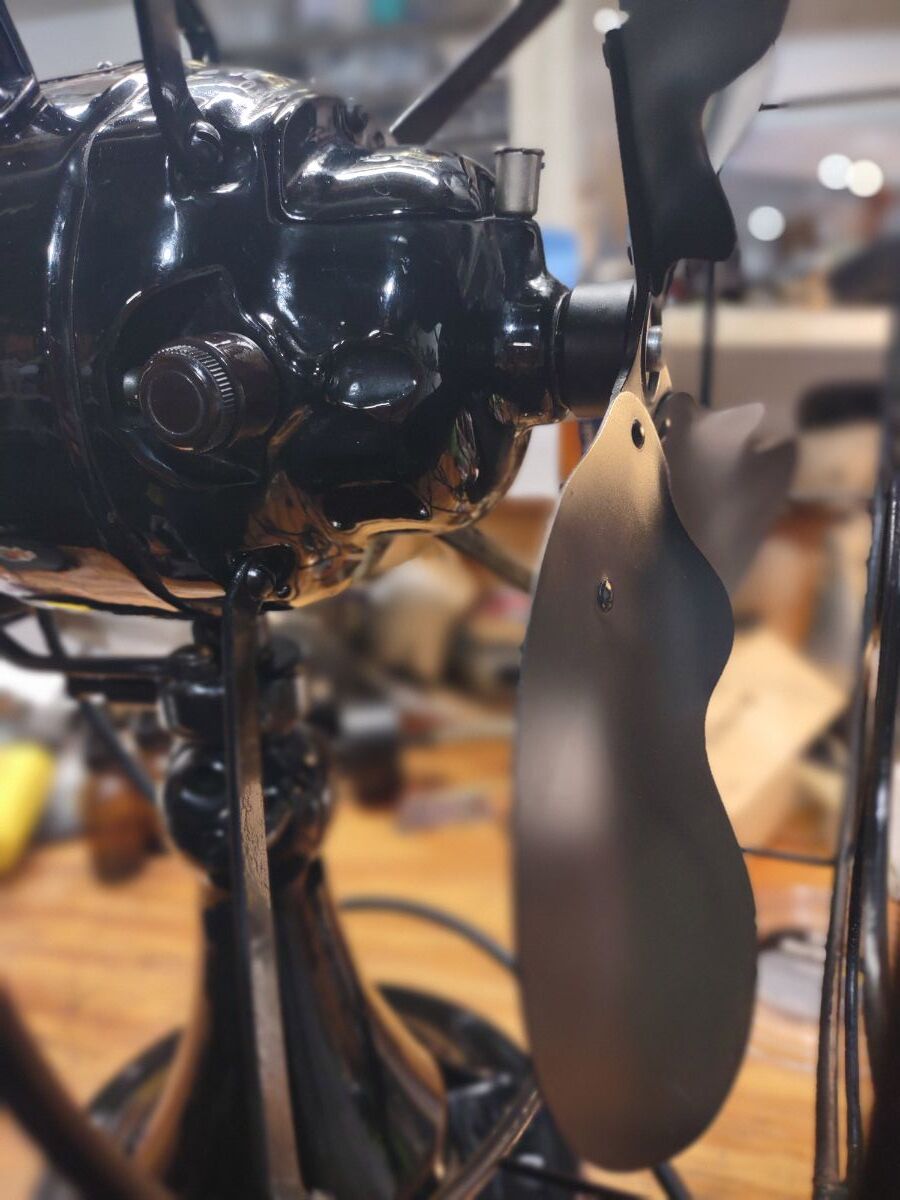
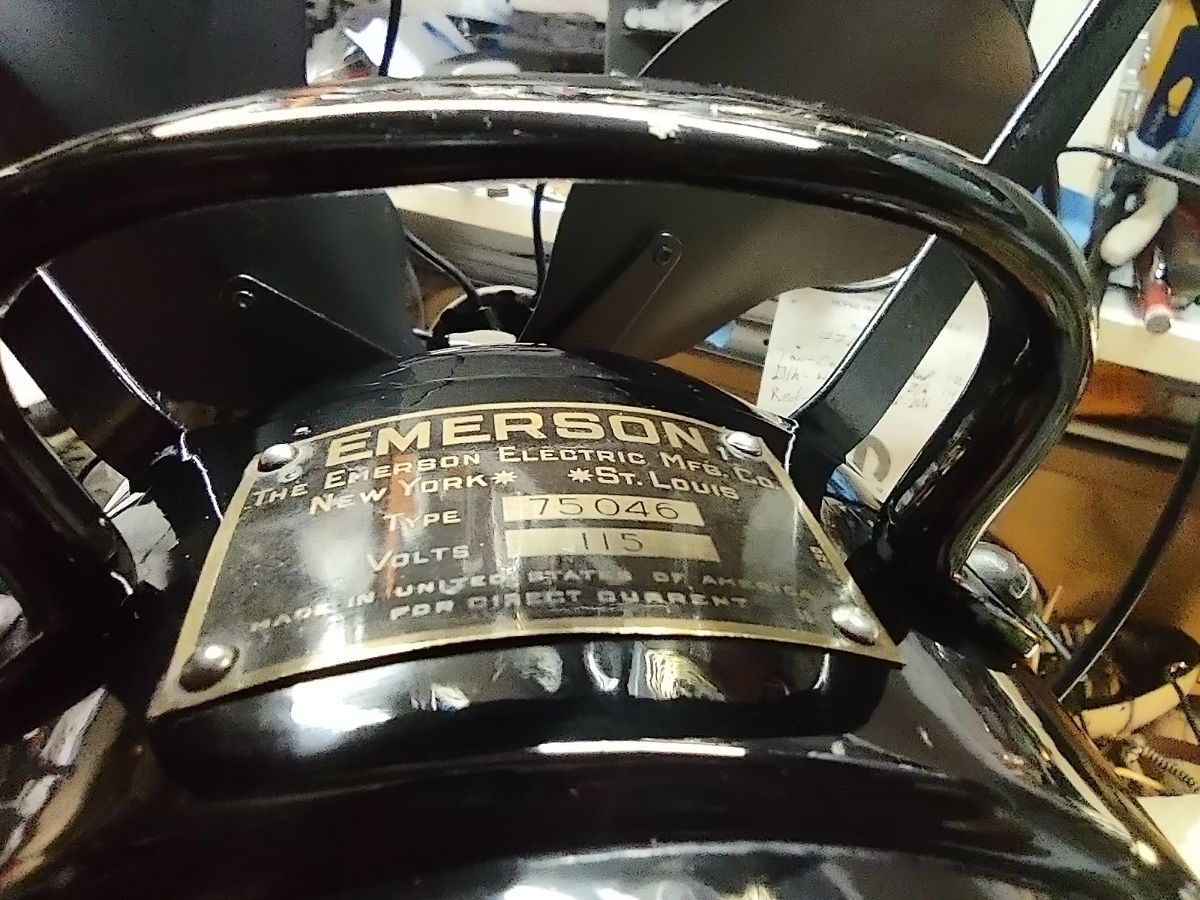
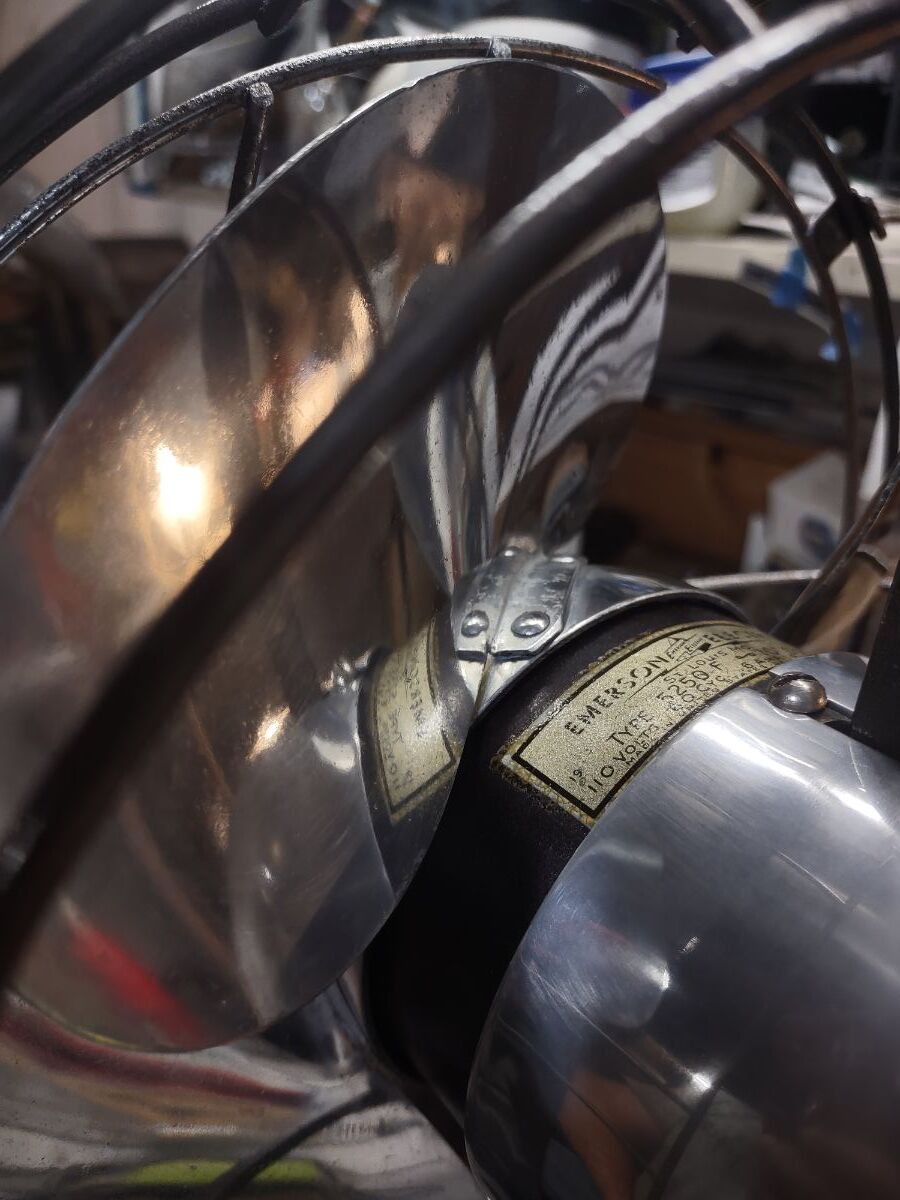
Recently got this 1931 Emerson 75046 at auction. Was in remarkable condition. Think the blades were painted a matte black more recently. Base had a very nice touch-up job on the usual rusty bits. But I'd say 90% of the original finish is still there! I just hit it all with Chemical Guys cleaner wax real quick. Brought out a nice finish. New wire all around. Bridge rectifier in the base. Pulls 0.25A low, 0.5A med, 1.0A high. Beautiful running fan! I did note that this is a 1931 steel blade. I have a 1930 75048 with brass blades. Enjoy the pics! VID_20250705_191423322.mp4
9 points
-
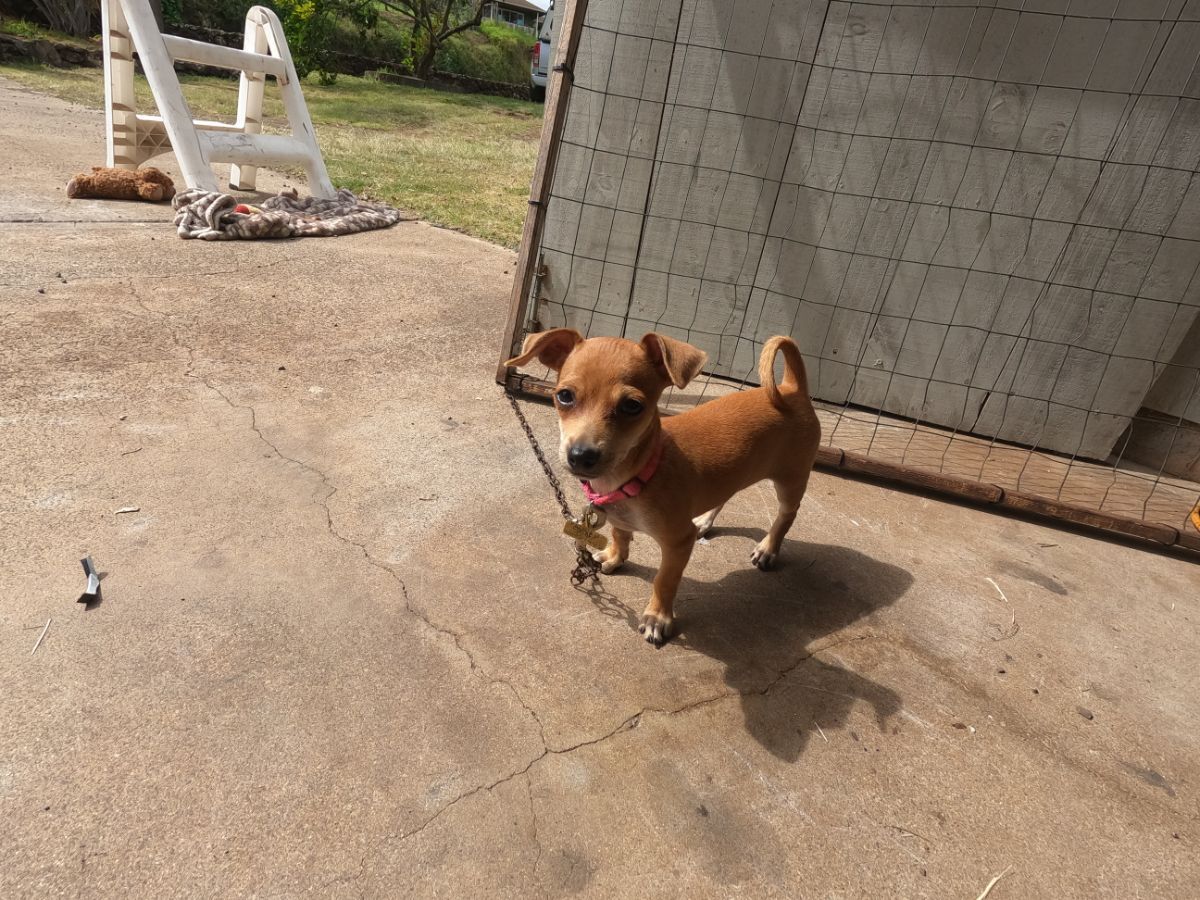
It could be saved. I won't call it perfect, but still has some small evidence of a past hard life. Definitely worth displaying, and the metal is solid. Not all of these can be saved. Sometimes the metal is crystalized and just falls apart in your hand. Probably a combination of vibration, differing metal qualities and previous manipulations. One spoke replaced. No single spoke retained it's original pattern so a tracing was made of an undamaged cage spoke for reference. On to the next one. Cheers, Bill PS. Note viscous guard dog. Chihuahua, terrorist, Chupacabra mix. Cookie. 4 pounds of unlimited energy.
9 points
-
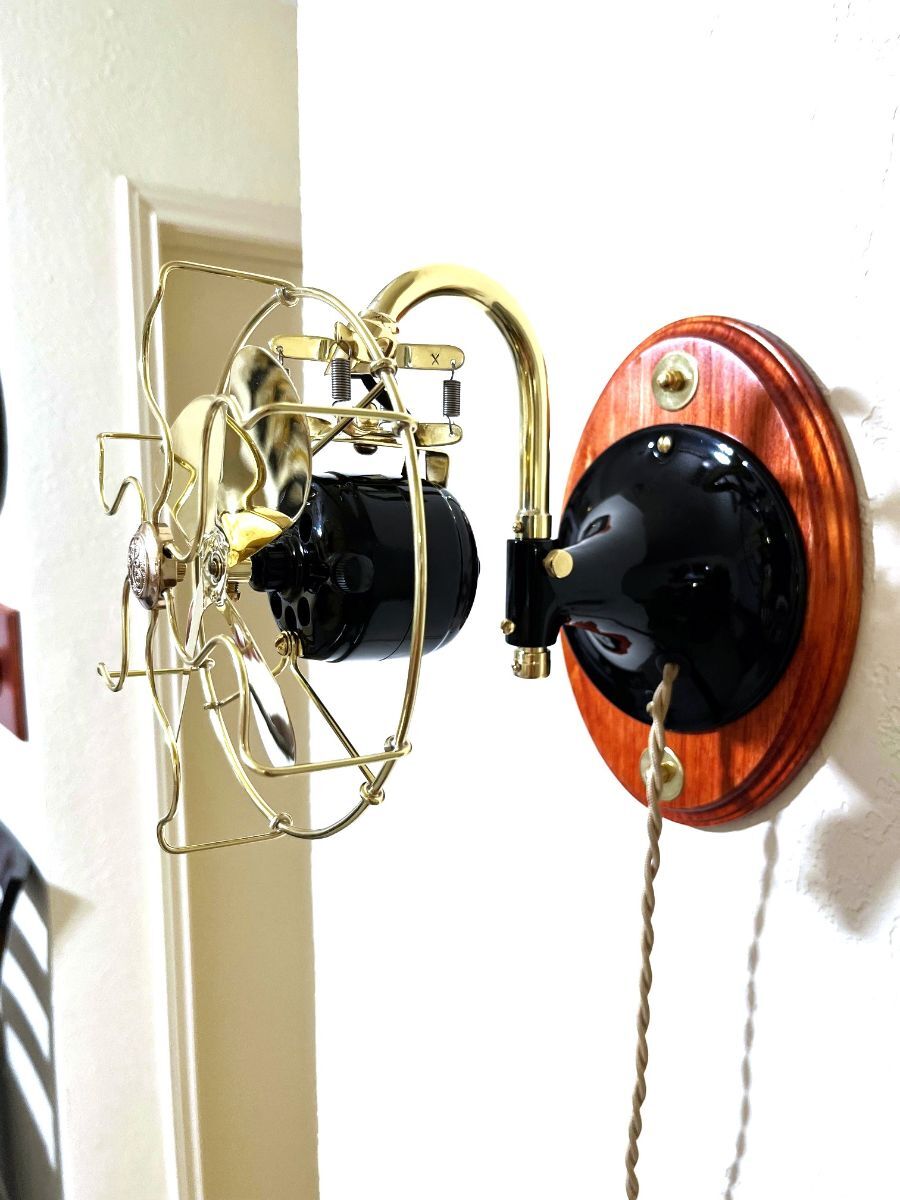
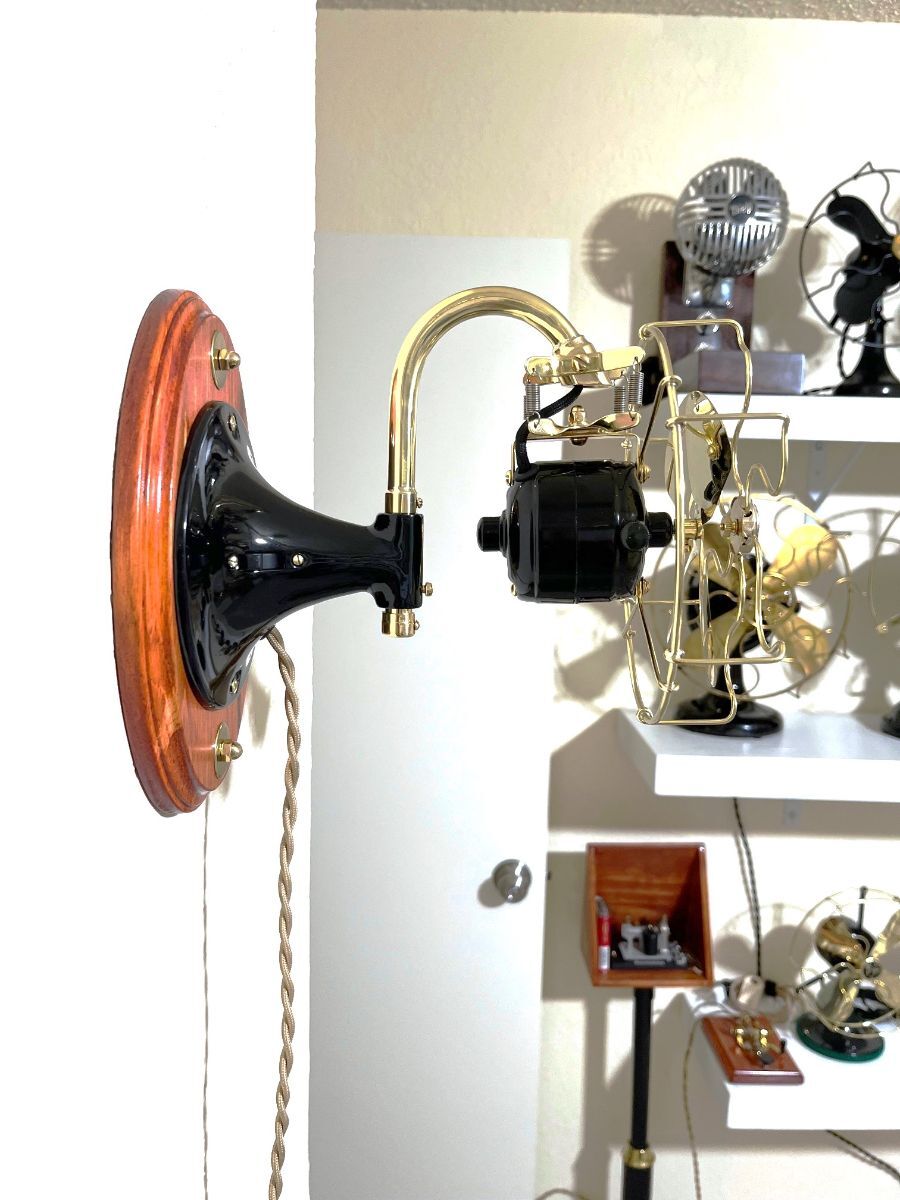
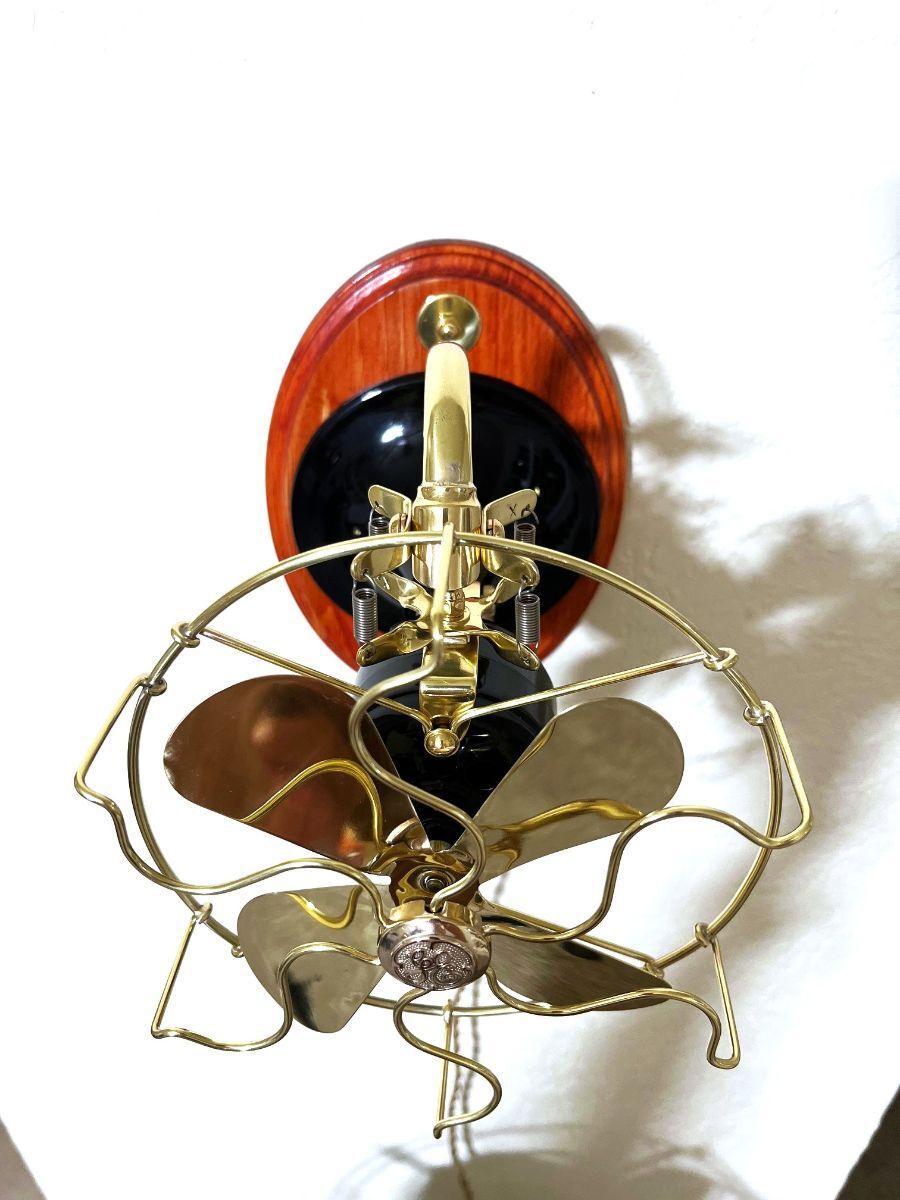
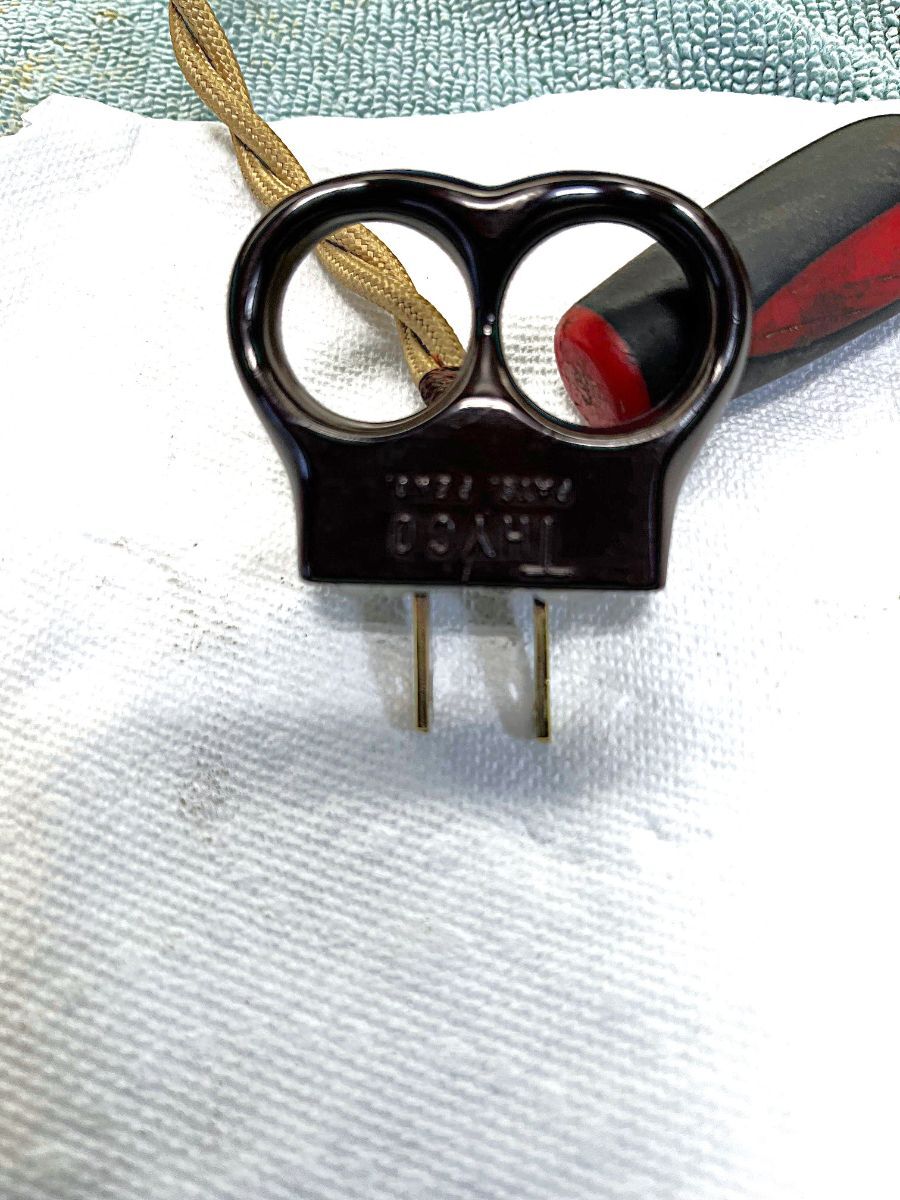
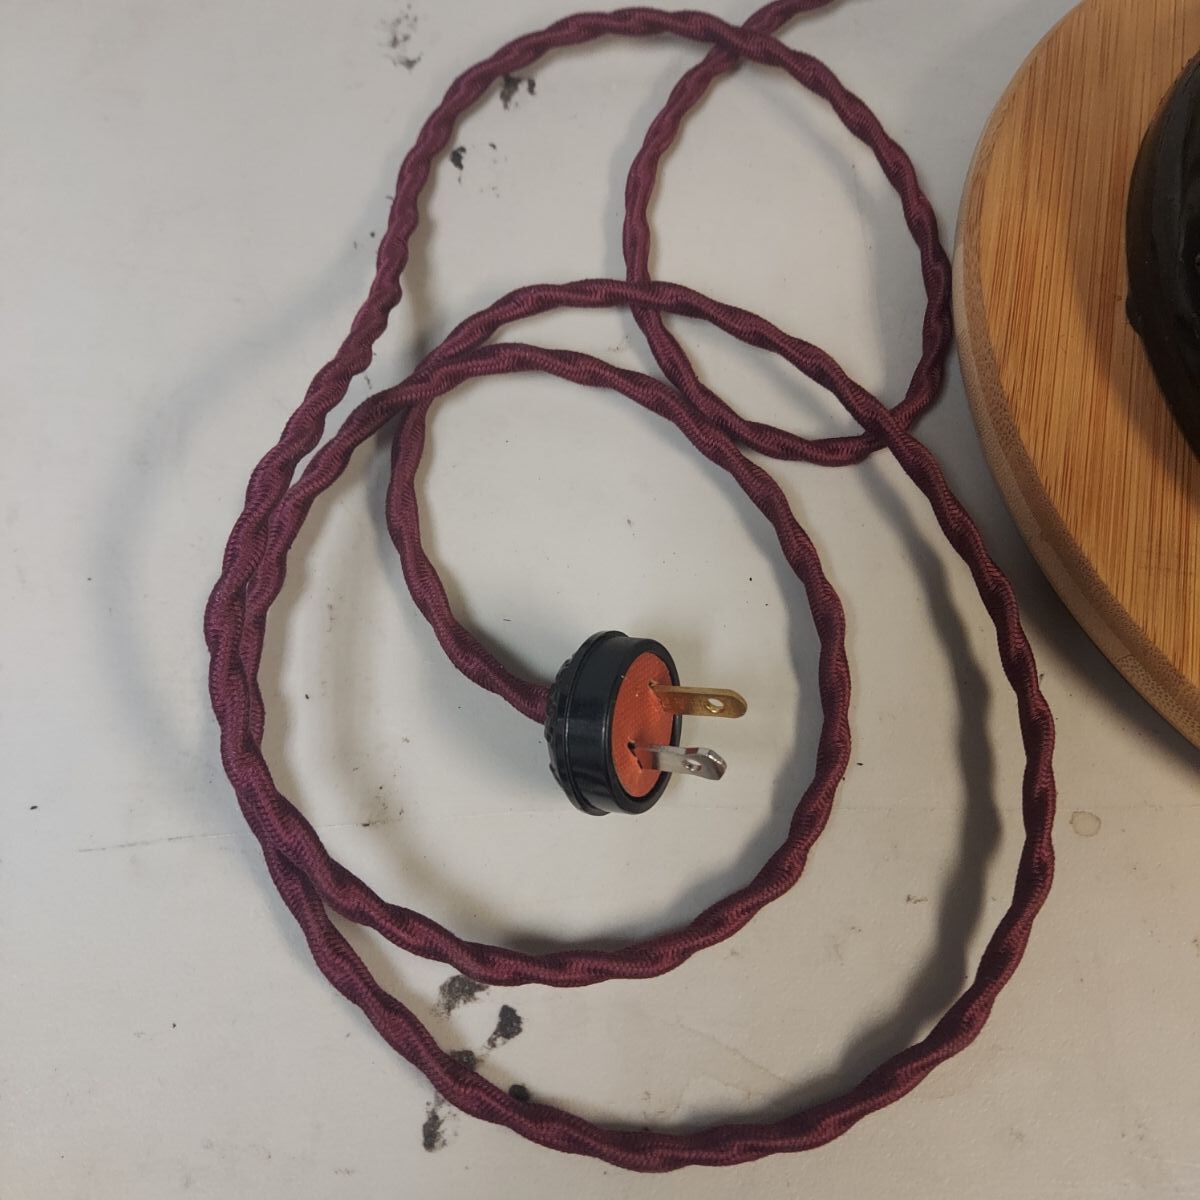
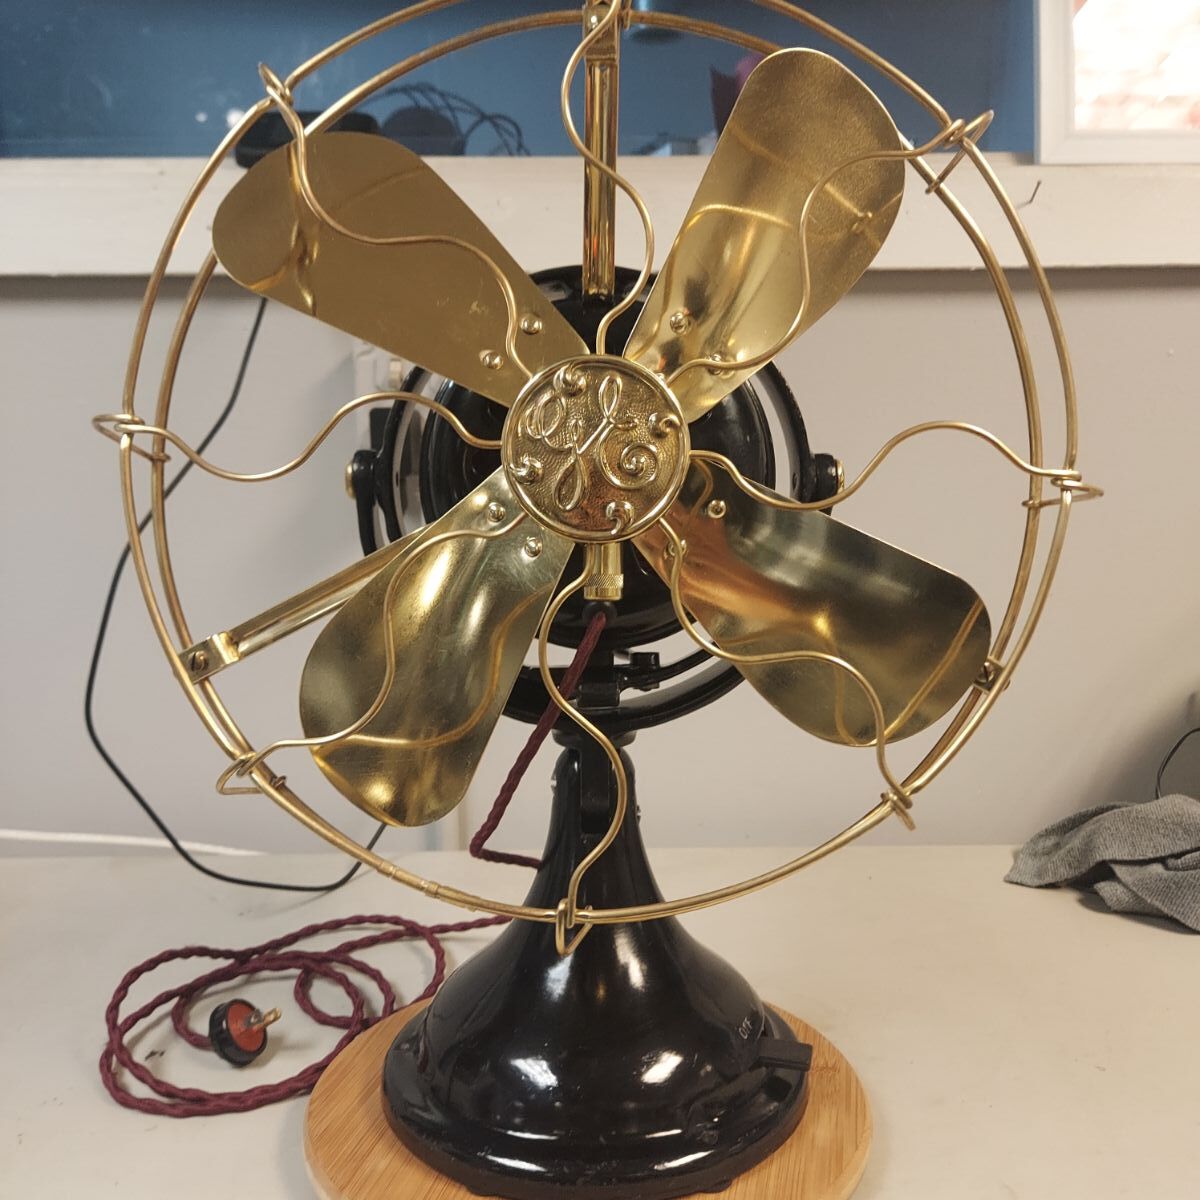
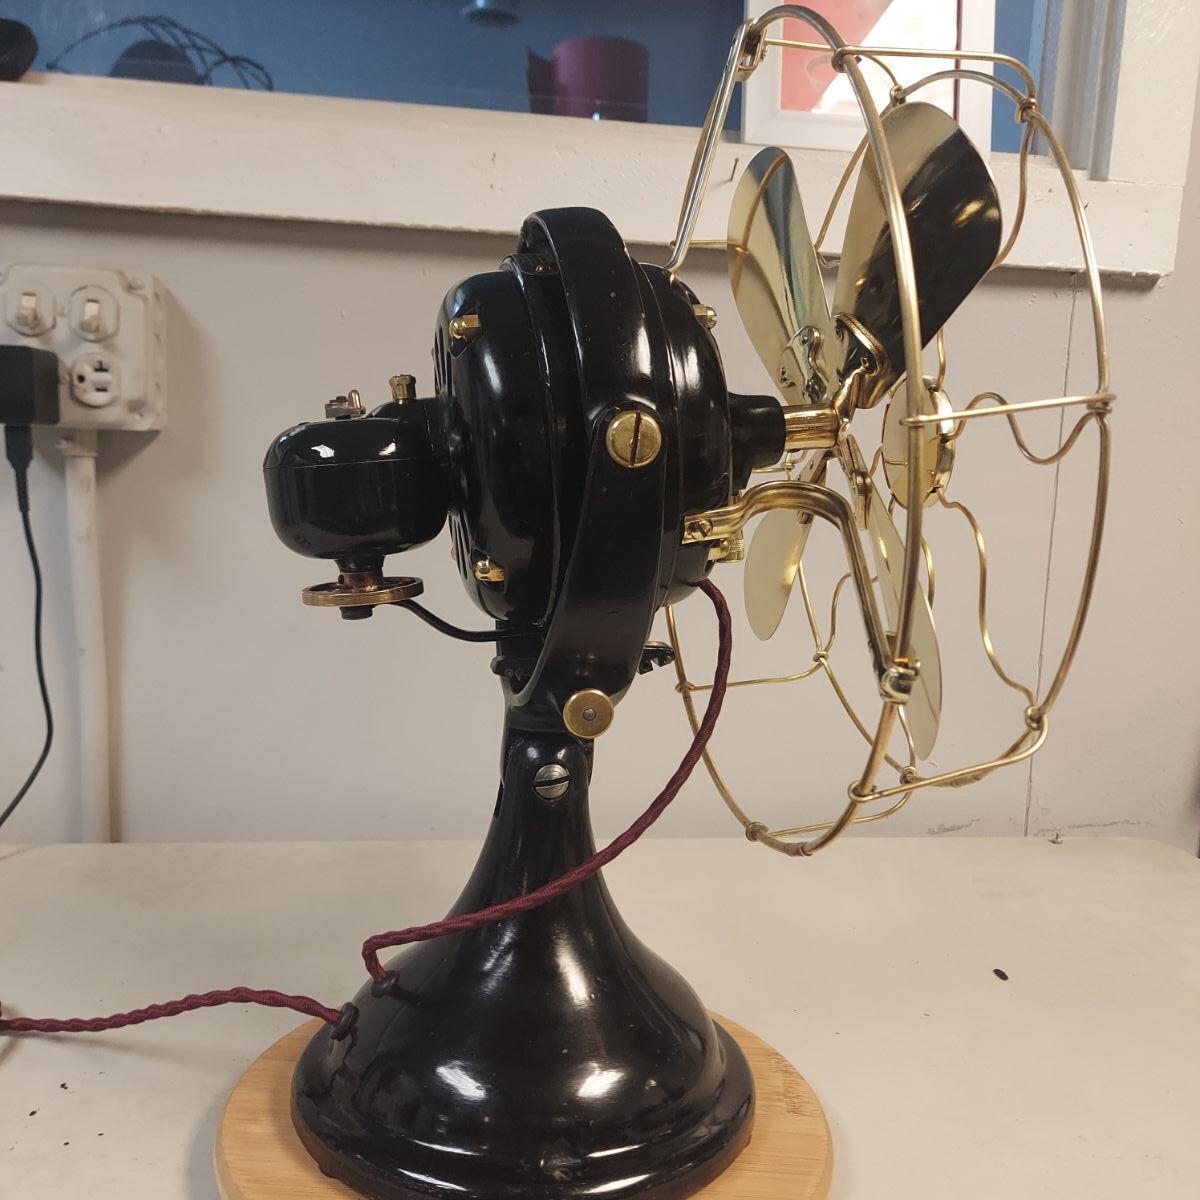
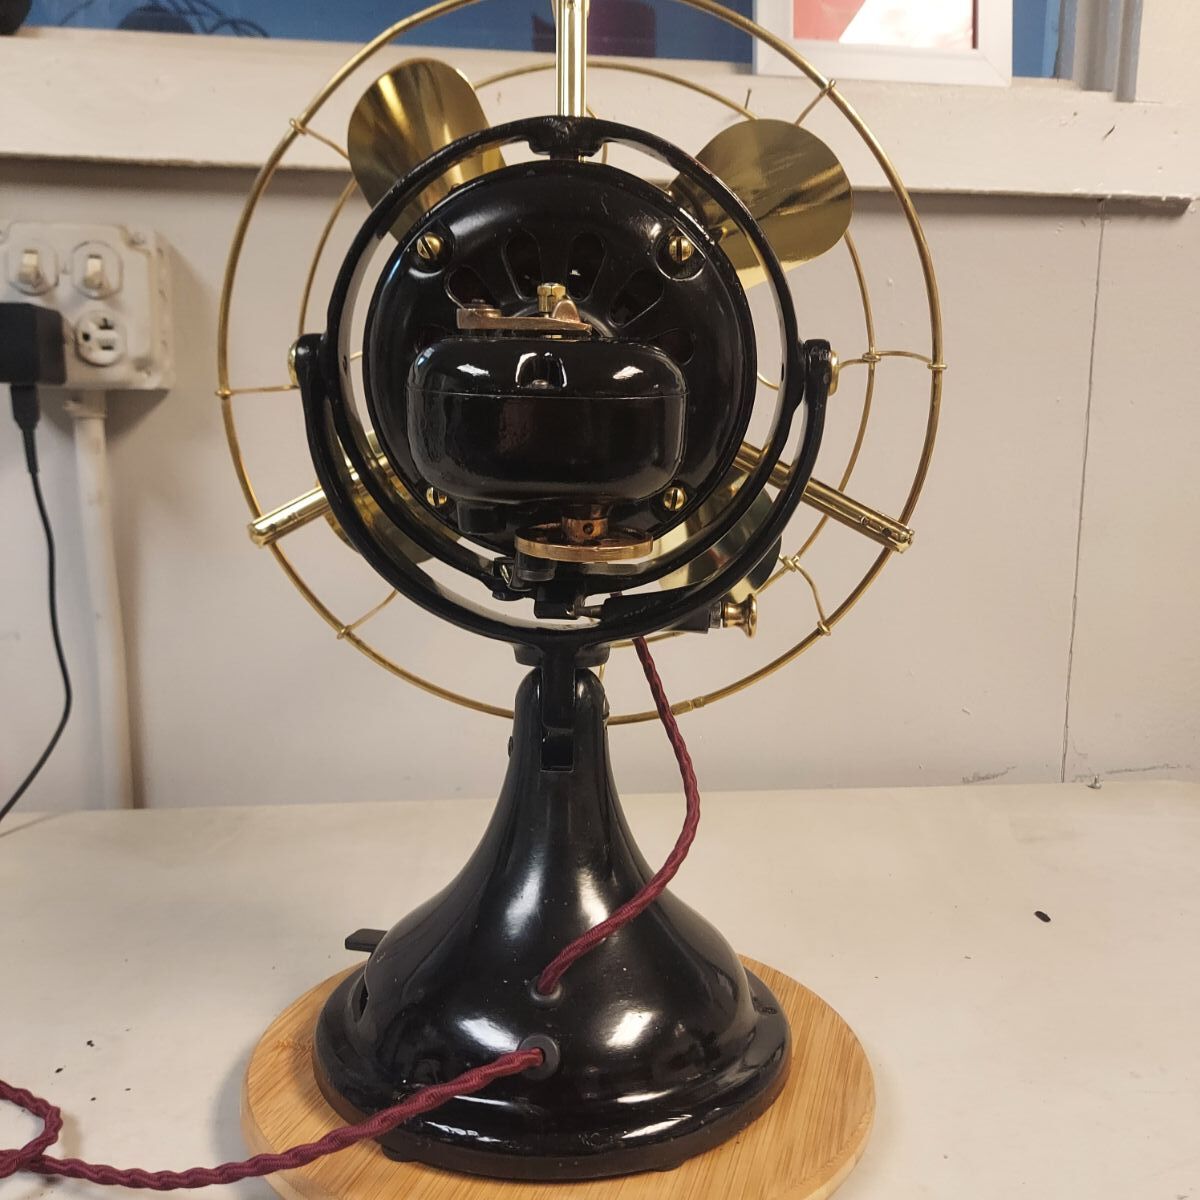
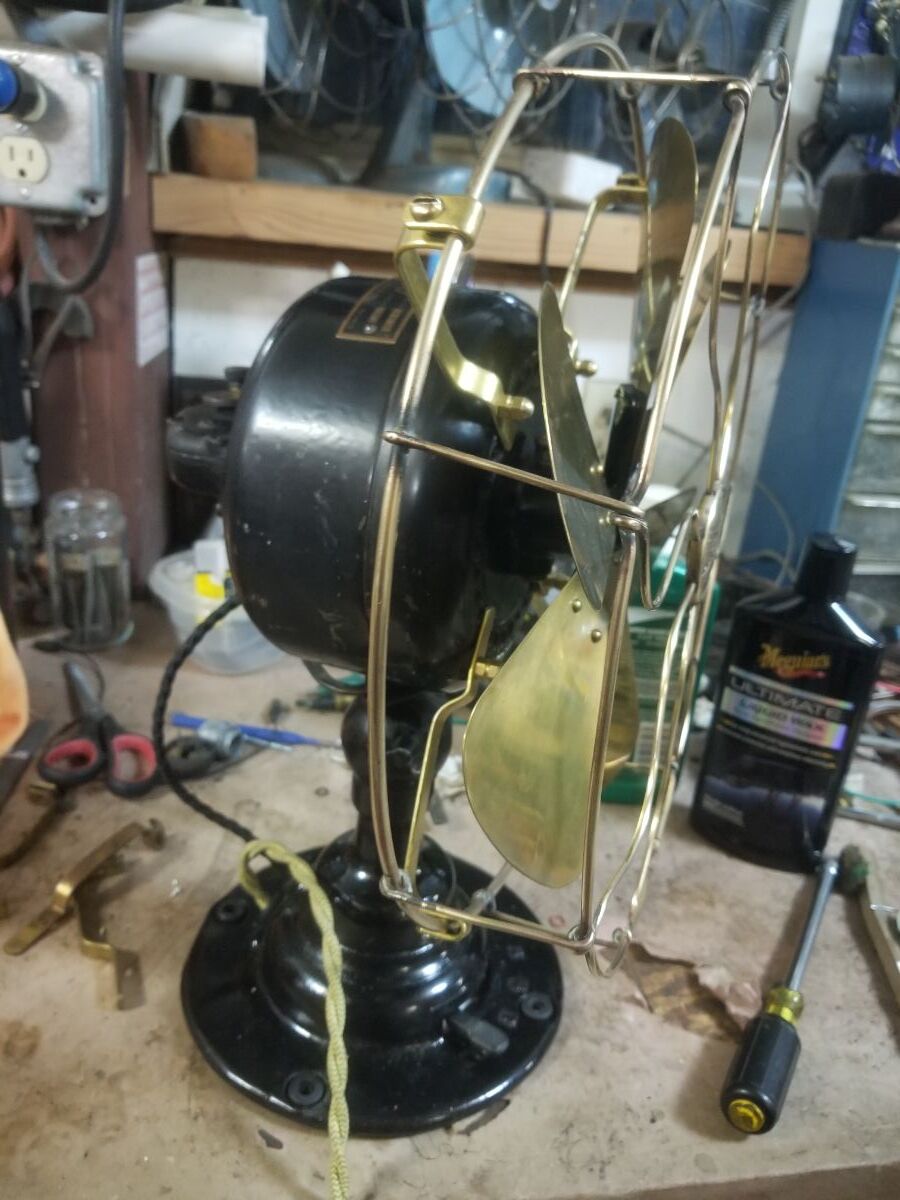
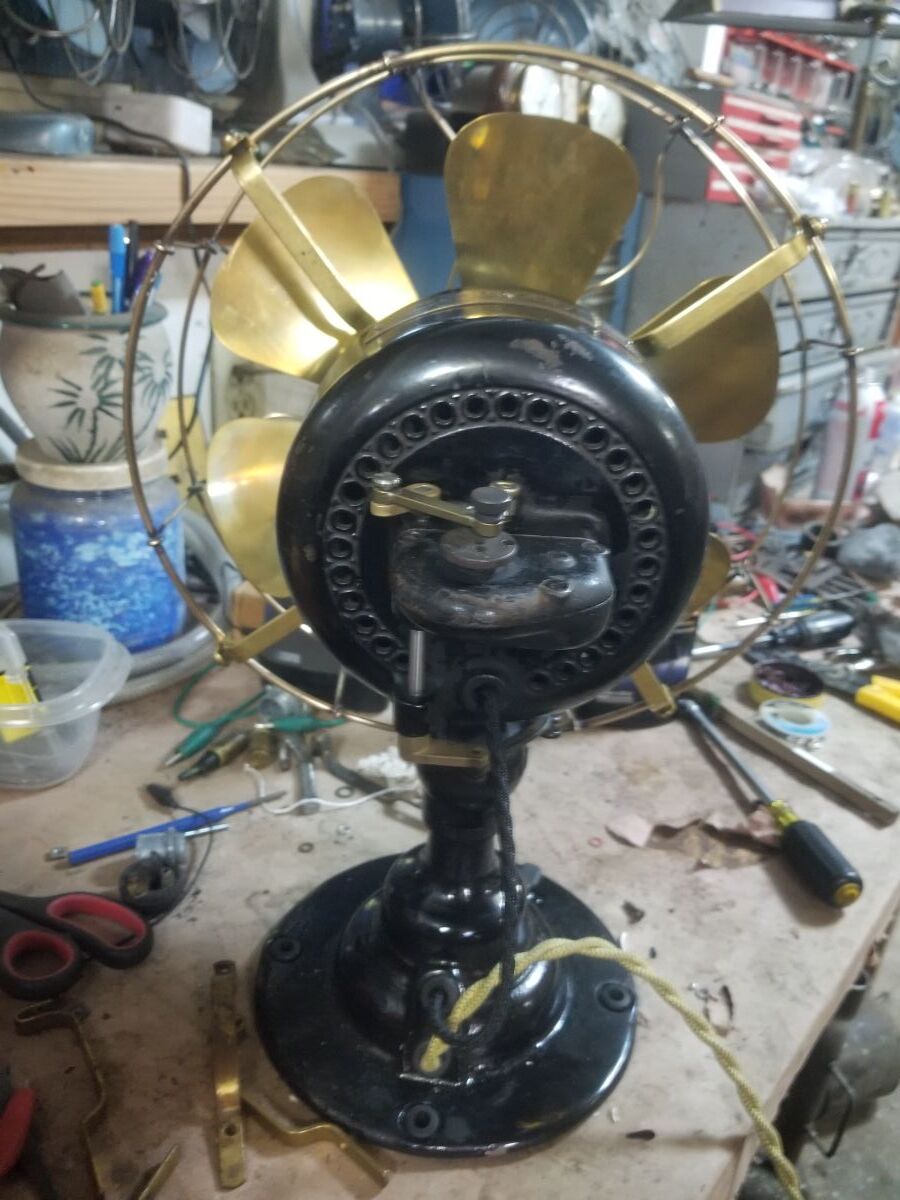
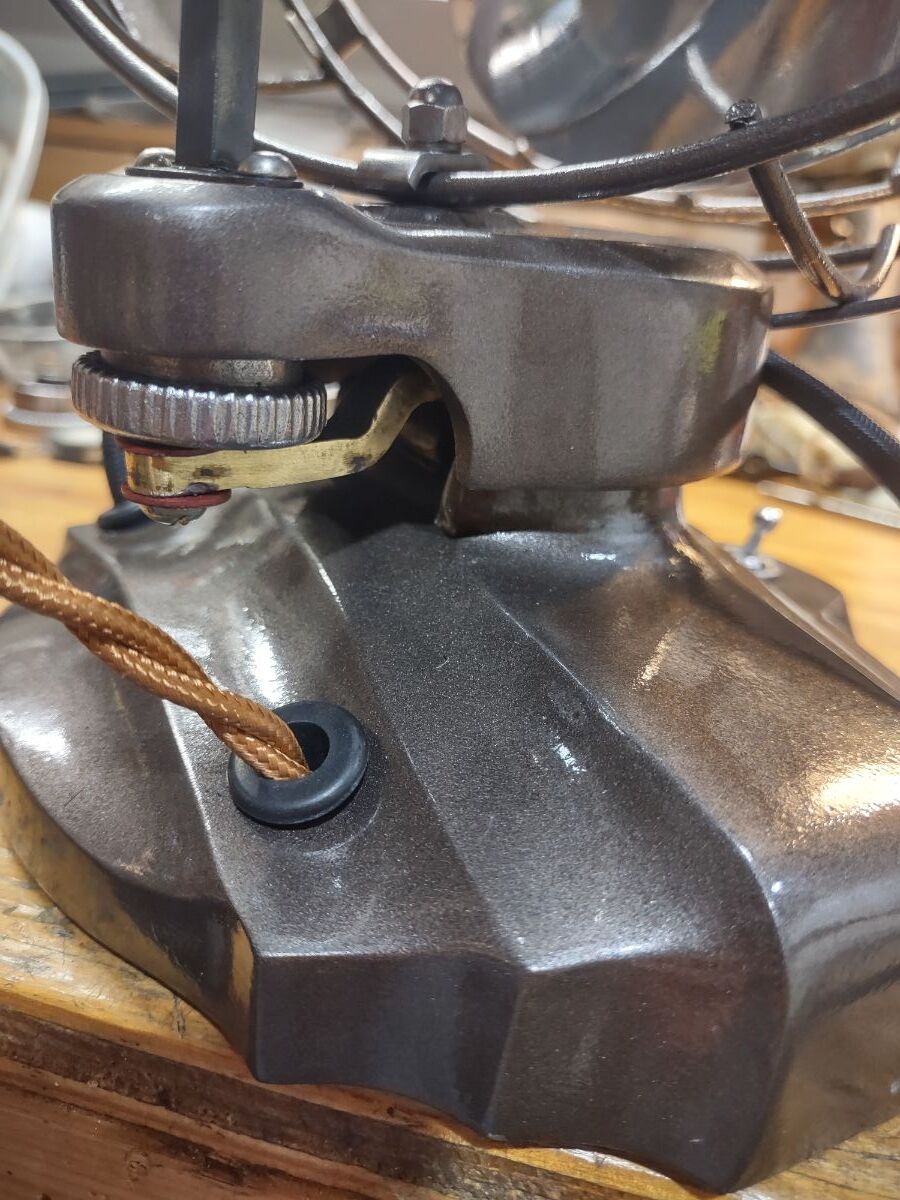
As you can see I used a 6" GE fan and a 9" base . Fabricated a brass goose neck, cage and Spring hangers. I put a half wave diode in the the base to slow it down a bit(thanks to Russ) Look at that plug I have never seen one like that. Video.mov
9 points
-
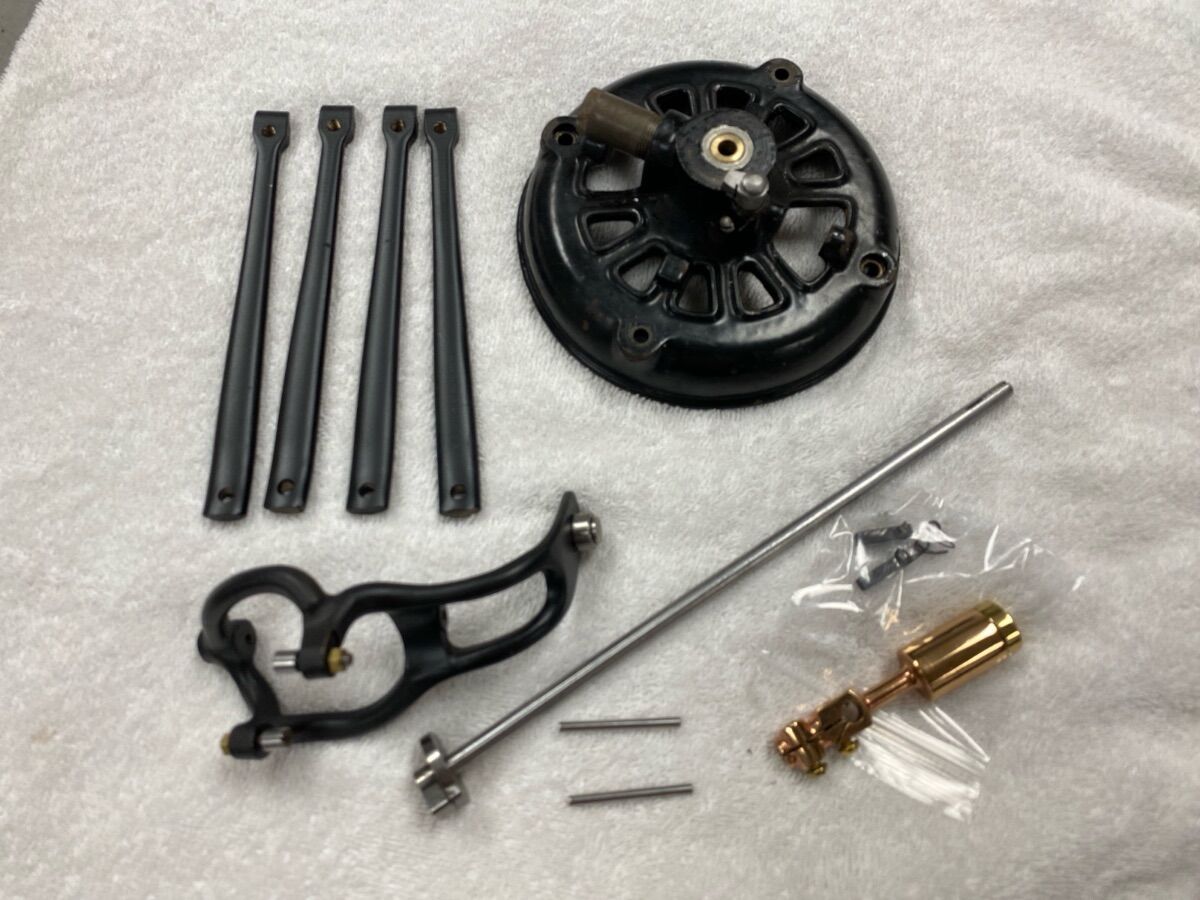
Progress is being made! Should be back up and running soon!
9 points
-
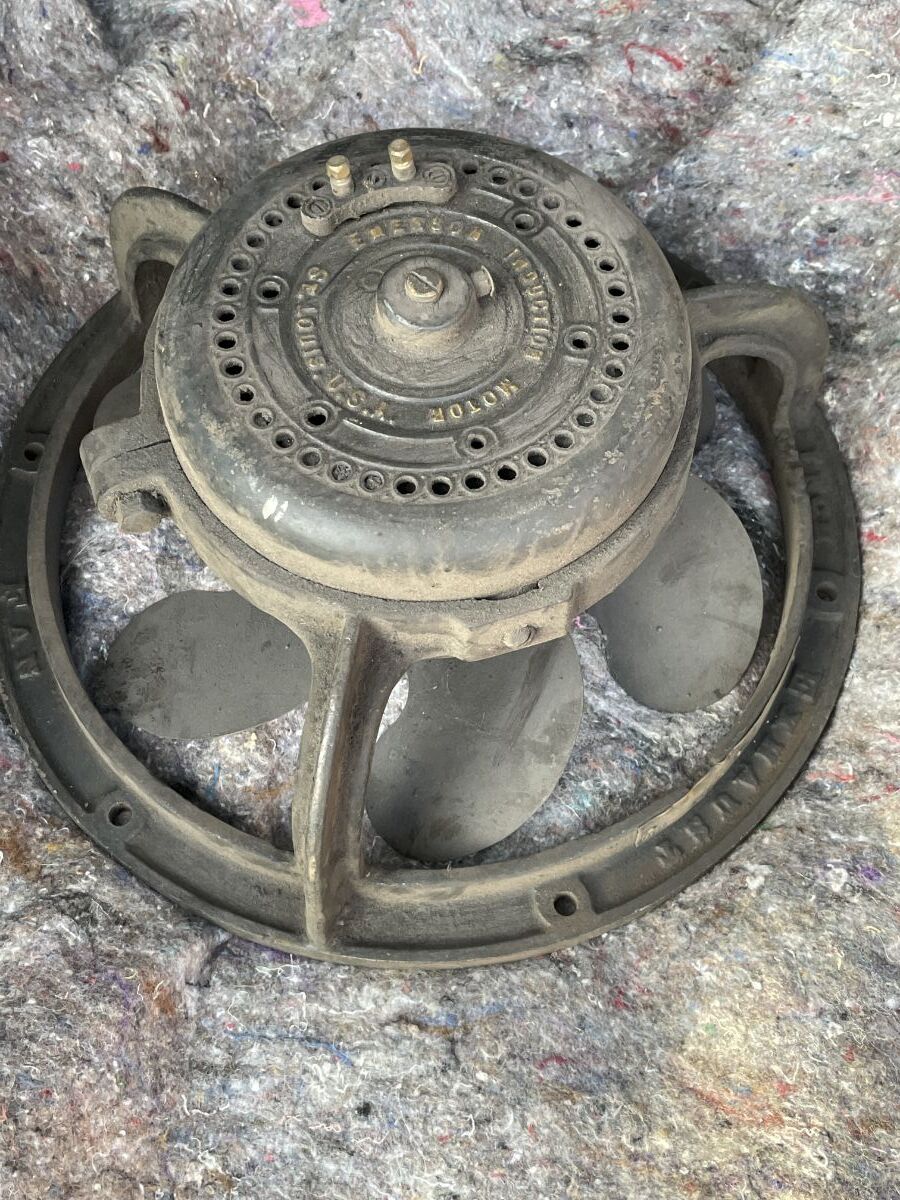
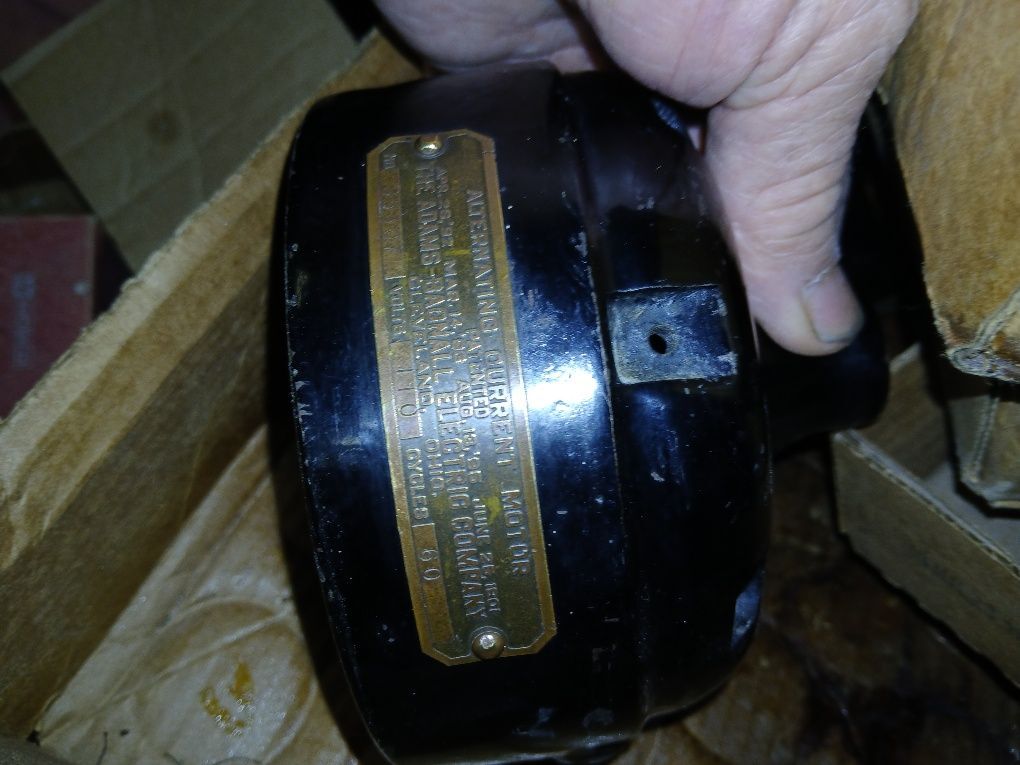
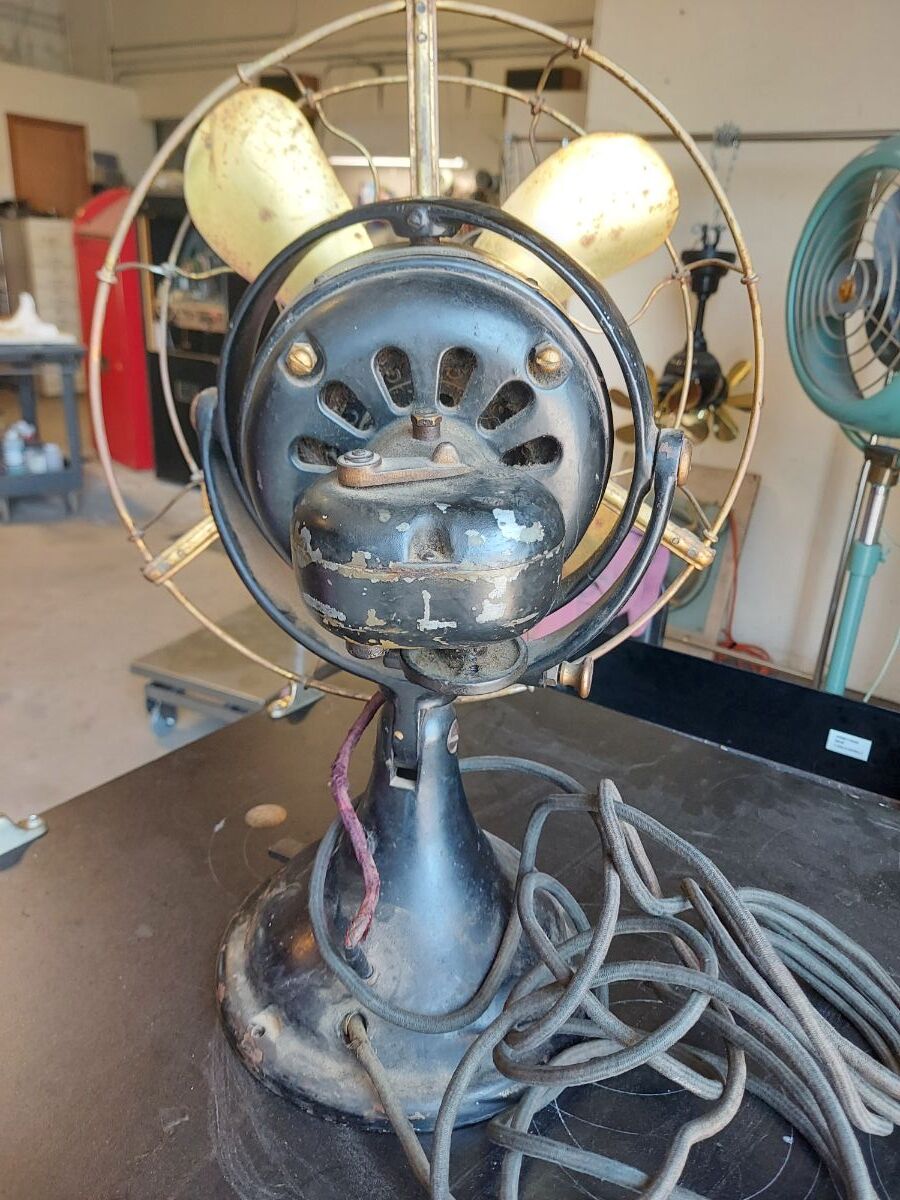
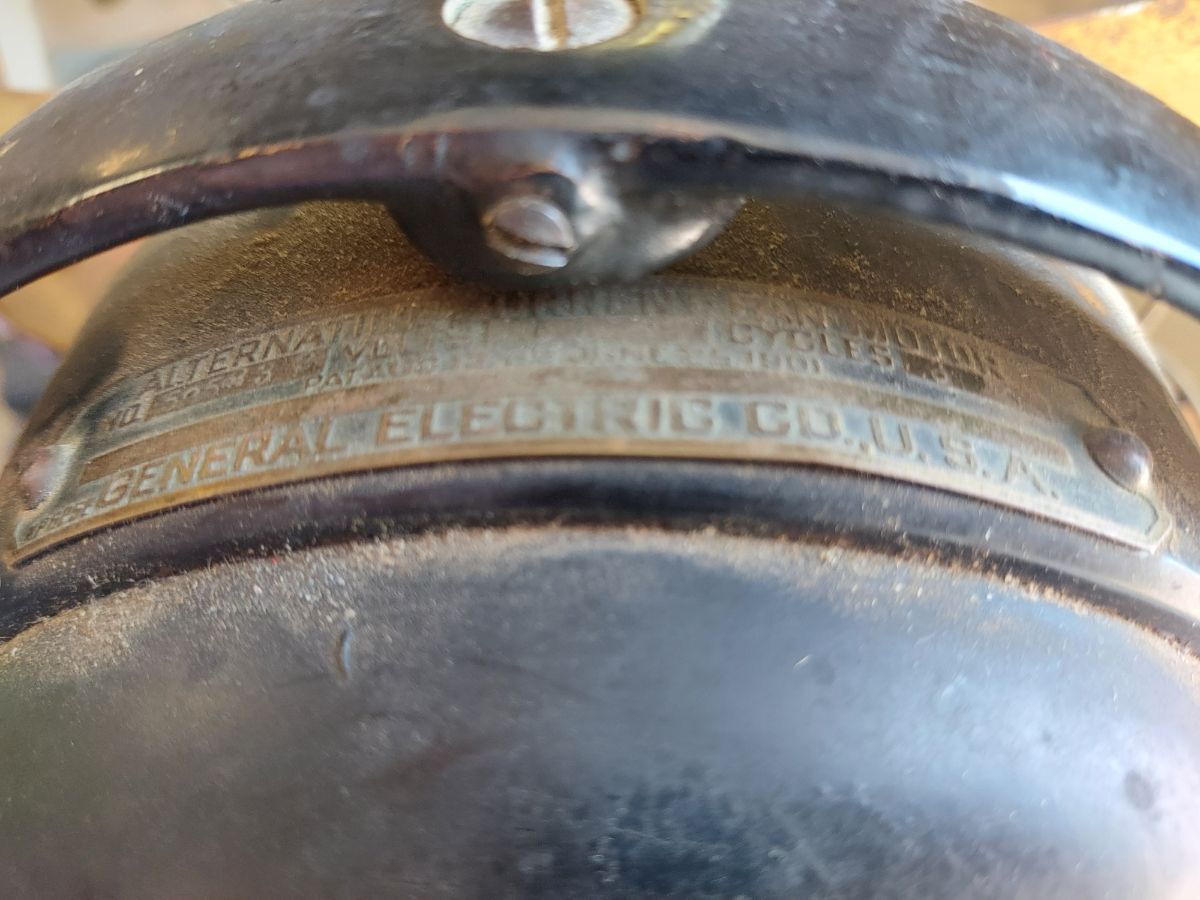
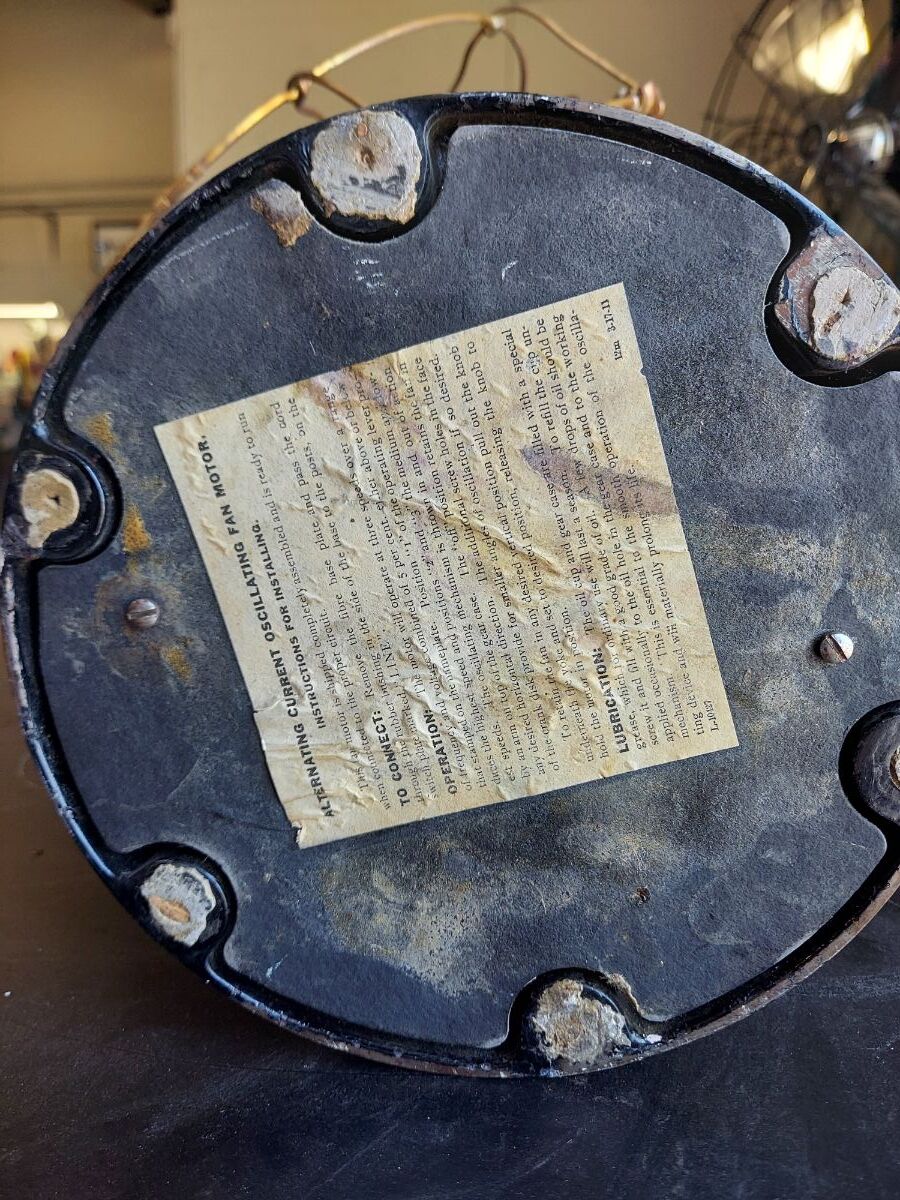
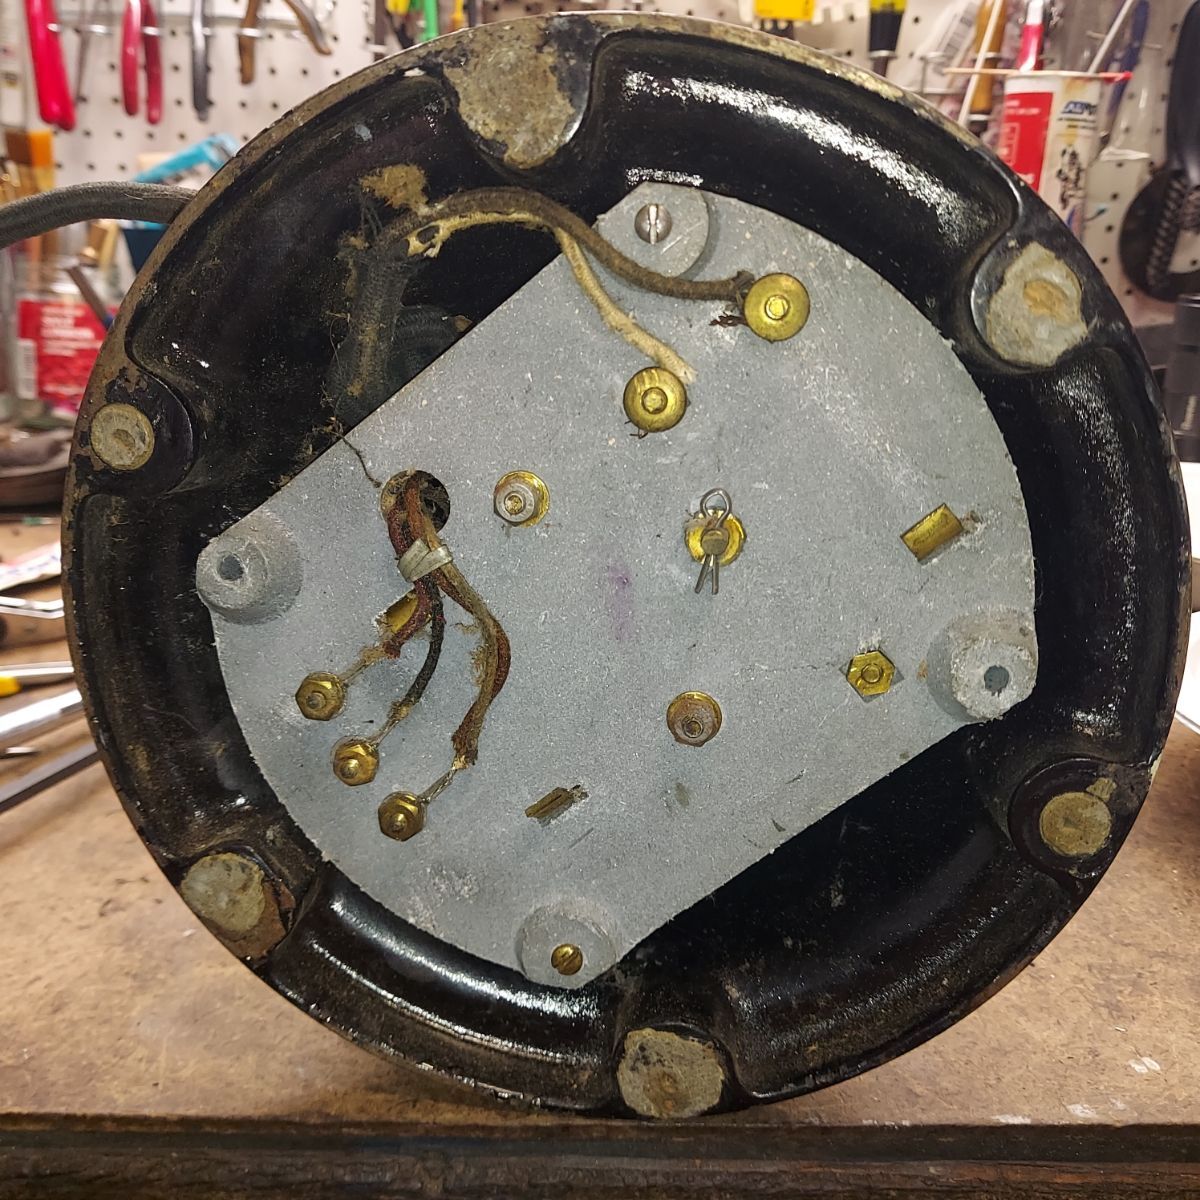
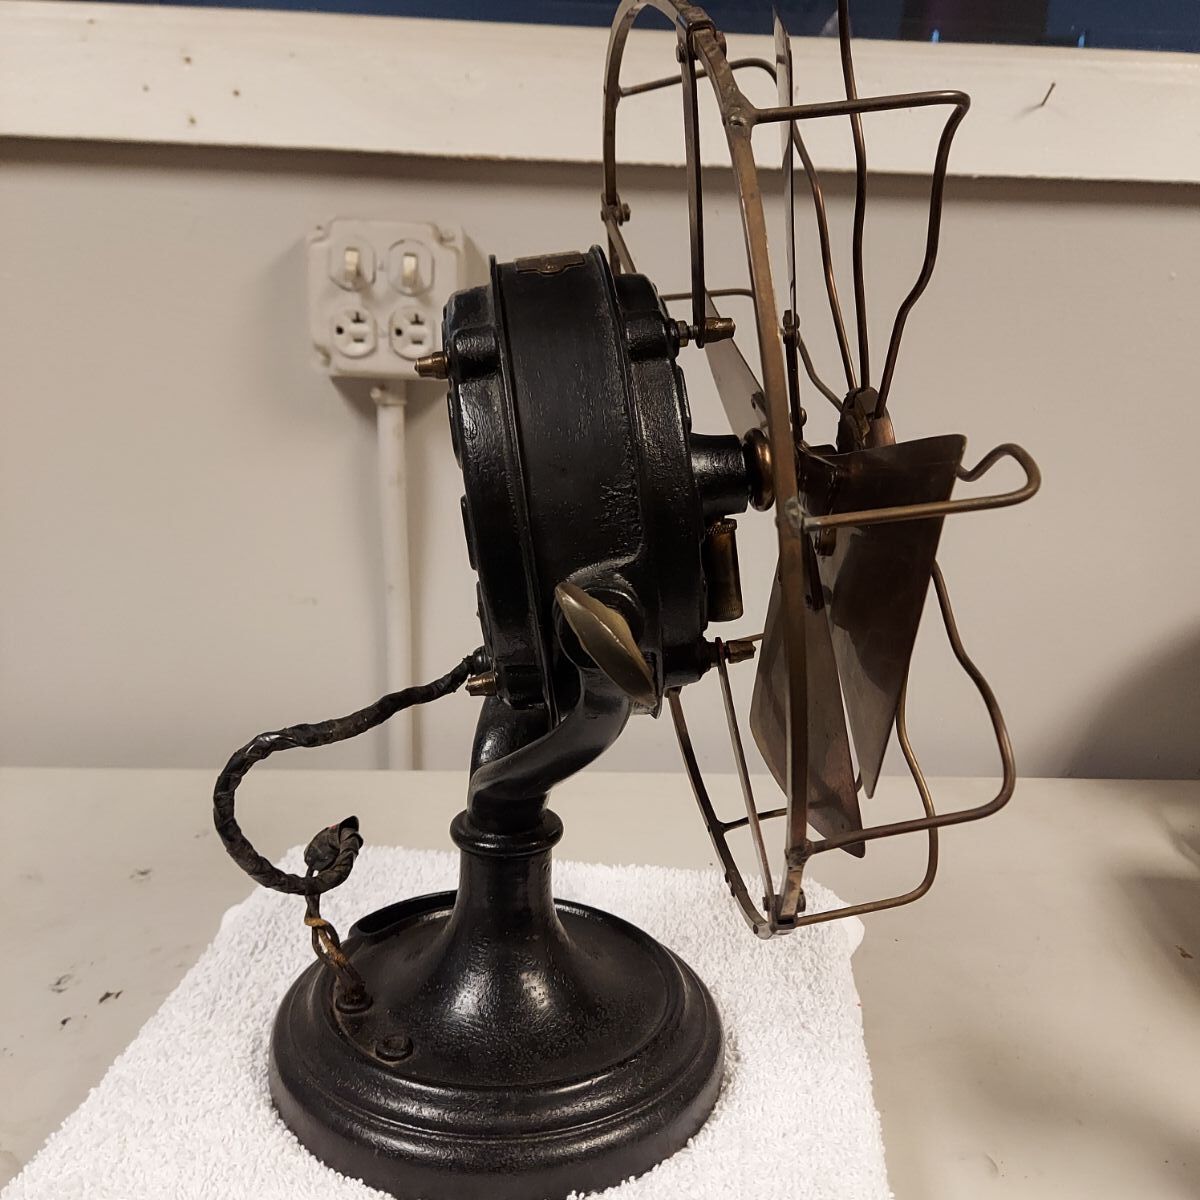
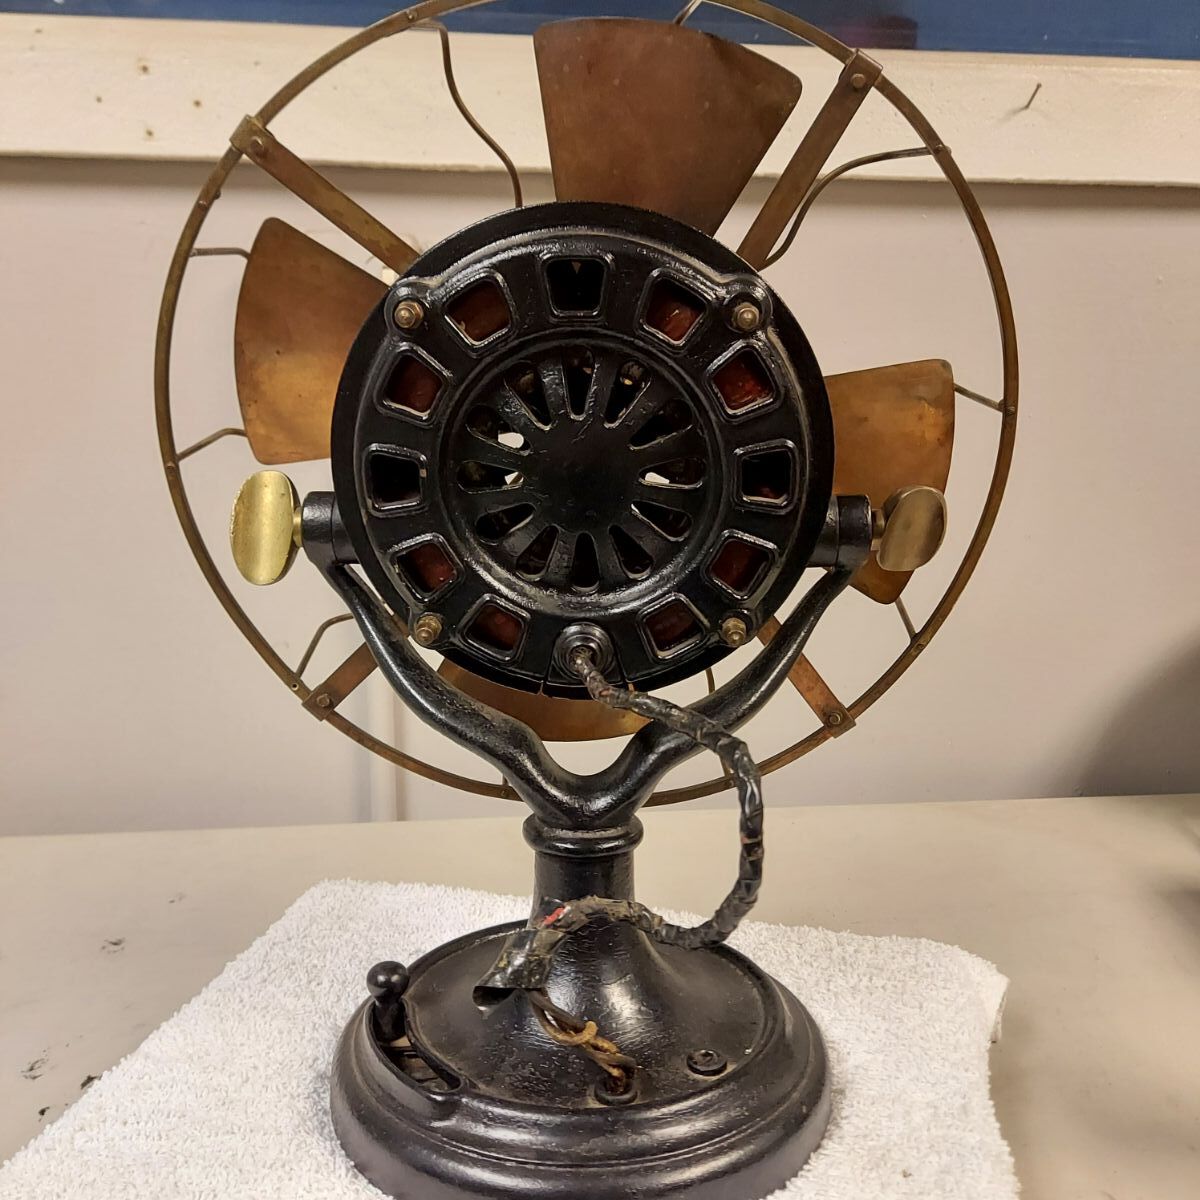
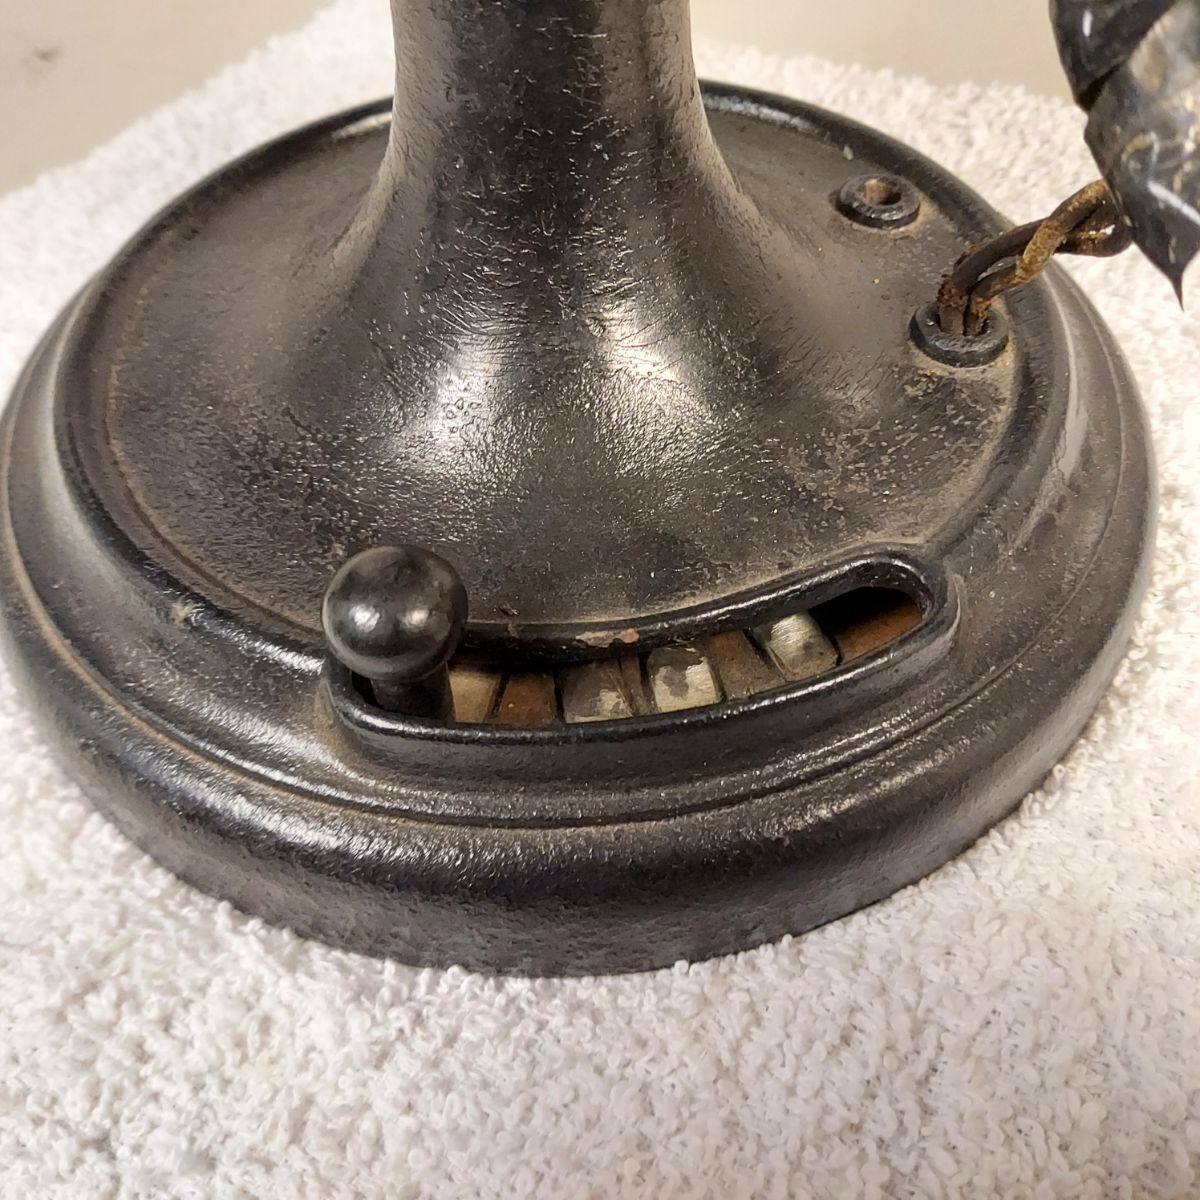
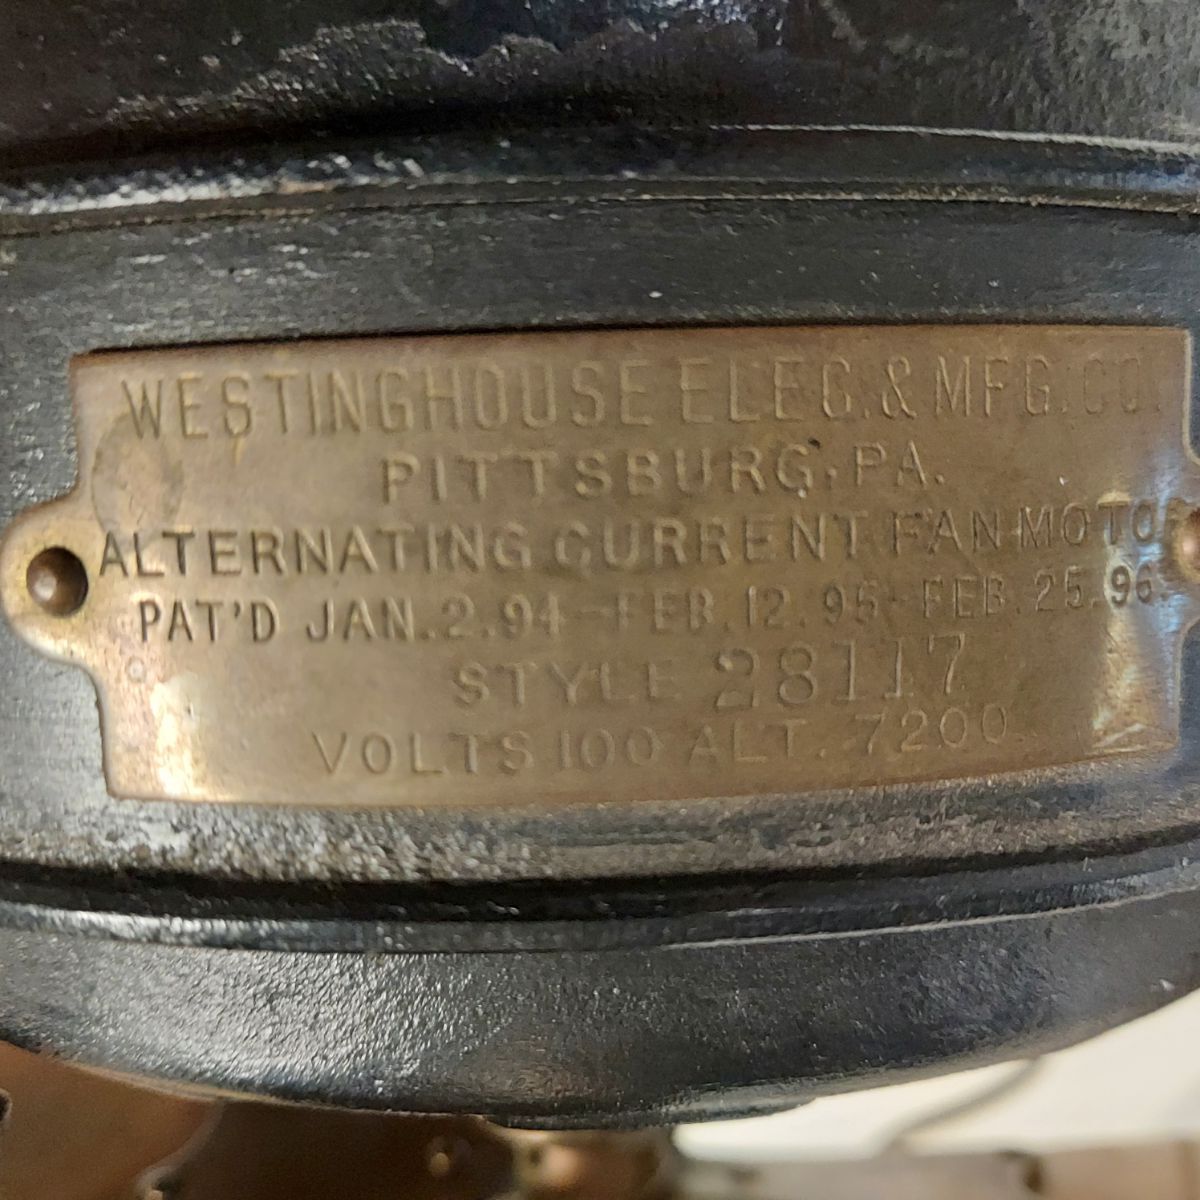
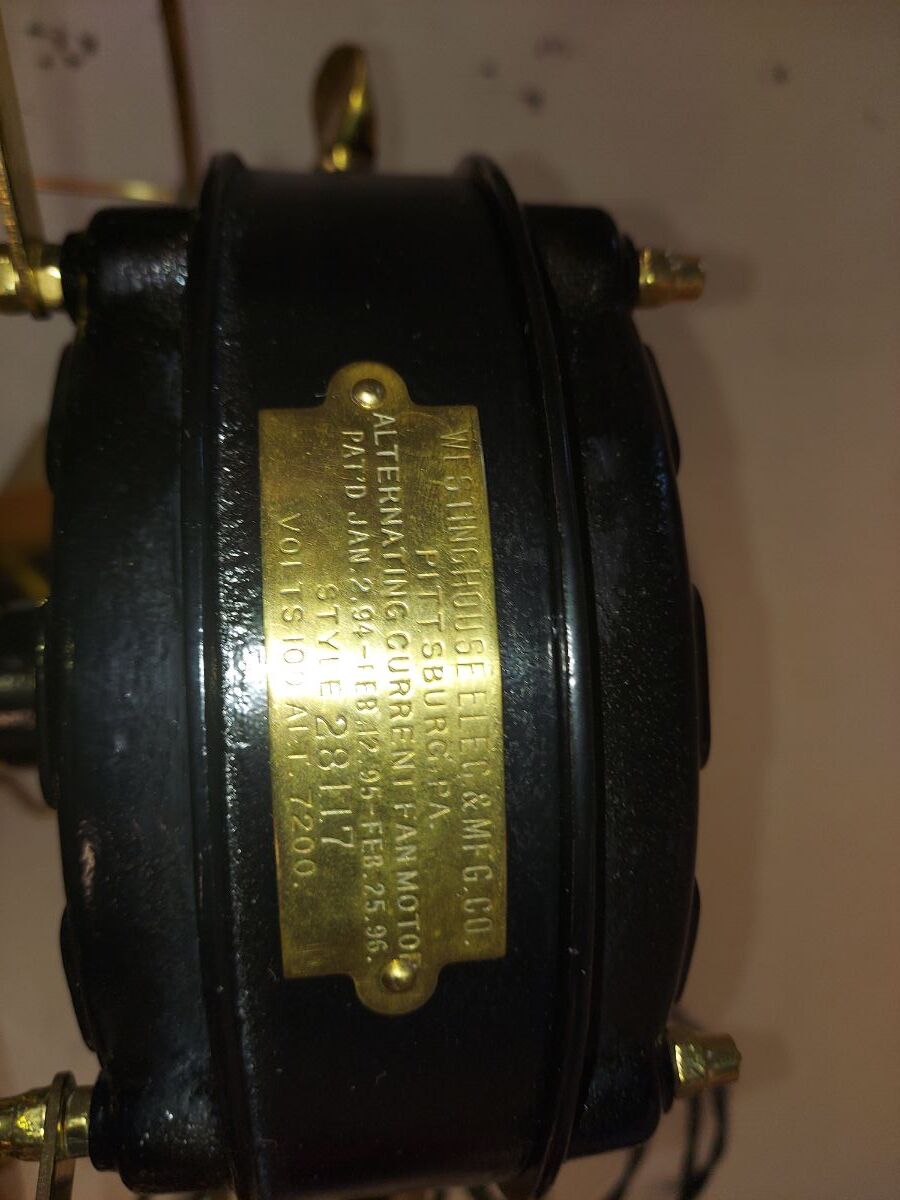
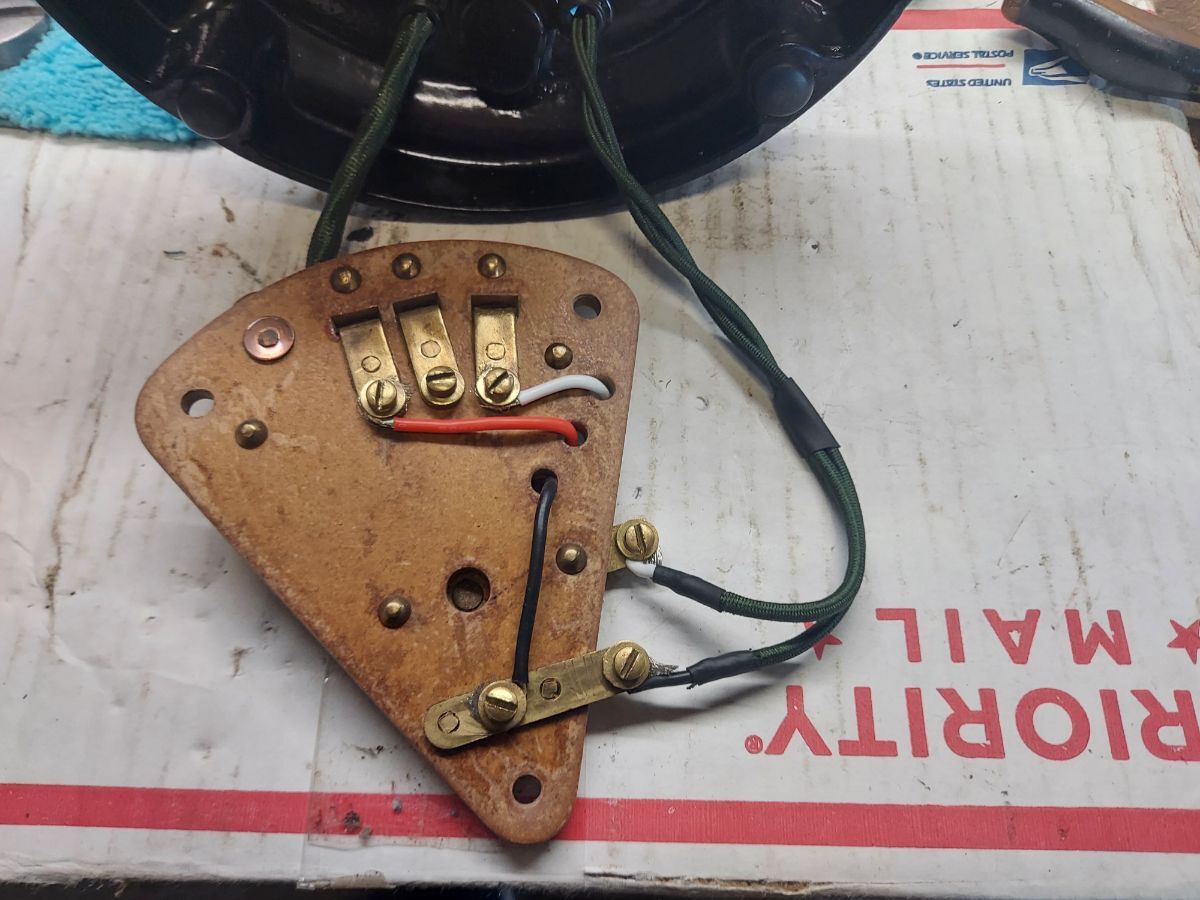
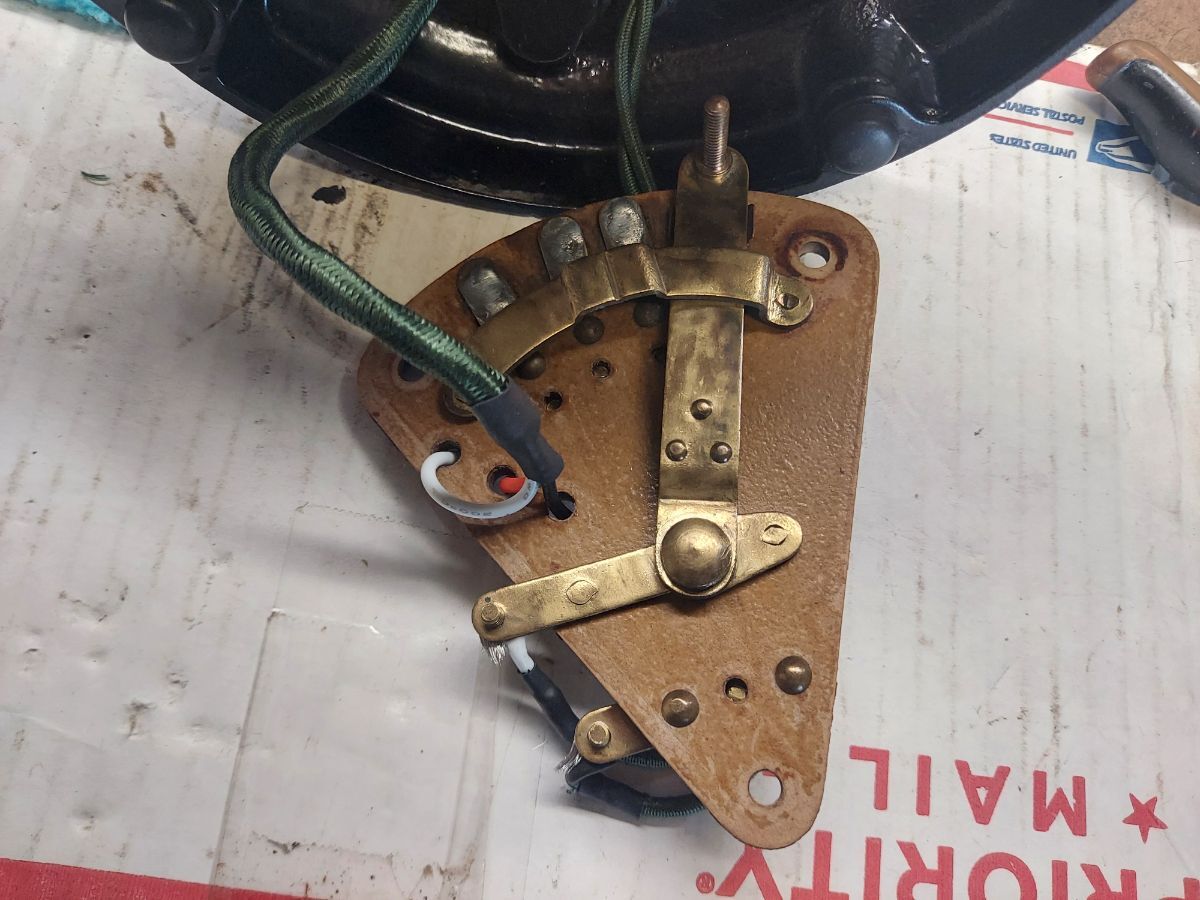
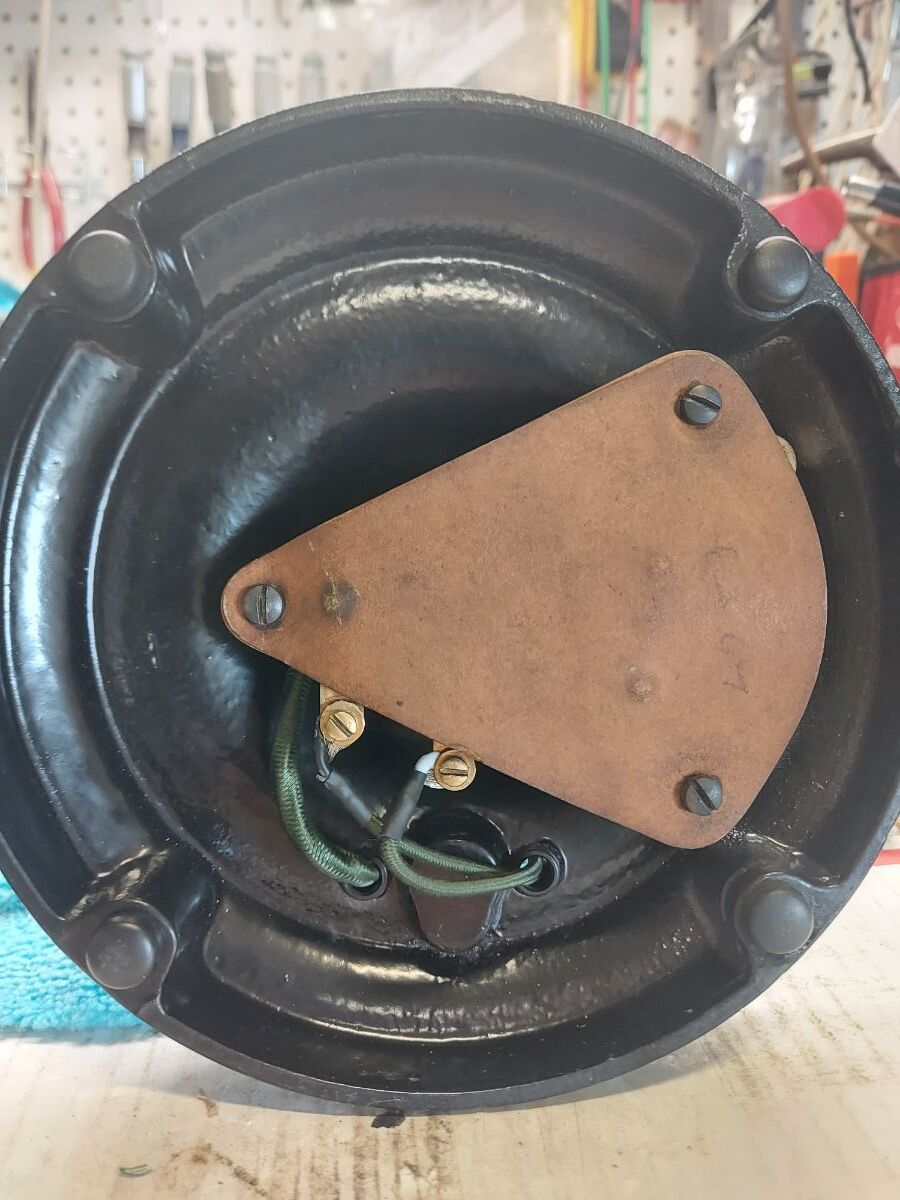
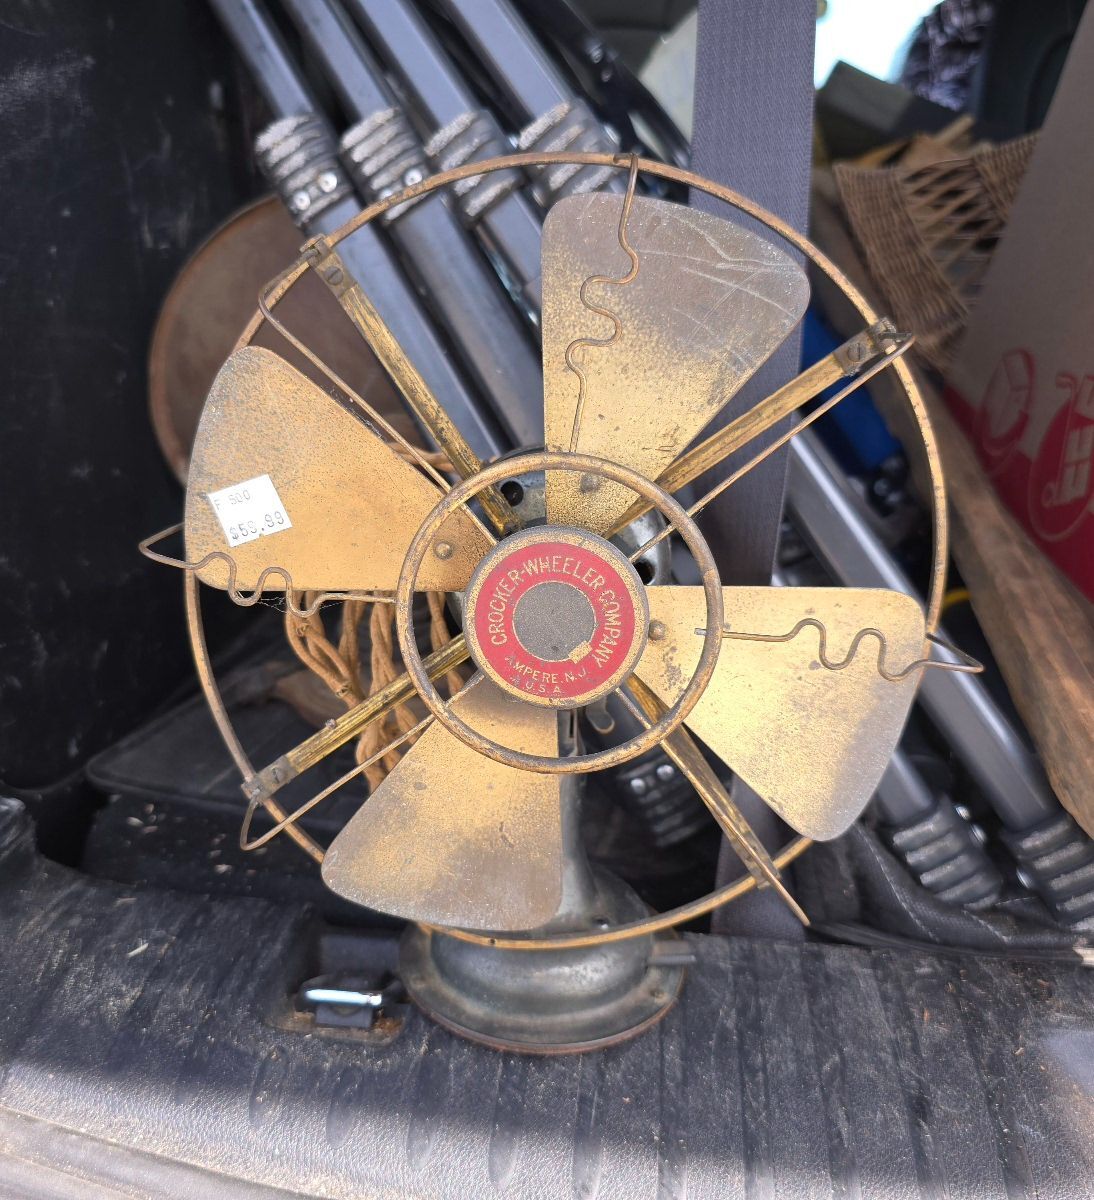
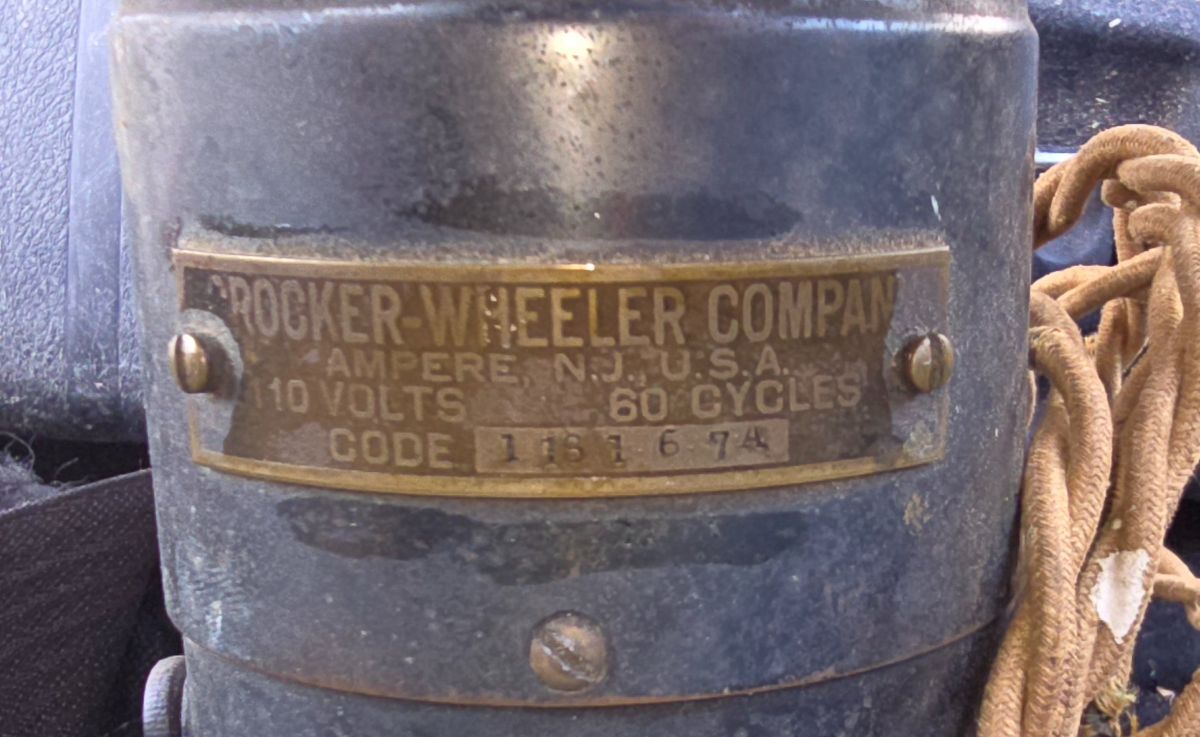
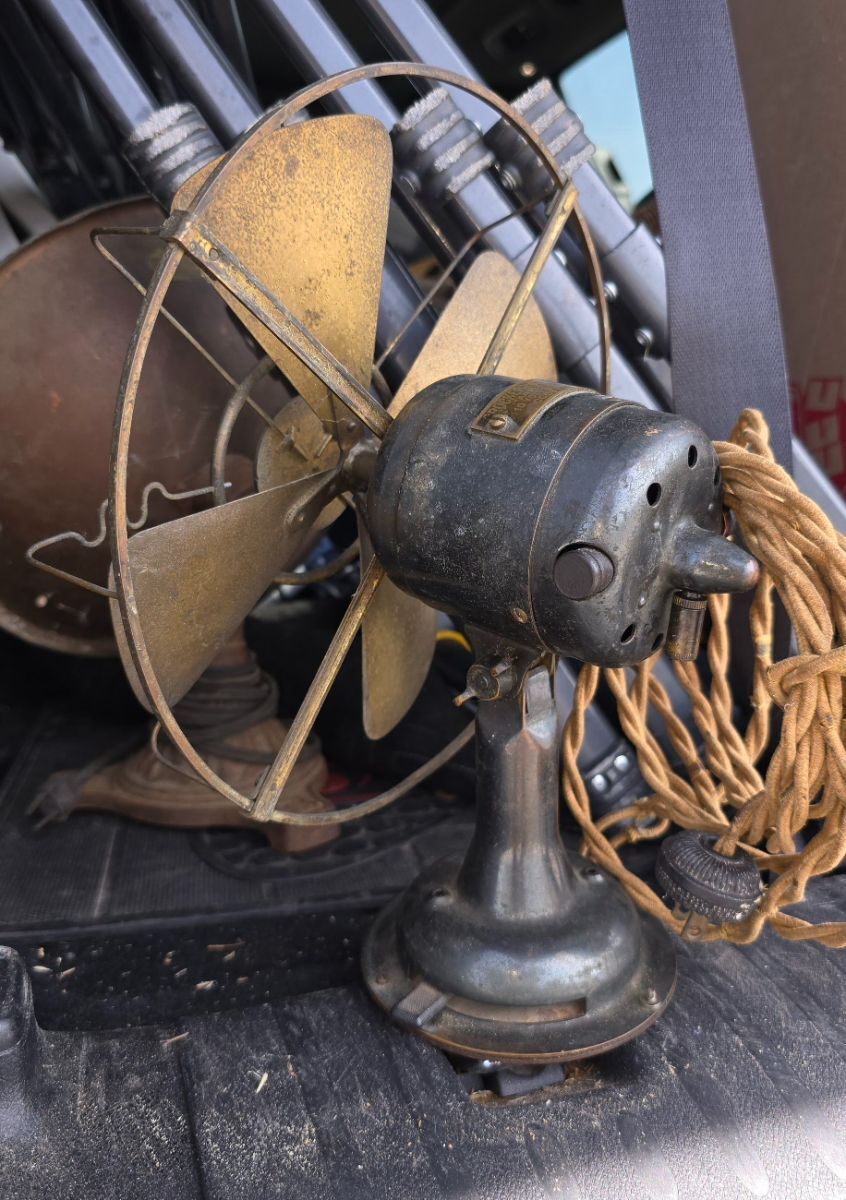
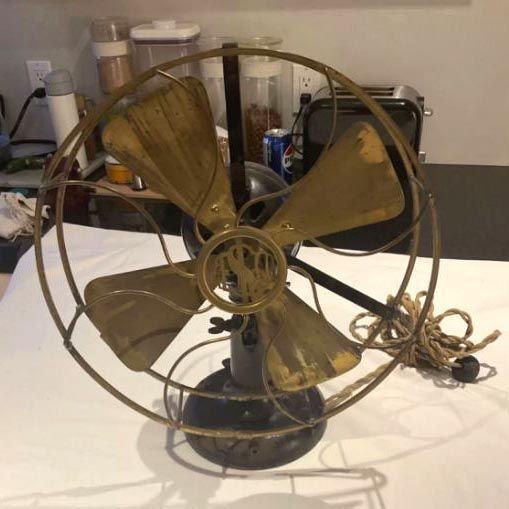
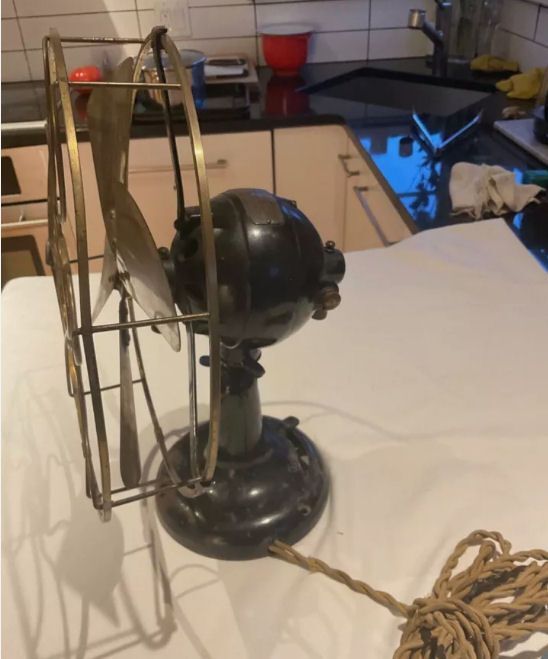
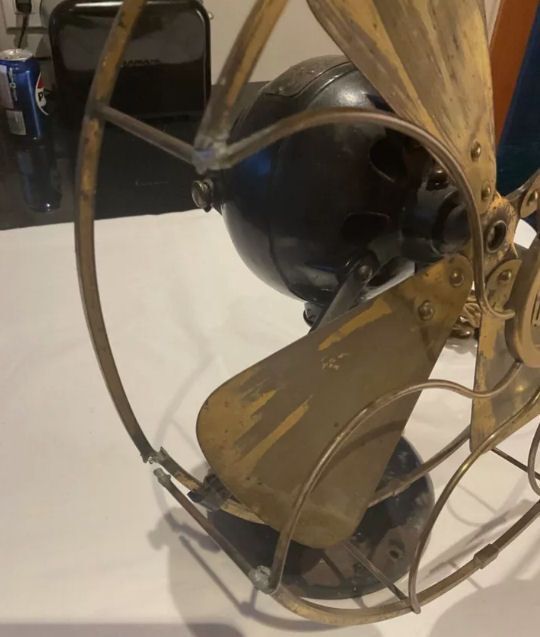
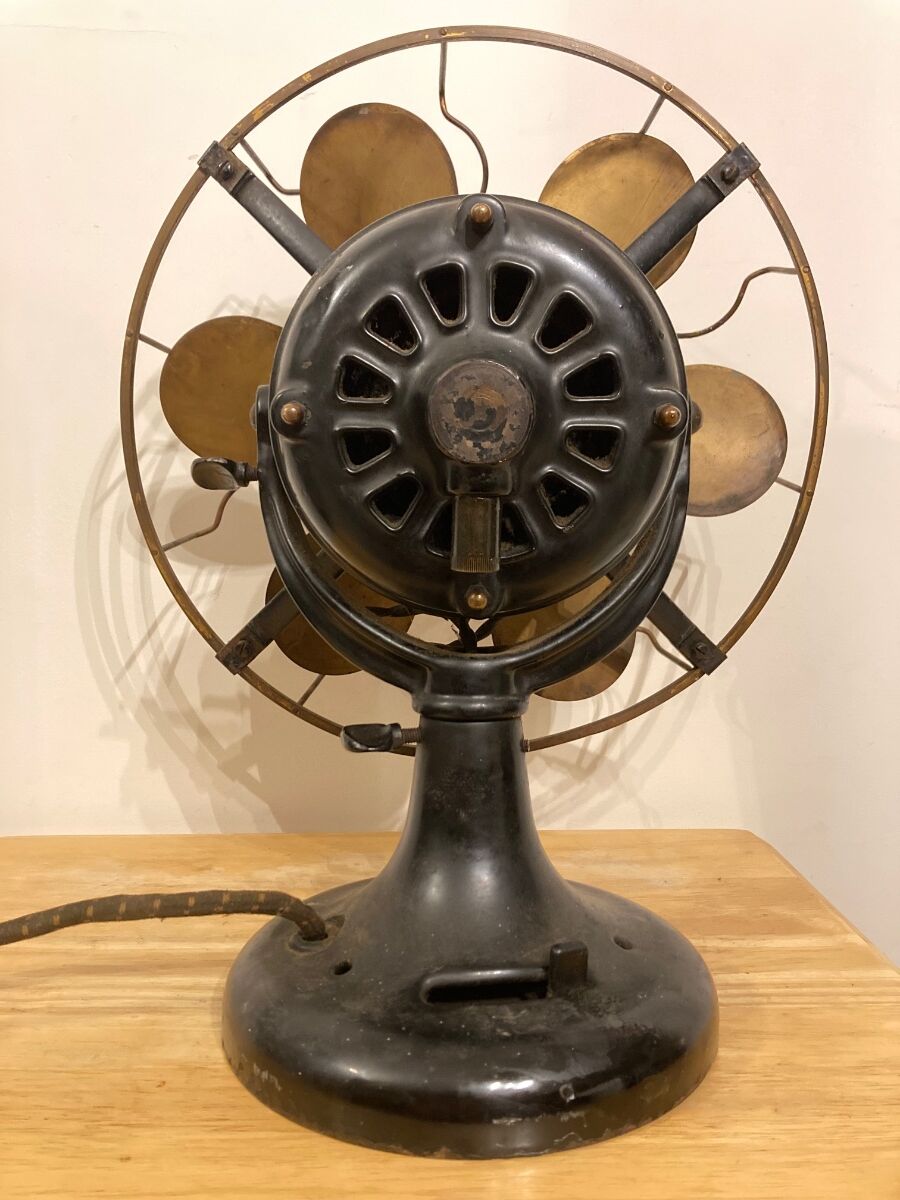
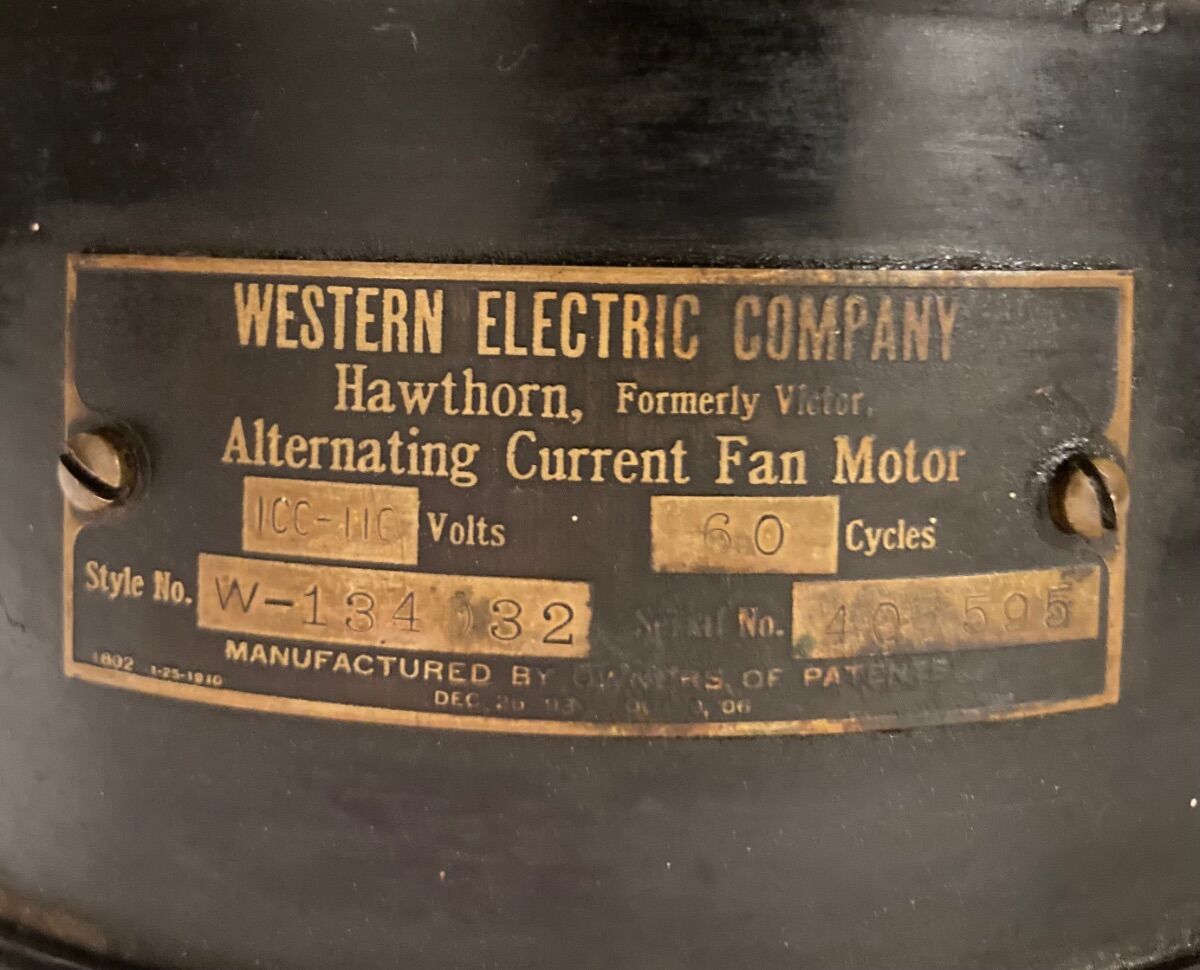
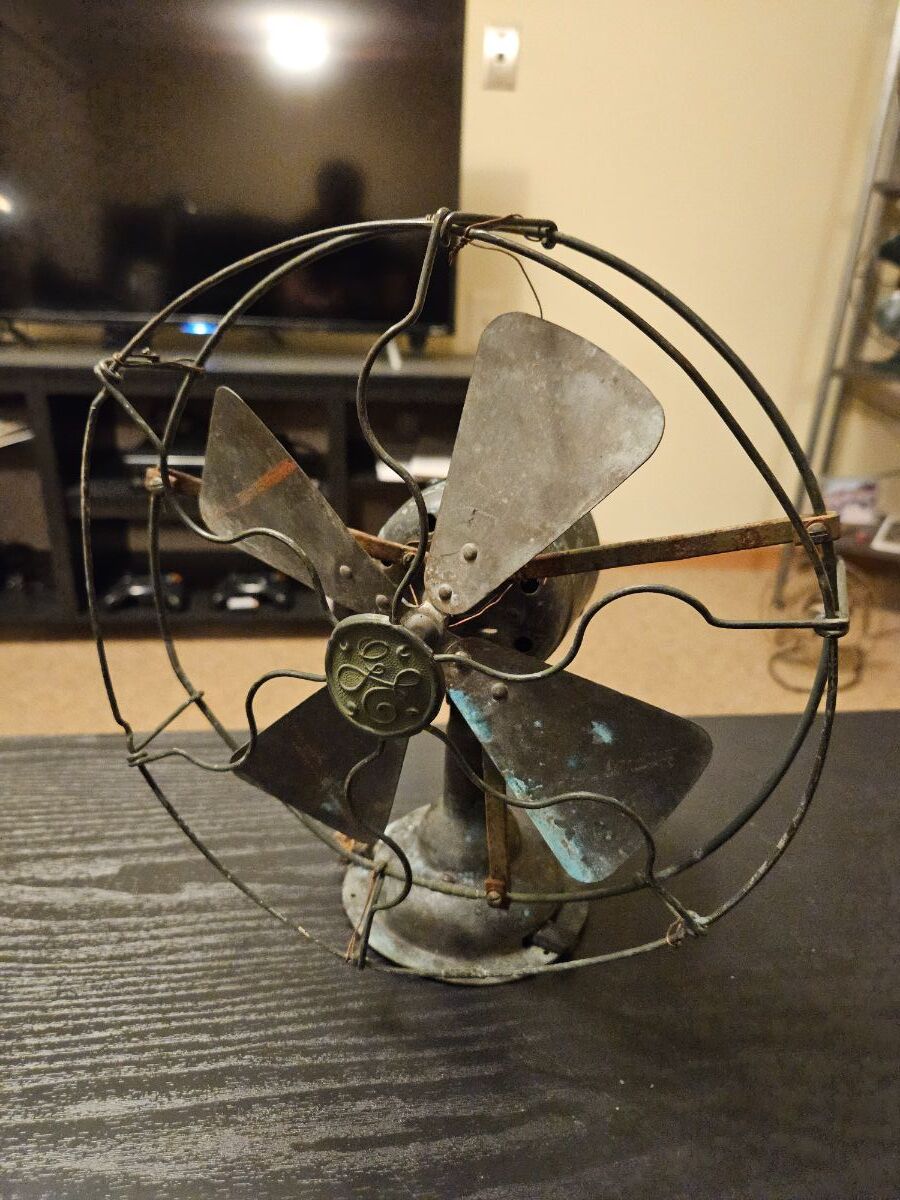
Got lucky and picked this up out of the wild. Quite unusual and in great shape. Going to clean it up and see if it runs! Started wiping it down and found a motor tag. Anyone else have one of these?
9 points
-
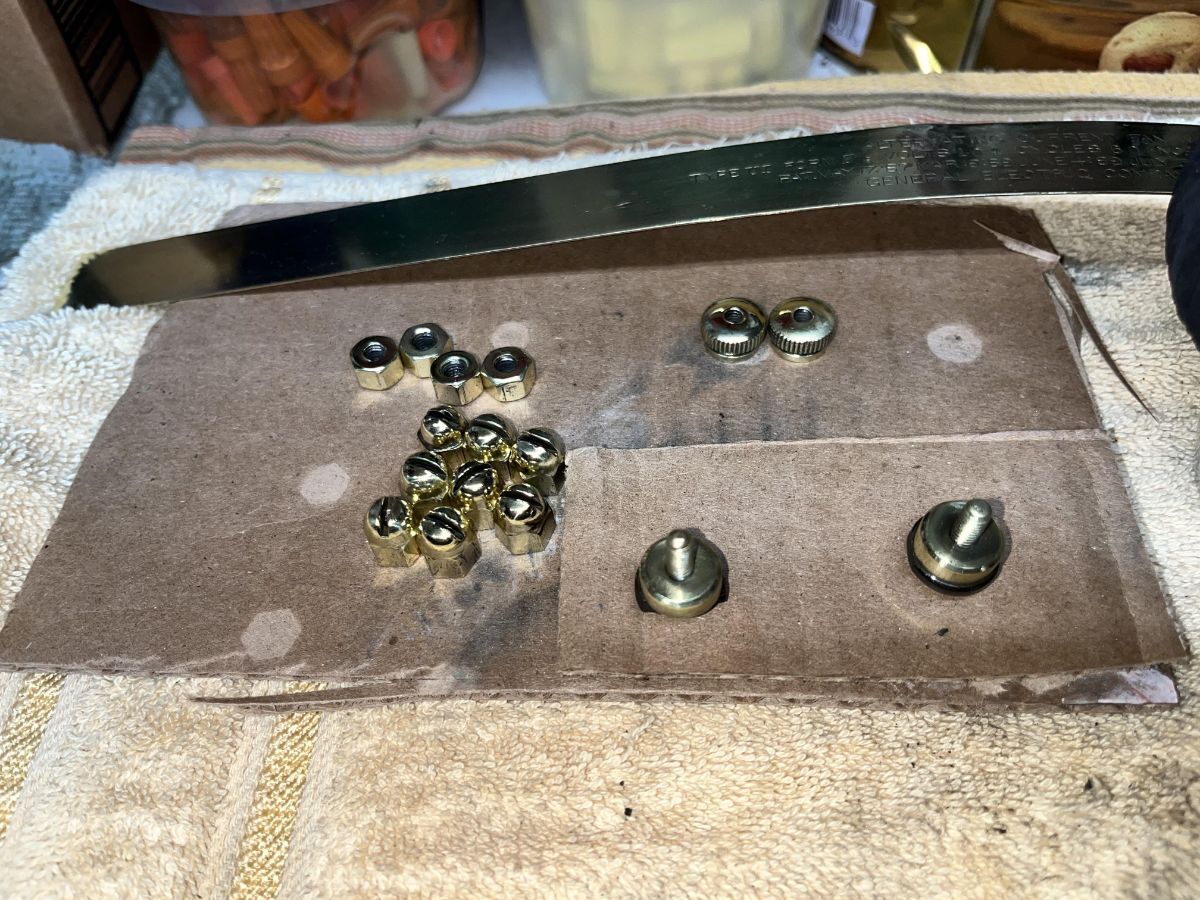
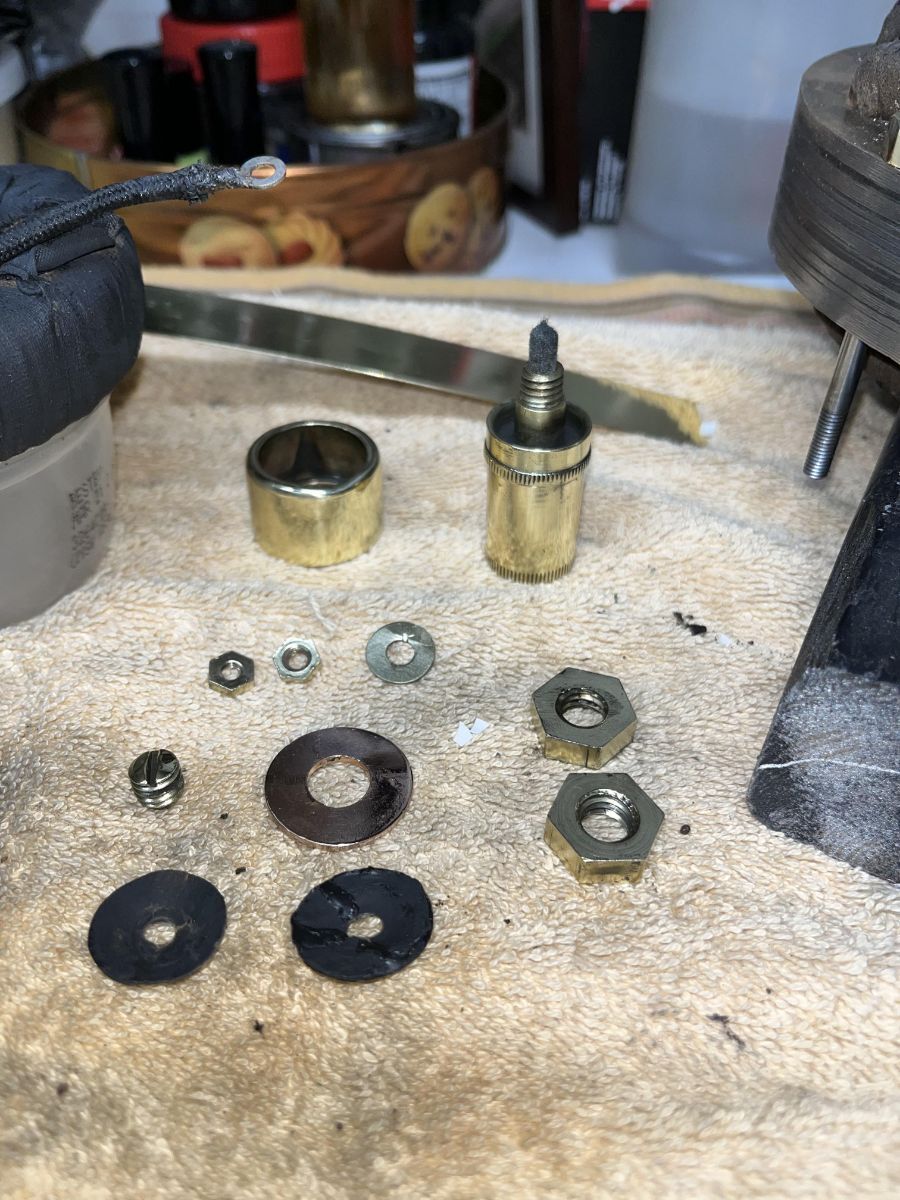
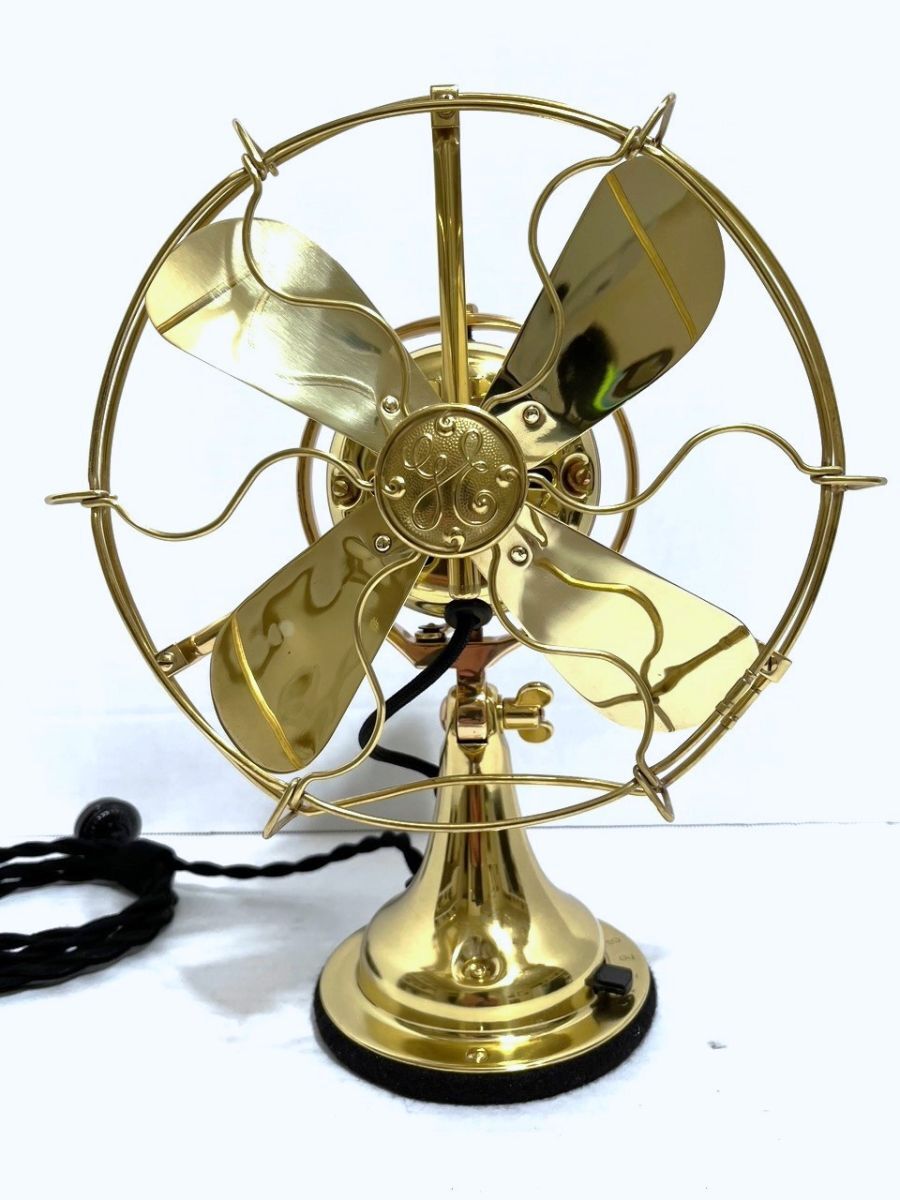
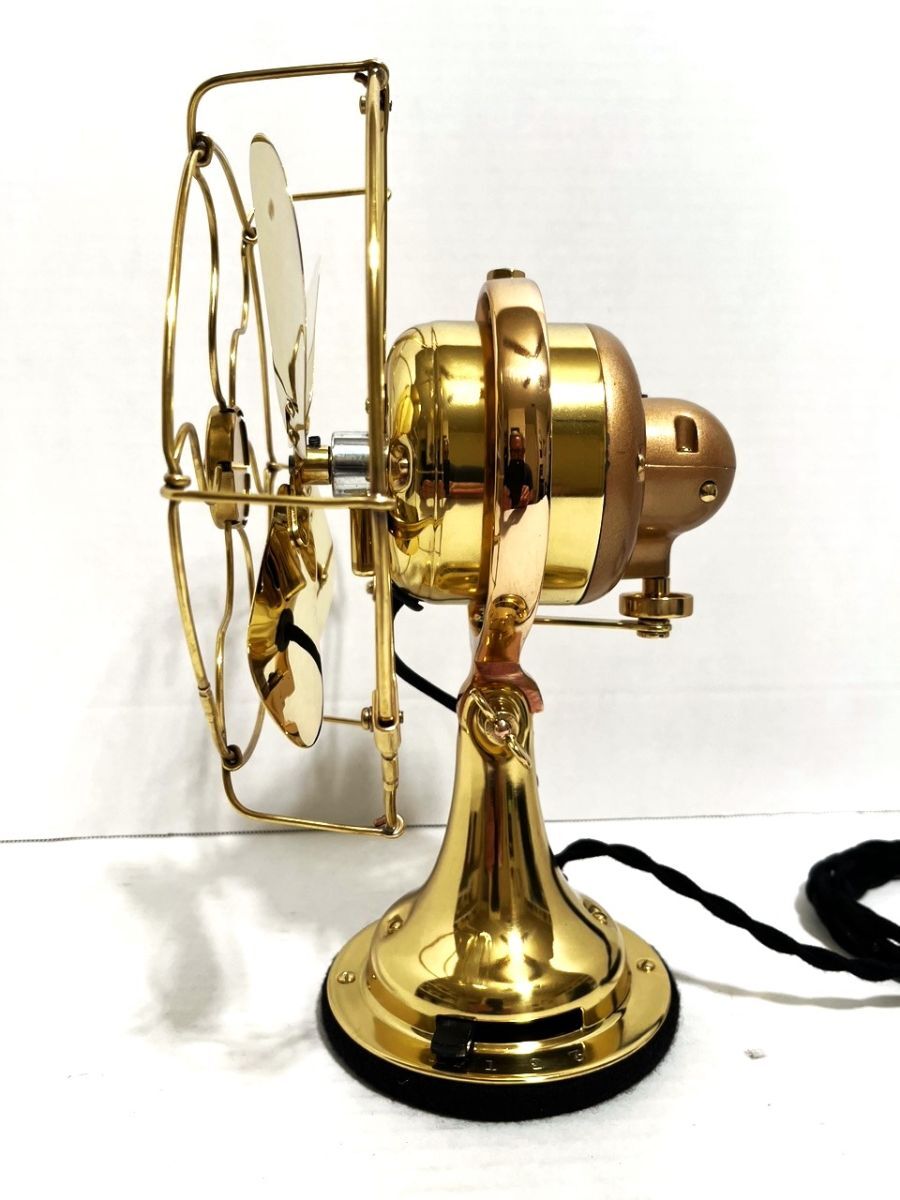
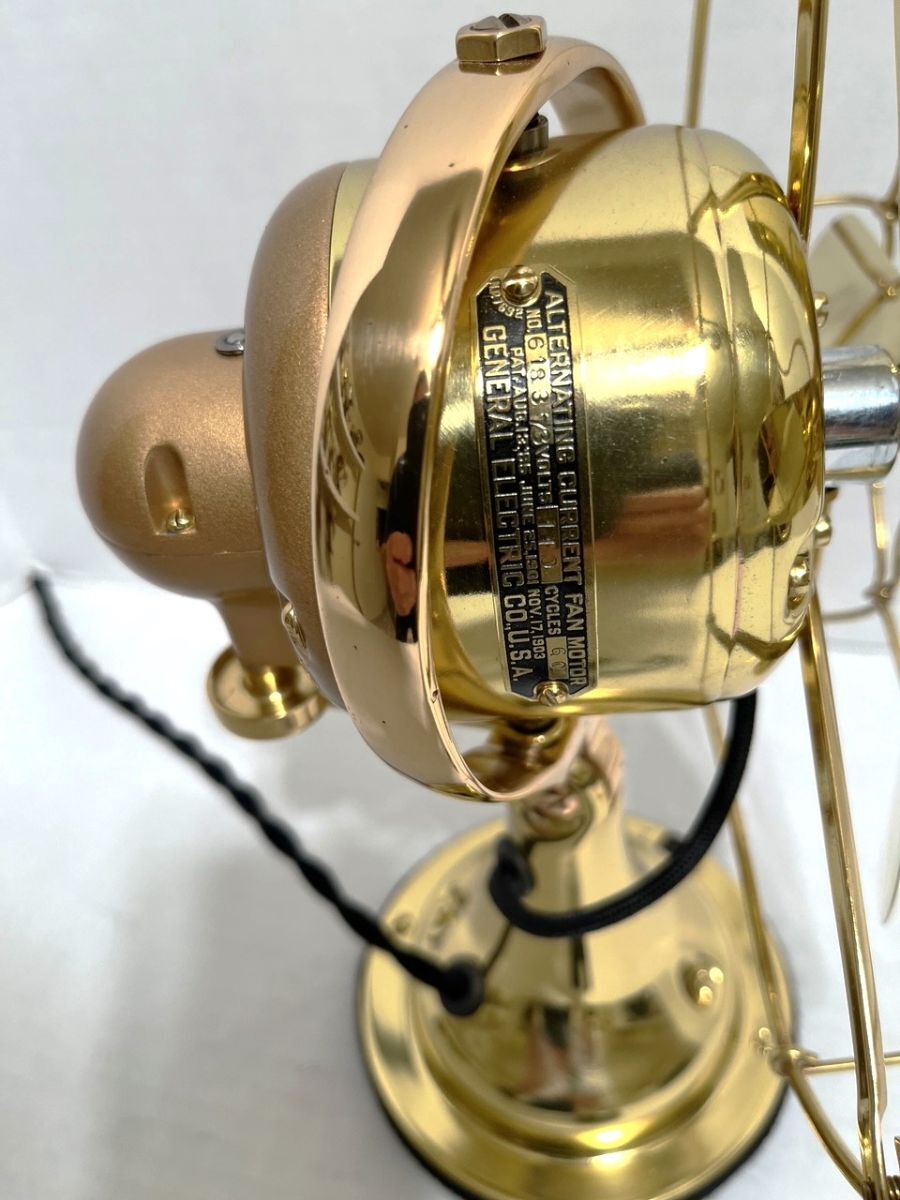
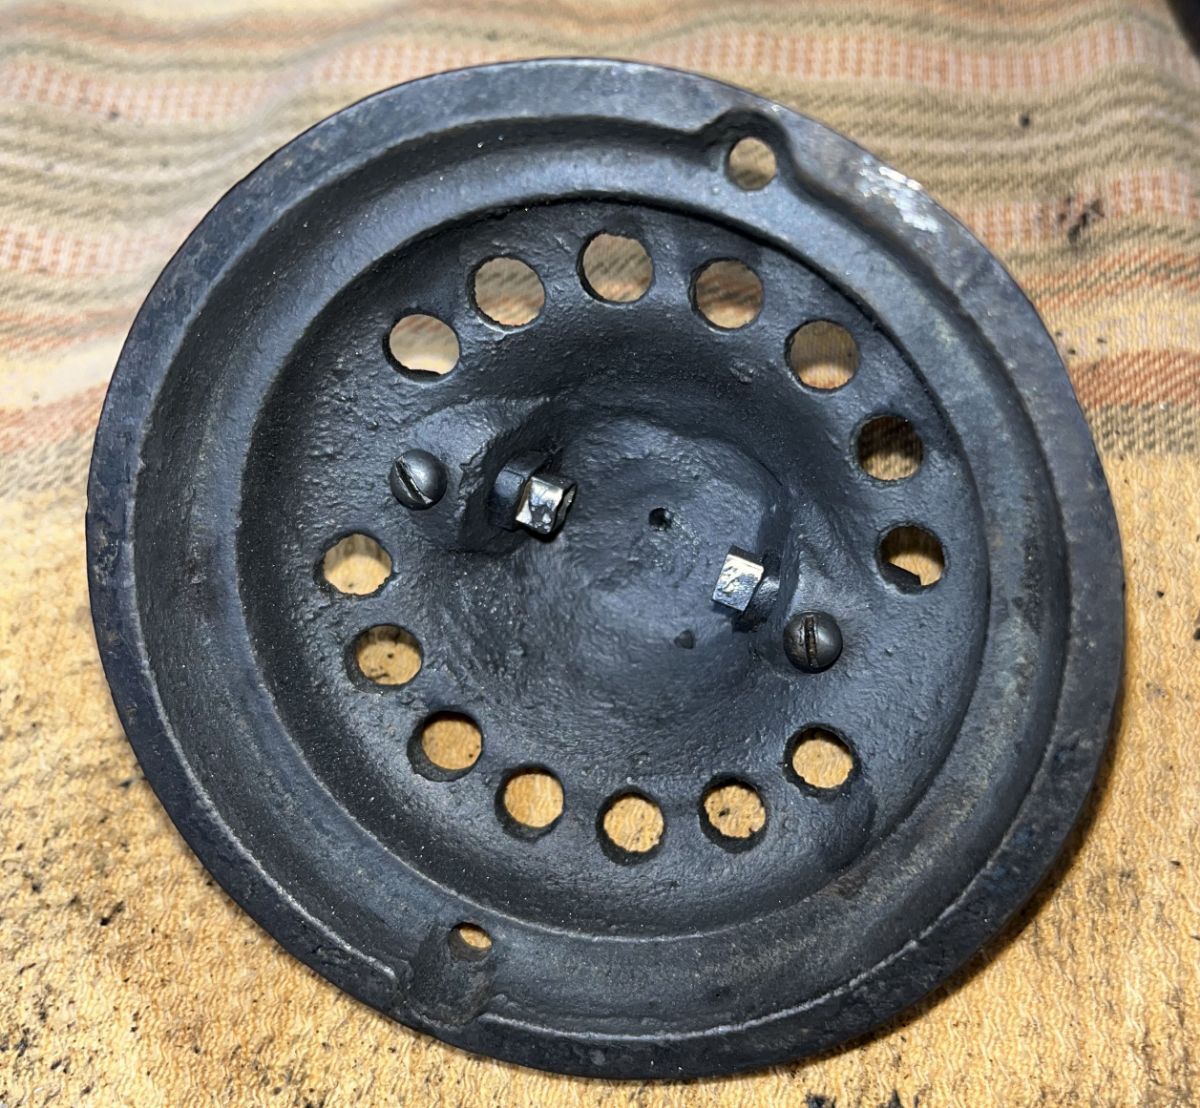
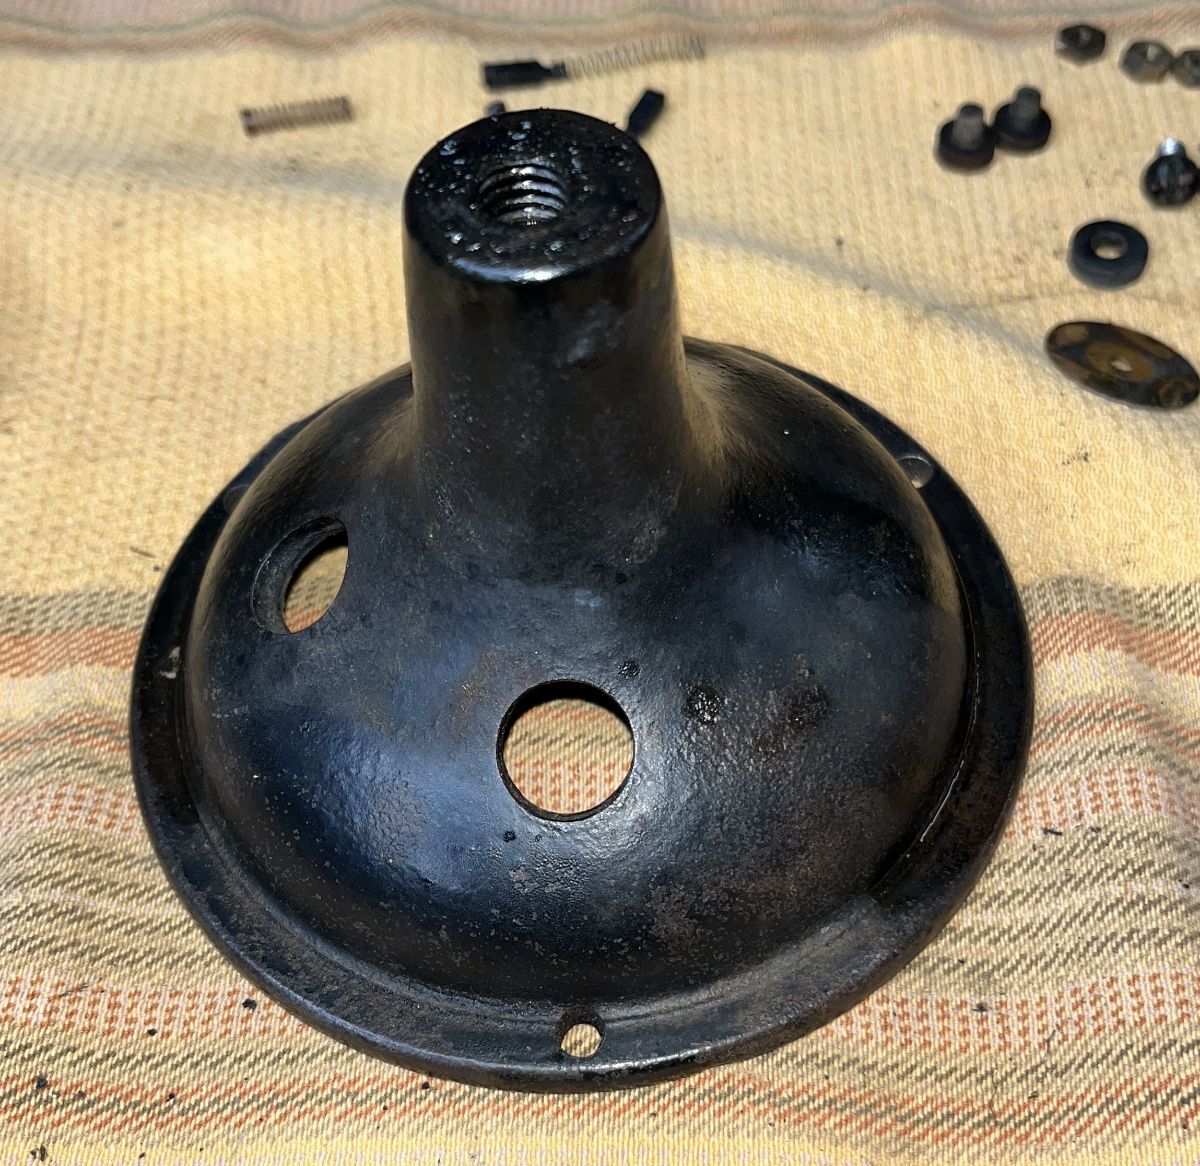
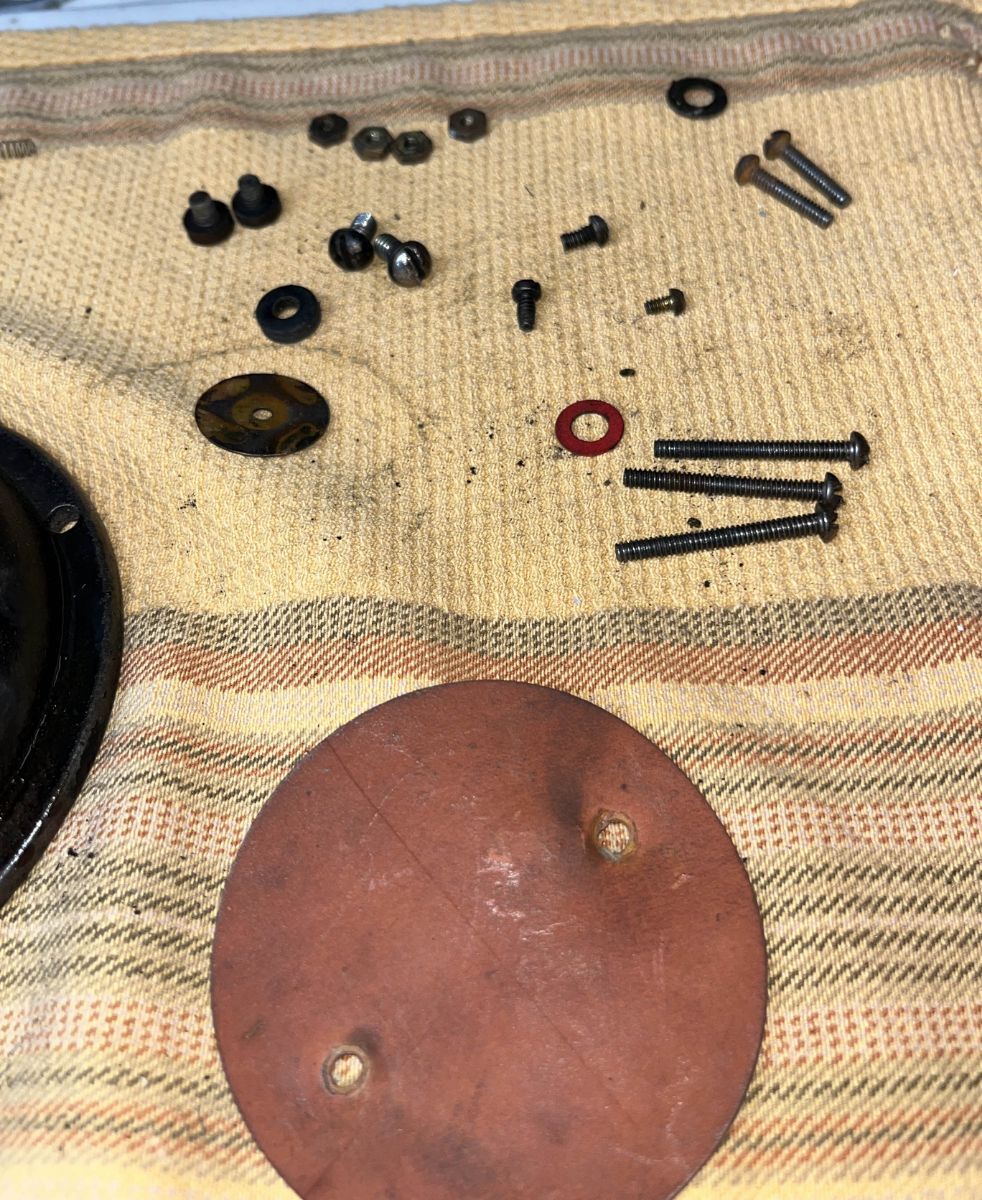
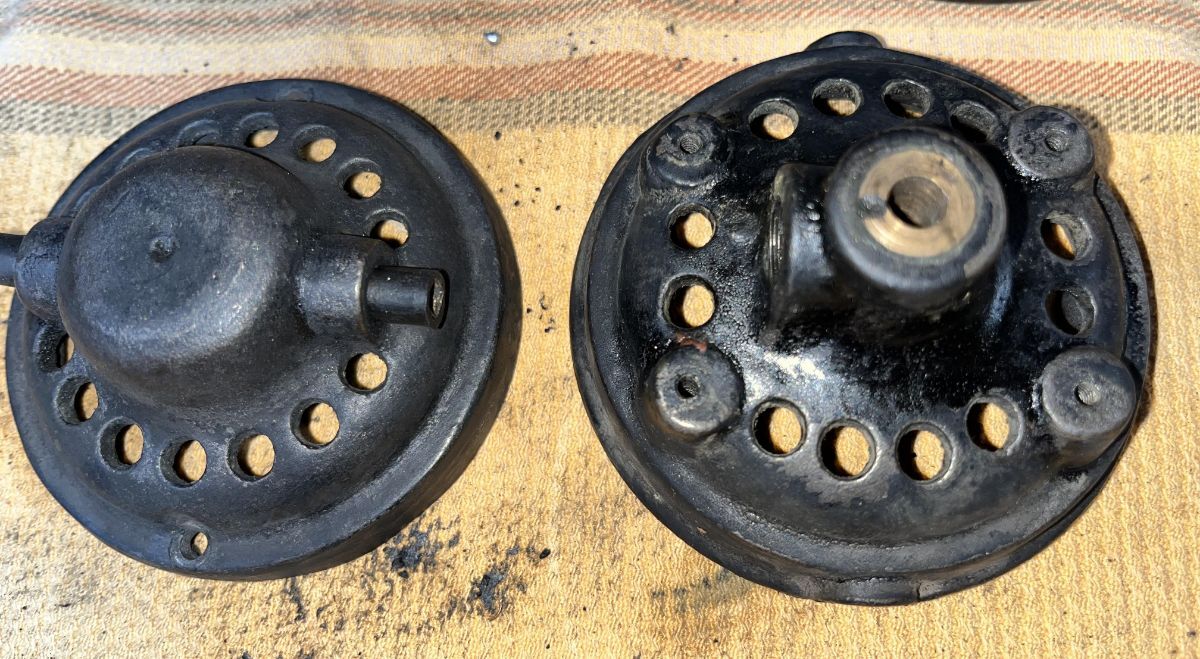
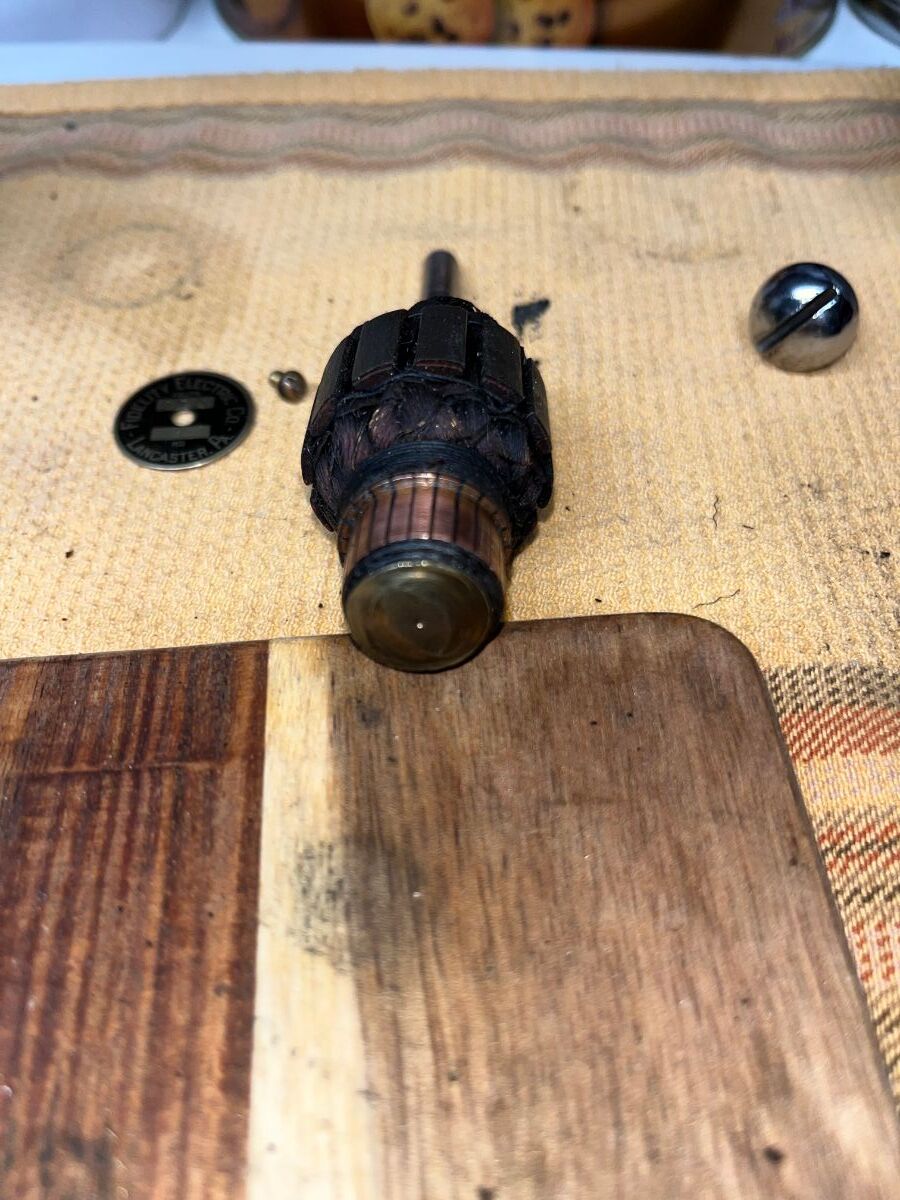
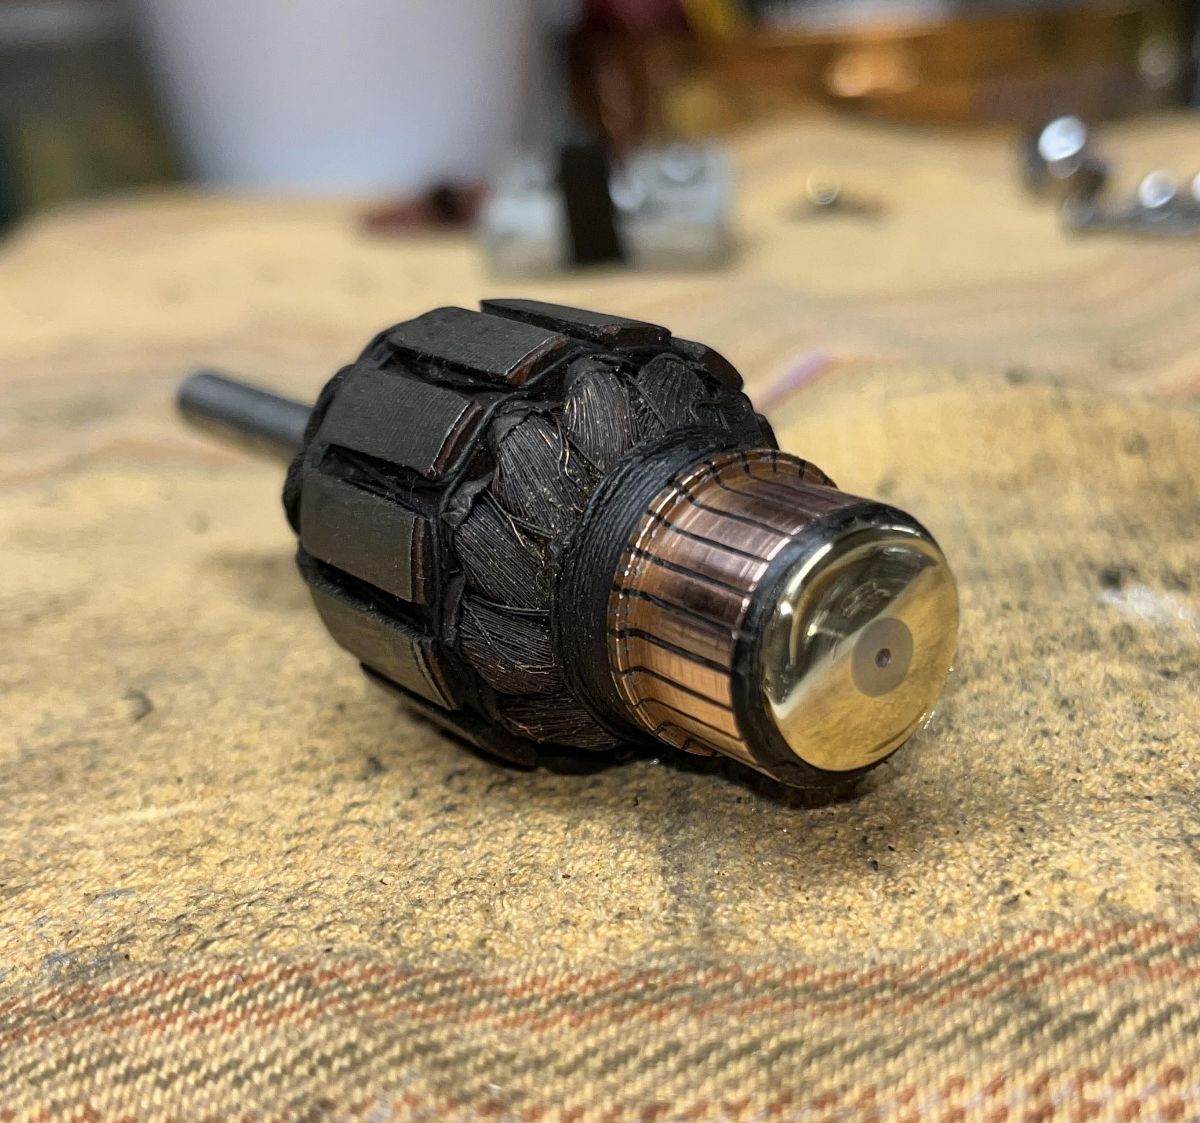
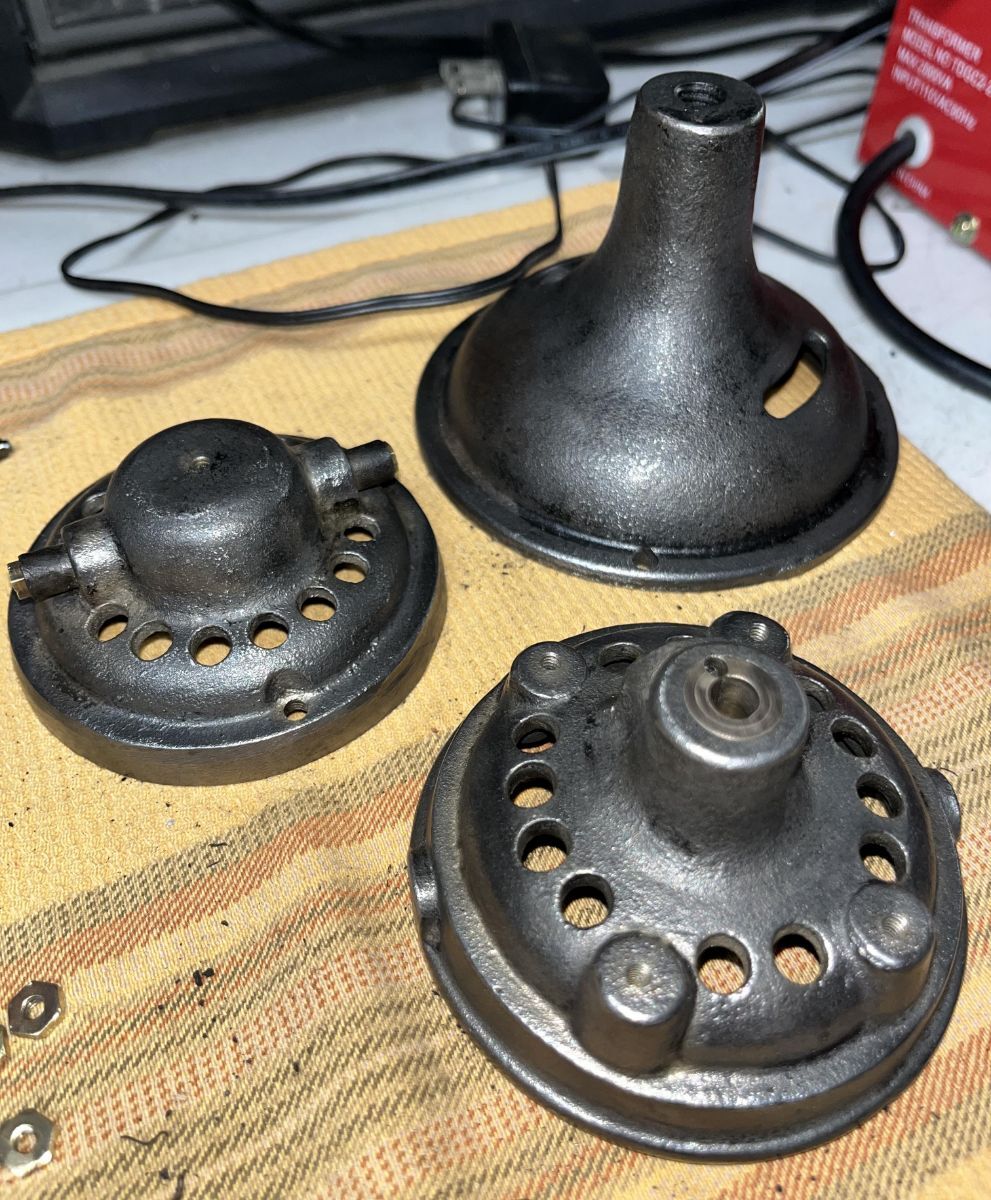
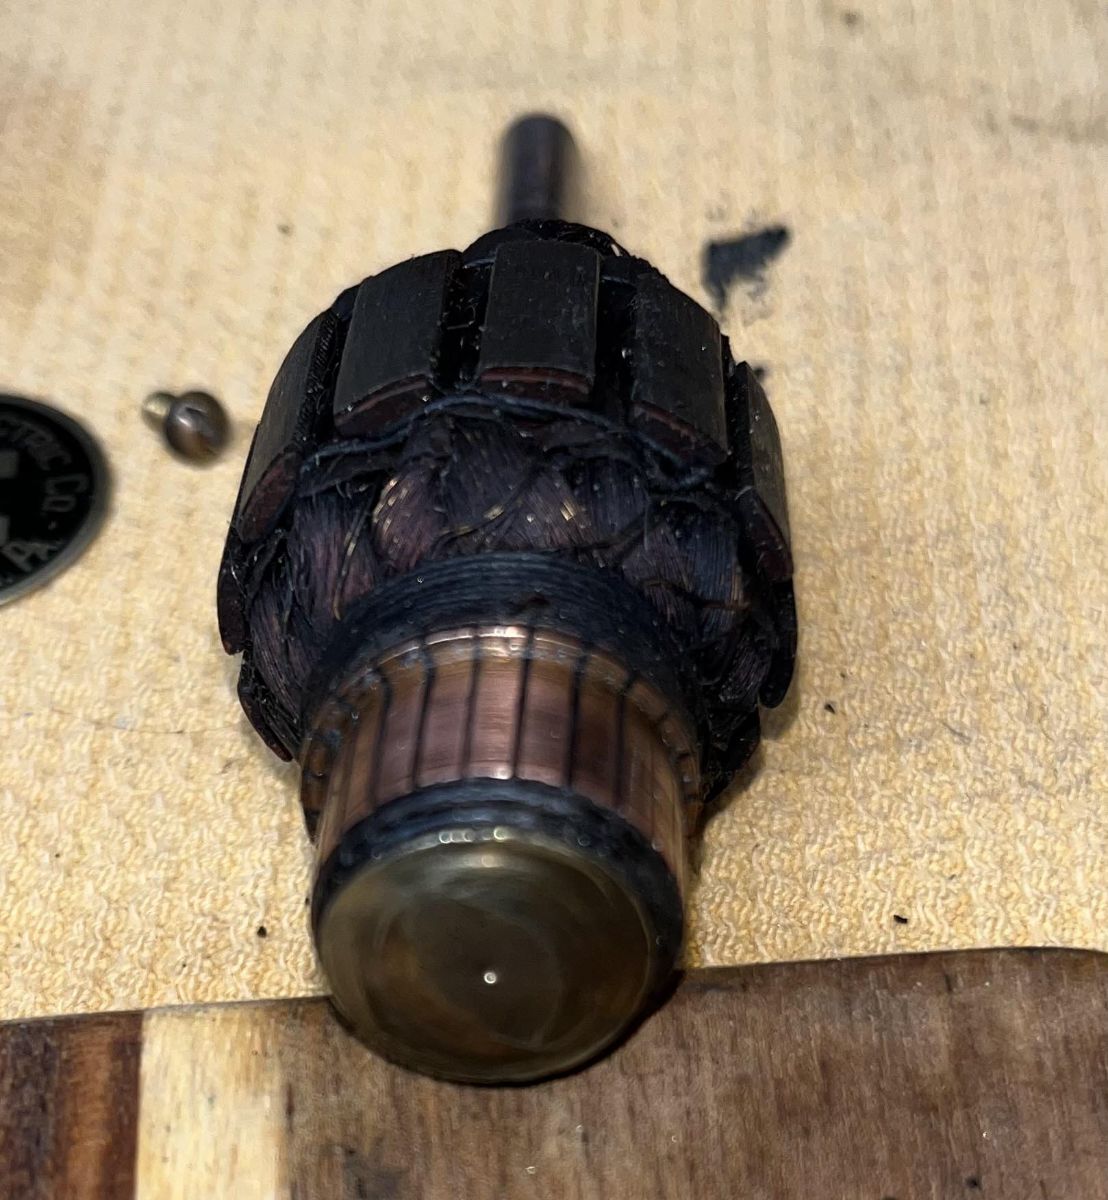
Hello fan friends. Recently, Anthony Lindsey was kind enough to sell me his 1900 stick pancake. It was unrestored but otherwise ran well on two speeds. It came apart easily and the parts were shipped to Rick Powell for japanning. These fans are so easy to work on. It barely took a half hour to break it down and polish the brass bits. The stator was in good shape though there were some bare spots whiched I touched up with some liquid tape. The rotor stem was somewhat worn but otherwise ok and the bearing was good and tight. I removed the tape you see above and applied very thin shrink tubes to the bare wires. I've learned that there isn't a lot of space to get the back cover over taped wires so I usually remove it during the restoration. I cleaned the surfaces of the switch in the speed coil and also the porcelain core. One of the power terminals has a broken bakelite covering. I ordered one from Darryl Hudson, who also supplied me with mica insulators. I usually use brass washers (for no. 10 screws) behind the acorn nuts so as not to fracture the japanne when tightening down the nuts. I recently found a good source for those from Jamestown Distributors - 50 for about $3 including shipping! Good deal!! Ron Bethoney did his usually wonderful work on the brass. The newly japanned pieces came back from Rick Powell yesterday (SIX COATS!) The fan's deep shine is truly something to see. The re-assembly took no more than one hour. I already had a 1900 trunnion cake but always wanted a stick. Thanks to Anthony's kindness, I have one now.
9 points
-
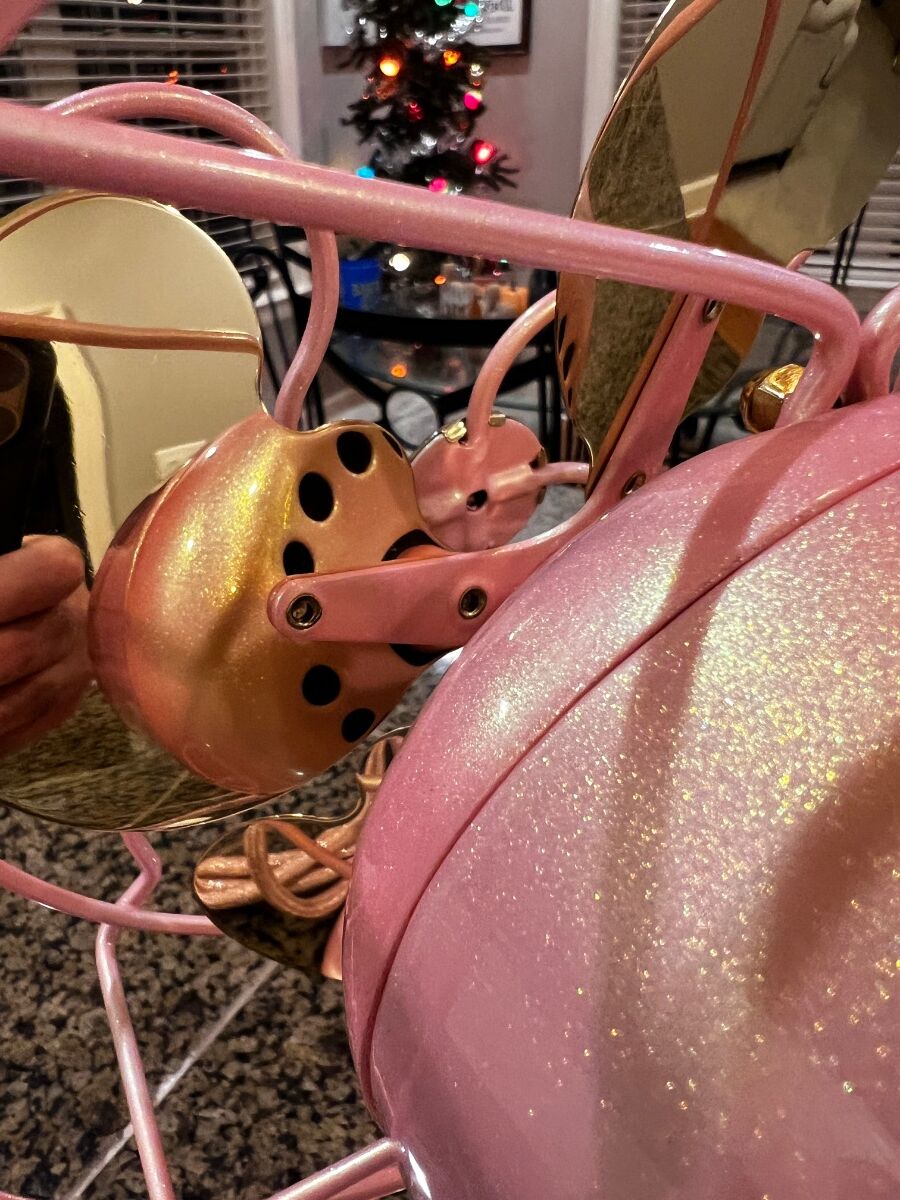
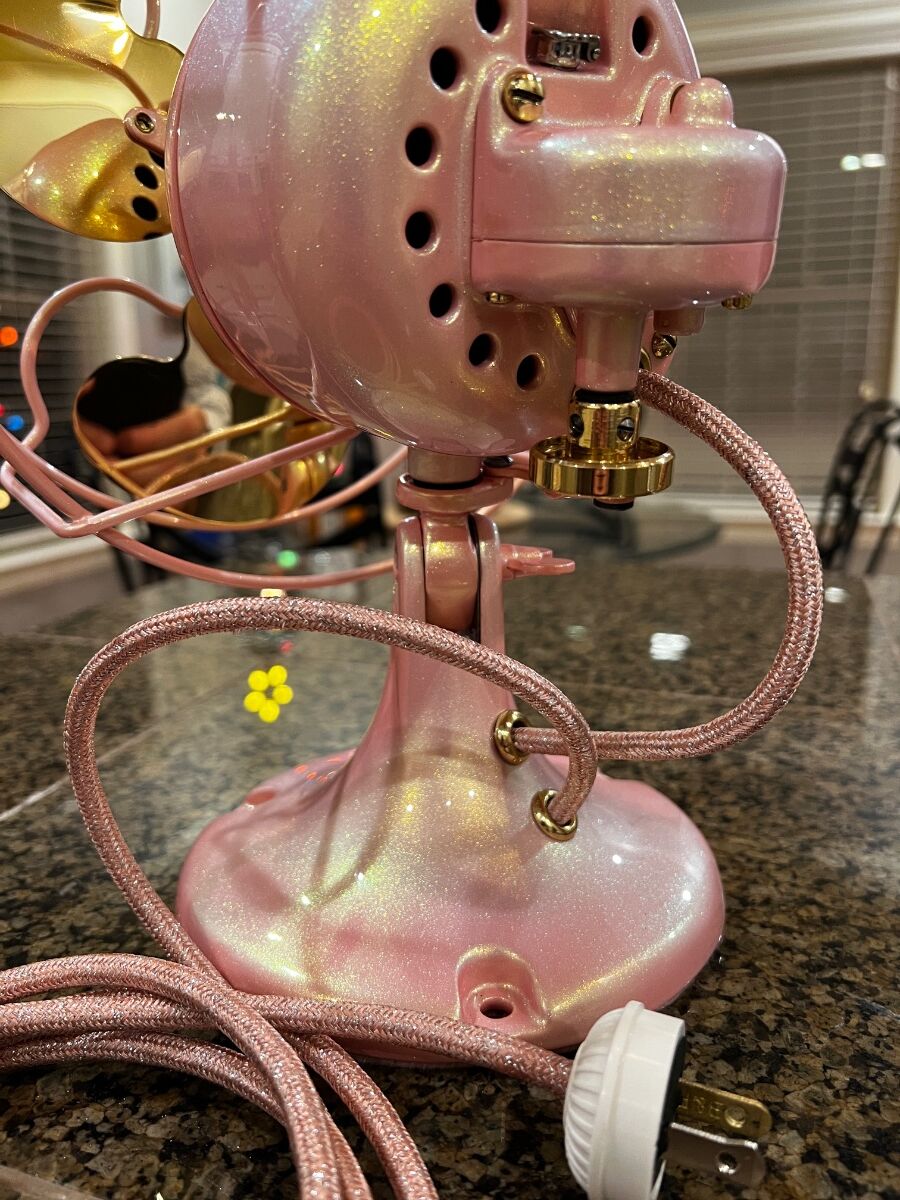
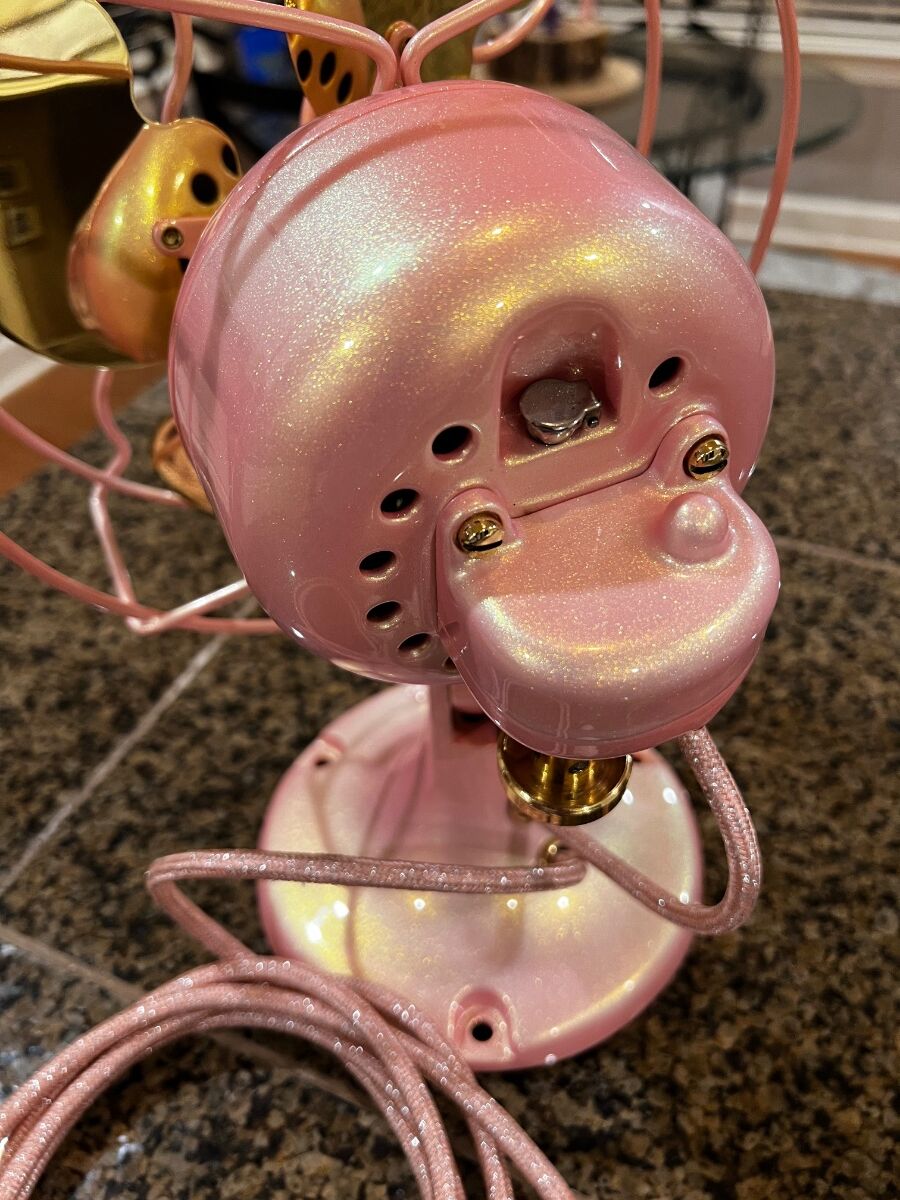
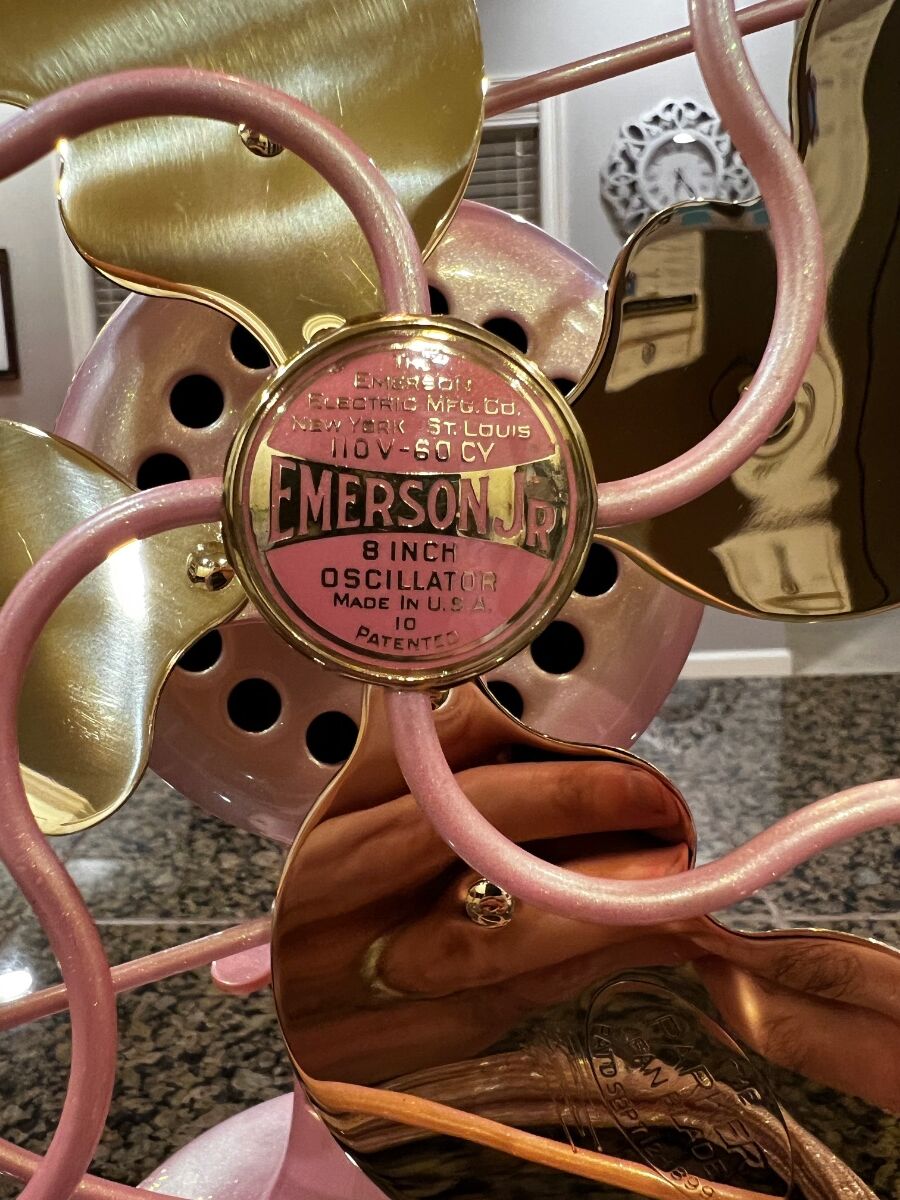
The second is an 8” oscillator and has a similar color shift that should have been gold to red to green. As much as I tried the green would not pop on this. Overspray in booth was evident the green existed and even with overloading the pearl just did not stand out with pink base. Still has a nice gold pearl pop.
9 points
-
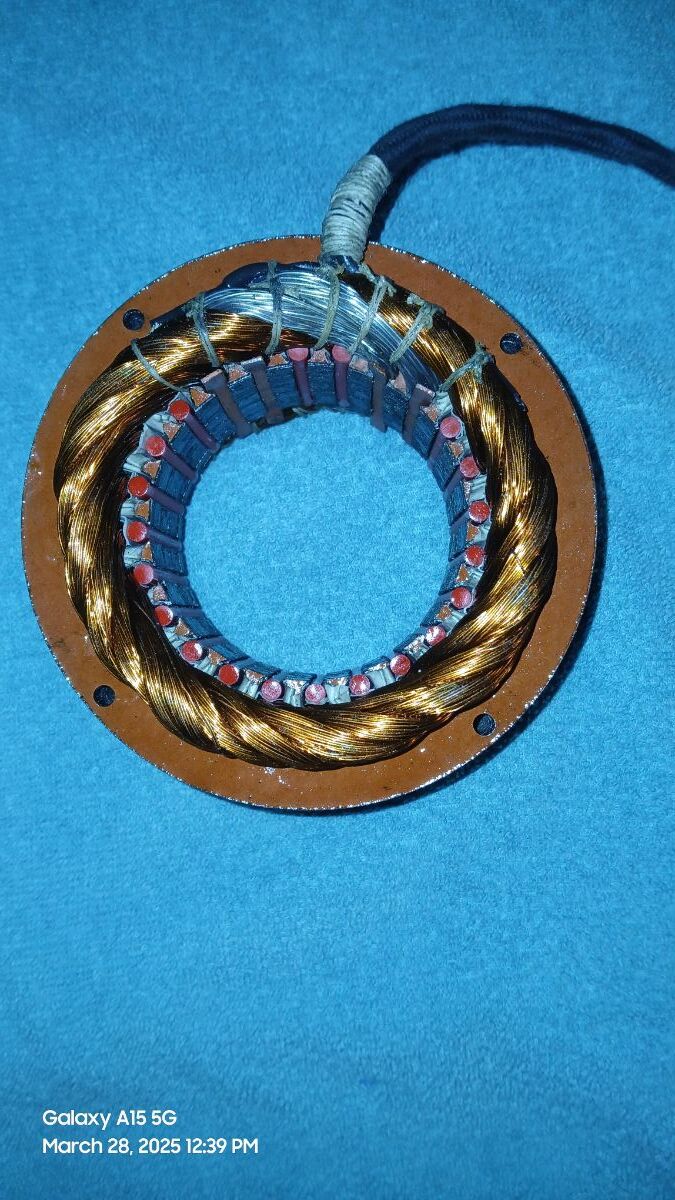
This motor is a three phase wound single phase. It has three different type windings connected star, a start winding consisting of four coils of 33 awg, a run winding consisting of eight coils of 25 awg and a run winding consisting of twelve coils of 26 awg. Twenty-four slot four pole. basket-weave.mp4
9 points
-
Something I wanted to do is finally done. A blinged out junior fan , makes it much more appealing
9 points
-
Pam and I would like to thank everyone who came. Even in a Monsoon everyone had a blast! Can't wait for Fanndango XII, 2025. See you then.
9 points
-
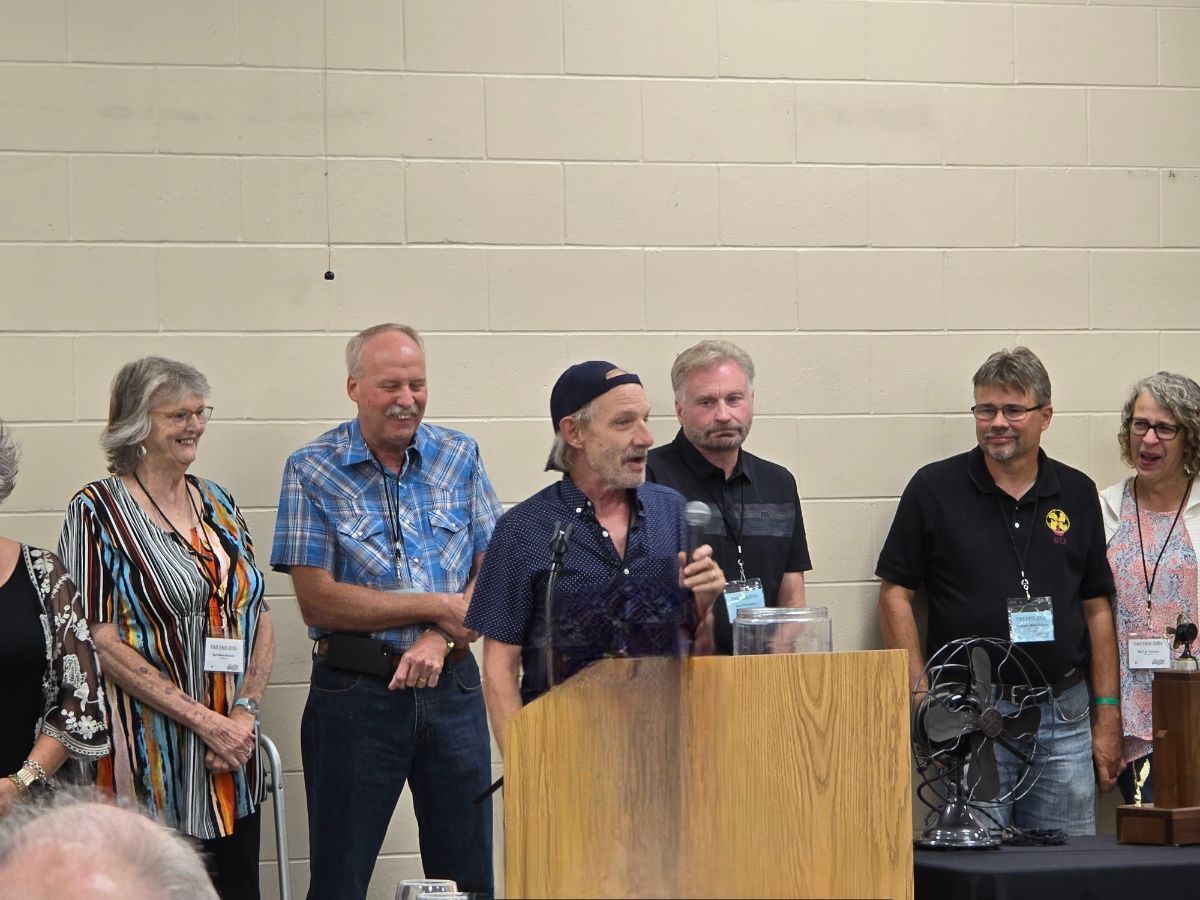
Pic of Paul getting the Breedlove Award
9 points
-
This afternoon's experiment was a success. VID_20240729_180446267.mp49 points
-
Hi everyone, Just finished these little jewels. I got them from Doc. at the Harrison meet, One was petty much complete and then a box of all brass parts. Along with the box of parts and some had I was able to get two fans with some leftover parts. Thanks again Doc for the fans parts and a great time at the Harrison meet. Video.MOV
9 points
-
I bought this fan at FF23. I t has BB/BC and brass struts. Circa 1911, three speeds. The Japan finish was in pretty good condition just touched up some of the chipping. I did repaint the oscillator housing. Tony Clayton made me the beautiful wire. Darryl Hudson supplied me with the feet and grommets. I got the oscillator lever from Louis Luu thru George Durbin. Thanks guys for all your help I appreciate it. The fan runs and oscillates very smoothly, no vibration.
8 points
-
Hey Folks, we're gonna host a 29th gathering around the fan tables and dinner table on the 29th-31st of May, the weekend immediately following Memorial Day. That way we don't trample on Memorial Day weekend OR Father's Day weekend. Flyer will likely not make it to the Magazine until the April issue but will get it posted here much sooner. Next year makes 30 ! Cheers / Blessings, Happy Fan Collector8 points
-
resistance_BMY.mp4
8 points
-
BallJointandYokeorbiter.mp4 I recently modyfied this fan for dual traversing lever orbit per the Verity's tradition, but since then, I've been working on simplfying the yoke and ball joint type and decided to mod this fan again. See video. Cheers, Bill8 points
-
They were named a "Gearback" years ago by a fan dork. Westinghouse "Tank Motor" fans named by a fan dork. "Rollercoaster" fans named by a fan dork. "Kidney Oscillator" named by a fan dork. The GE "BMY" named by a fan dork. The GE "Pancake" was named by a fan dork. Etc...etc...etc. Once named by the fan dork, the fan dork masses made the fan dork terminology gospel. 🙂8 points
-
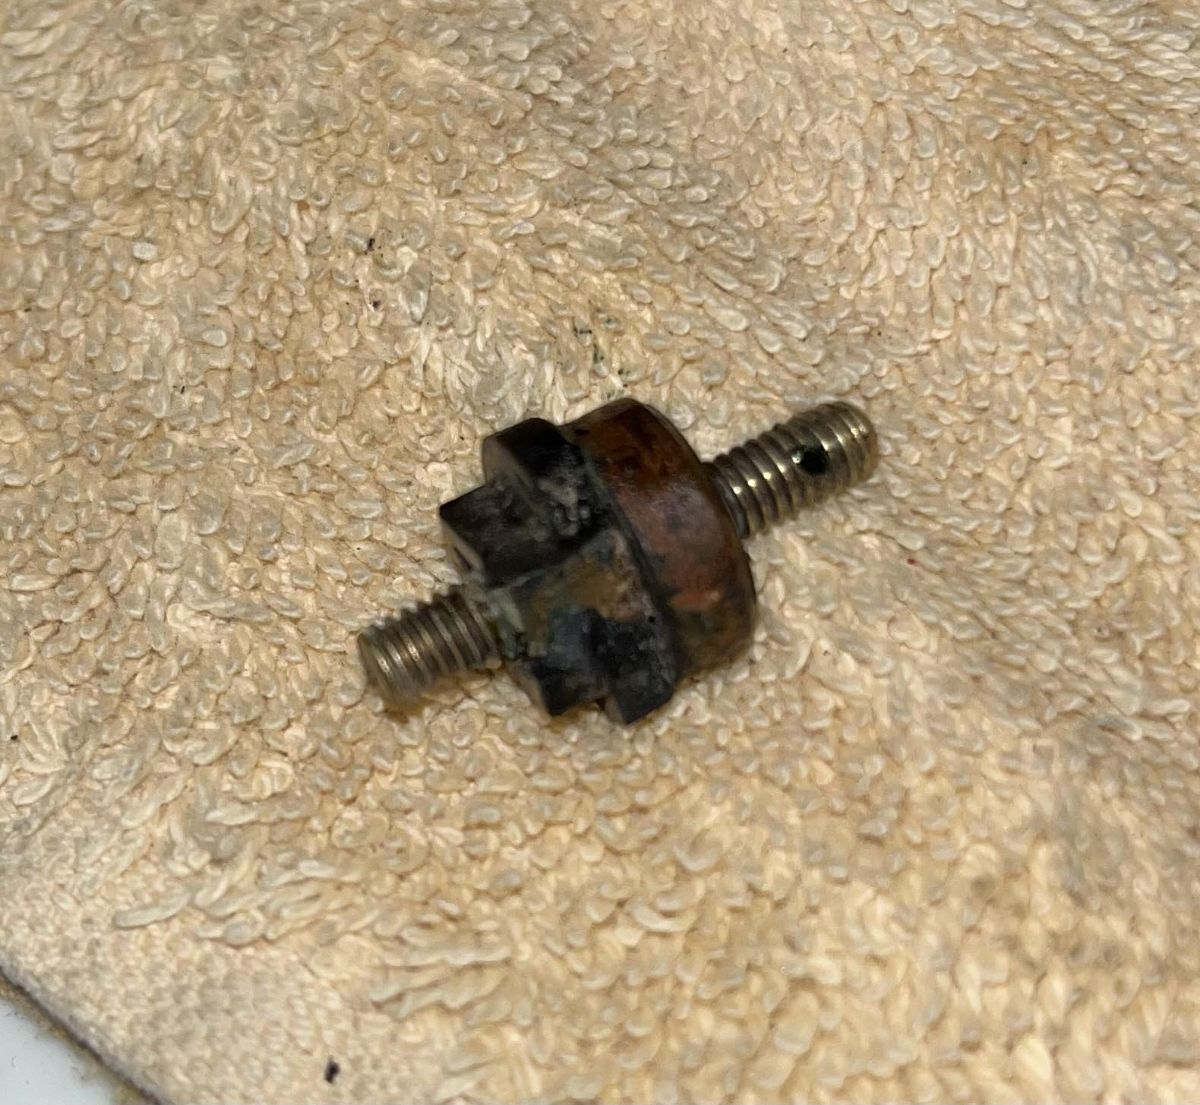
Well an AFCA member did get the fan sort of.... A box came today, addressed to my wife. Long story short, I placed my max bid and walked away, didn't trust myself to not get caught up in the action. I had told her about the fan and shown her pictures of other members fans on the forum etc. She knew I wanted it and that it was a highly sought after fan. While I was out in the previously mentioned garage, she was bidding on the fan. She said that if the price bothered me I could sell it or I could thin out the herd a little and sell some duplicate fans and some of those awaiting restoration. After thinking about it for about it for 0.001 seconds. I am now trying to make a list I can take to Harrison in a few weeks. Got a couple of BMY's, brass bells, couple of Emersons etc. Need to check them over quickly and get them priced and on the BST. The Lollipop does need cage repair ( I knew that prior to bidding) the square back ring is broken and missing a section , also needs a top strut and 2 cage clips. It did not arrive completely unscathed, but believe I can fix. Blade wrinkle and the bottom lollipop pin that hits the spring arm and flips mechanism back the other way broke off (piece was in the box). It sure looks like it was part of the casting. Not sure if that can be silver solder/brazed or needs drilled out, new pin made and inserted then silver soldered. Testing at the brush terminals showed the stator appears to be good, switch is intact and will probably get a Kanthal rewind like the one David Kilnapp documented. The Lollipop itself survived and is standing proud. Even with the shipping bruises, cage repair and needing a a couple of pieces, I am beyond thrilled. I know a lady that is getting flowers, and a very nice evening out in the near future. I am a lucky man in more ways than one.8 points
-
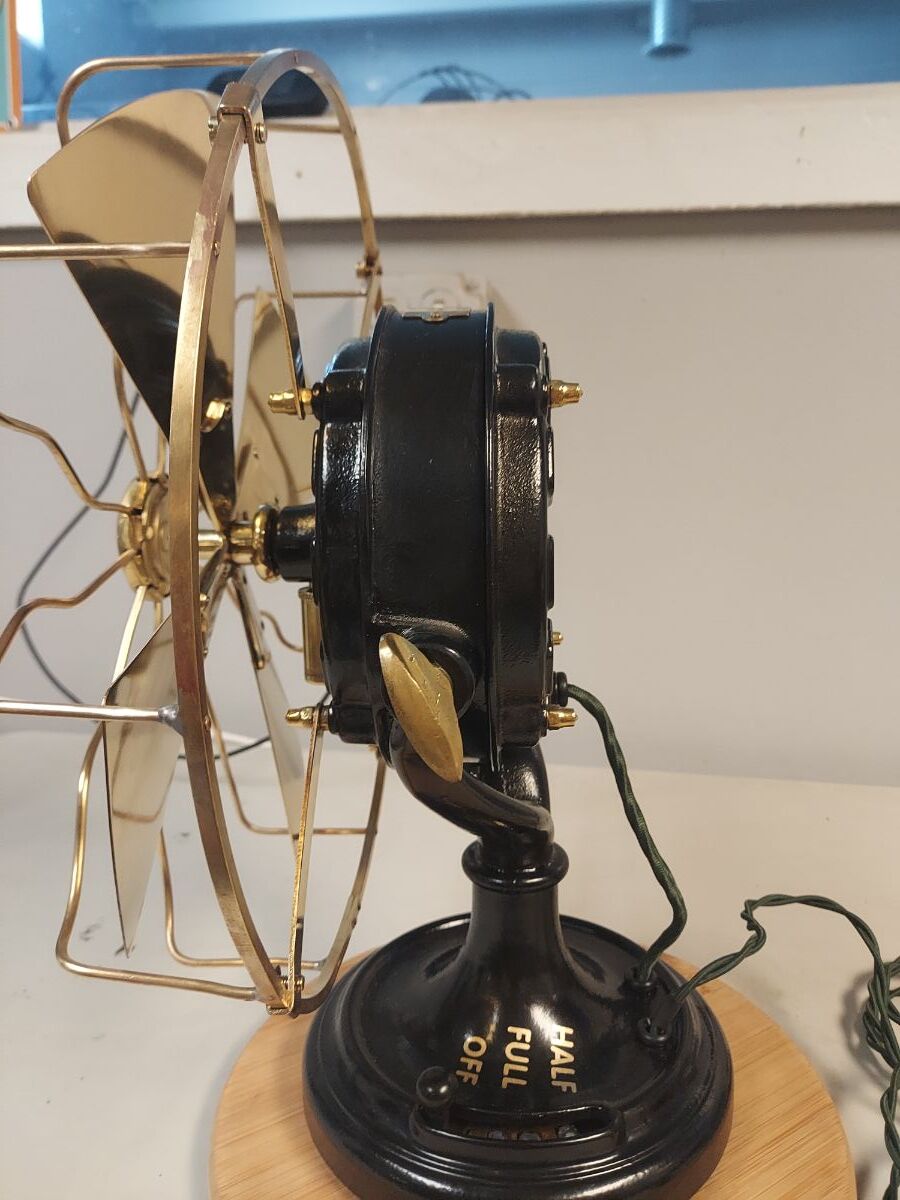
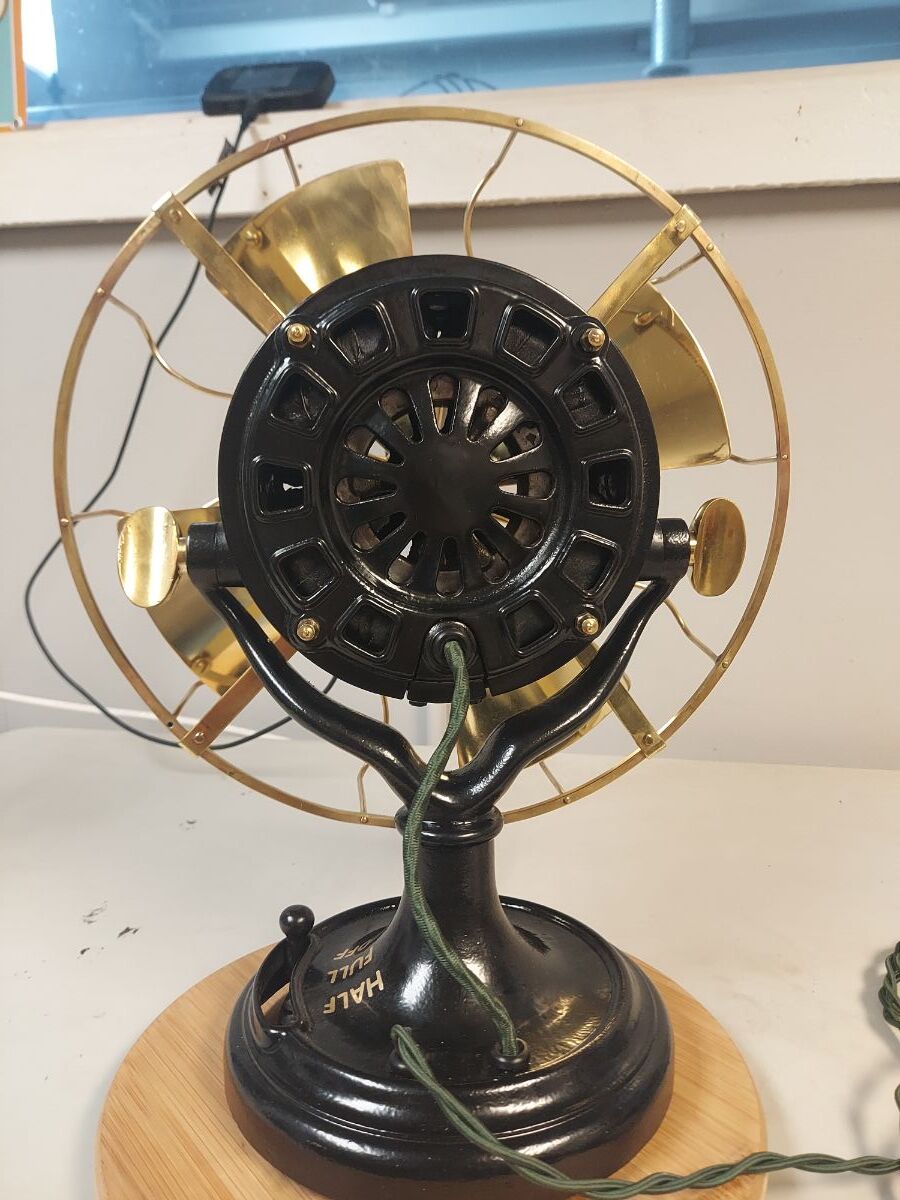
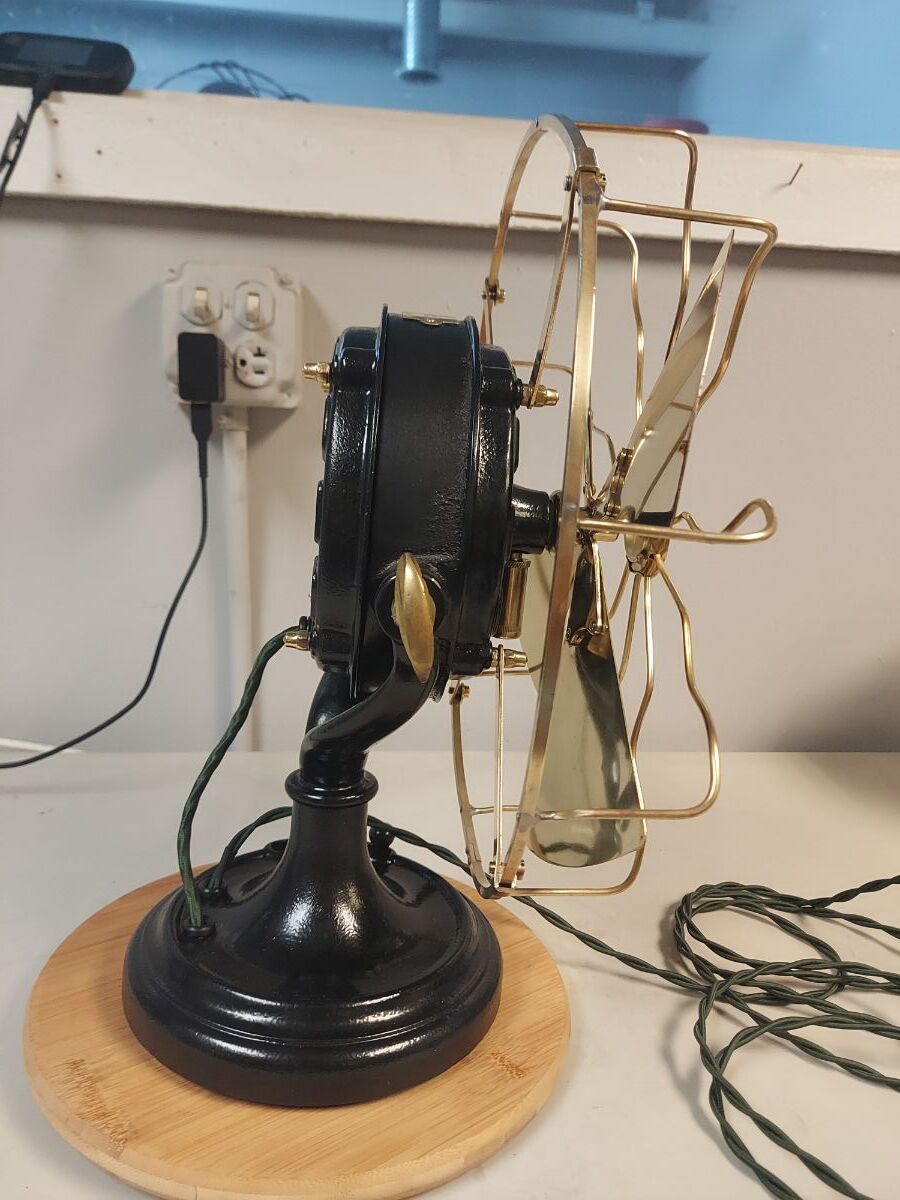
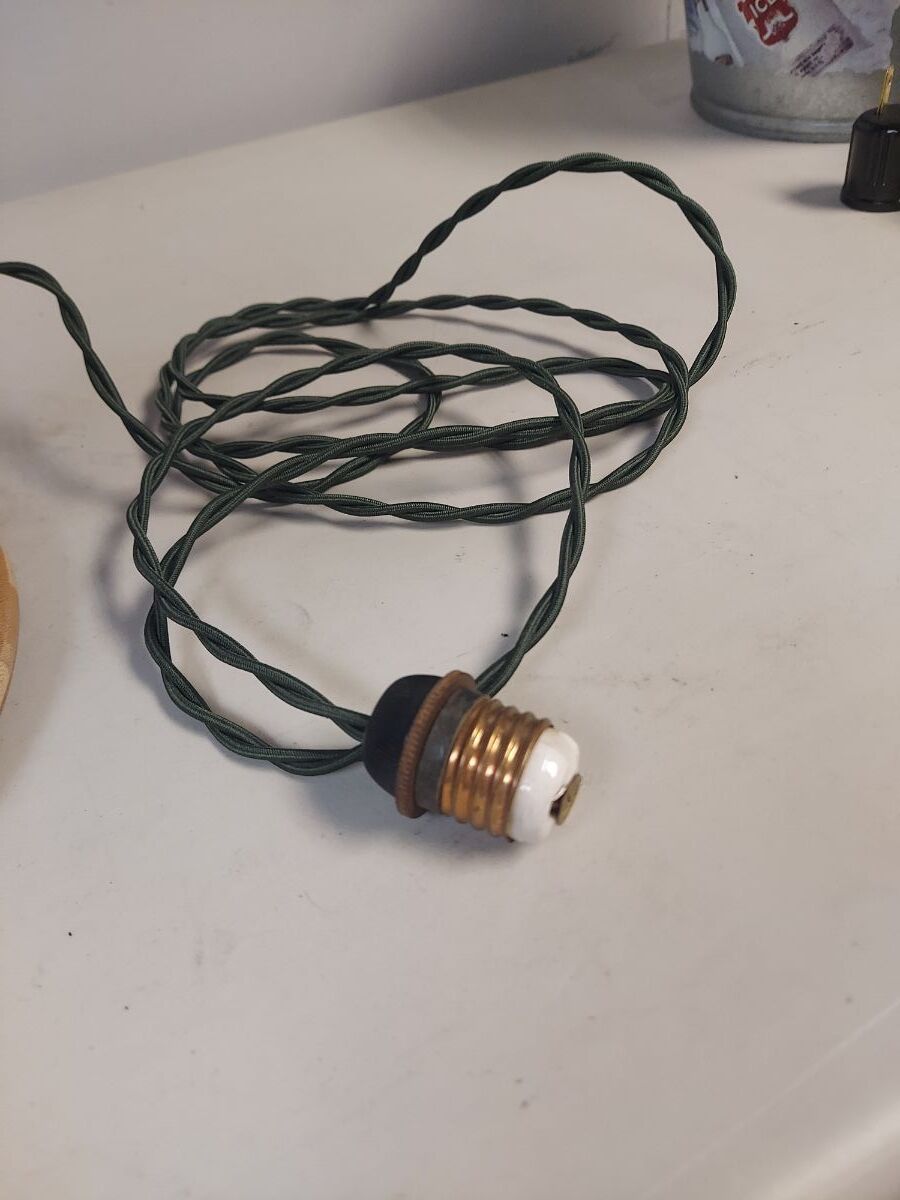
It took a long time but we finally got it done. Circa 1905, runs at full and half speed, 100vac, BB/BC. It runs smooth and quiet. I stripped it all down and powder coated it a medium black. I formed and installed three cage wires. I retaped the four stator coils. Many members helped me out with their ideas in getting the motor to start on it's own. I want to thank Darryl Hudson for making me a new bearing and rotor shaft also screw in grommets and rubber feet. I also want to thank Tony Clayton for making me the beautiful head and power wire and Peter Blackman for the great looking speed decals. Great job guys!!
8 points
-
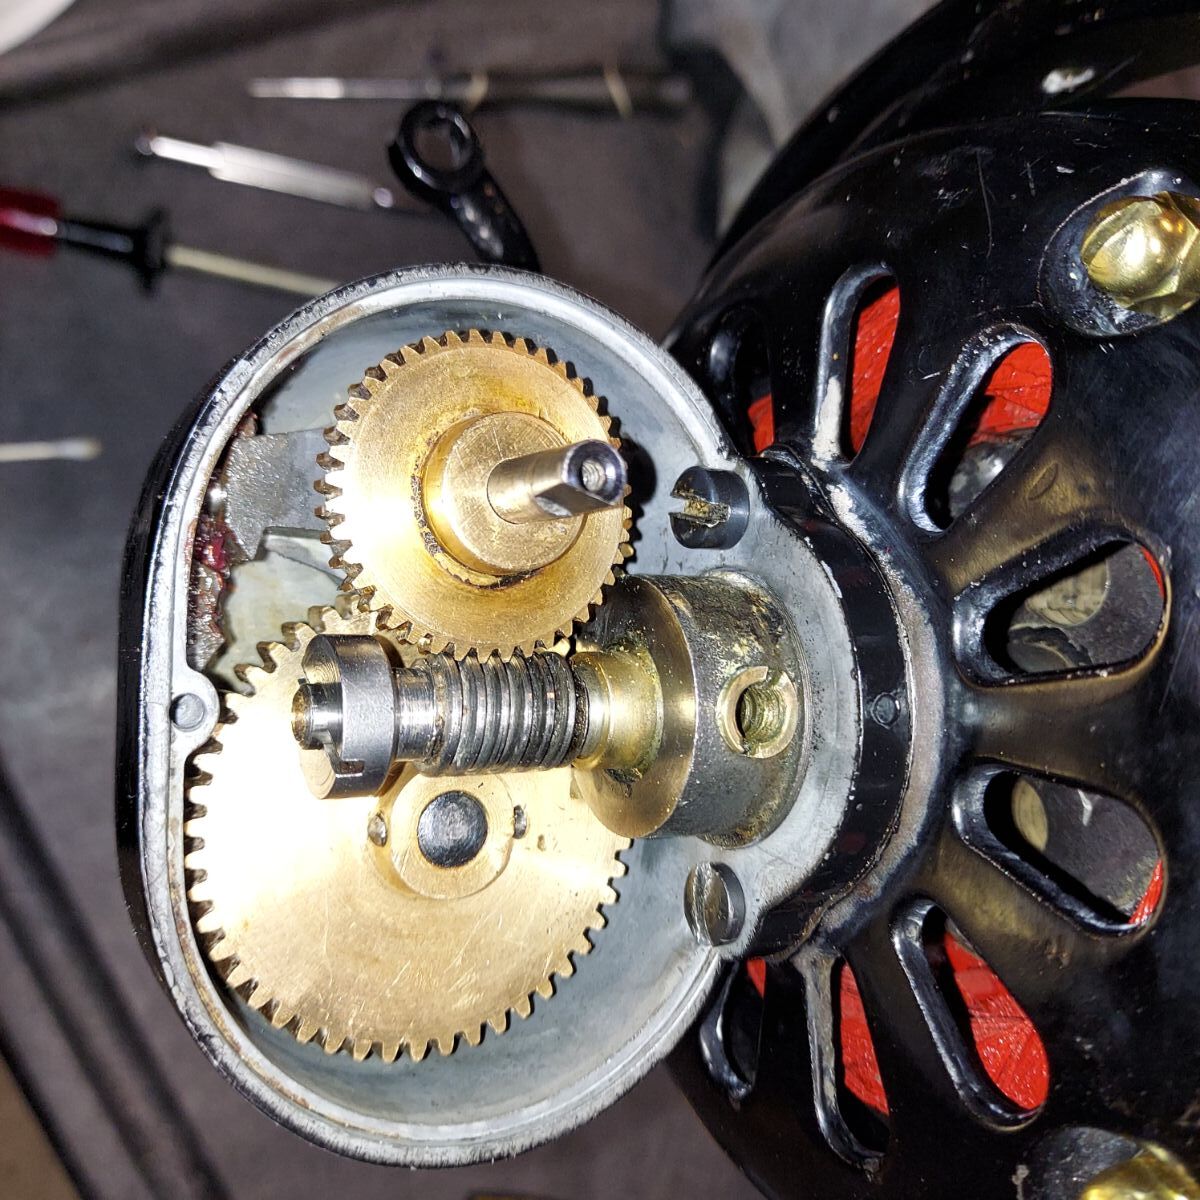
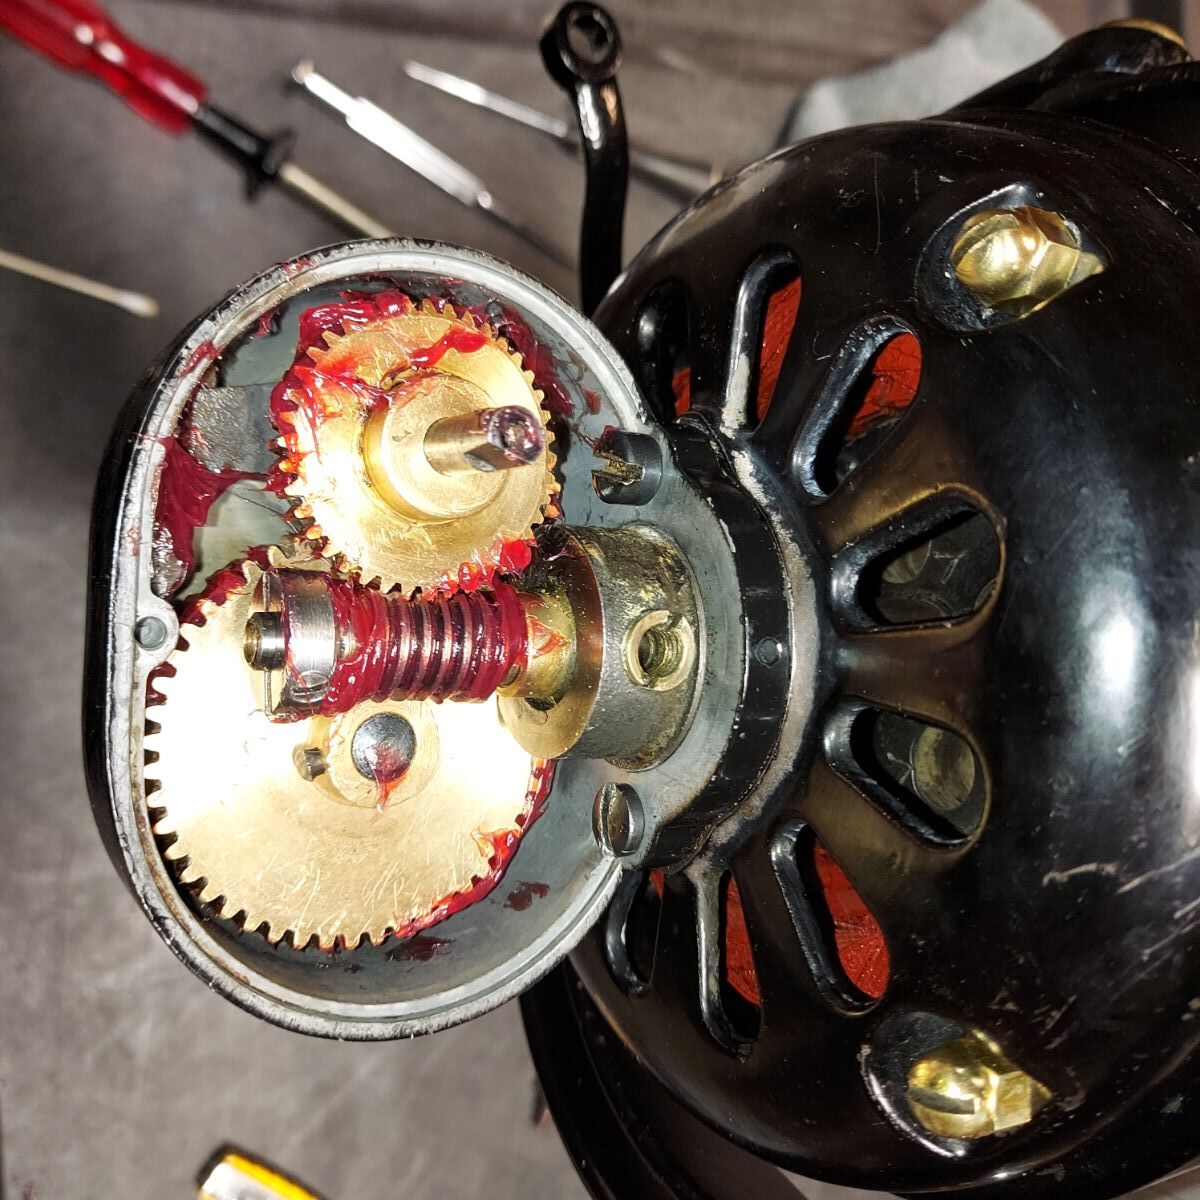
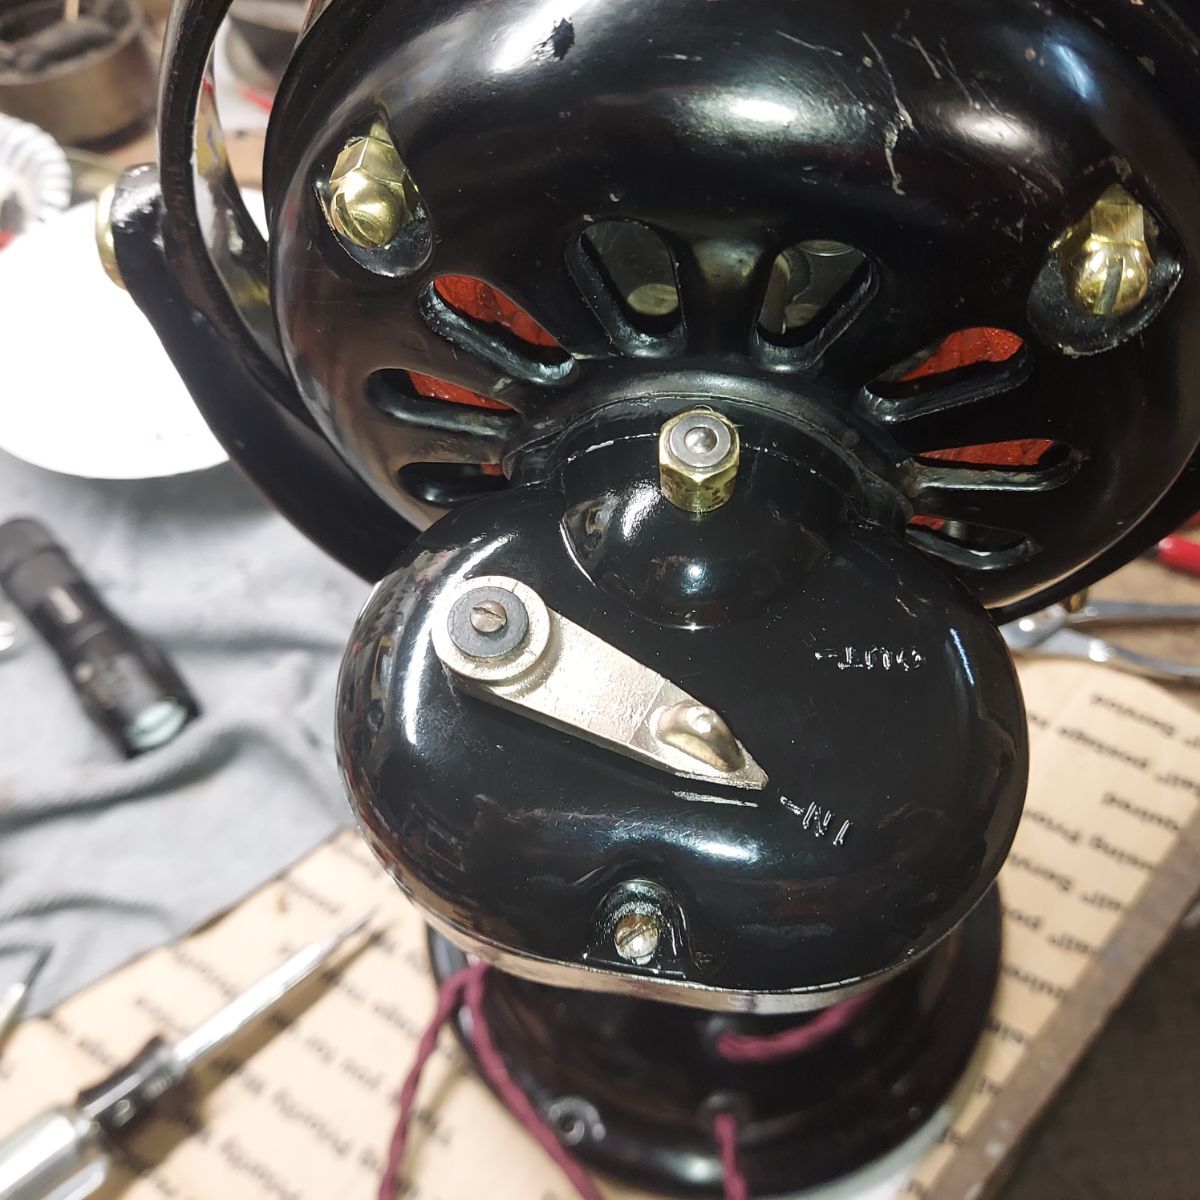
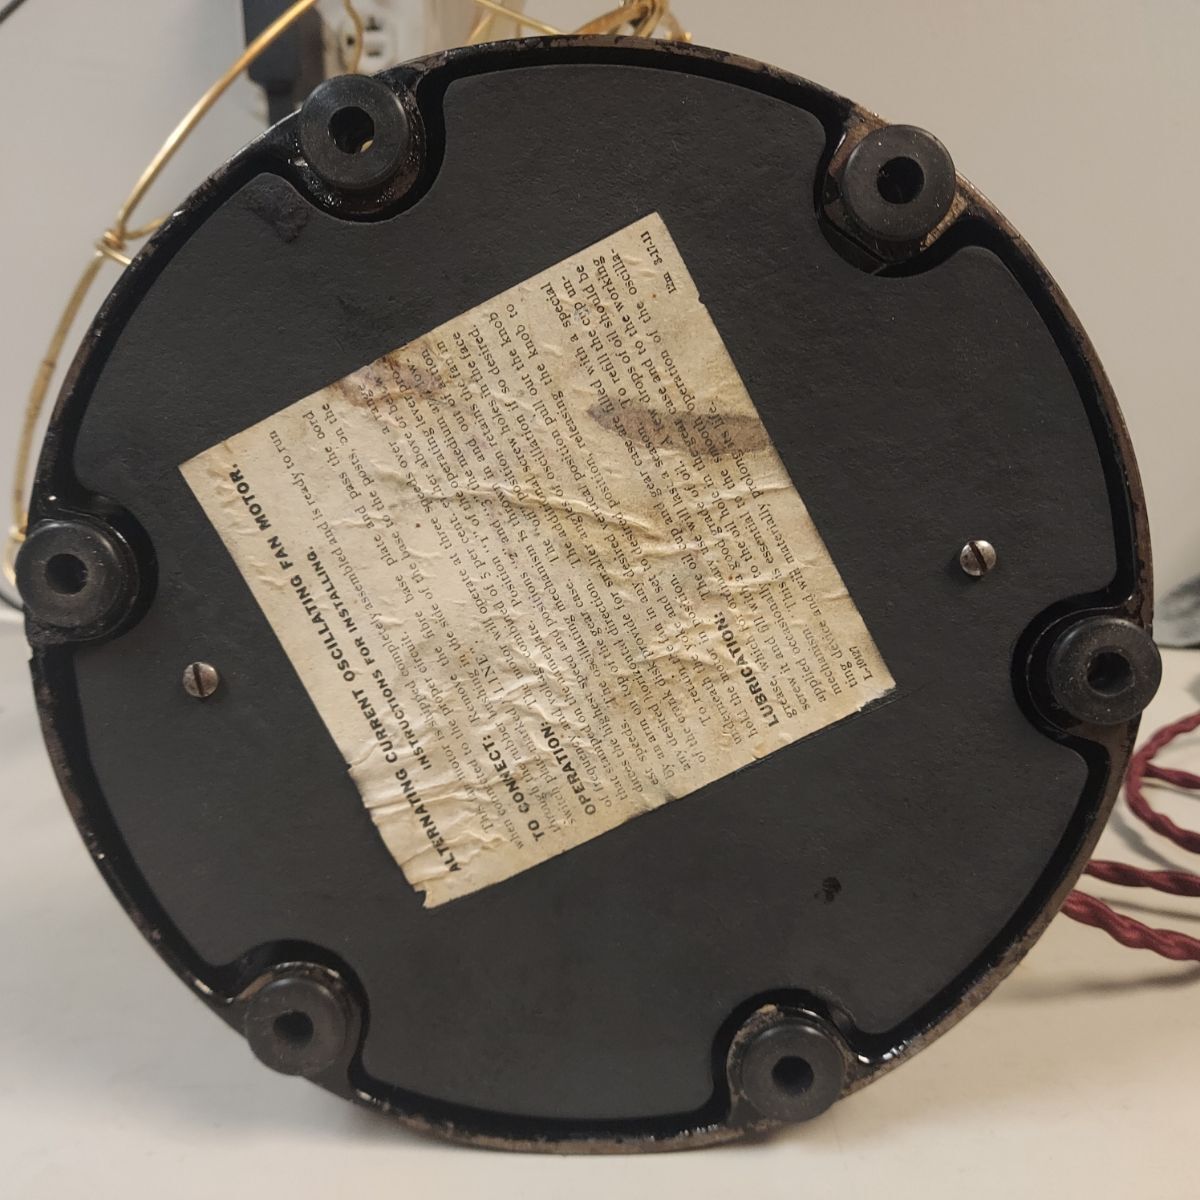
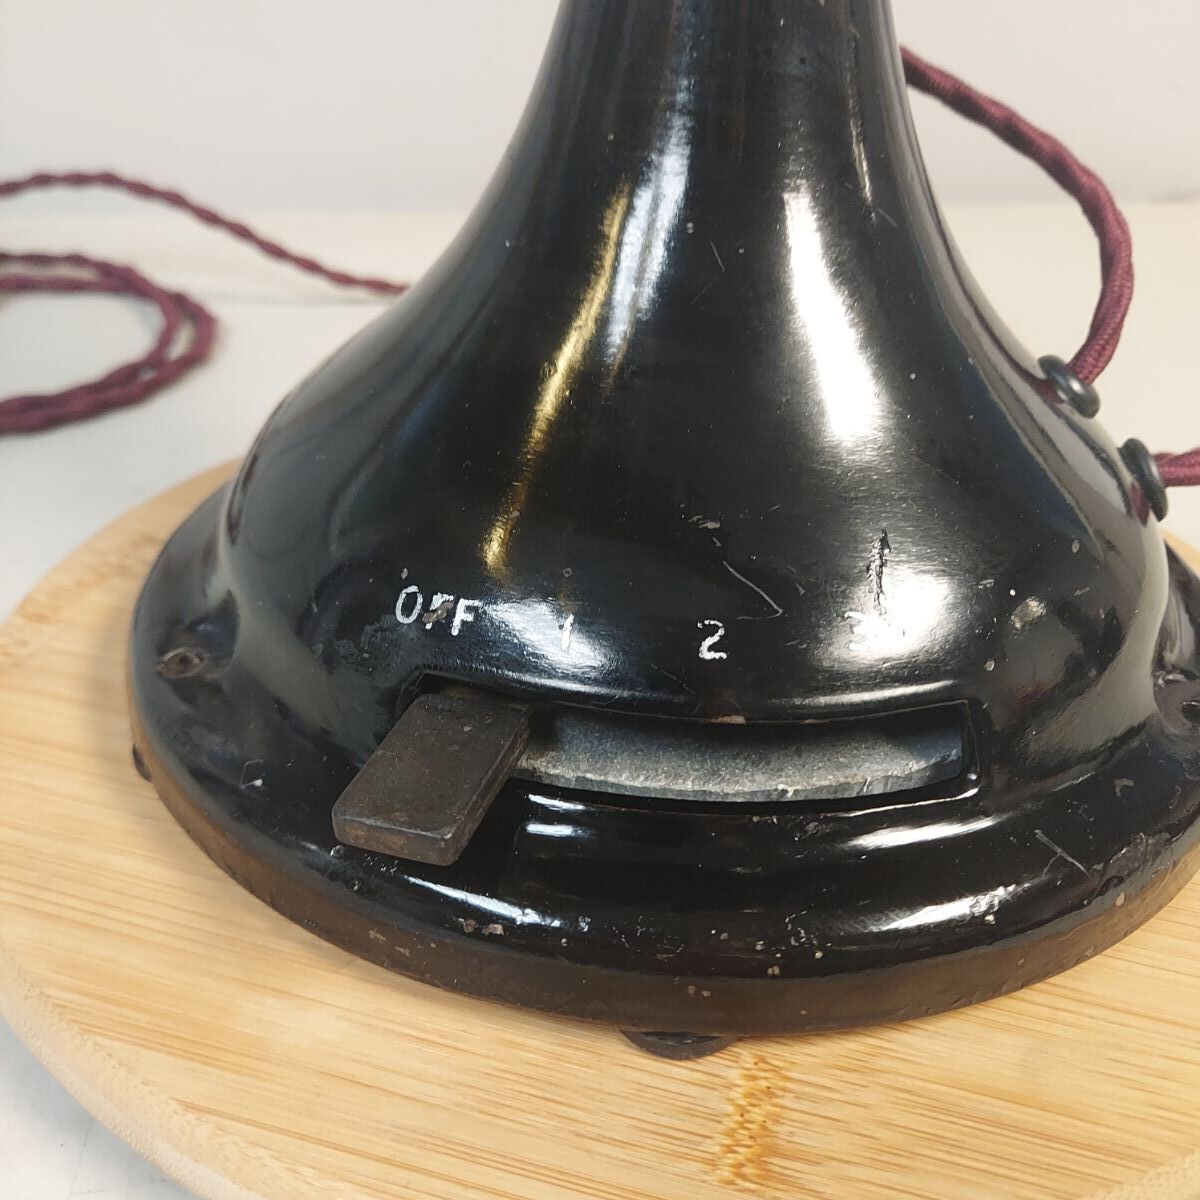
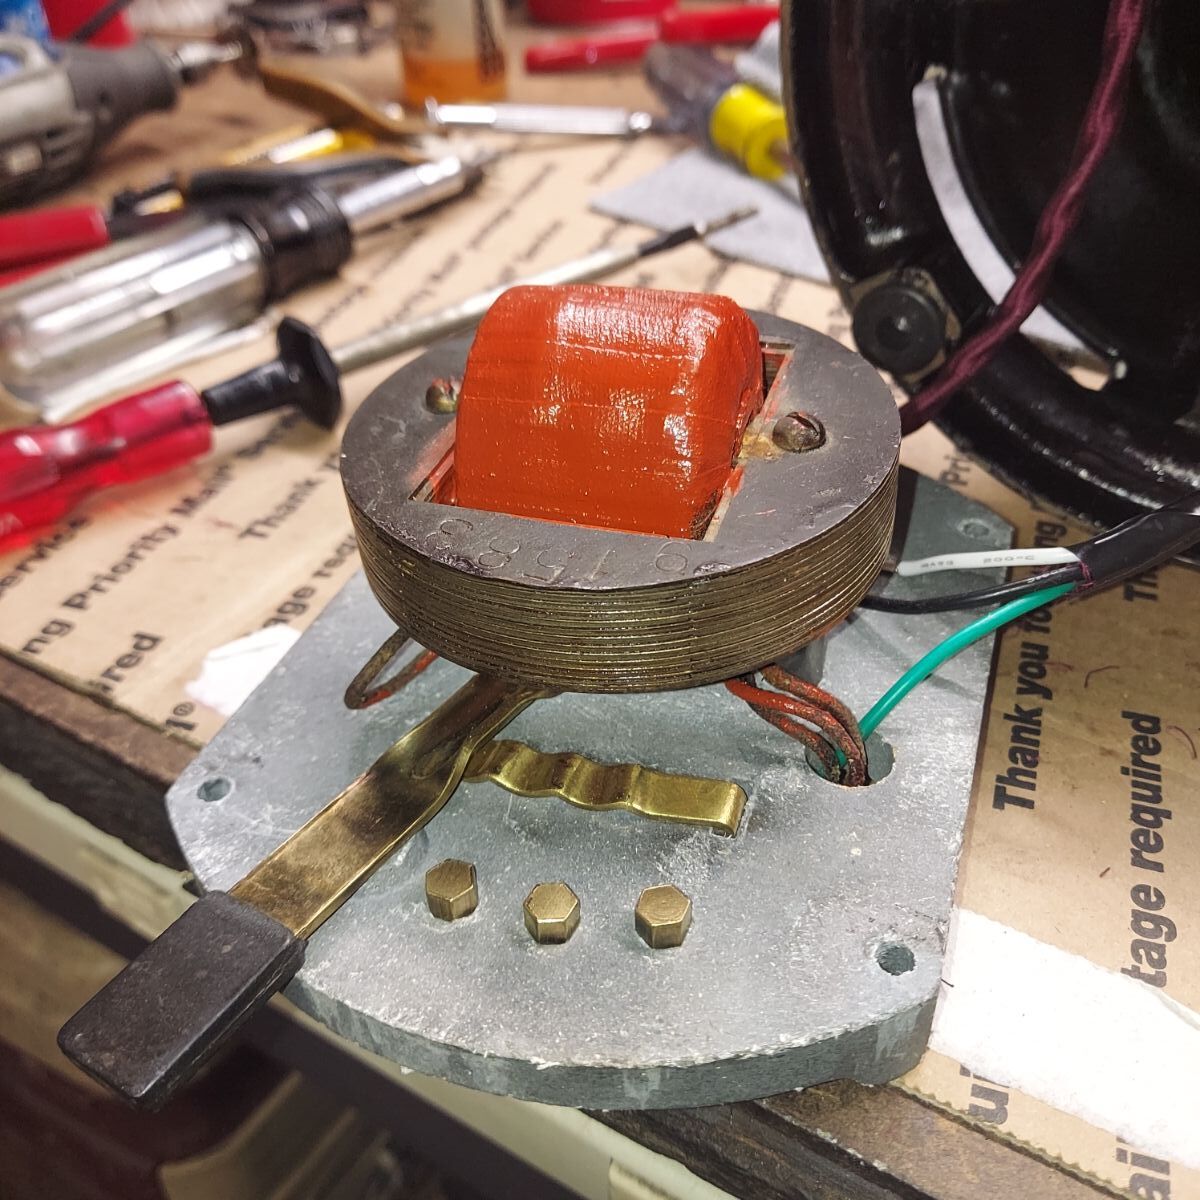
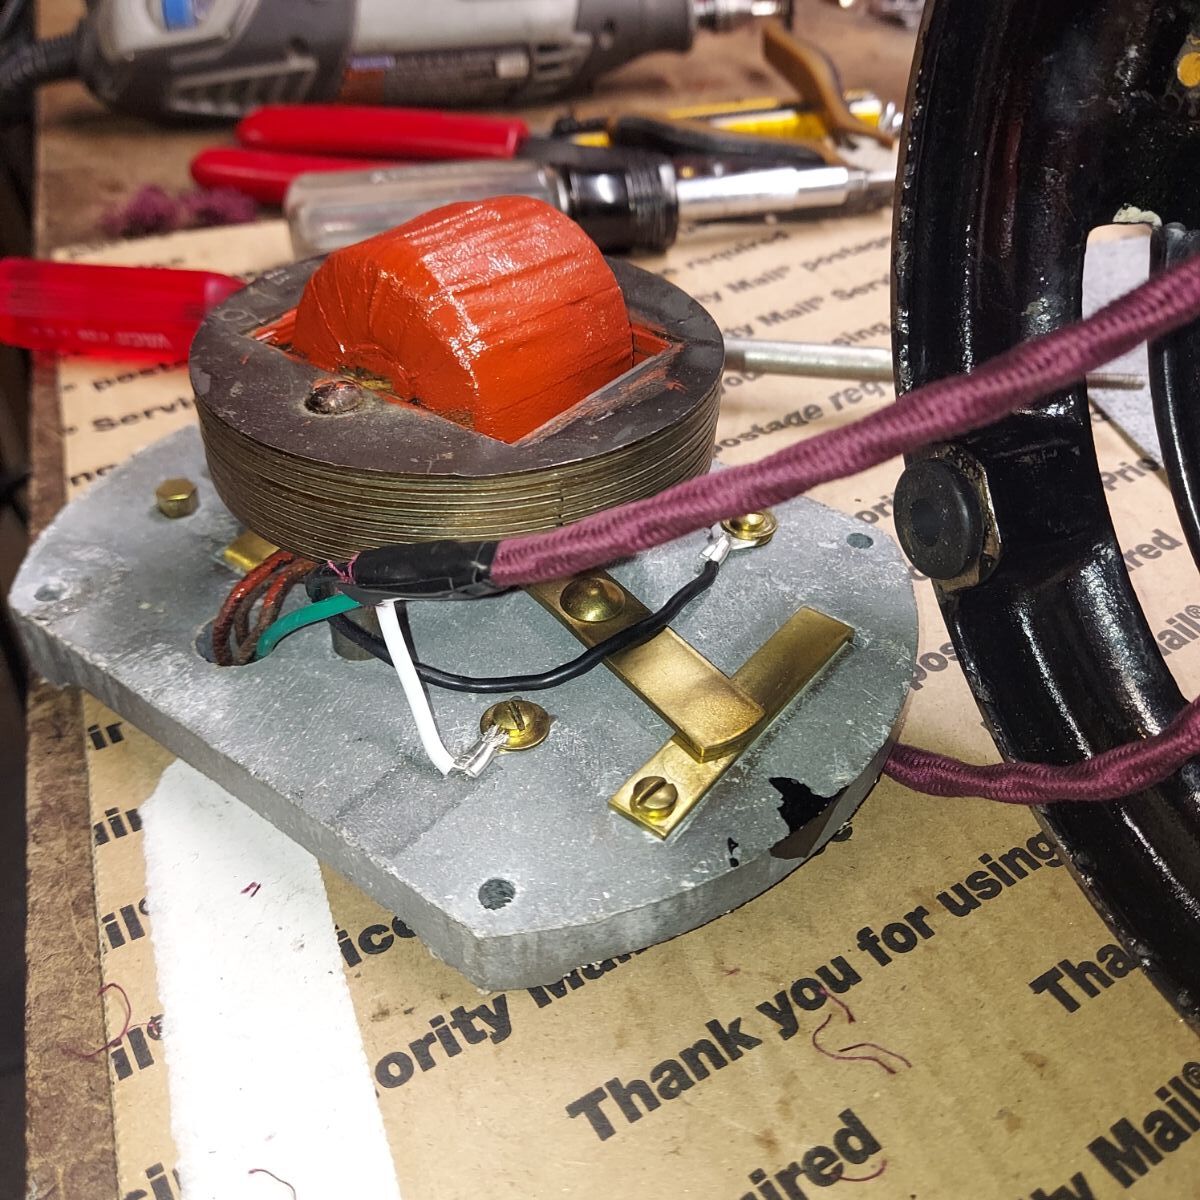
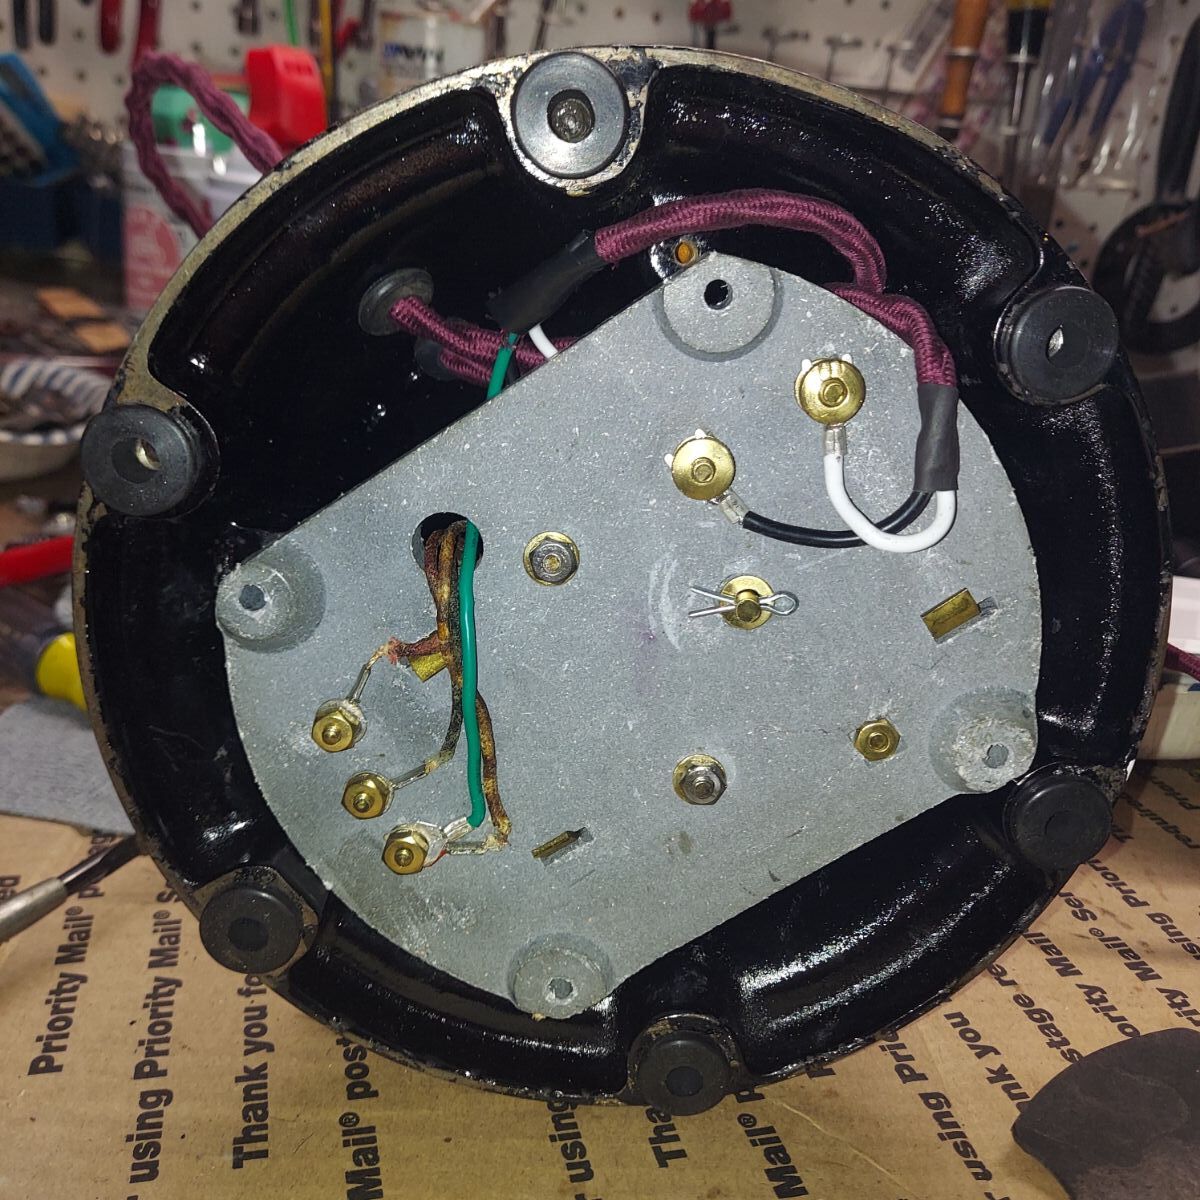
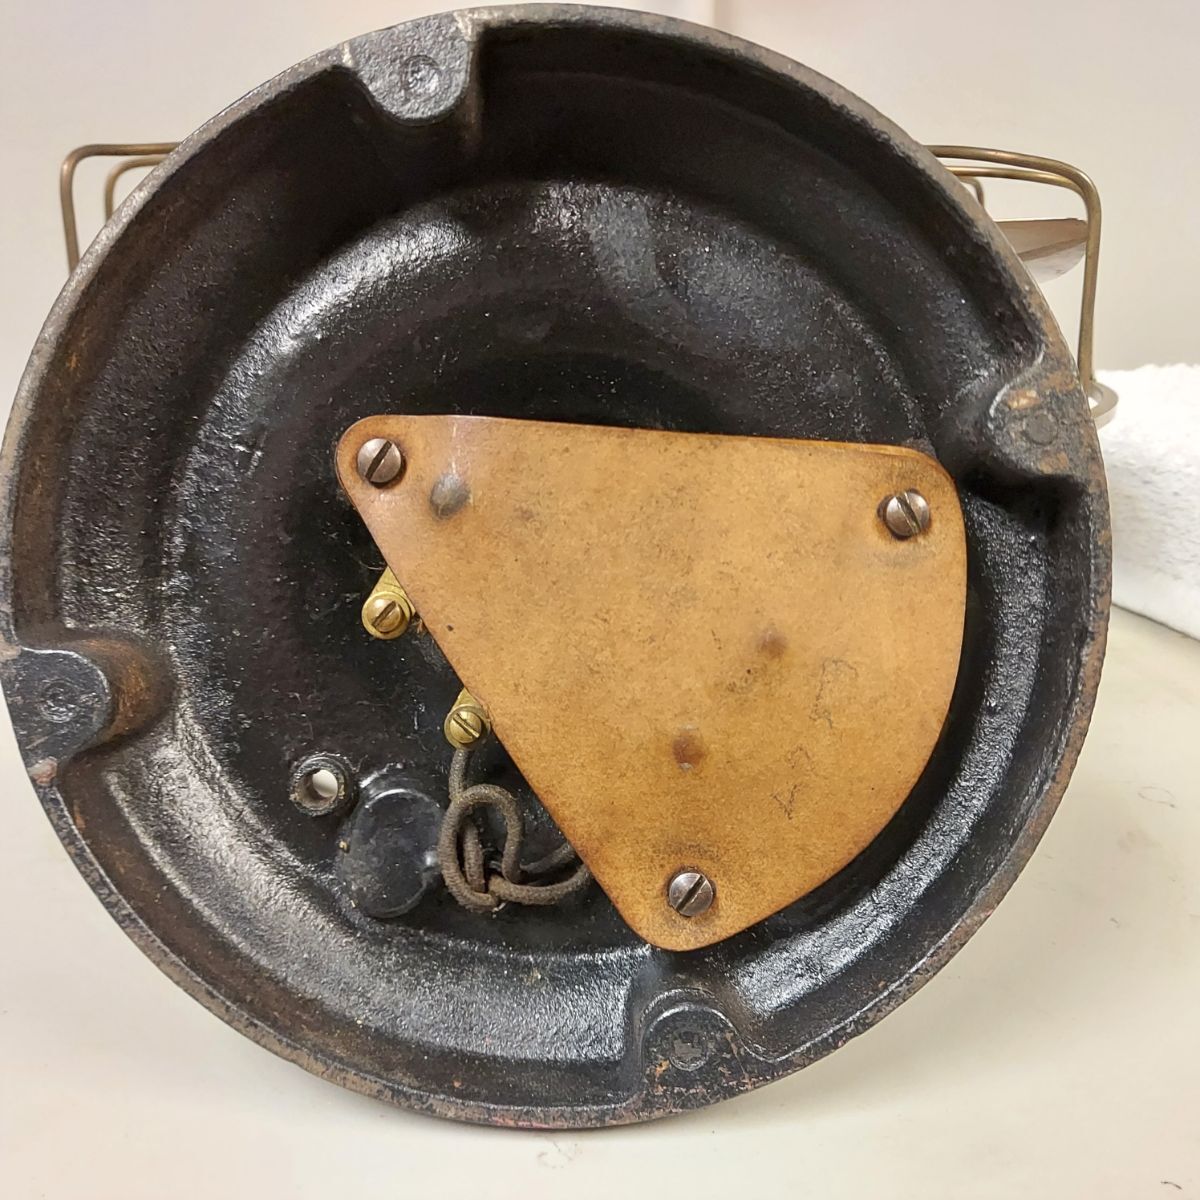
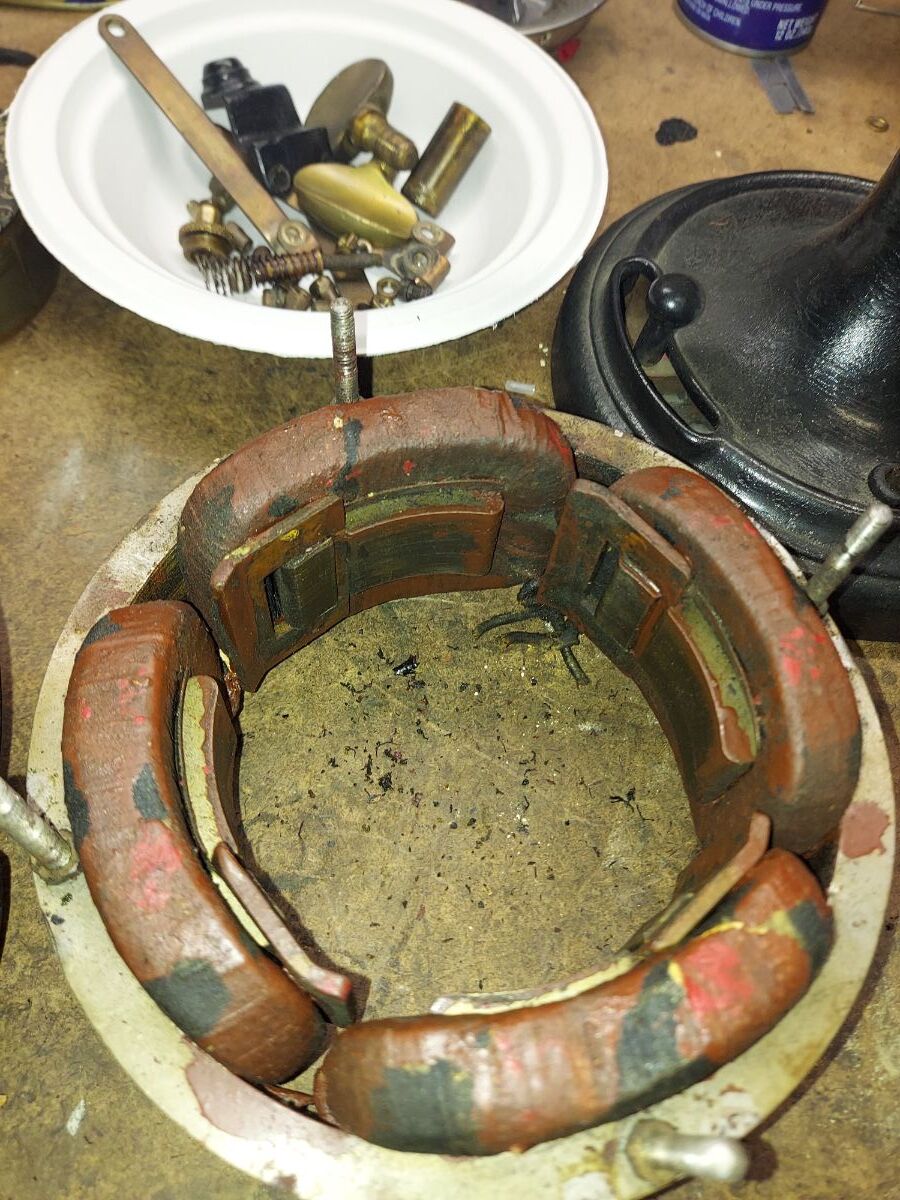
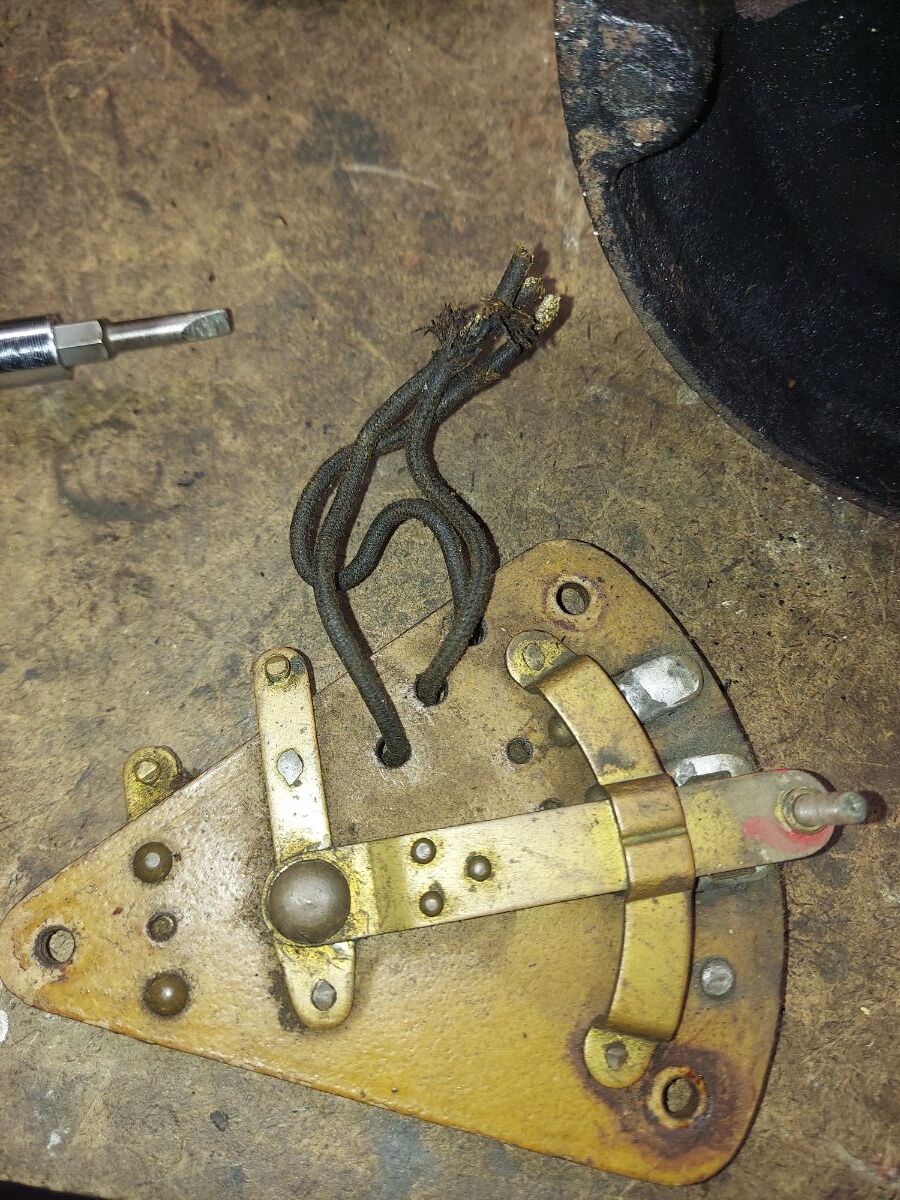
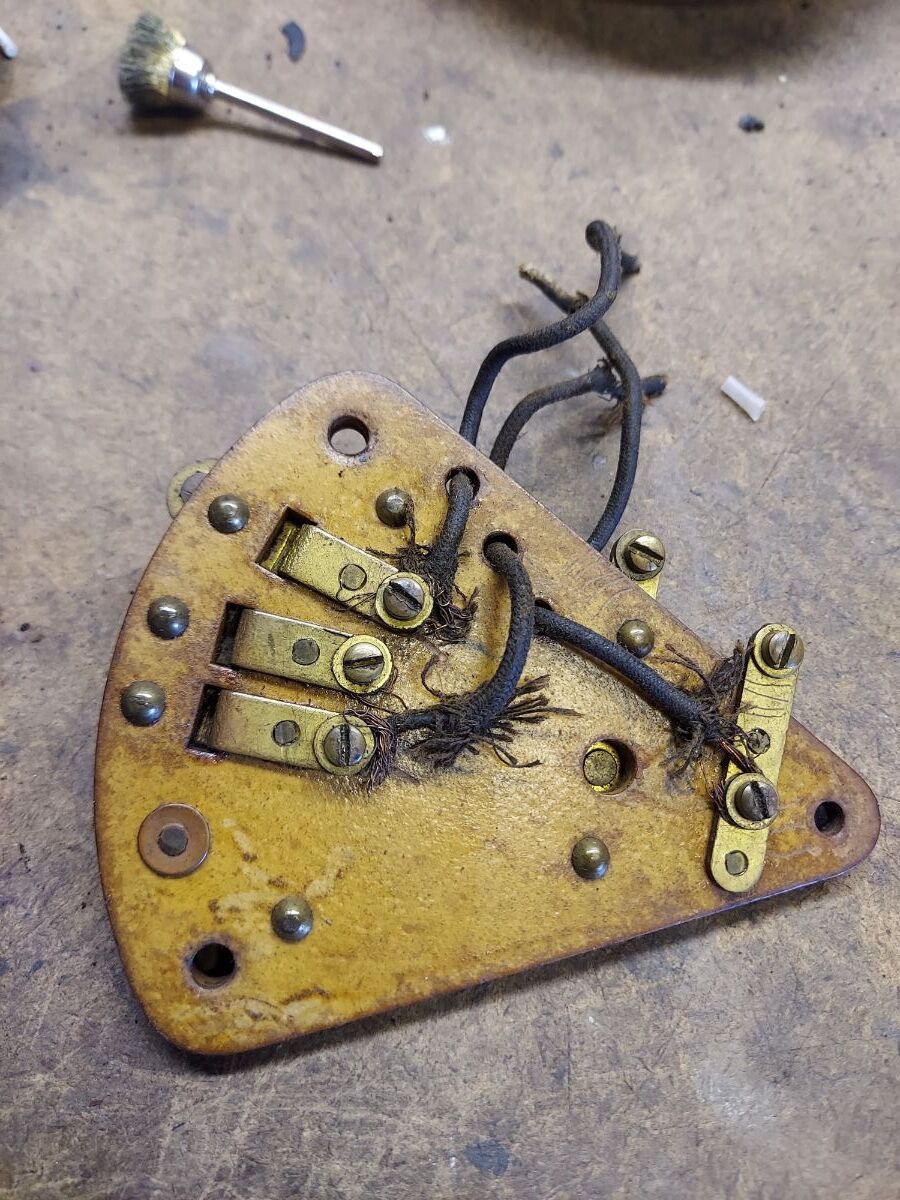
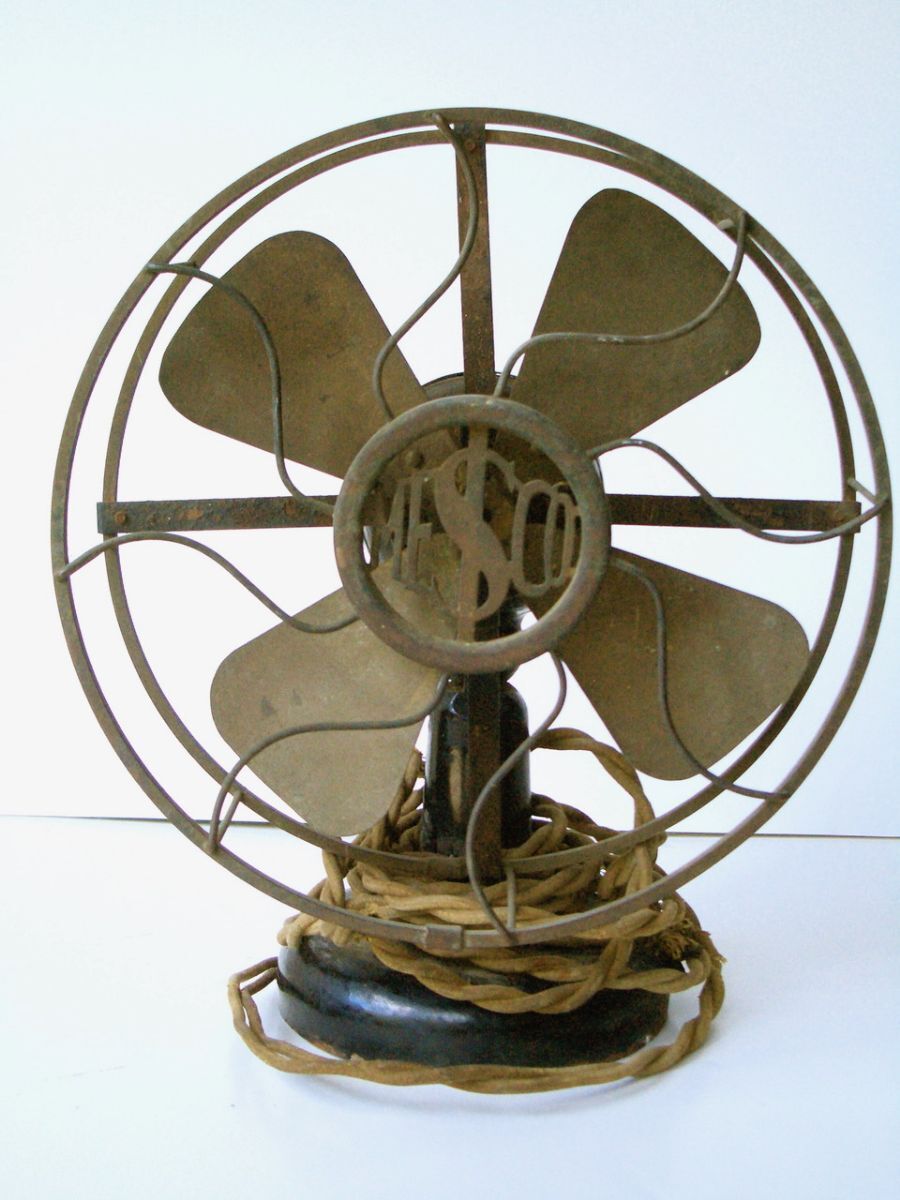
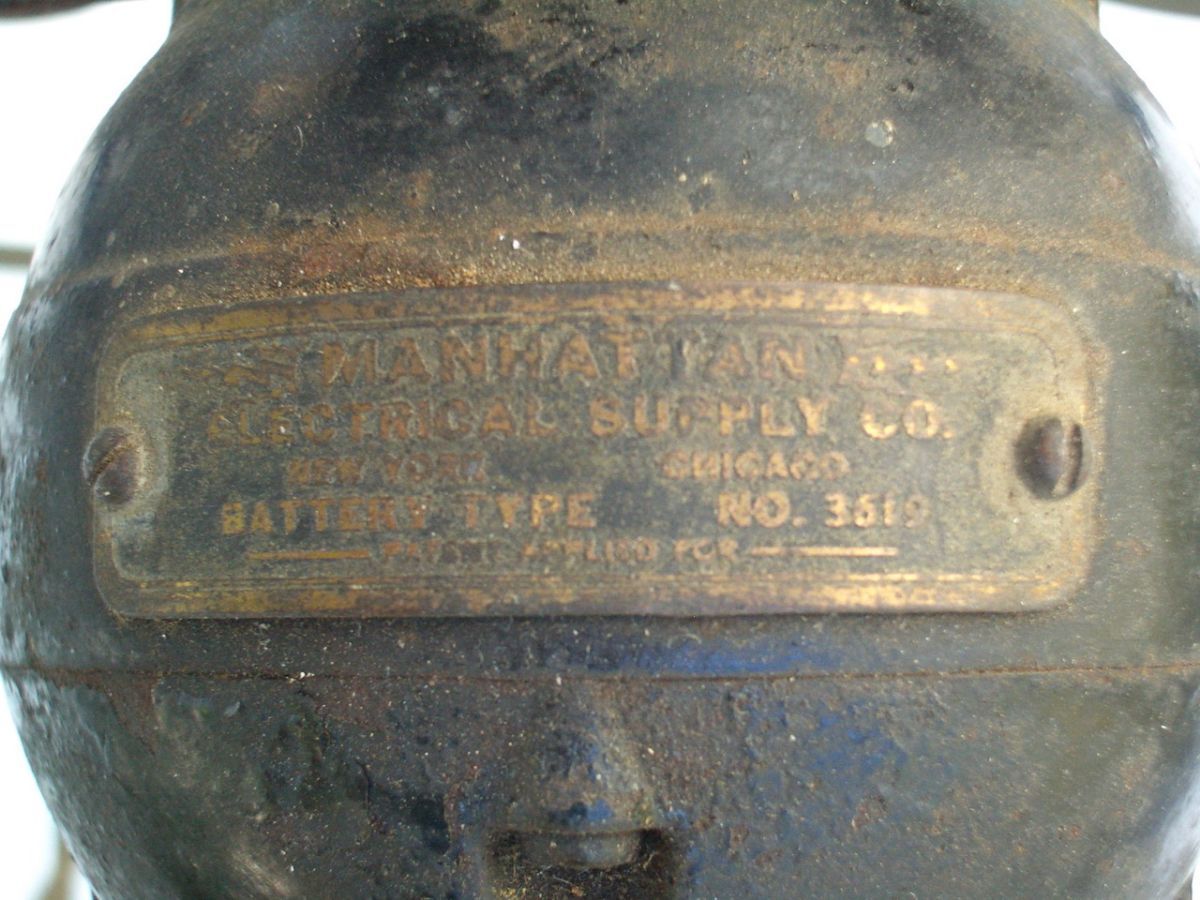
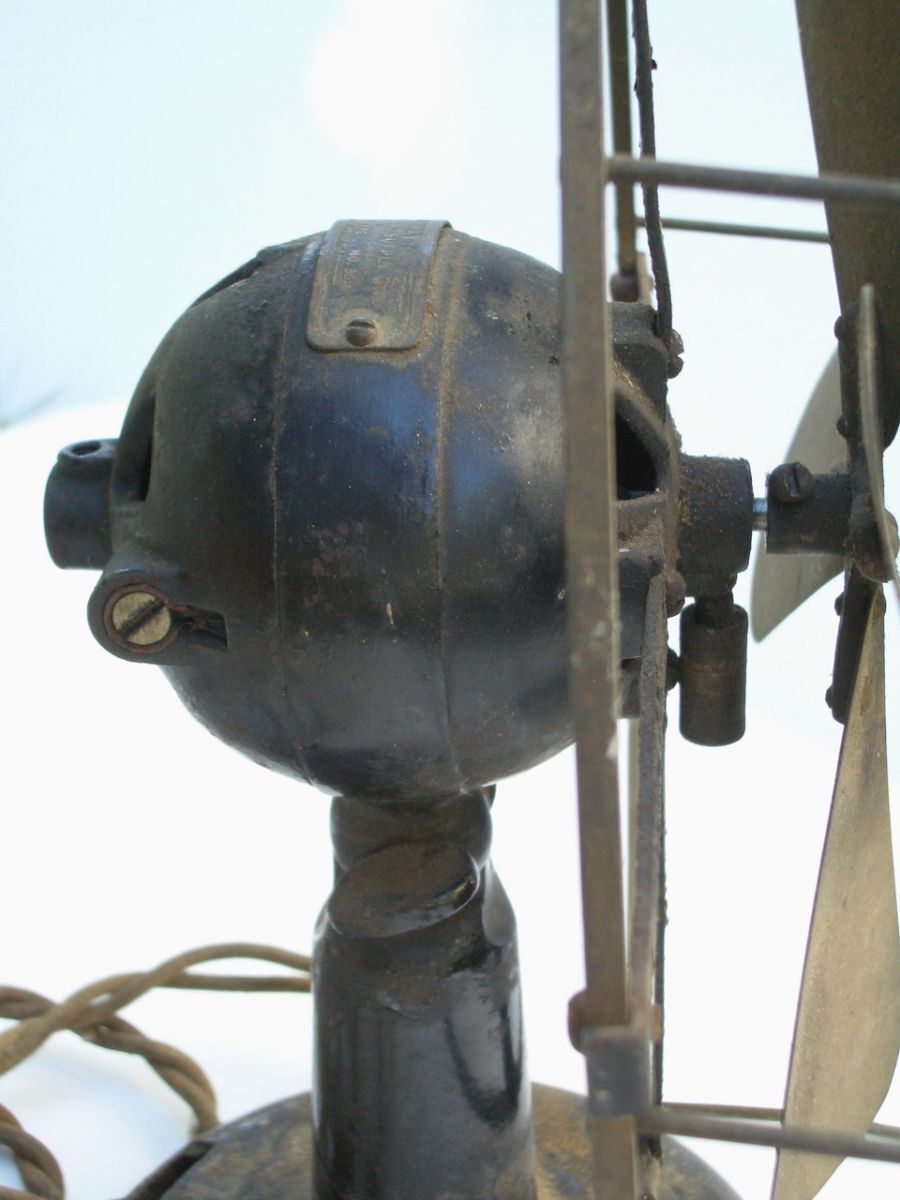
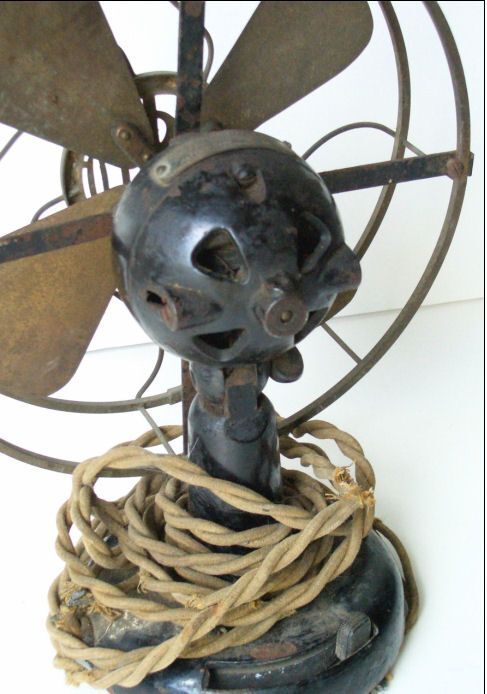
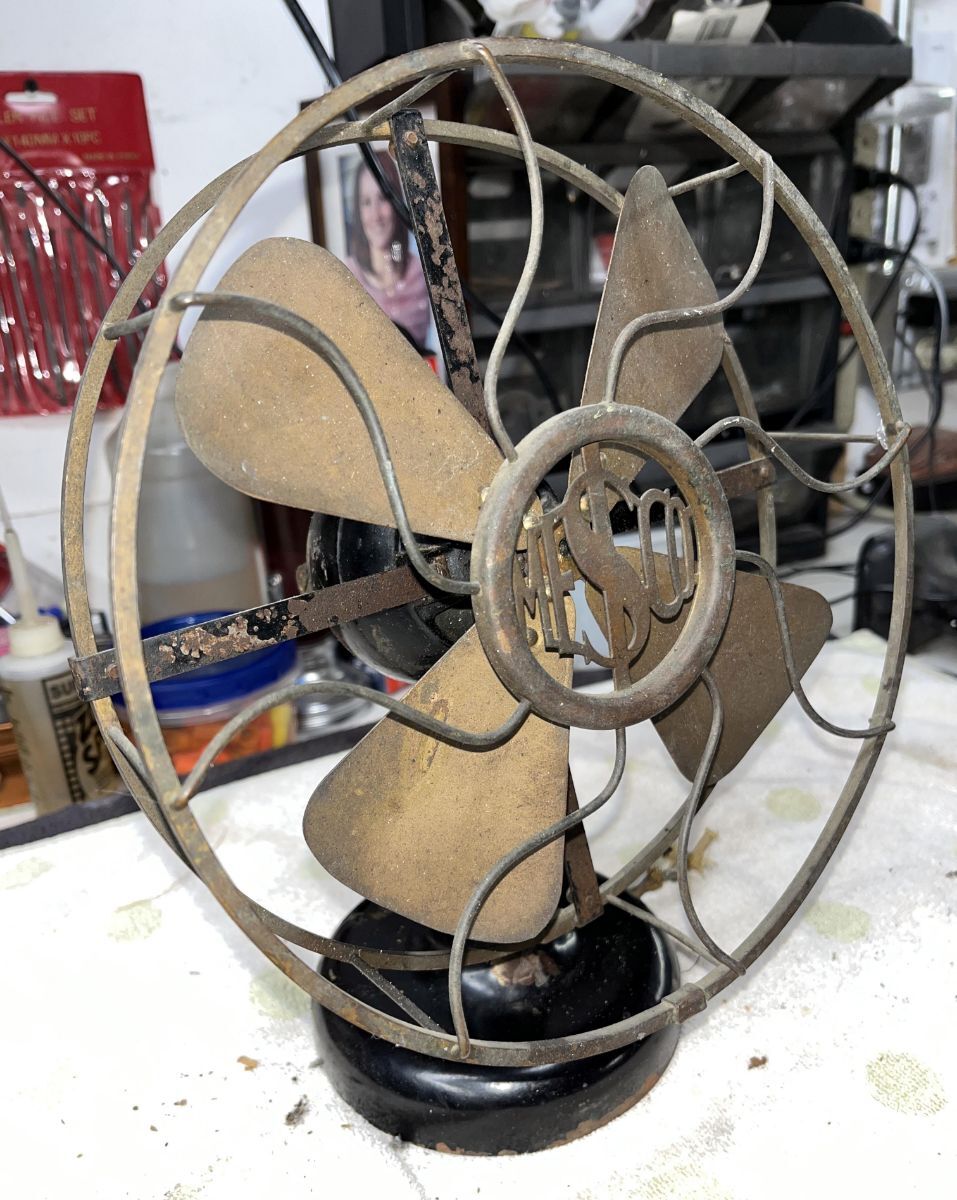
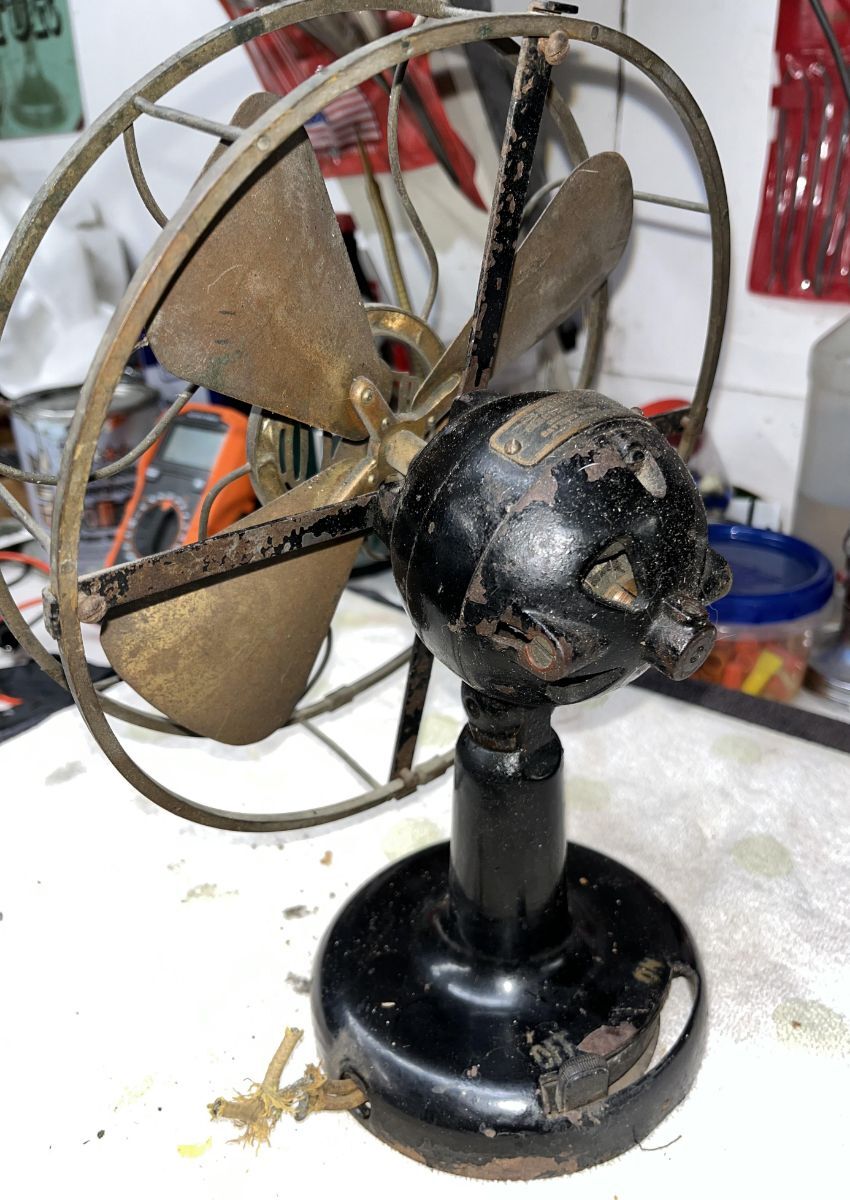
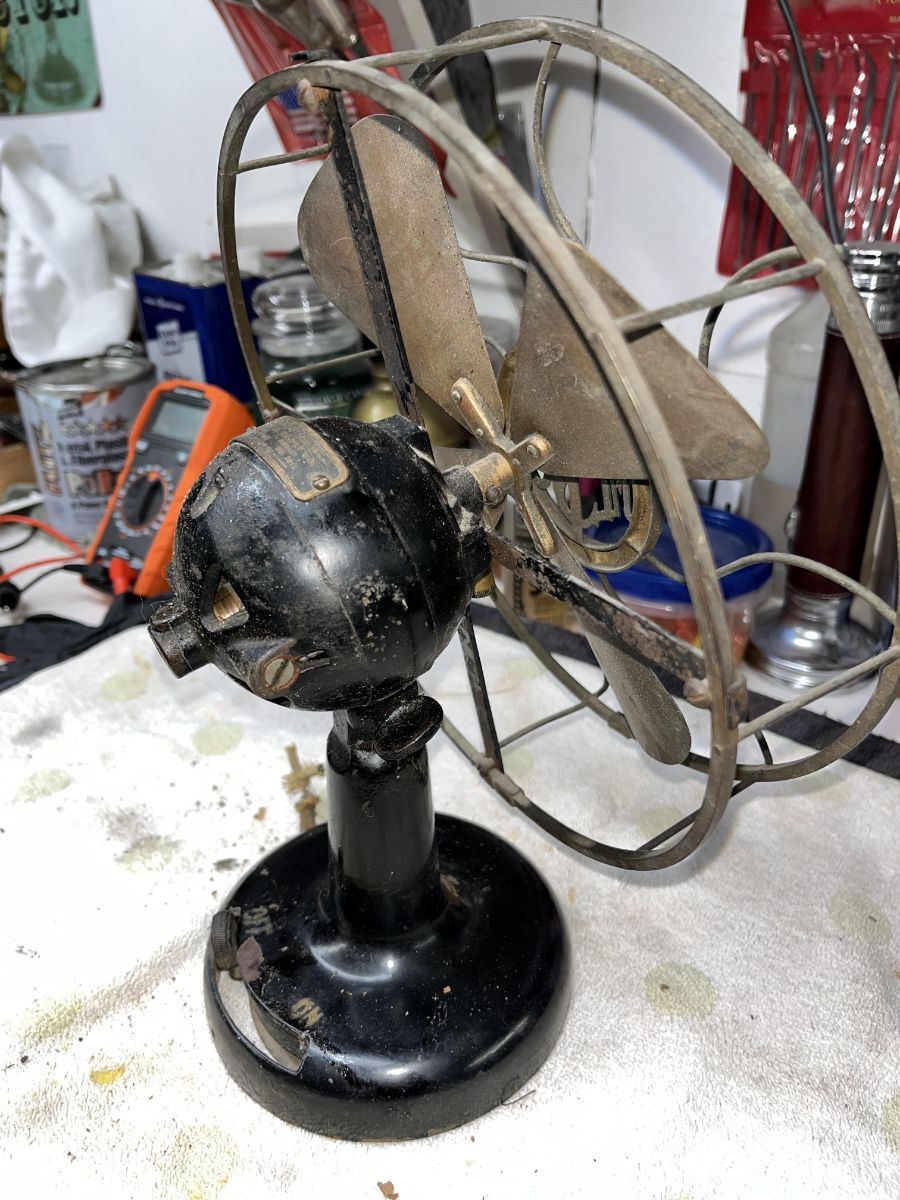
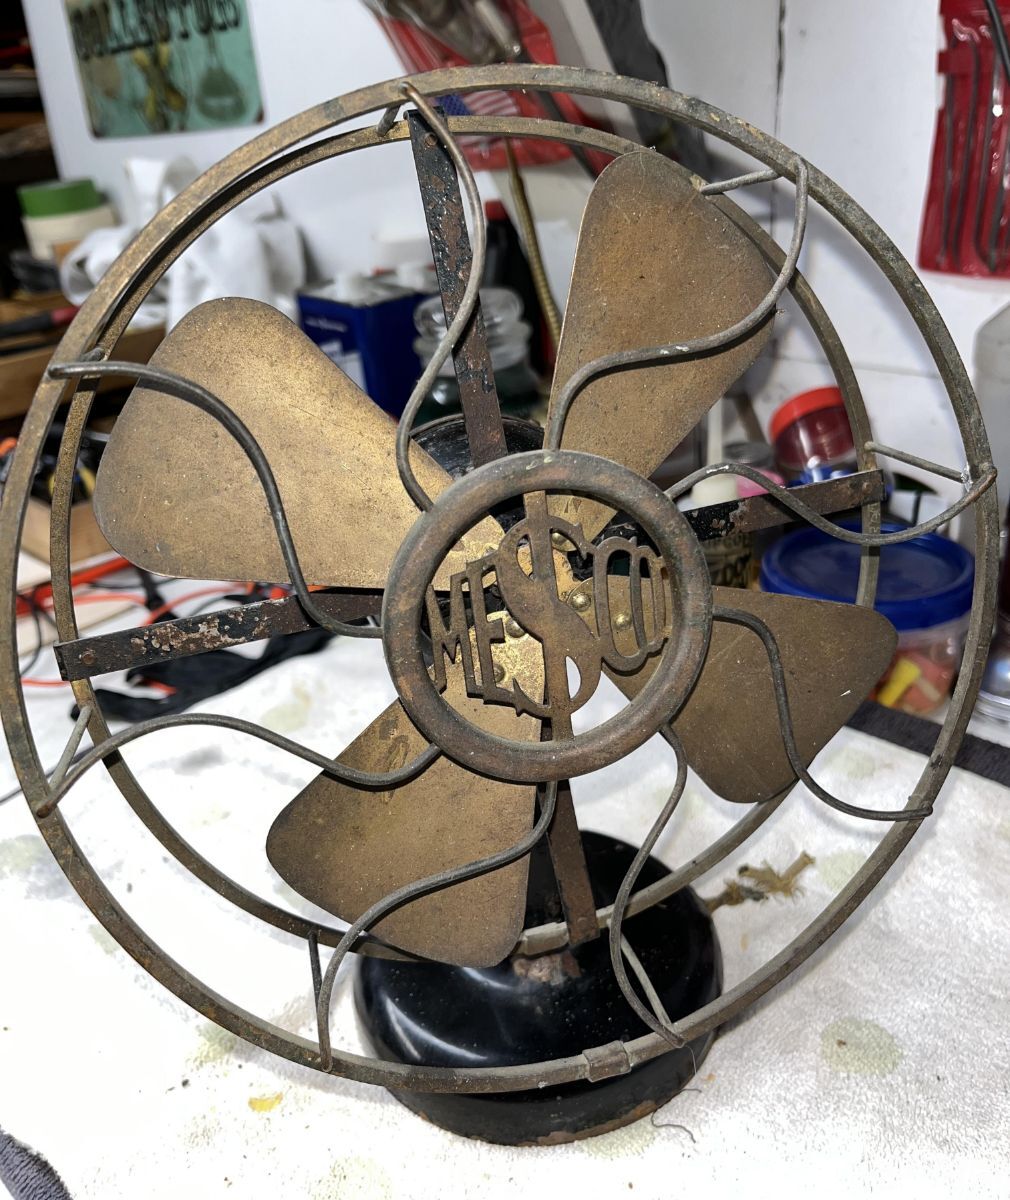
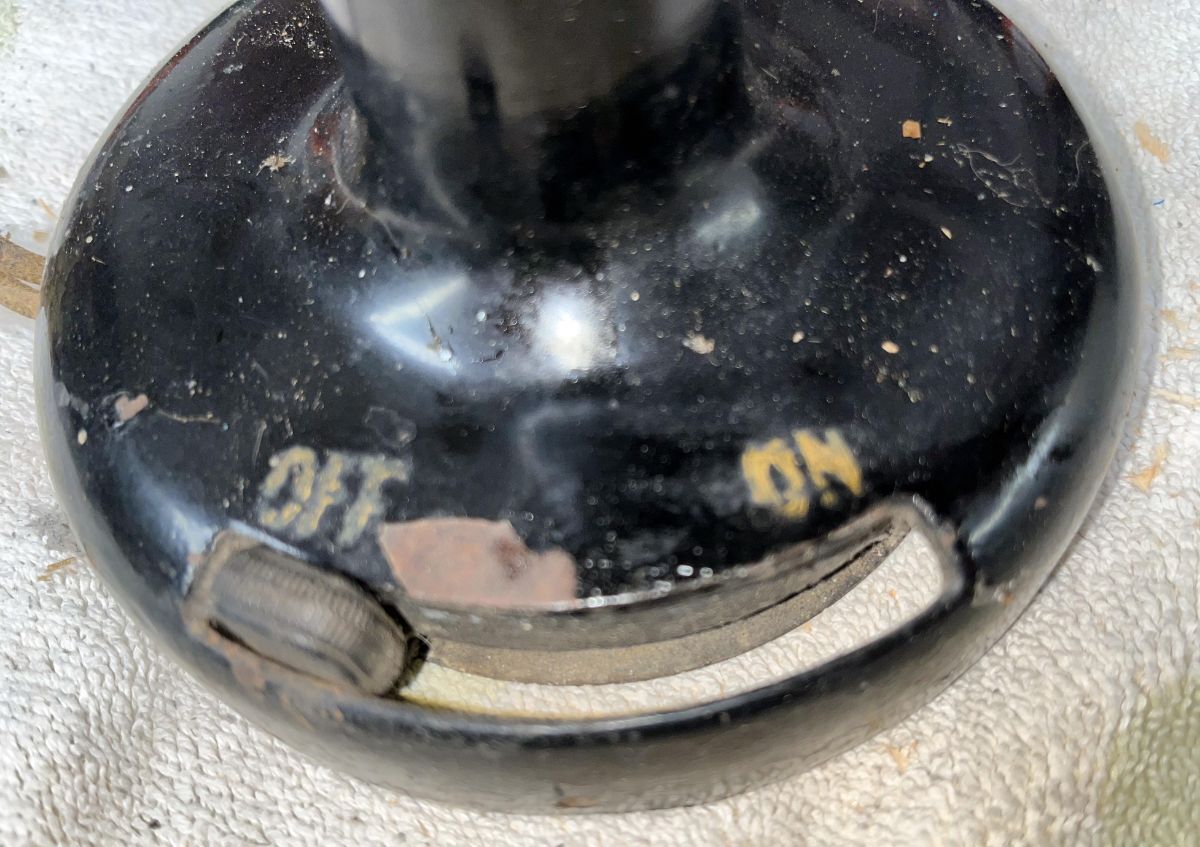
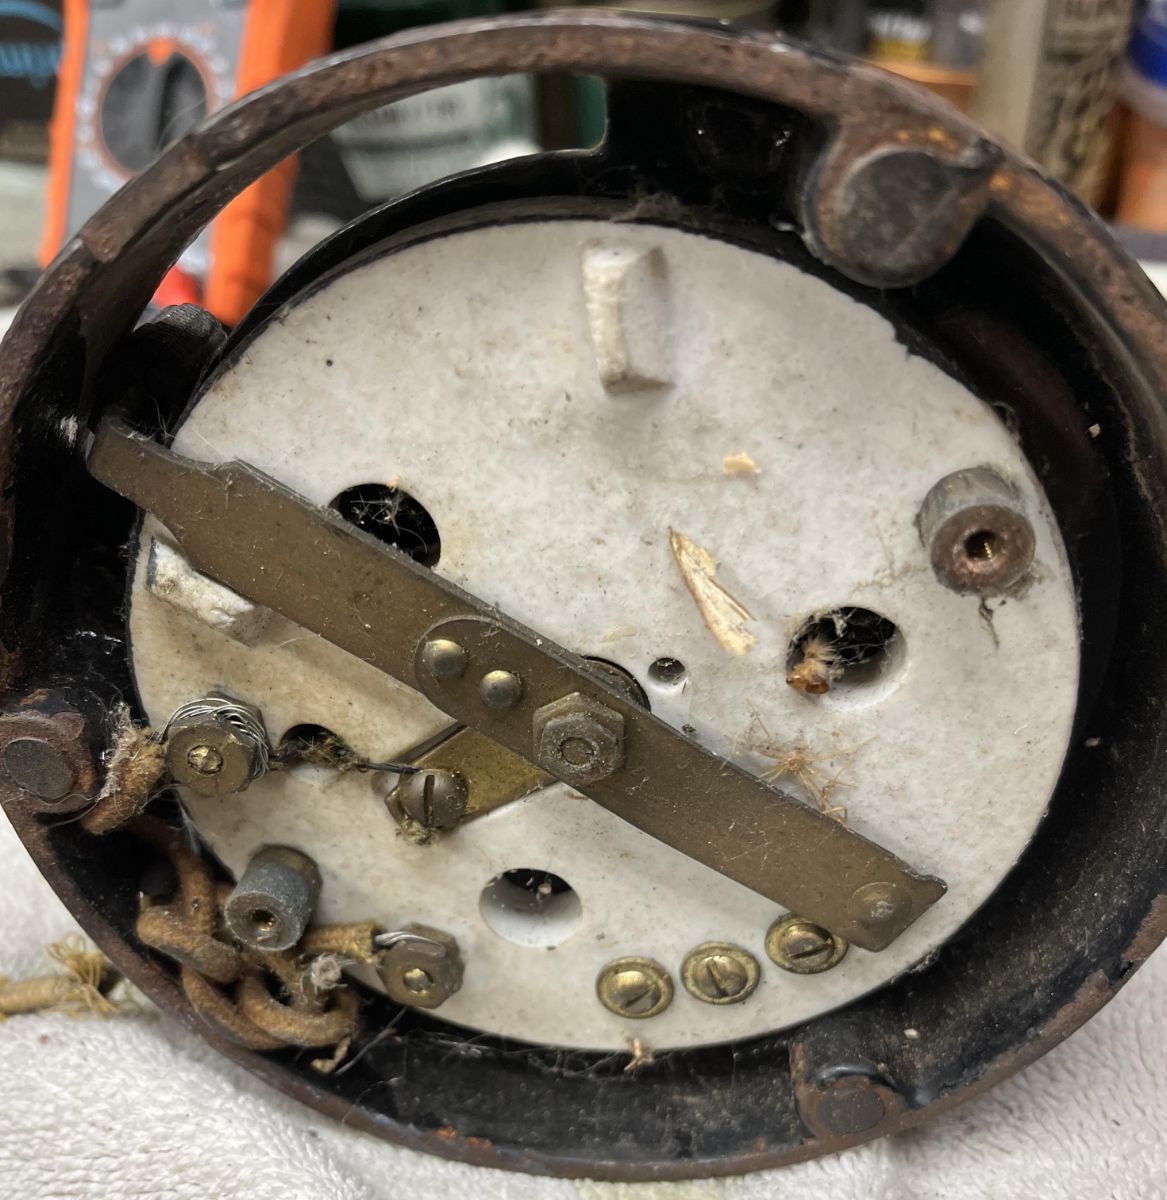
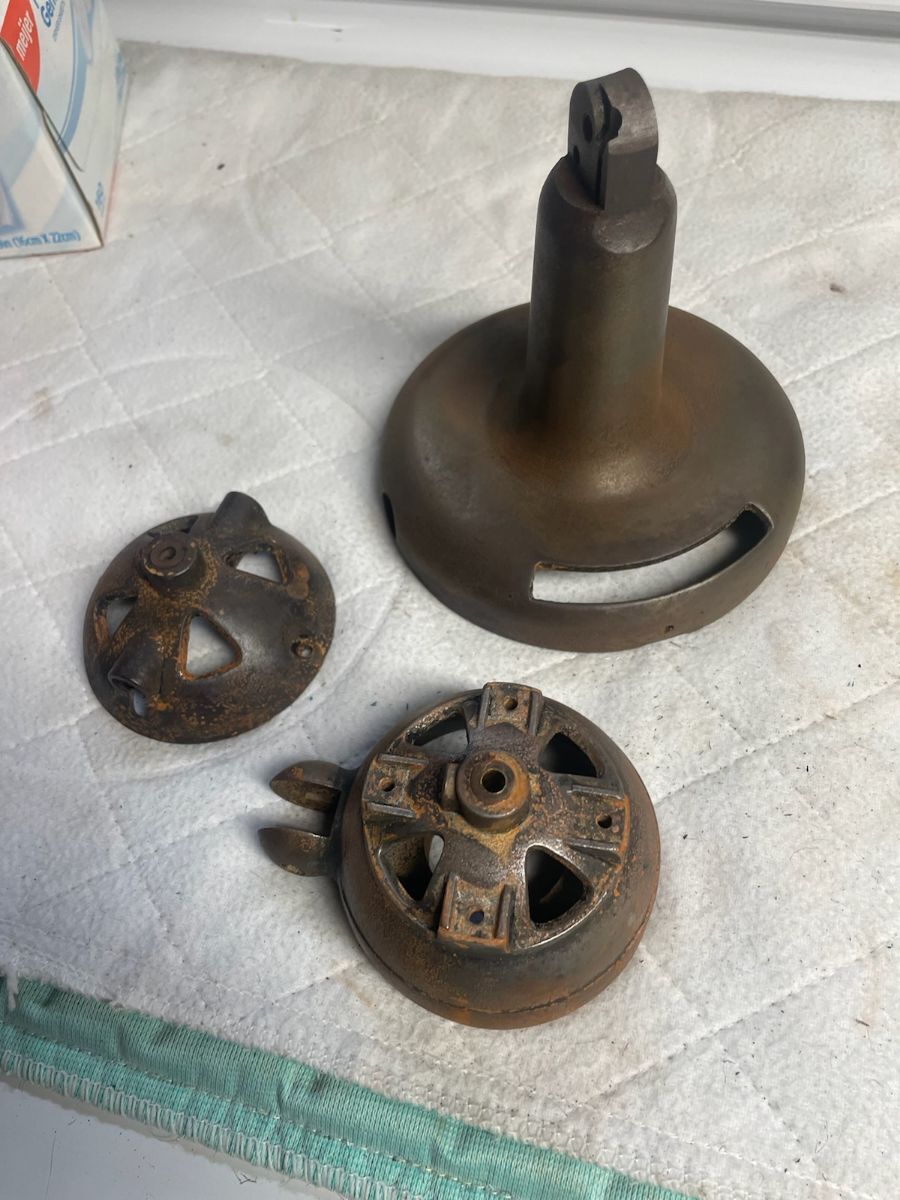
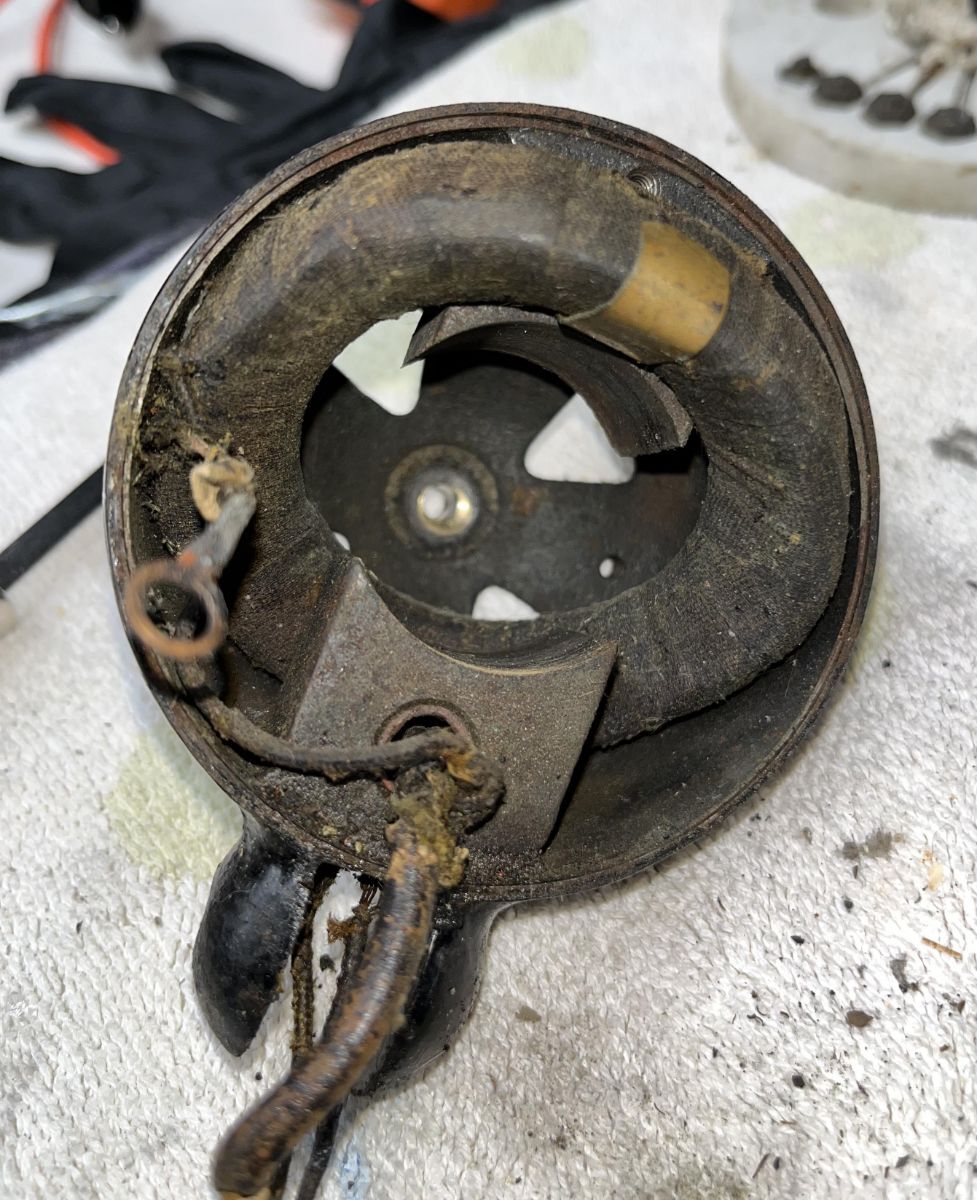
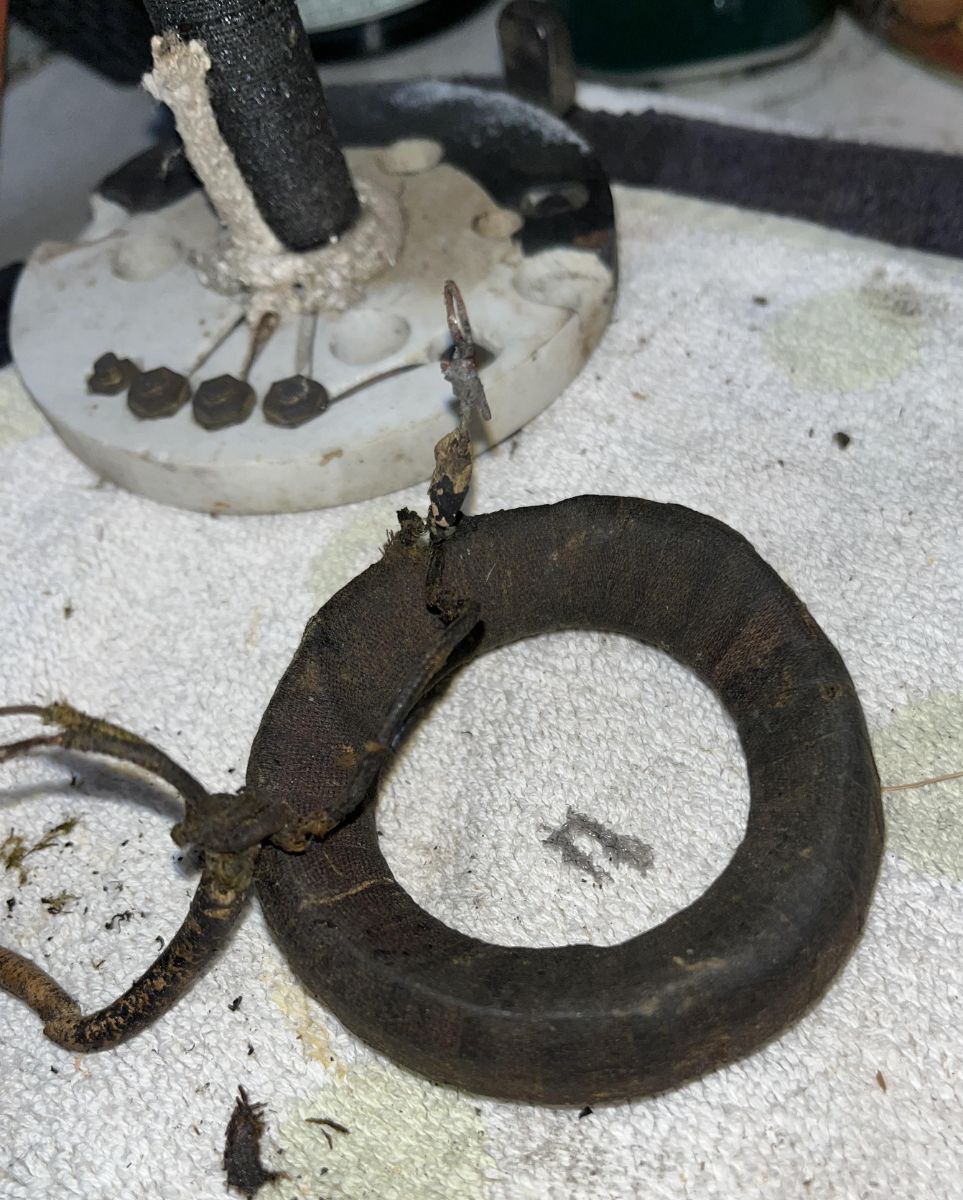
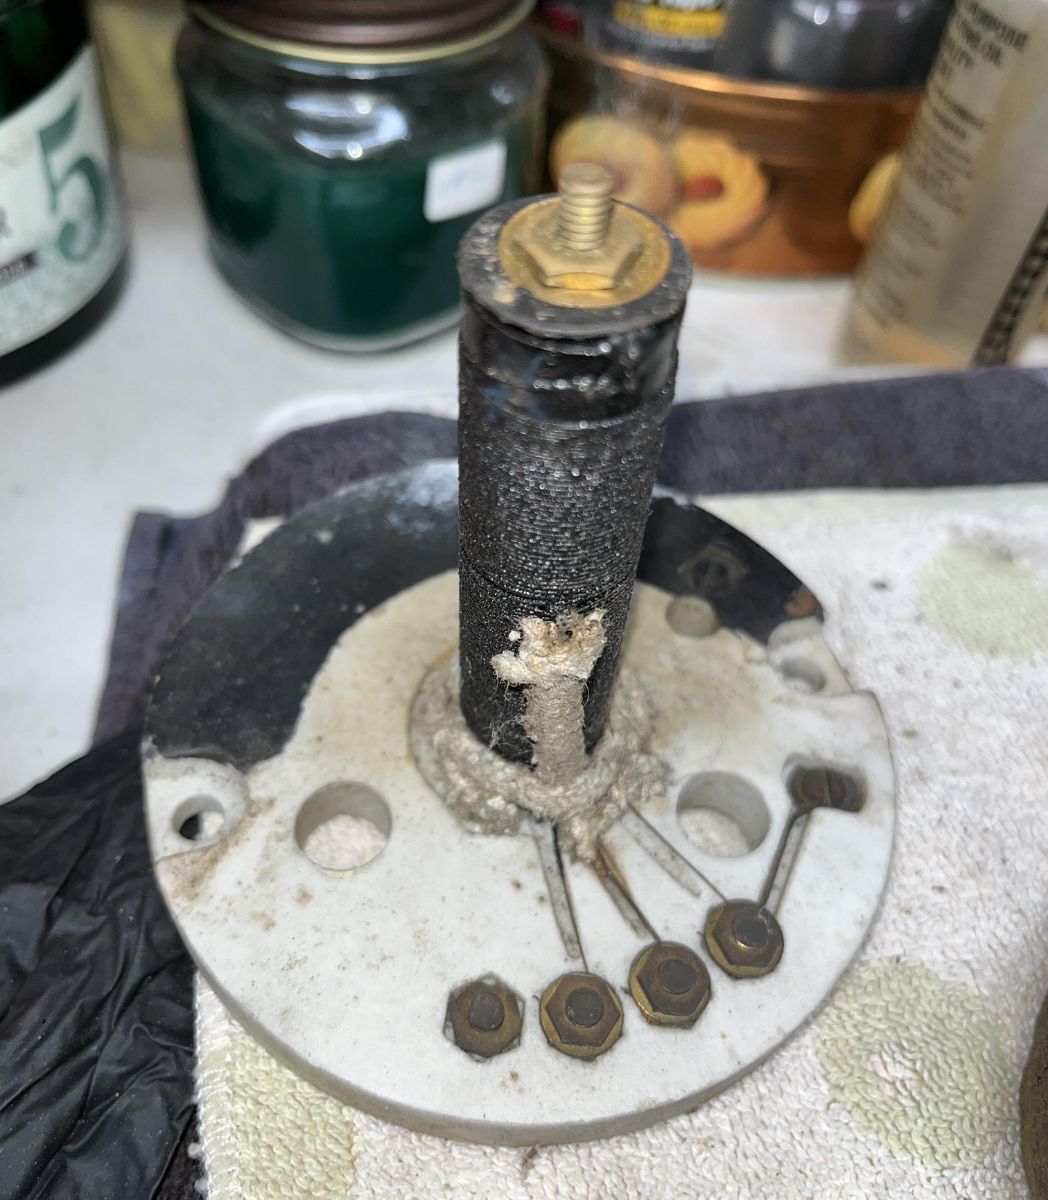
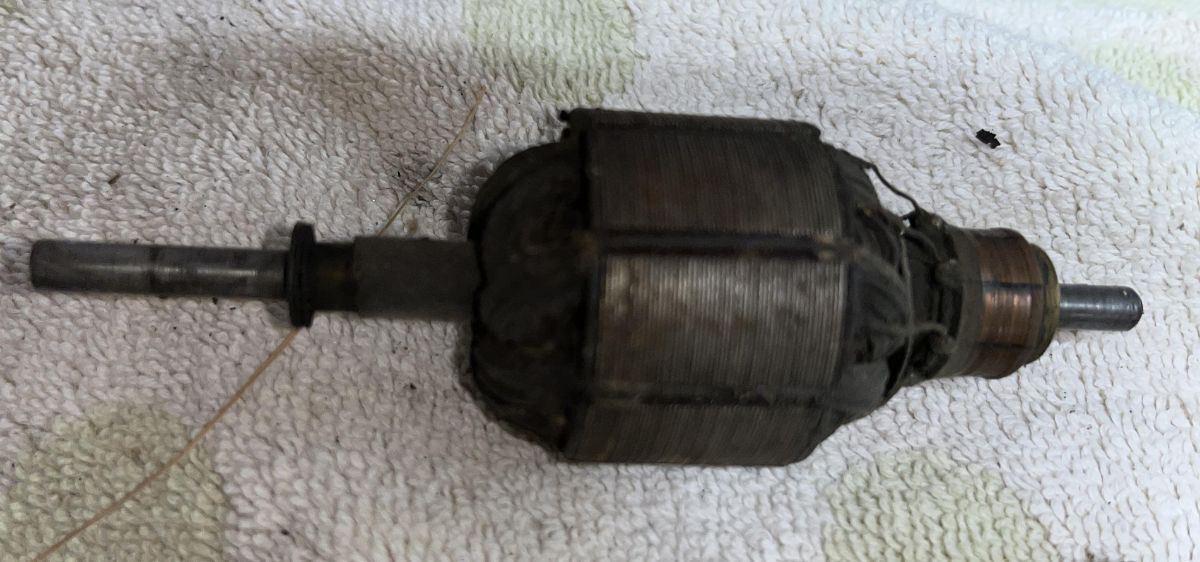
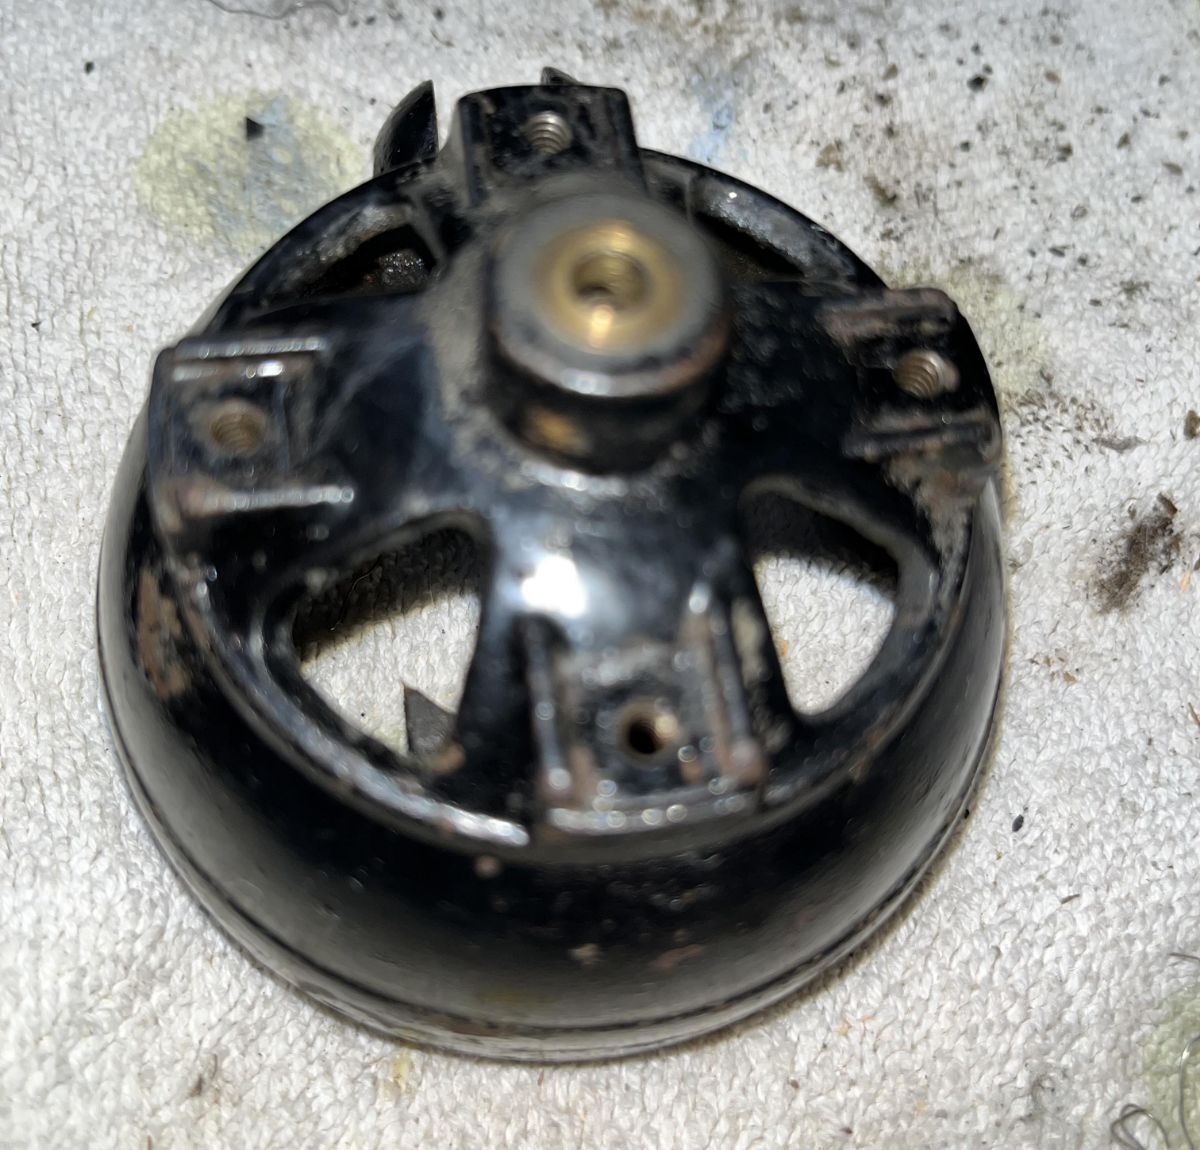
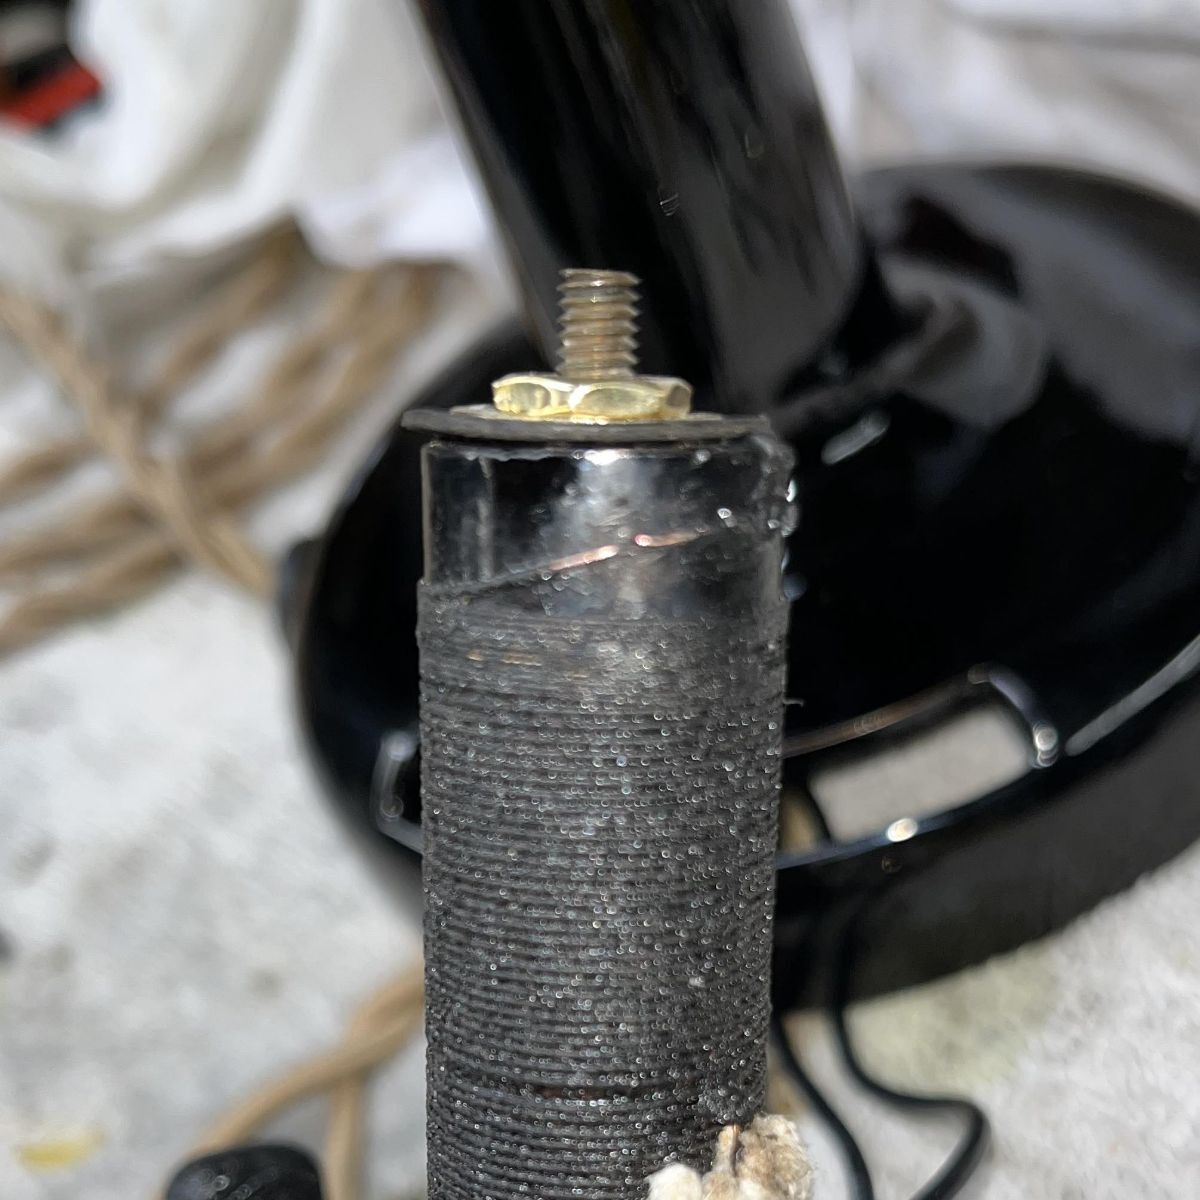
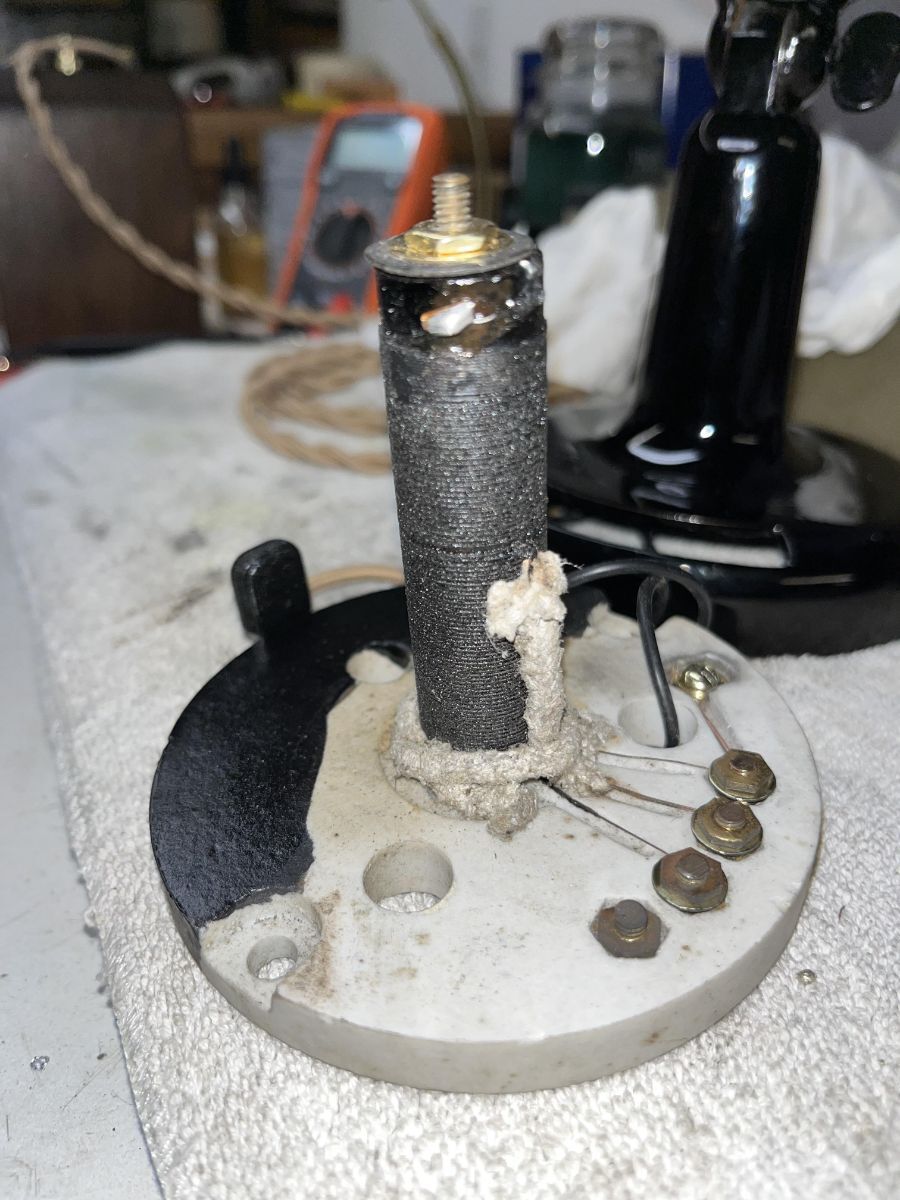
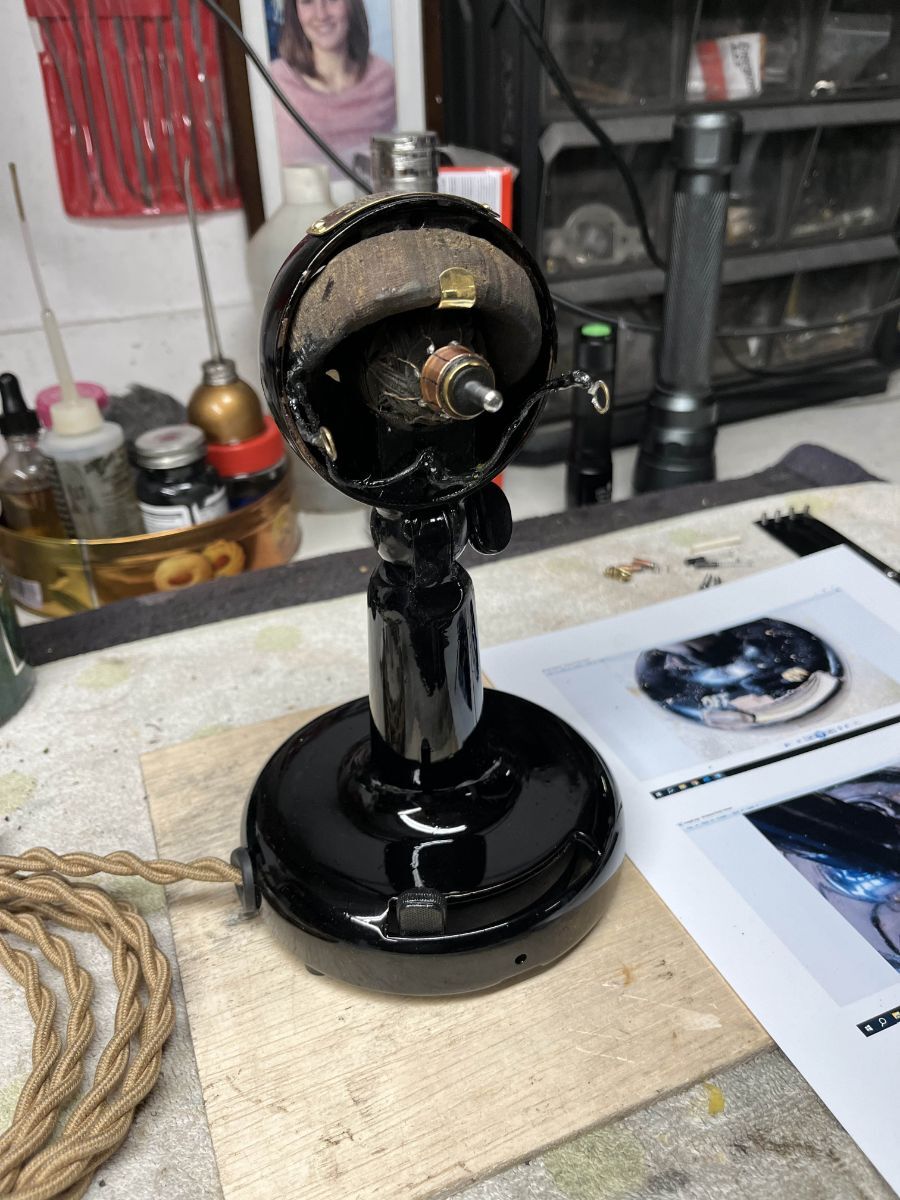
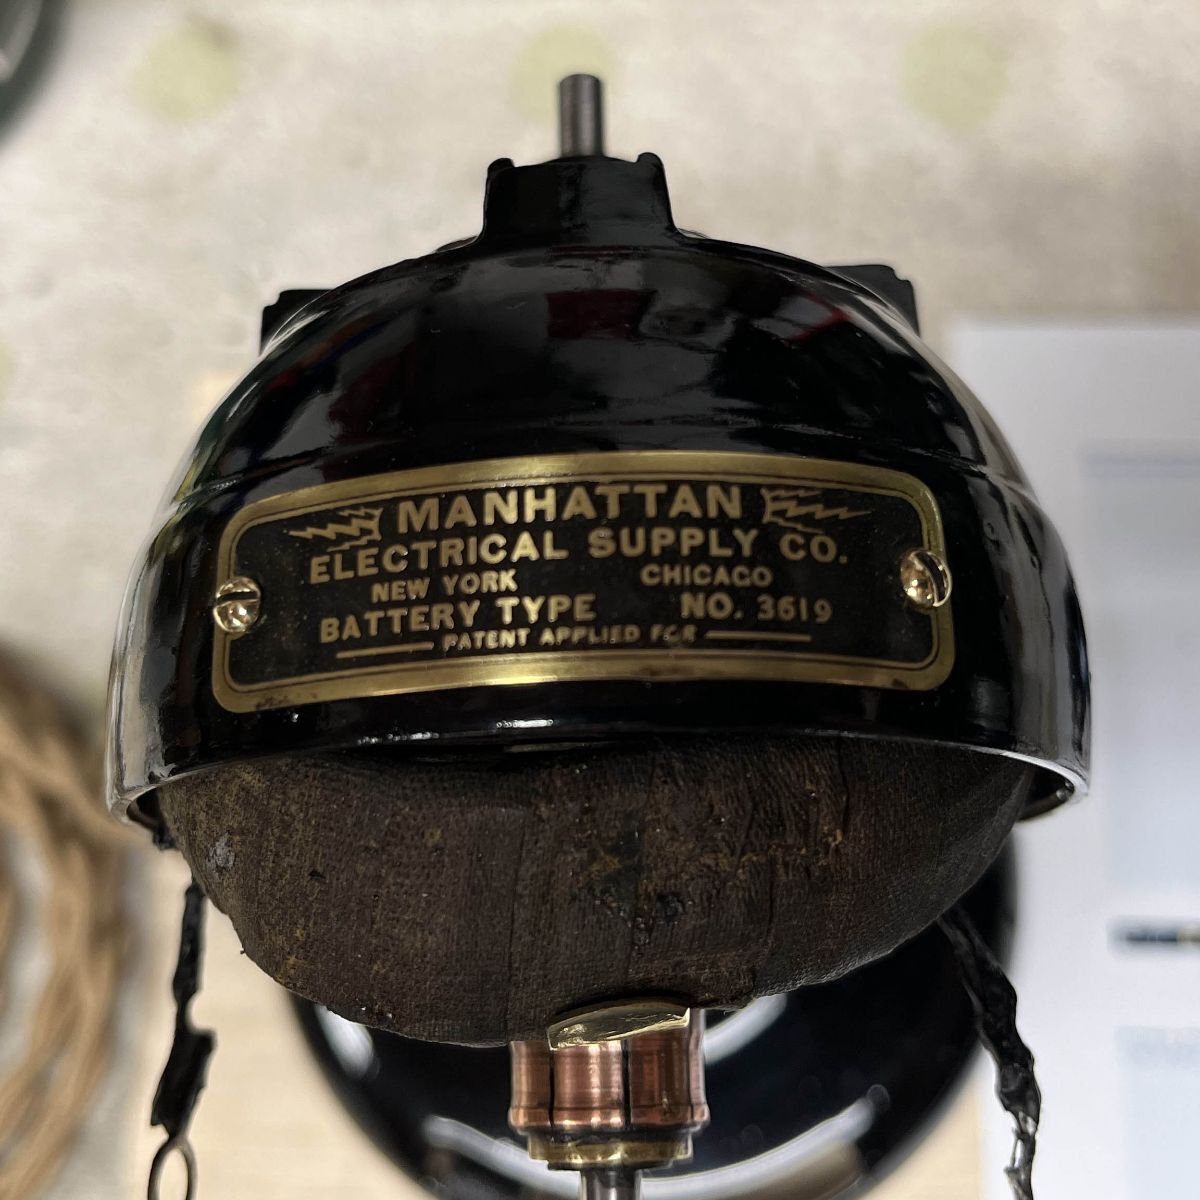
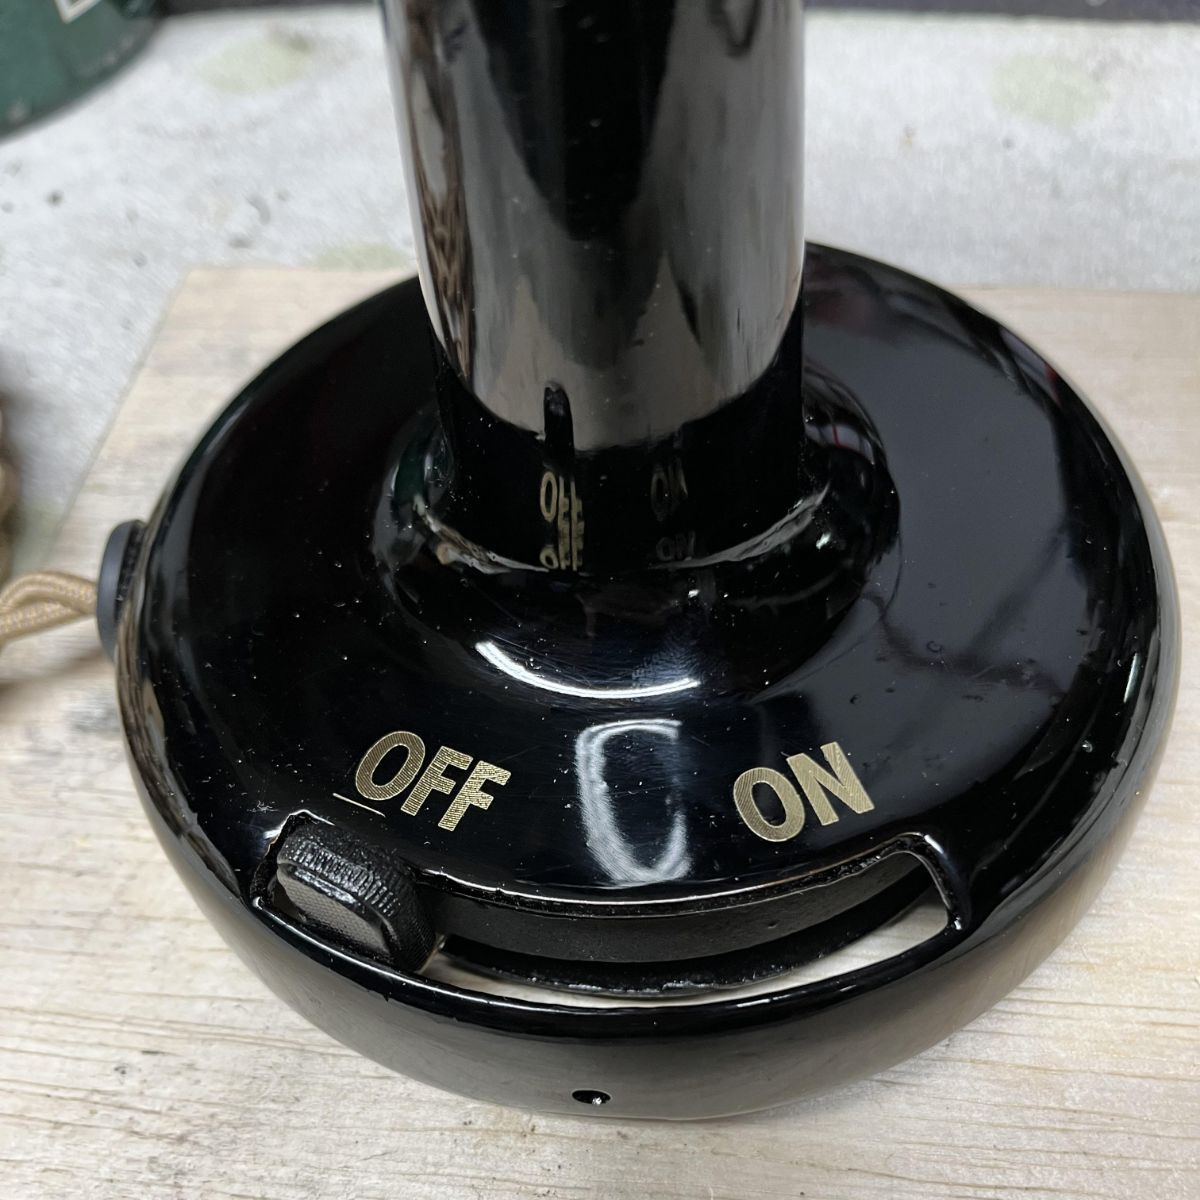
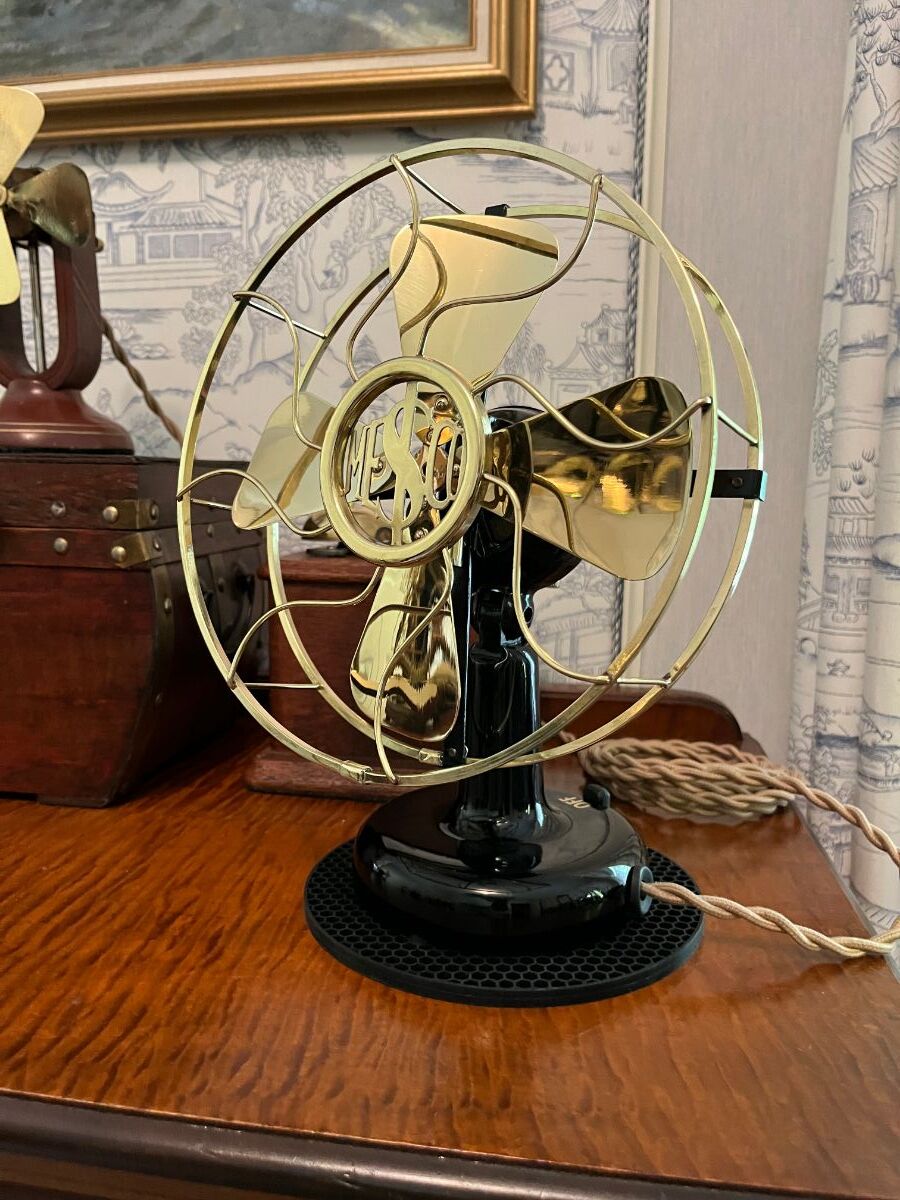
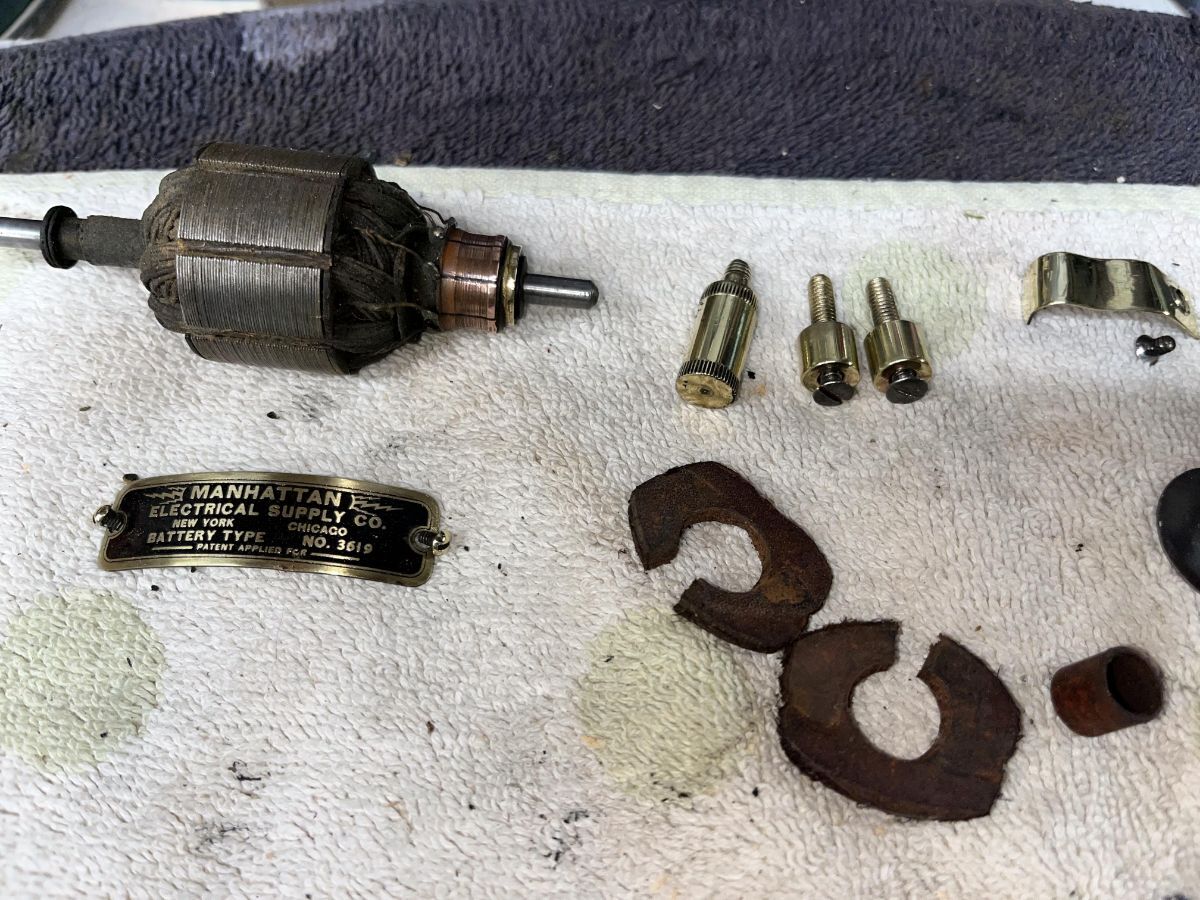
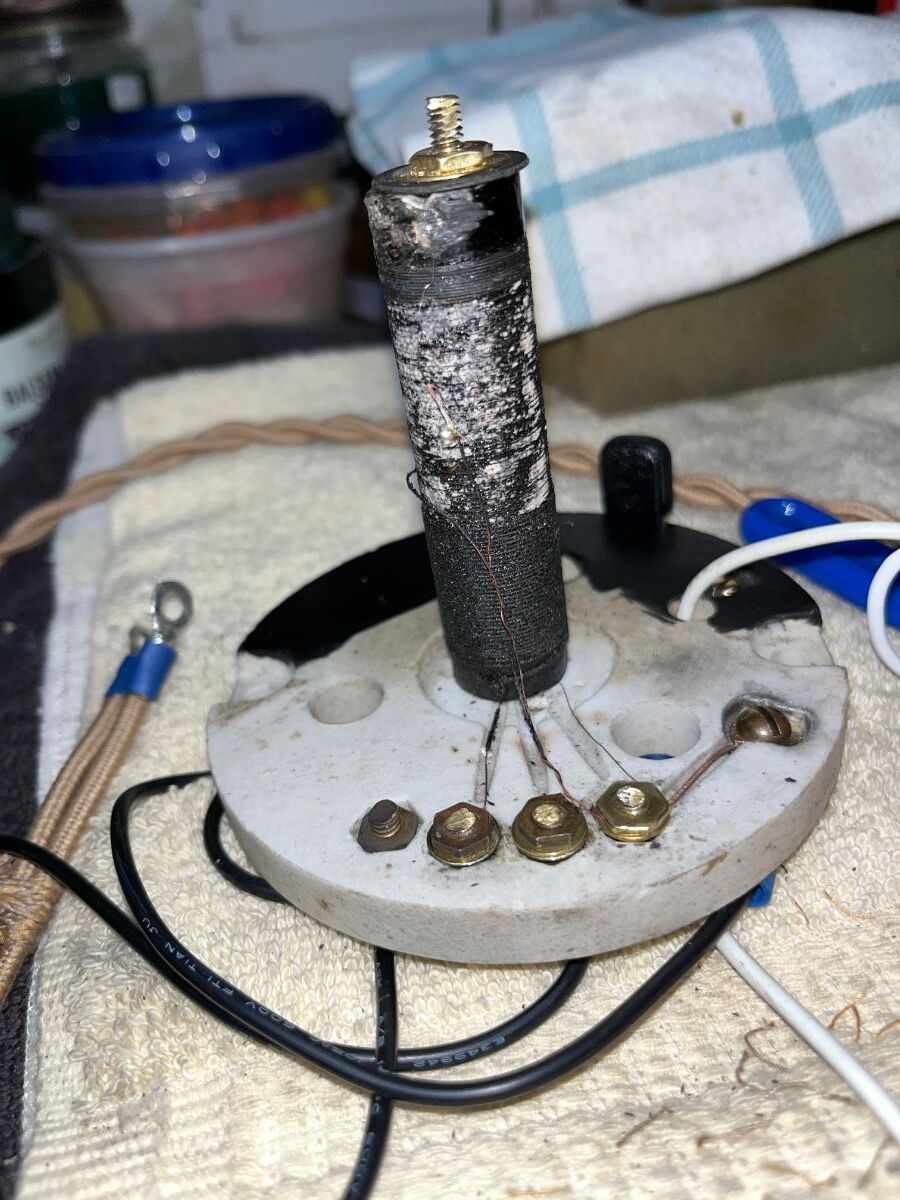
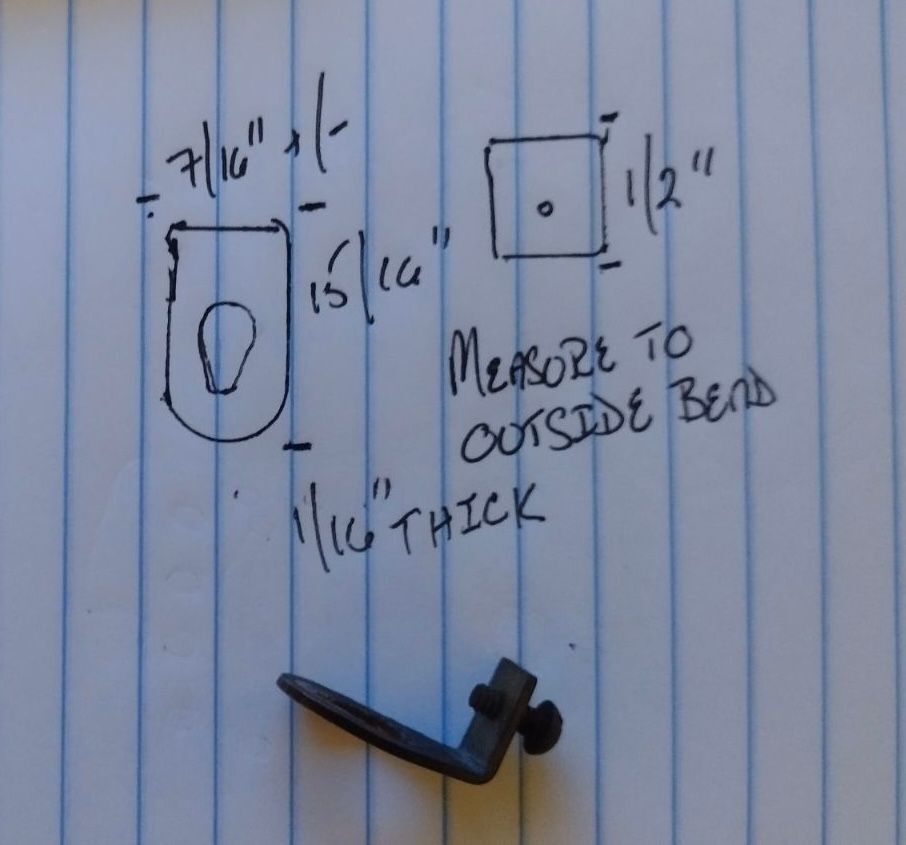
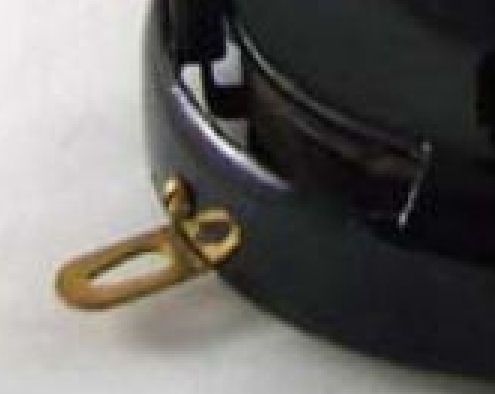
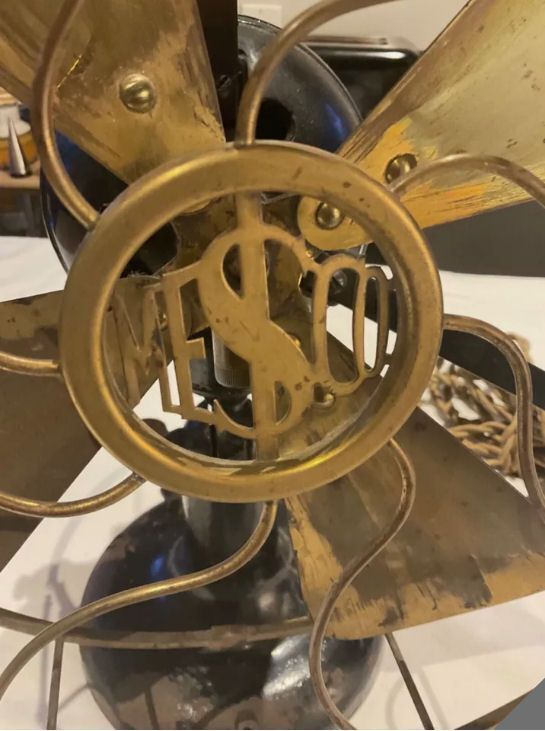
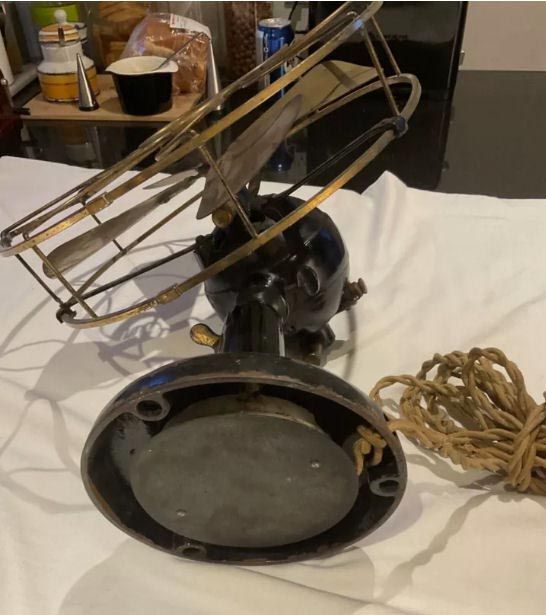
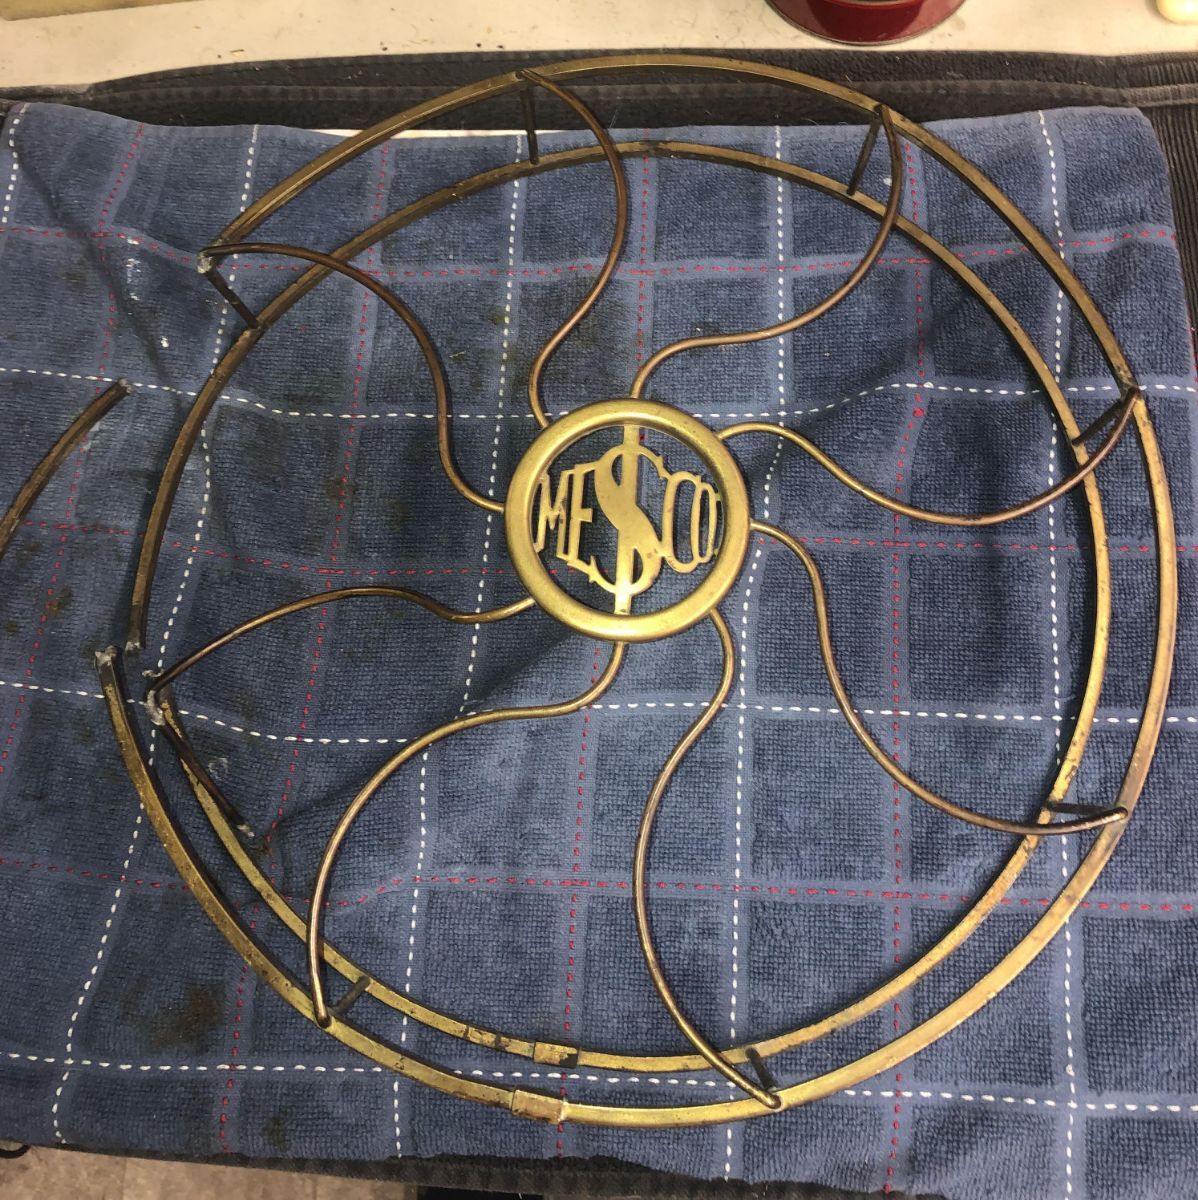
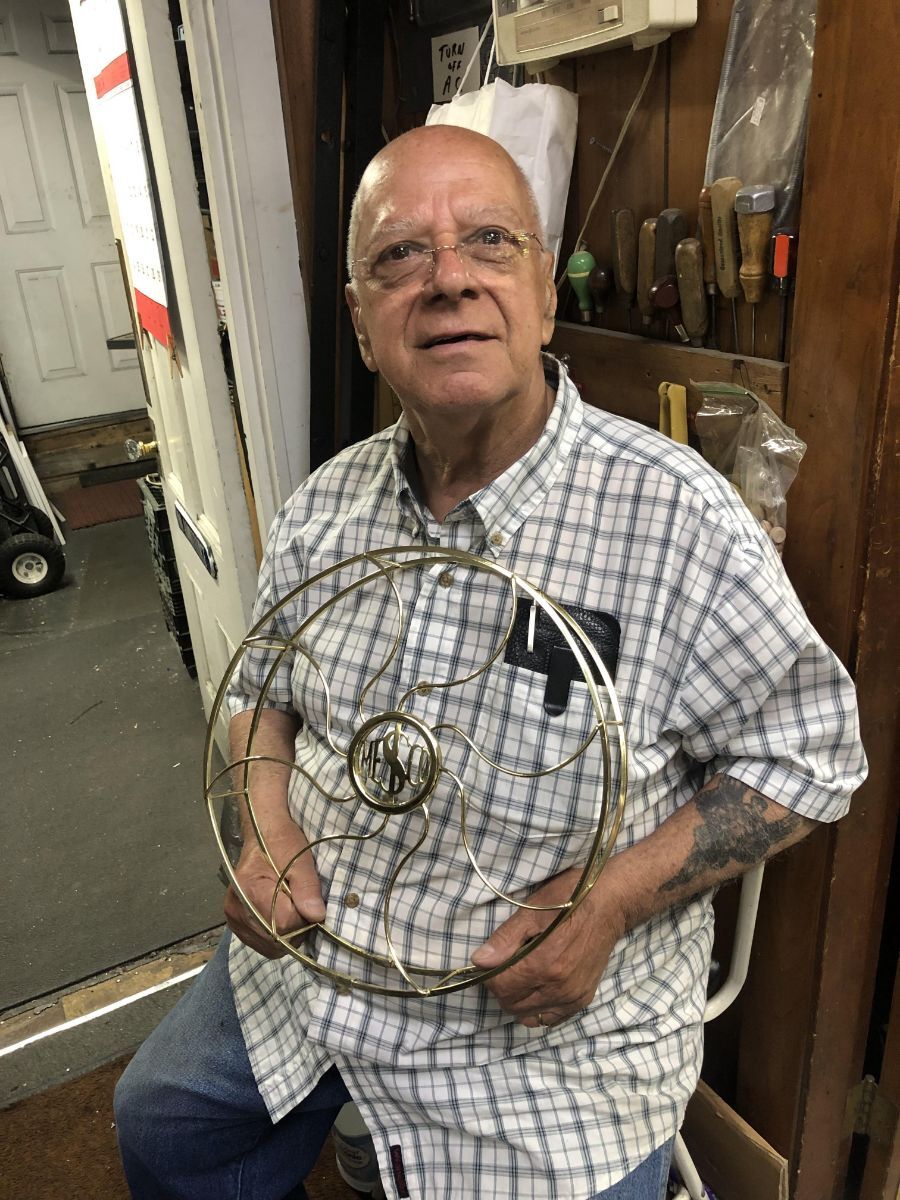
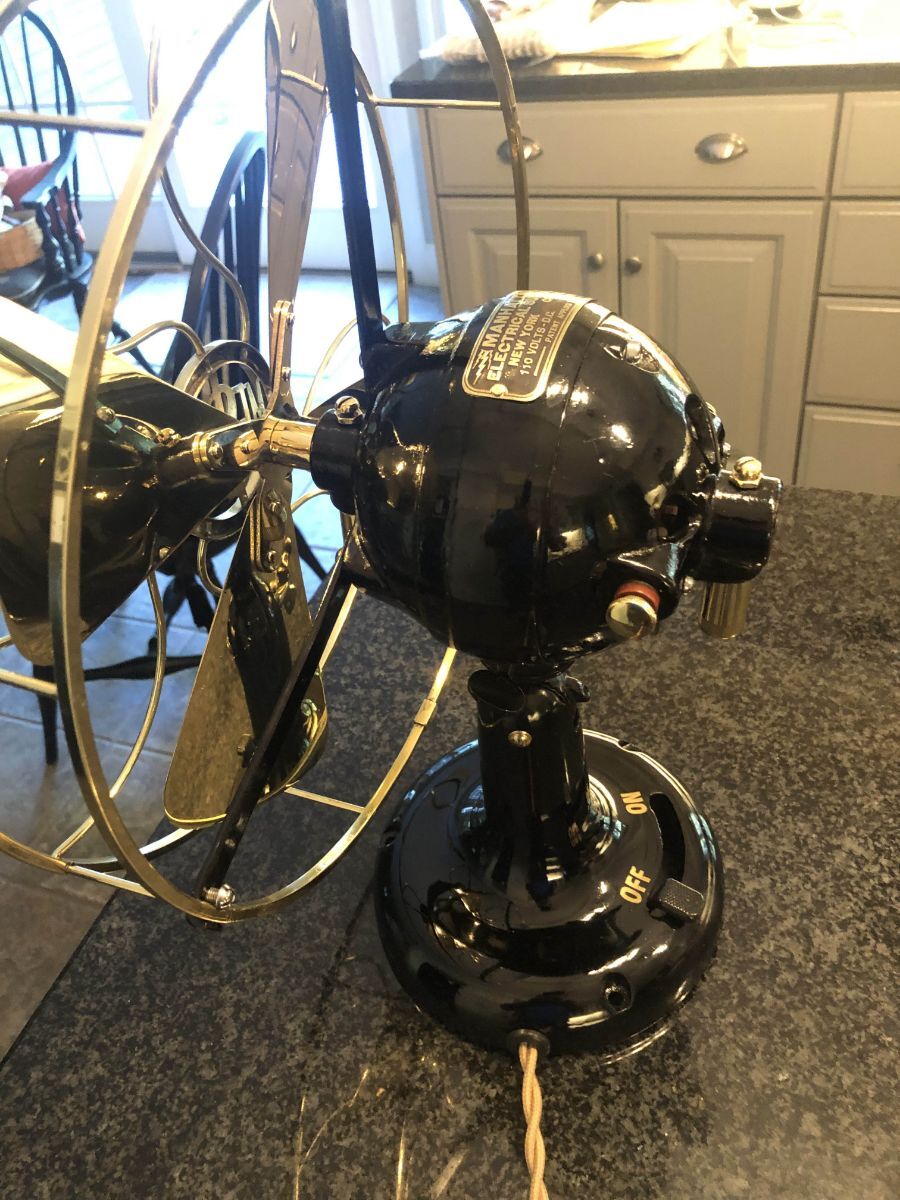
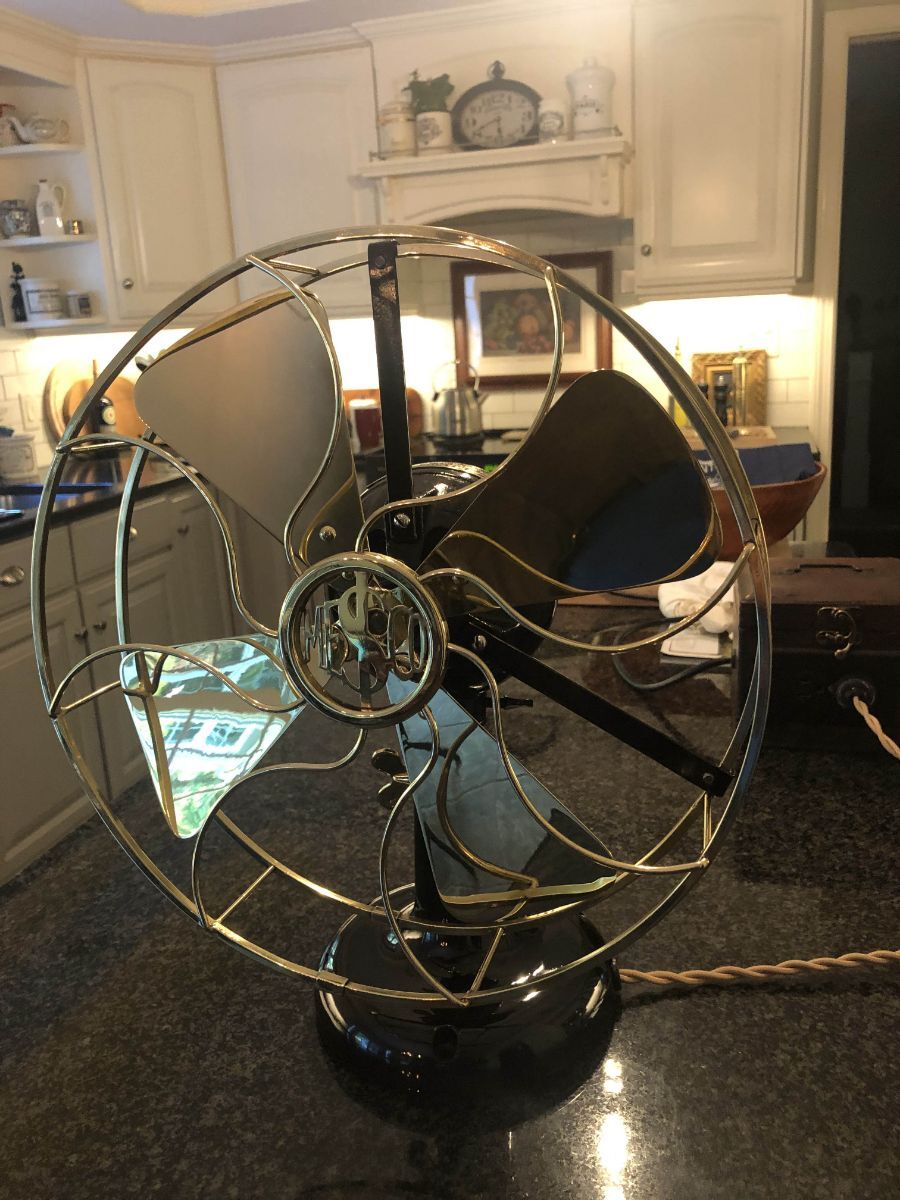
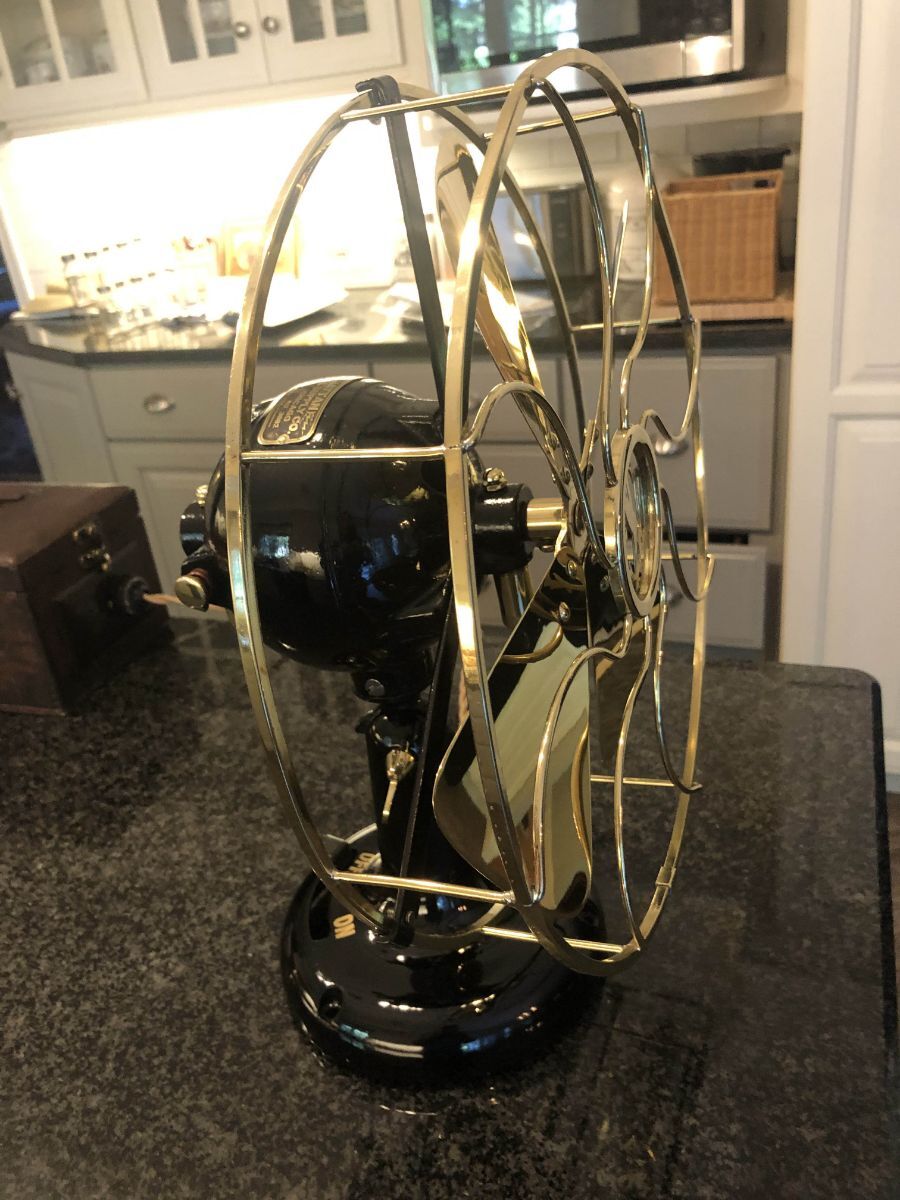
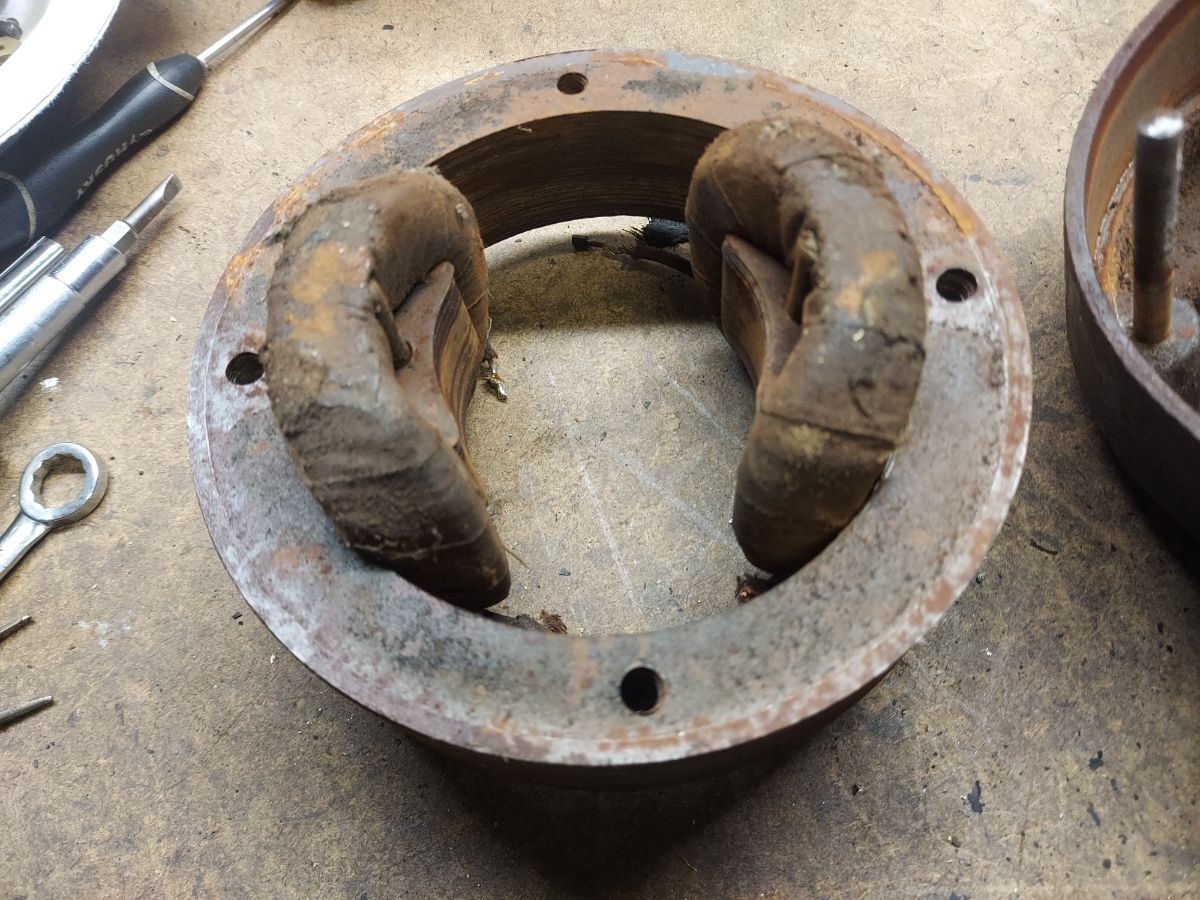
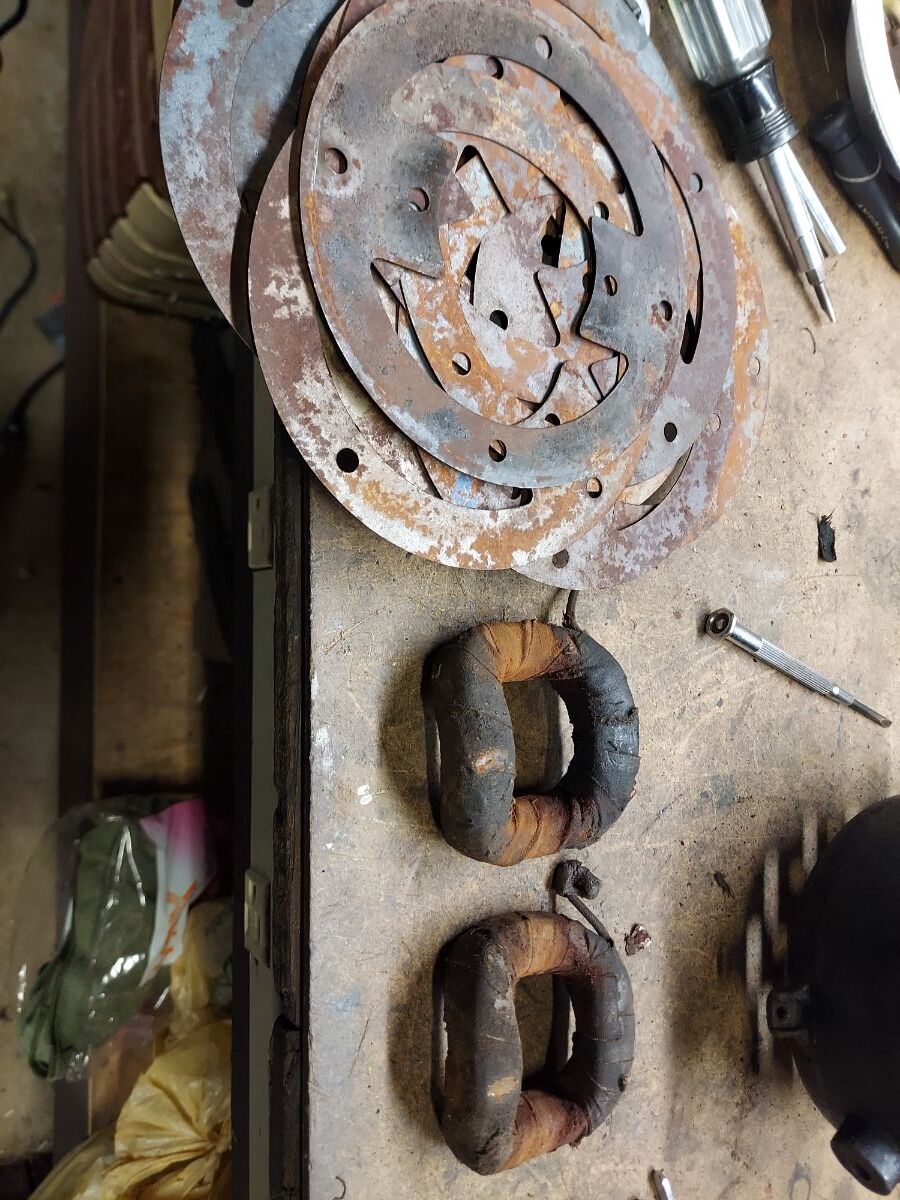
Good evening friends. Here is something to distract you from the craziness in the world right now. About a month ago, a former AFCA'er that I have been friends with for quite some time, agreed to sell me his 1910 8-inch MESCO battery fan. The fan was unrestored and had never been run - it was in its original state. See pictures below. This is an early version of this fan as indicated by the pinned (as opposed to wrapped) rear cage ring. Two of the pins were broken and one of the brass rods joining the front of the cage to the rear was missing altogether. The fan was also missing the rear oiler. The plan was to have Darryl Hudson reproduce the front oiler once I got the rear cover (seen before japanning below) back from Rick Powell. As soon as I received it, I cut off the rotten power cord and quickly examined the headwires to see if I might be able to power it up. Unfortunately, the headwires were in terrible shape with bare spots so I postponed starting it. The first order of business was to ship the base and head to Rick Powell for new japanne. He sent the progress pictures below after stripping the parts. Next, I paid a call to Ron Bethoney of New England Brass Refinishing with the cage and blade so that Ron could do his magic. He took a quick look at the cage and said, no problem. In the meantime, I took the speed coil out and tested it for continuity. There was a small break in the top of the tower, which I repaired but still no continuity which indicated a break somewhere inside the tower. Bill Dunlap (an AFCA'er in Hawaii) volunteered to take a look at the speed coil for me, so I sent it off to him. A word of advice DO NOT USE UPS to ship to Hawaii. It's outrageously expensive and slow - ten days travel time. Bill found the issue (a break inside the tower) and shipped the repaired tower back to me using USPS. The cost was one third of what UPS charged and took only four days to make the trip. Live and learn. The readings from the repaired tower for the three speeds were 6.14 VDC on high, 1.25VDC medium and 1.13VDC low. The fan barely ran at the two lower speeds so I determined to strip off some of the resistance wire to see if I might get higher readings. I also moved one of the wires. After doing this, I got a very nice second speed but no difference between high and medium. Further work is needed. You can see the difference in the speeds in the video below. I took the newly japanned base to a retired gentleman, Peter Blackman, who did car decals for work. He reproduced the OFF / ON lettering in 14K gold leaf below. Before: After: The rotor was in good shape though the commutator was badly worn (see picture below). I used a trick that Malcolm McGregor showed me to mount one end of the rotor in a drill held in place by a vice, then slowly rotate the rotor while carefully applying sandpaper to the commutator to even out the grooves. The trick worked quite well. You can see from the above that I repainted the motor tag, which turned out quite well. I polished some of the brass bits and pieces too (above). Motor tag before: After (notice Rick Powell's excellent japanne work): I reassembled the fan and fired it up. It barely ran at the lower two speeds so I determined to remove some of the resistance wire which gave me a very nice second speed. Additional work needs to be done to restore the medium speed. I'll do that another time. Still to be done is the reproduction of the brass tab used for hanging the fan on vertical surfaces. Mike Rathberger was kind enough to provide me with a measured drawing which I took to a local machine shop that I have used in the past. I expect to have that part sometime soon. So here is the finished fan (minus the brass tab above): The video of the fan running and the twelve-inch version of this fan can be seen in the video below: Notice the reproduction rear oiler from Darryl Hudson. My thanks and gratitude are owed to the following individuals: Steve Stephens (who sold me the fan) Rick Powell (japanning) Bill Dunlap (switch repair) Ron Bethoney (brass repair and refinishing) Tony Clayton (reproduction wire) Peter Blackman (OFF / ON decals) Mike Rathberger (brass tab measured drawing/specifications) Darryl Hudson (reproduction oiler) It's a great pleasure and privilege to know the individuals above who graciously share their time and talents so willingly. I am very fortunate.
8 points
-
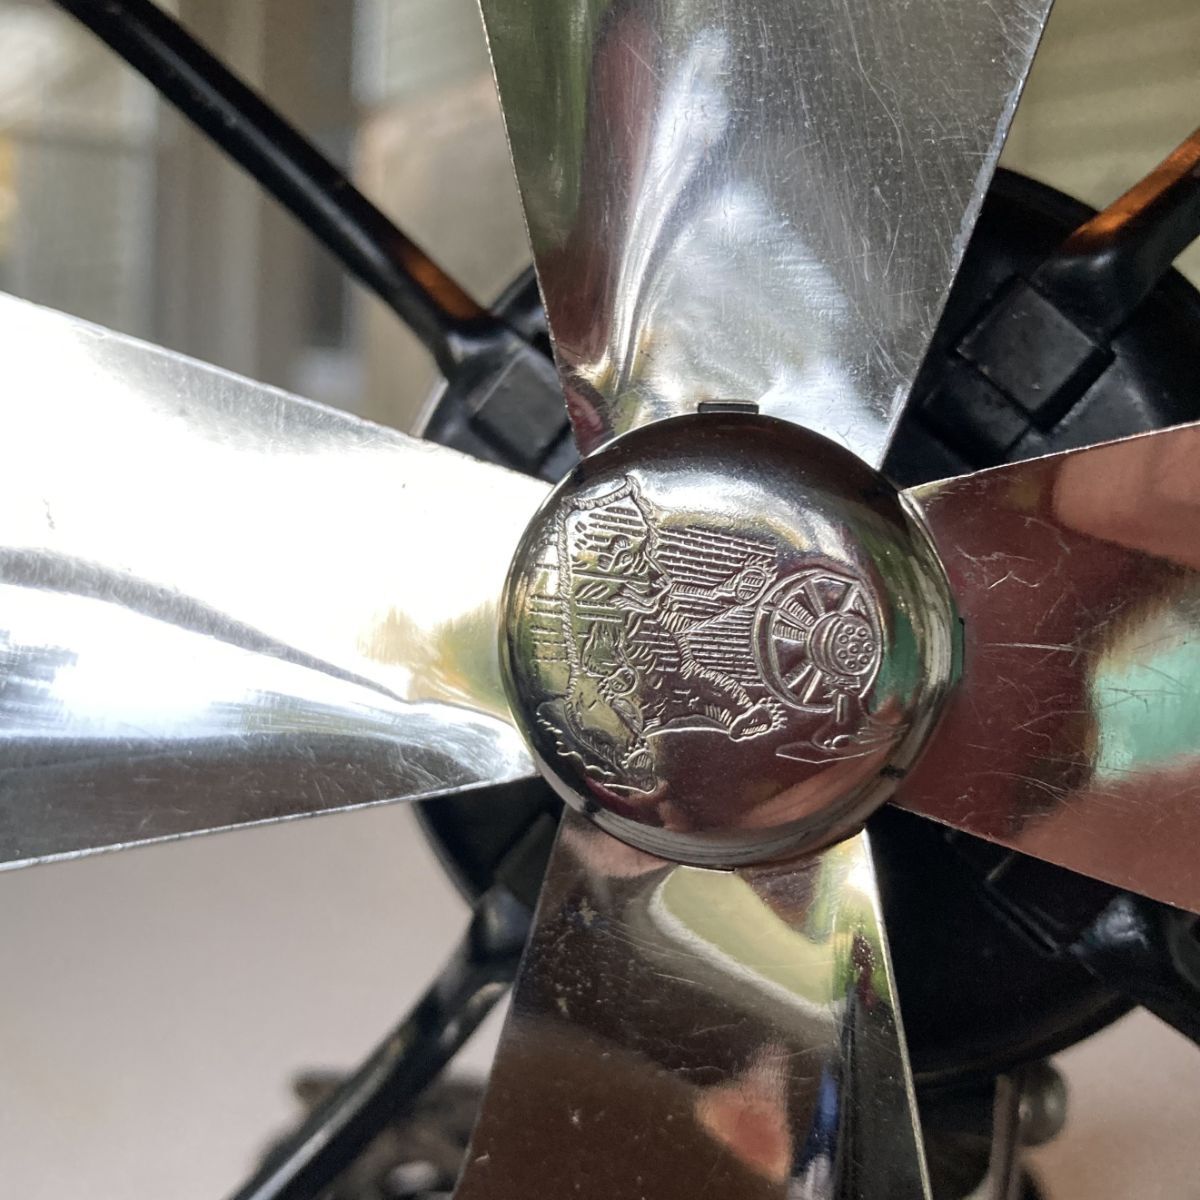
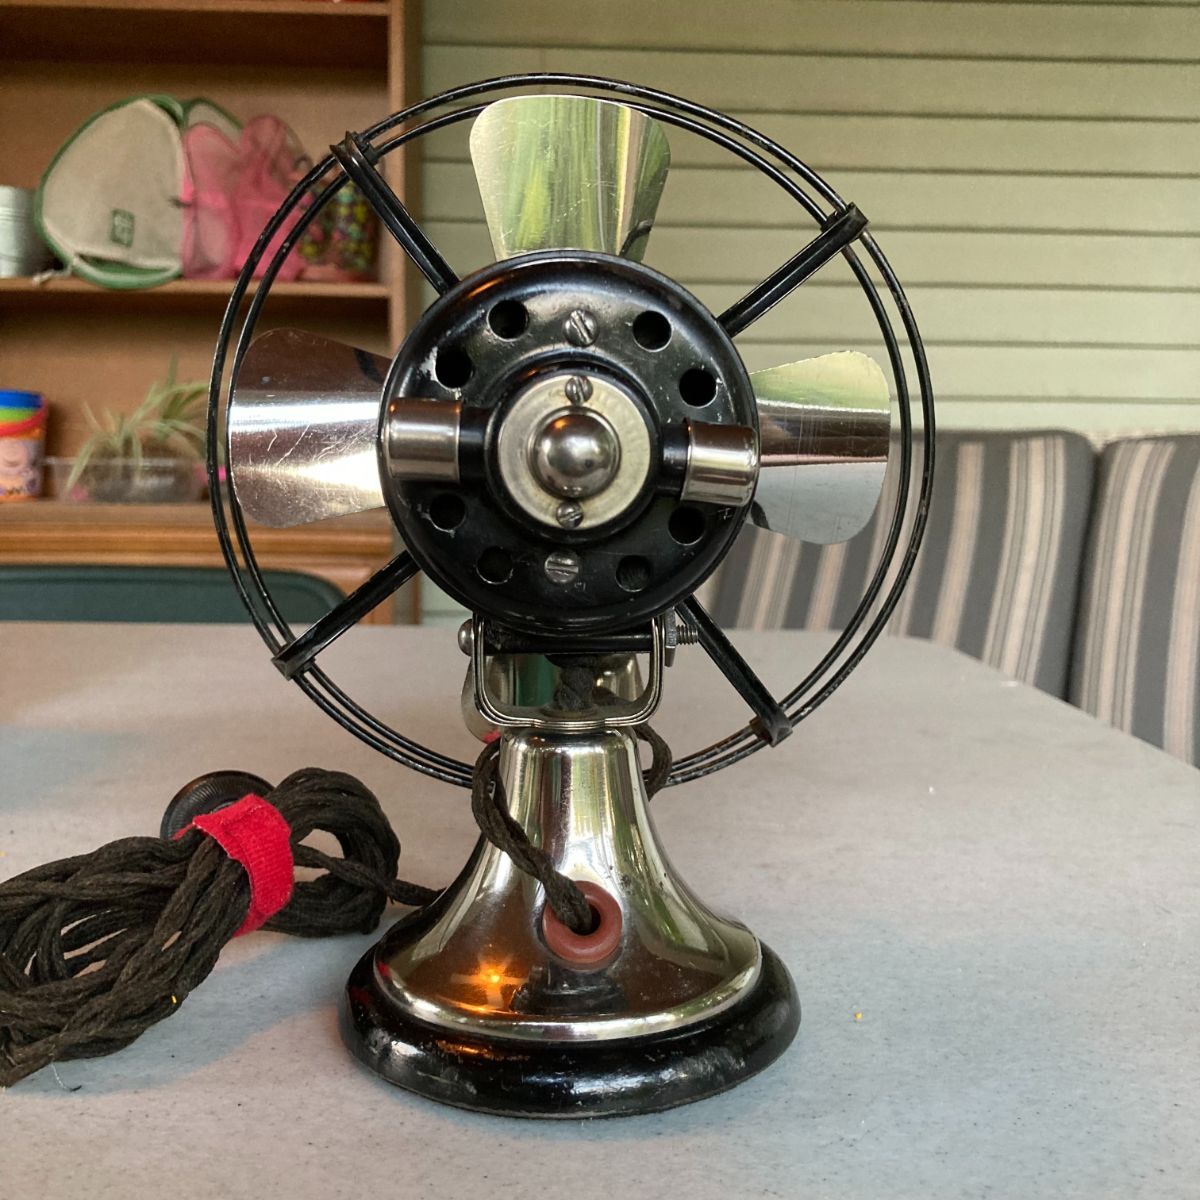
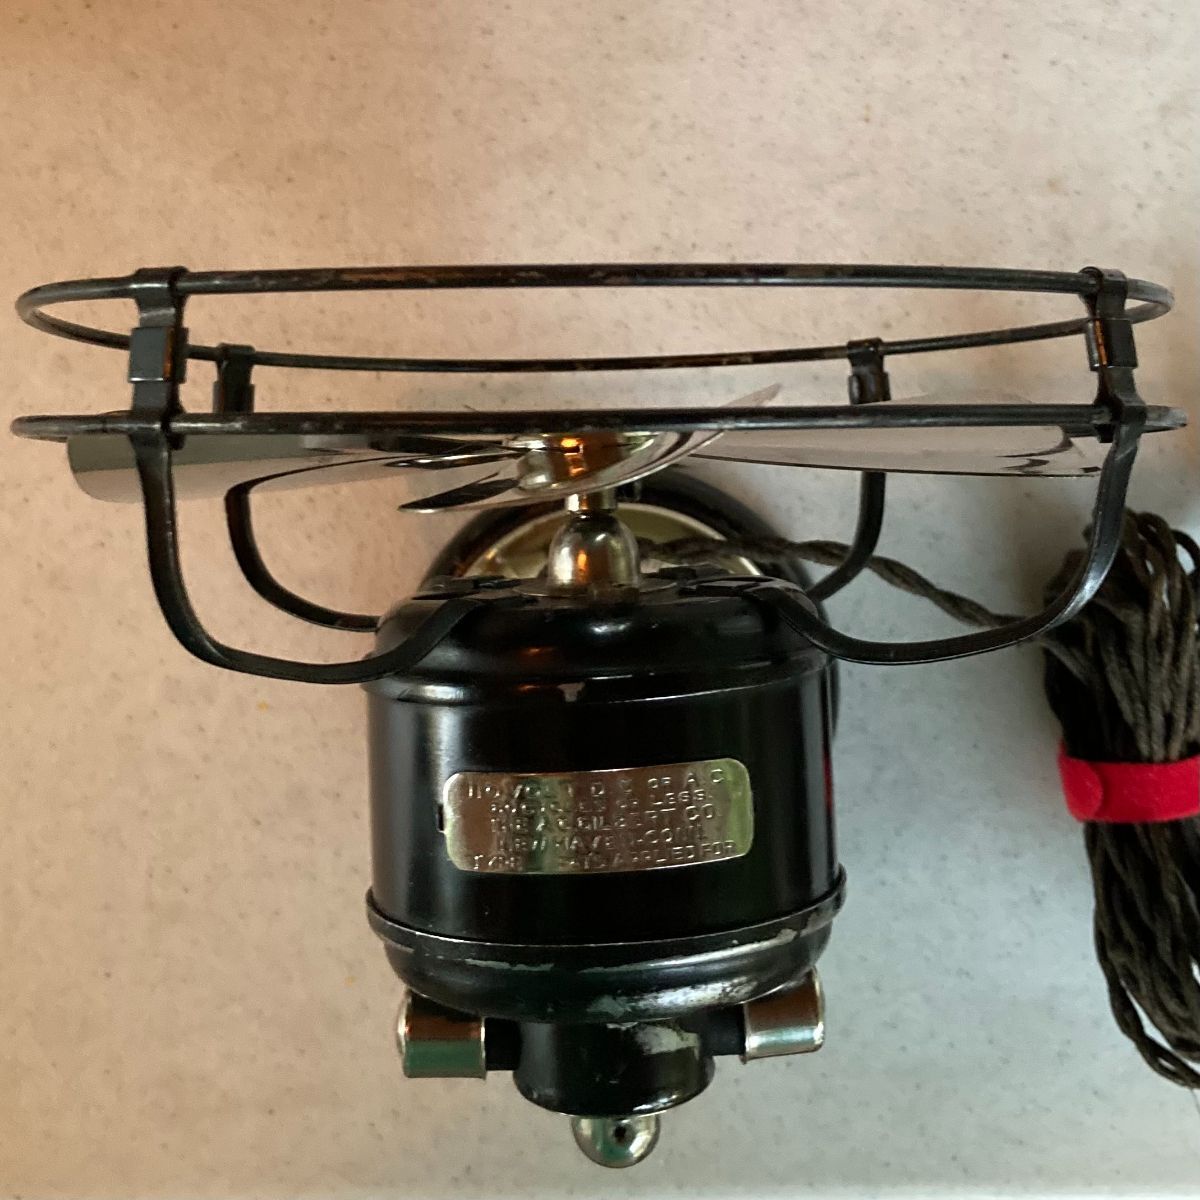
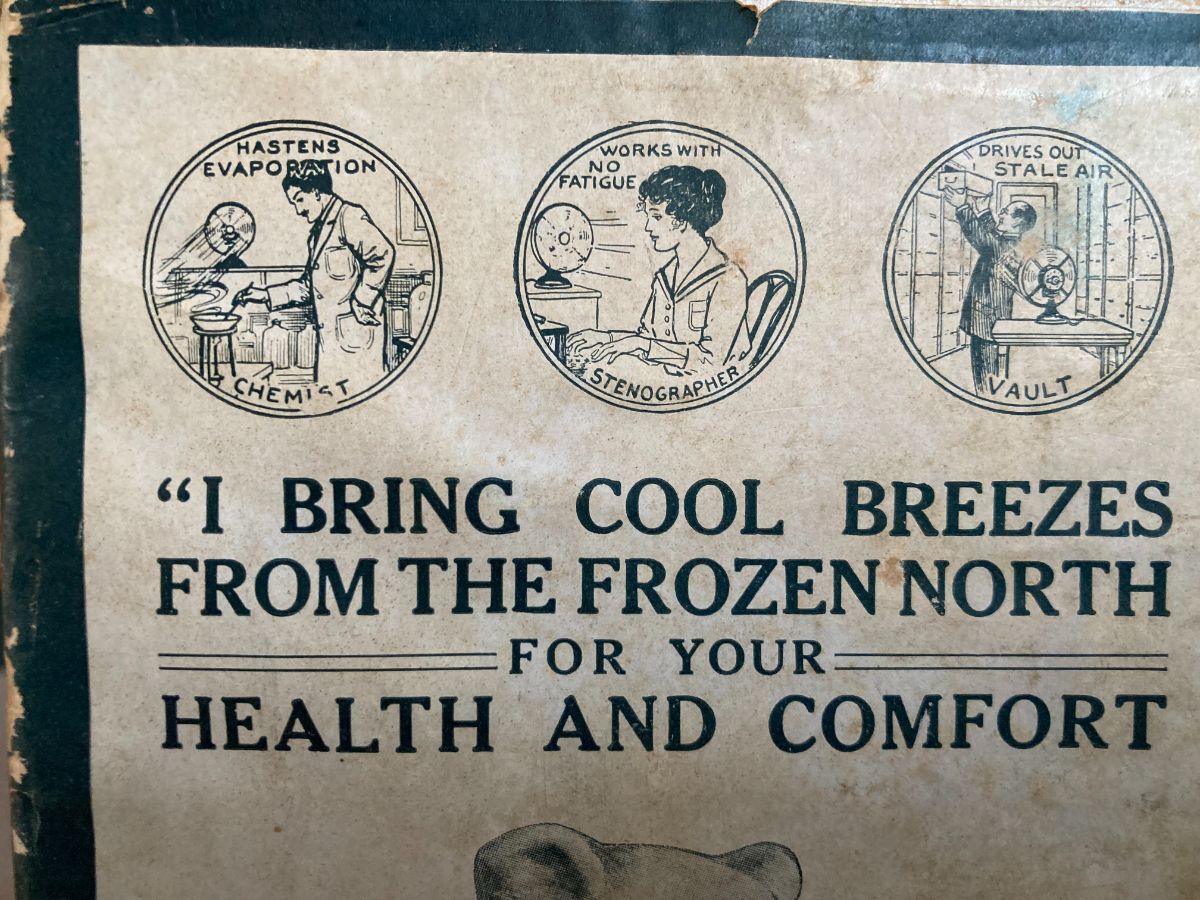
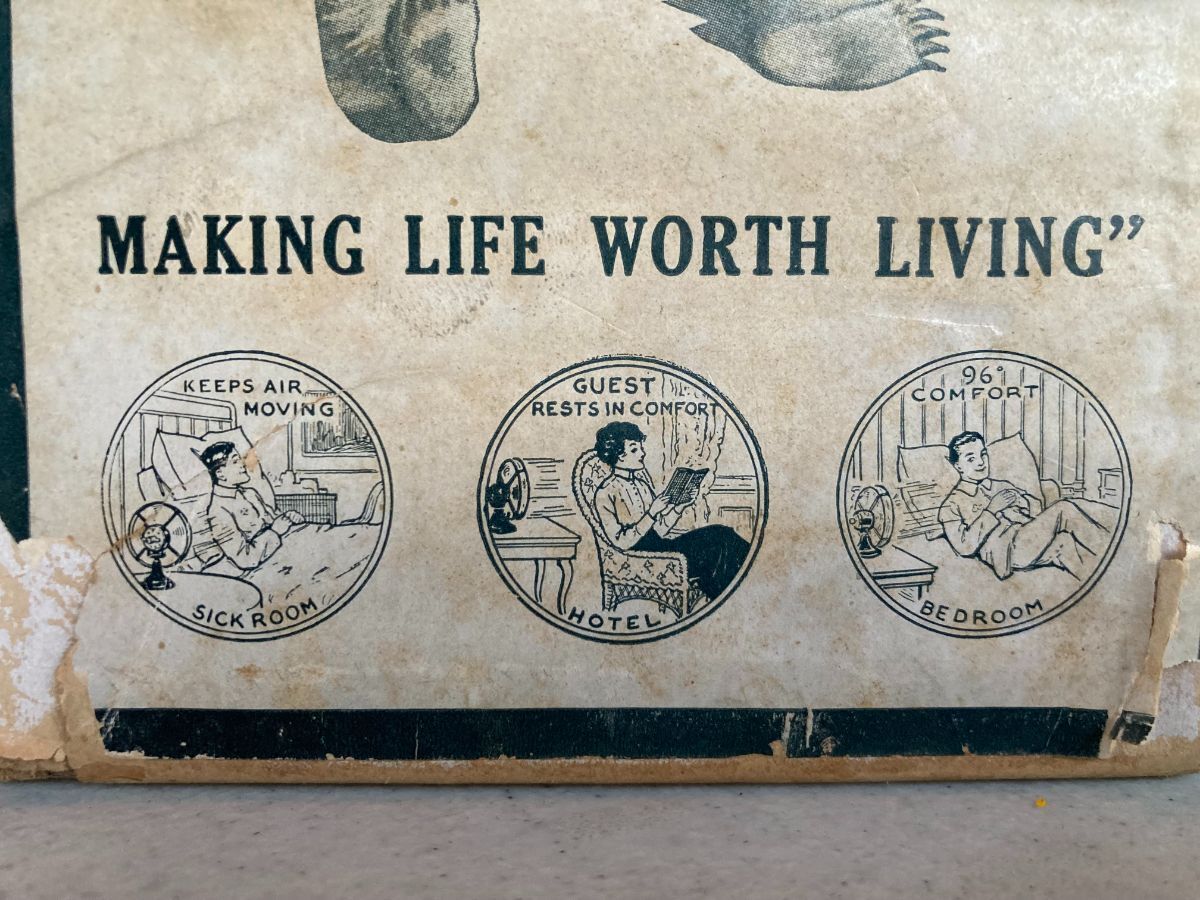
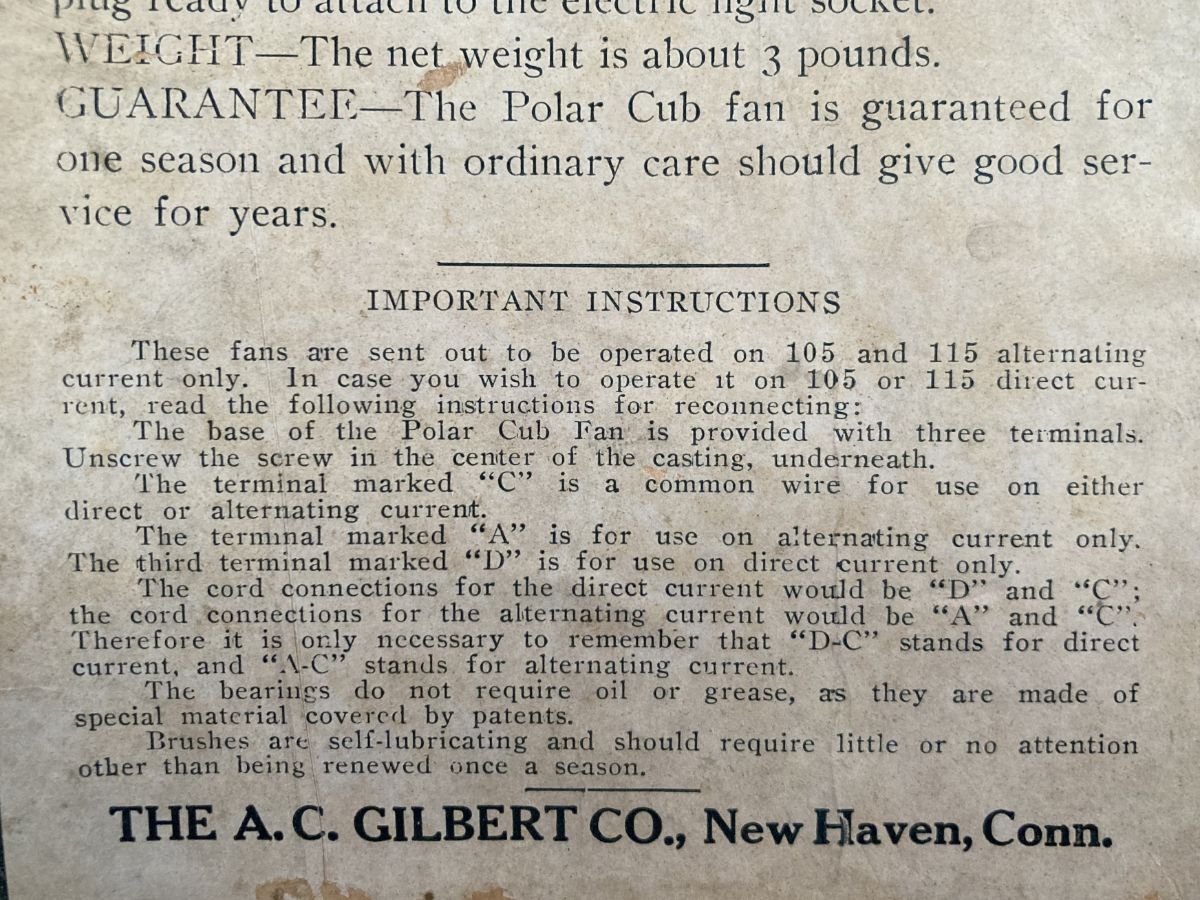
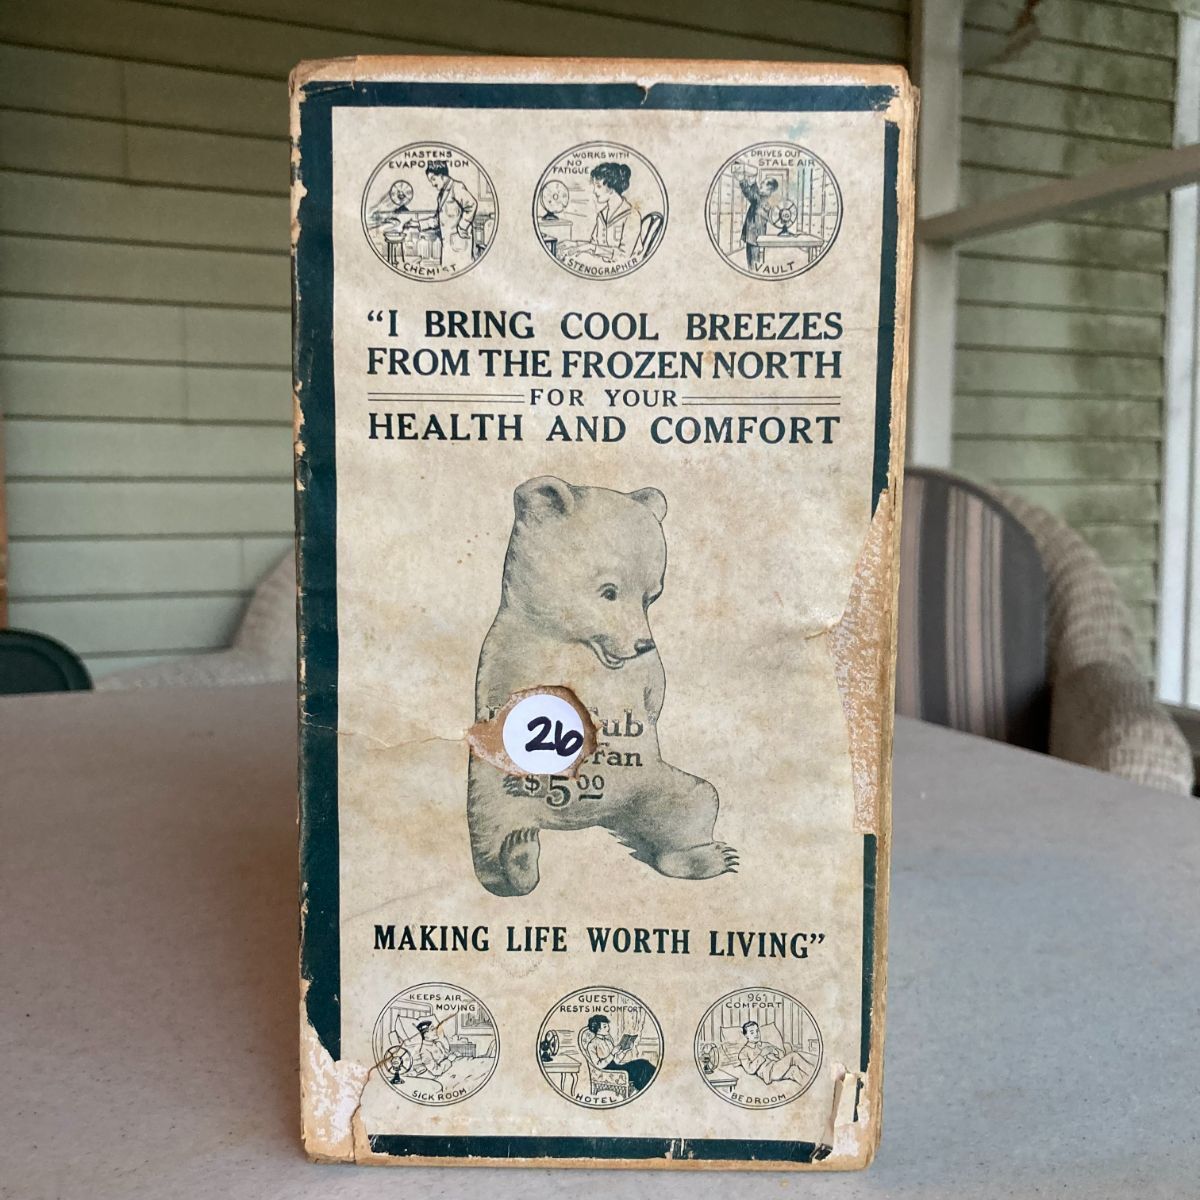
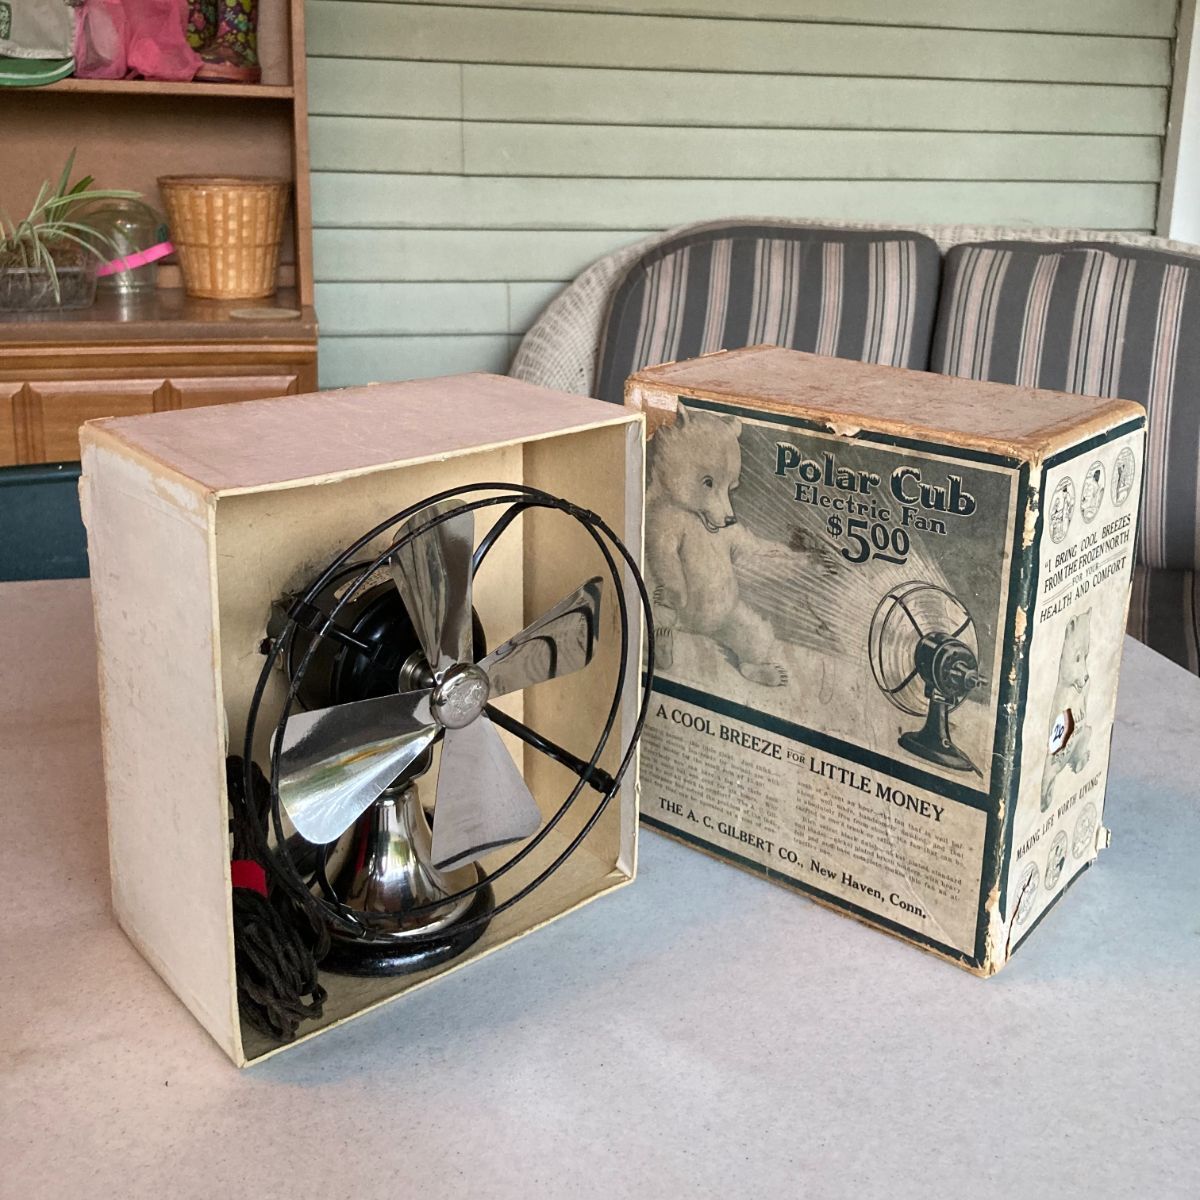
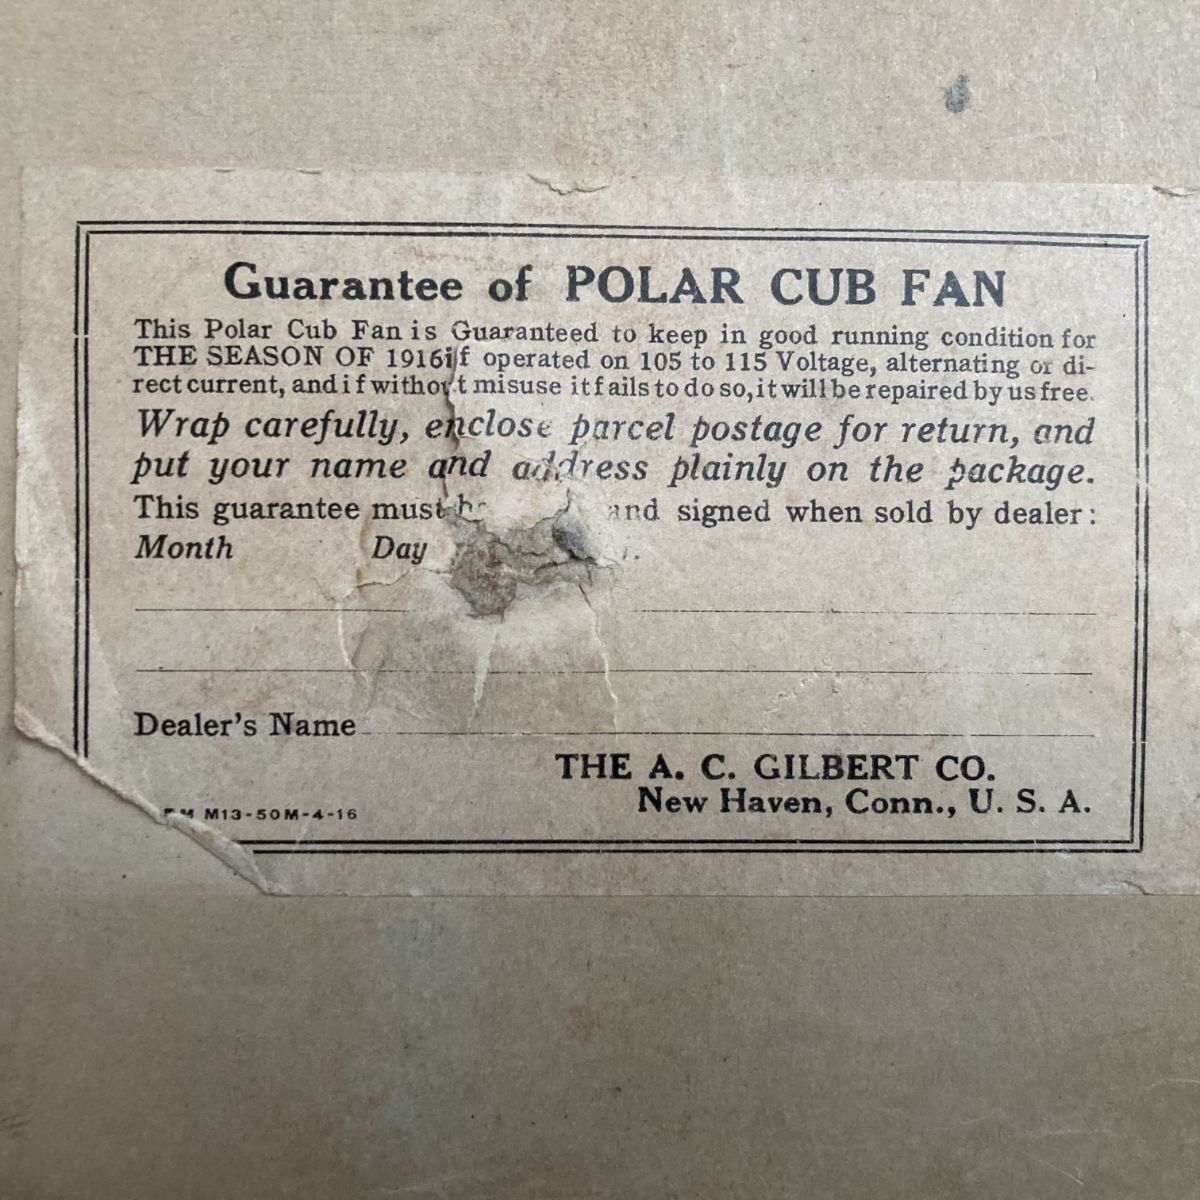
As found, all original circa 1916 Polar Cub (first year as A.C. Gilbert ?) with original box. Runs smooth with classic brushed fan sound. What made this extra unique was the hand written note in the box from the original owner. Love the box labels and features...especially that the fan only costs $0.01 for six hours of running...and most important it is "impossible to get shocked" 😜 Here is the video link of it running....enjoy!! :
8 points
-
Picked this nice running little all brass biskit today at a store I was just at 3 days ago! I didn't want to go in as I was already there a few days ago... Just goes to show you, ya never know! As the great Yoda once said... "A bargain have we here!"
8 points
-
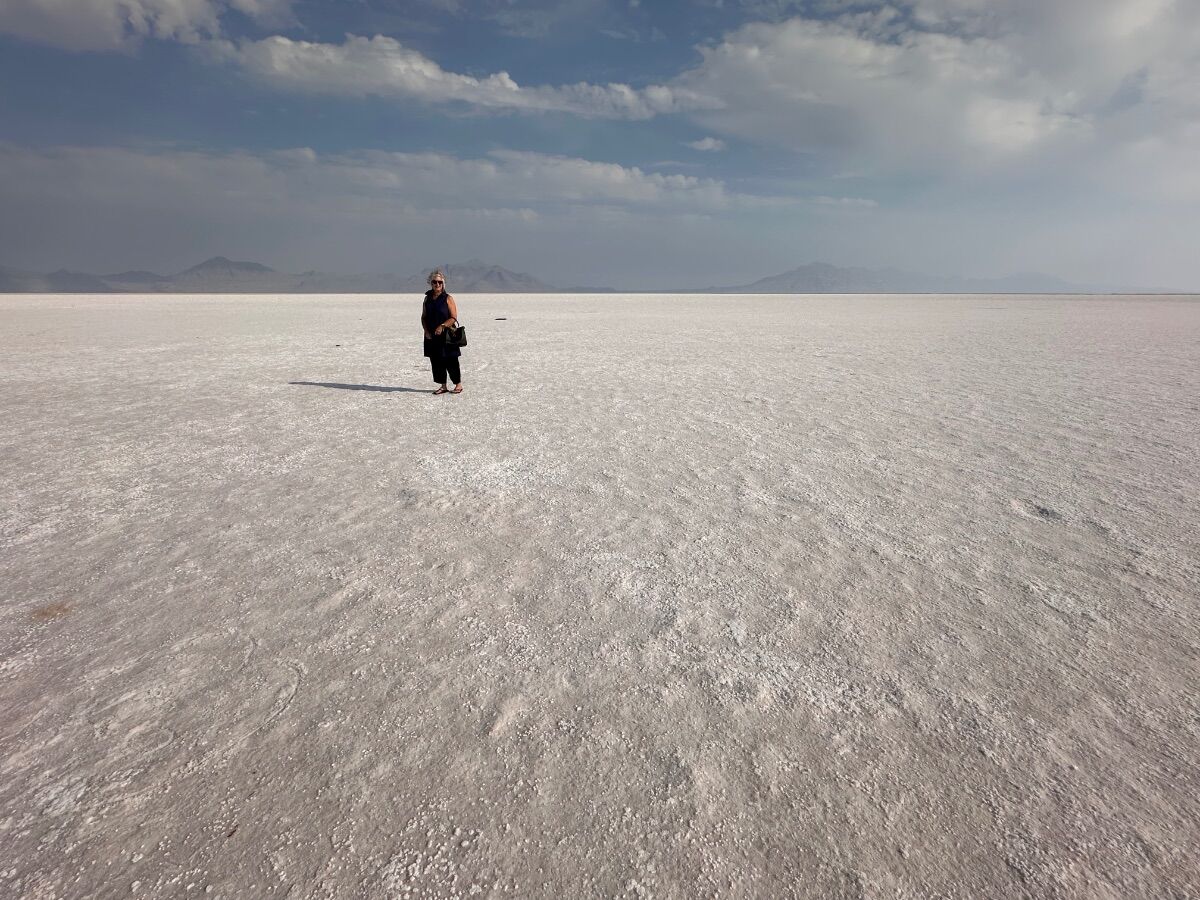
It was a fun time. Using the livestock building at the fairgrounds was different. Plenty of room. But being a distance from the hotel meant a little more planning. Can anyone recall prior Fan Fairs where sellers could simply drive into the Bourse?? Annie and I literally arrived home an hour ago (today is Thursday). 4477 miles since we left for Boone County in July. Today was the longest travel day at 635 miles. One of our short stops was the Bonneville Salt Flats. Very happy to be home.
8 points
-
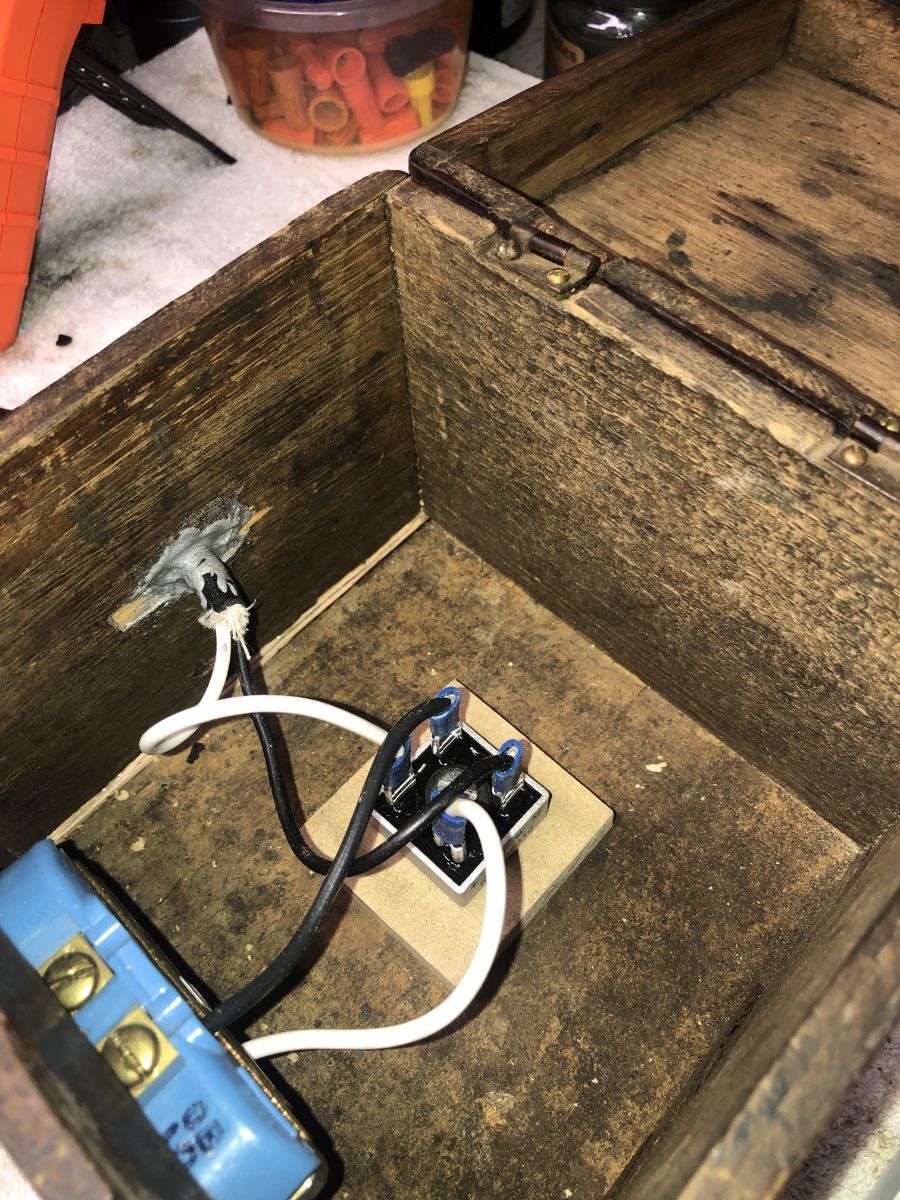
Hello fan friends: Today, after about a month of work by some very talented craftsmen, my 1910 MESCO is complete. I hope to be contributing a detailed explanation of the various aspects of the restoration to the quarterly magazine so what follows is a brief summation. I purchased the fan from a seller in BC Canada on eBay. I don't often buy things on eBay but this was an extraordinary fan with some challenging issues (which probably had something to do with why I was able to acquire it so cheaply). Below are pictures of the fan as found. The seller indicated that it was not tested so there were no assurances that the fan would operate. In fact, when I got it, it only ran on the top speed so there was an issue with the speed coil (which I was able to find and repair). While I waited for the fan to arrive through international customs, I did some research (and pestered some of our really patient AFCA'ers) on bridge rectifiers. I wanted to completely understand how they work and know what I would need to allow me to run this fan. Thank you to Bill Fanum, Carlton Ward and others that I pestered about how bridge rectifiers work. I have a pretty good handle on the subject now. Below is what I built to house the full wave bridge rectifier. The repairs to the cage were difficult but Ron Bethoney of New England Brass was more than up to the challenge. Here are the good talented folks (in addition to Ron) who contributed their skills to make the restoration possible: Rick Powell (Japanning of the base) Tony Clayton (reproduced the original wire) Mike Rathberger (supplied me with pictures of the original lettering for Peter Blackman to copy) Peter Blackman (painted the OFF and ON lettering on the base) Below are pictures of the restored fan. You can watch a video of the fan running below:
8 points
-
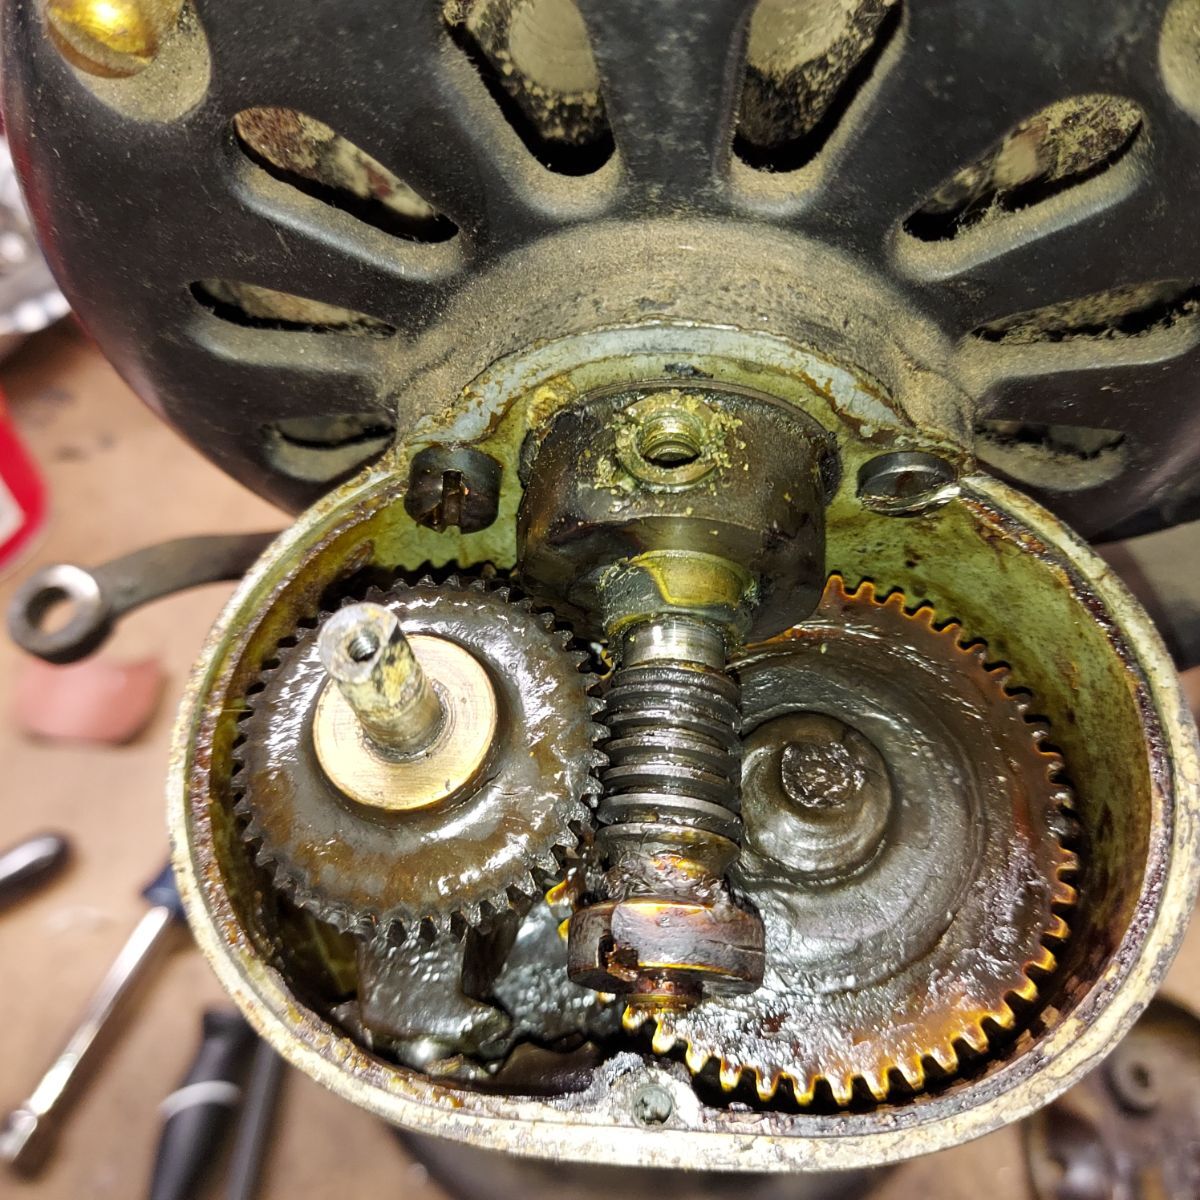
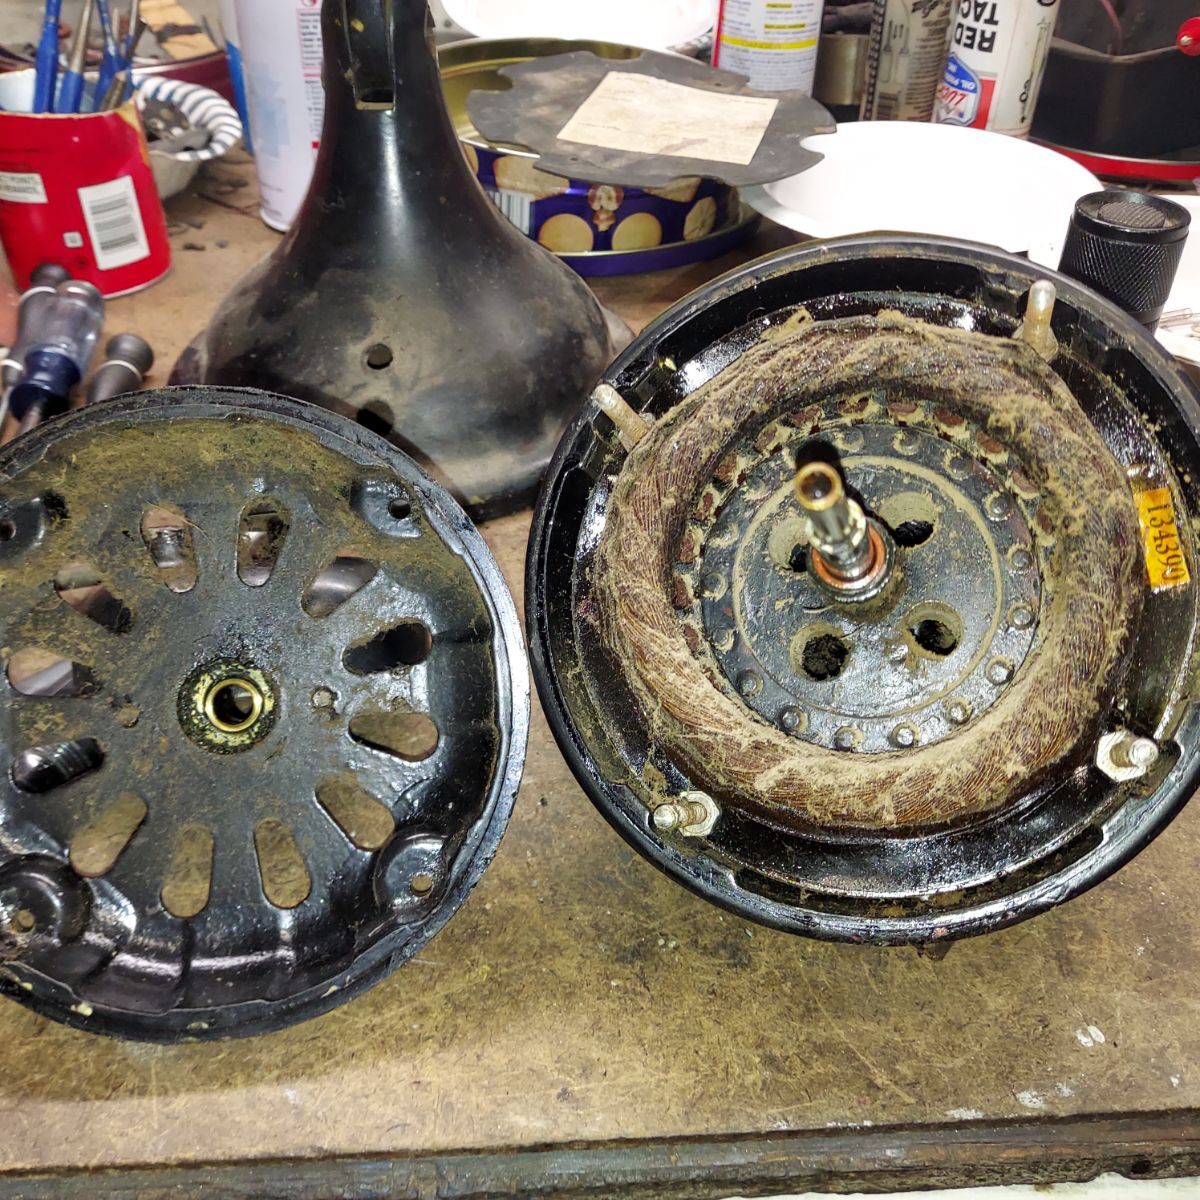
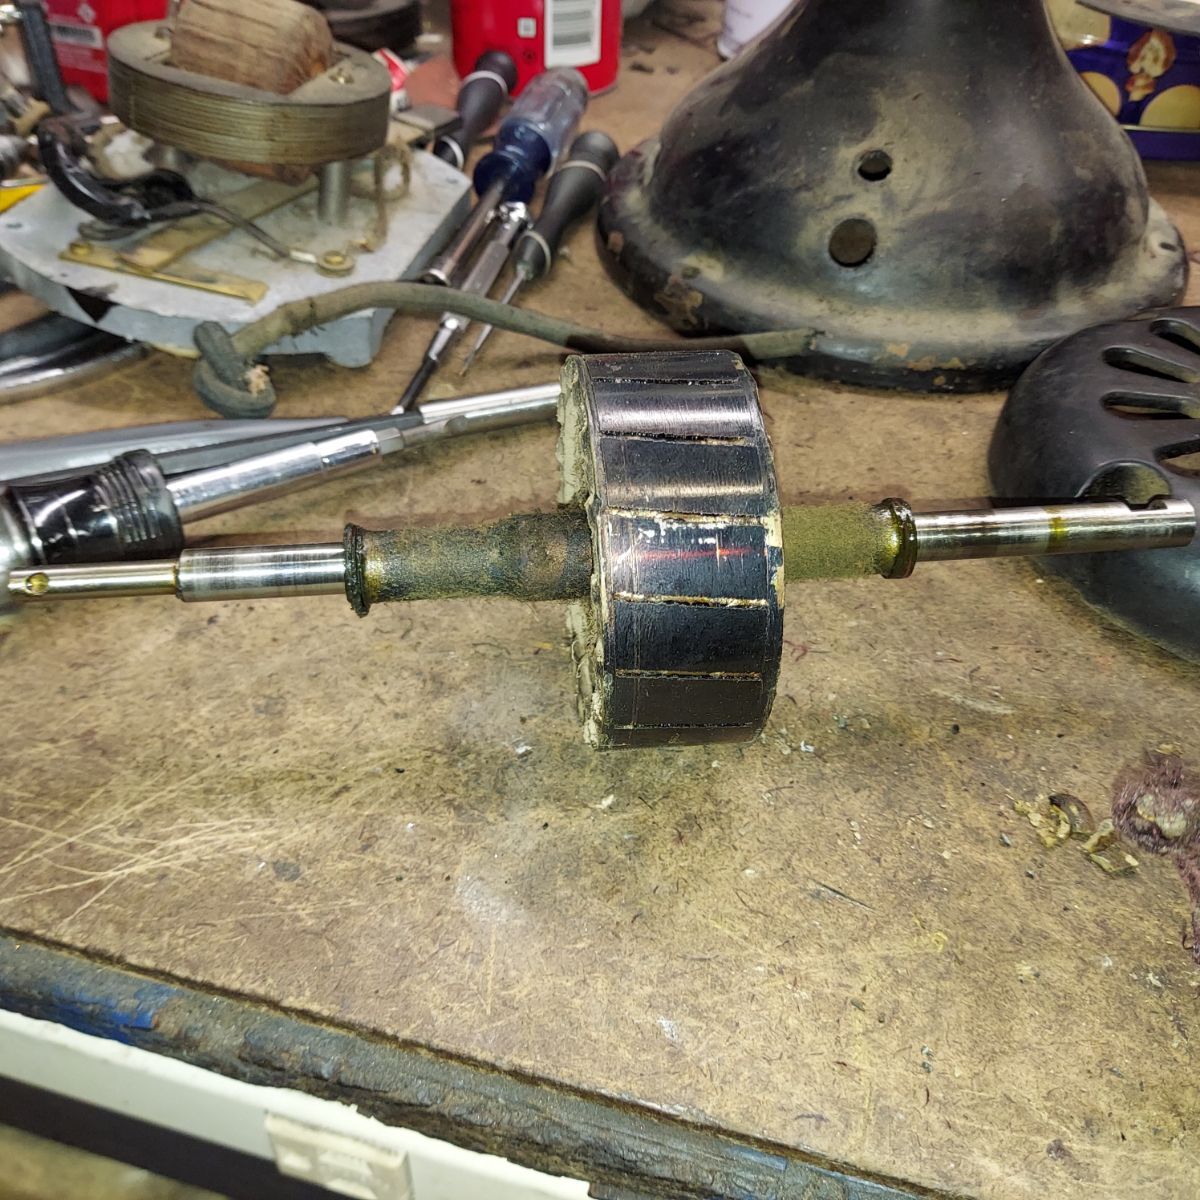
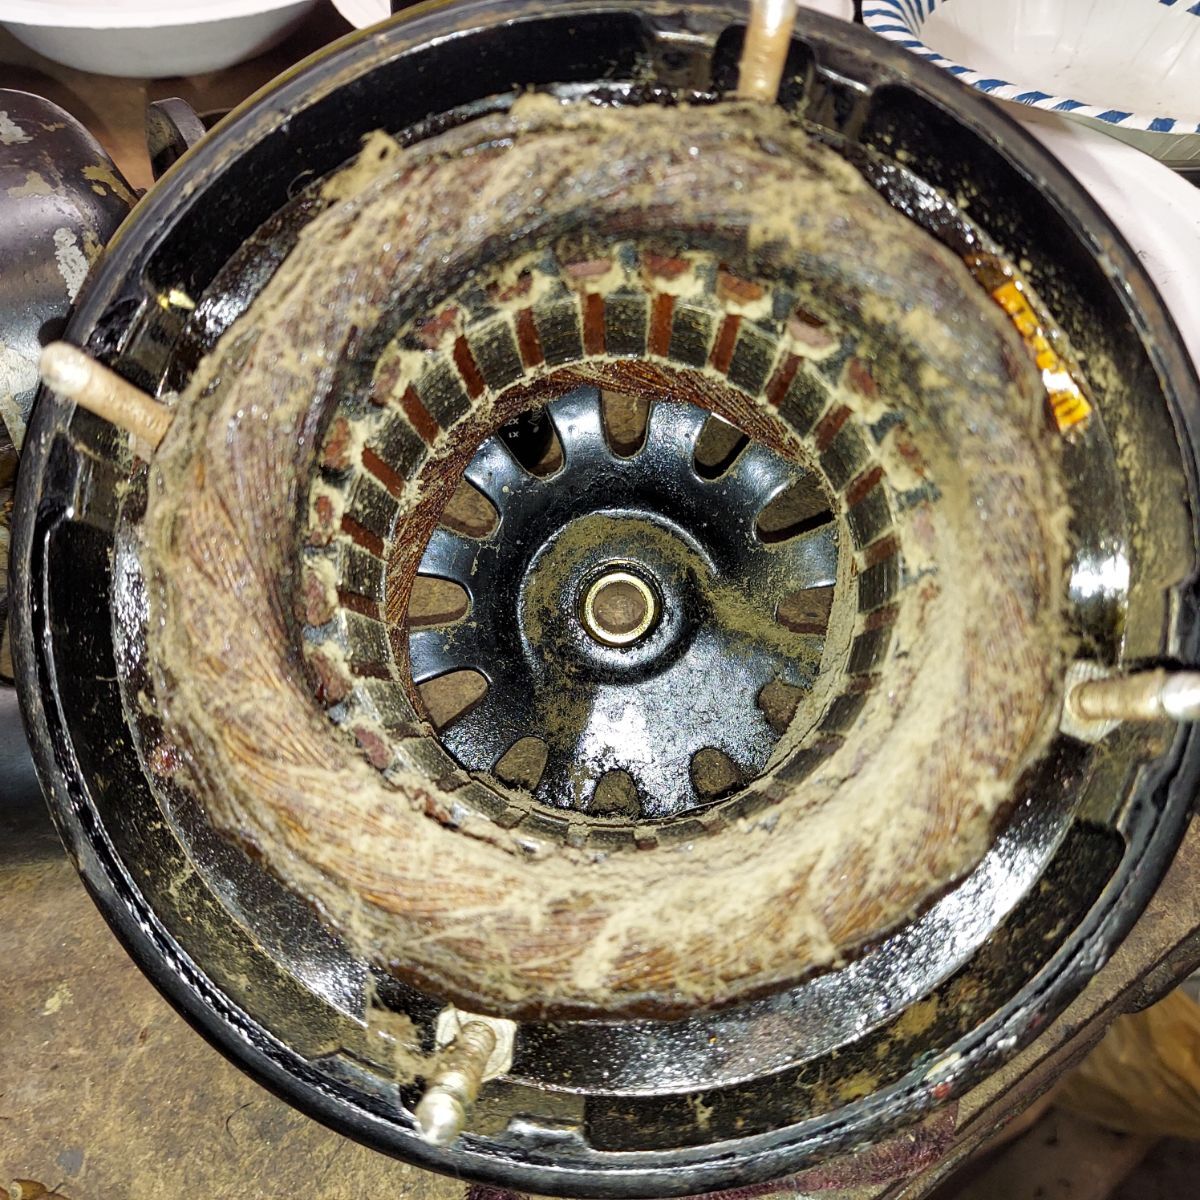
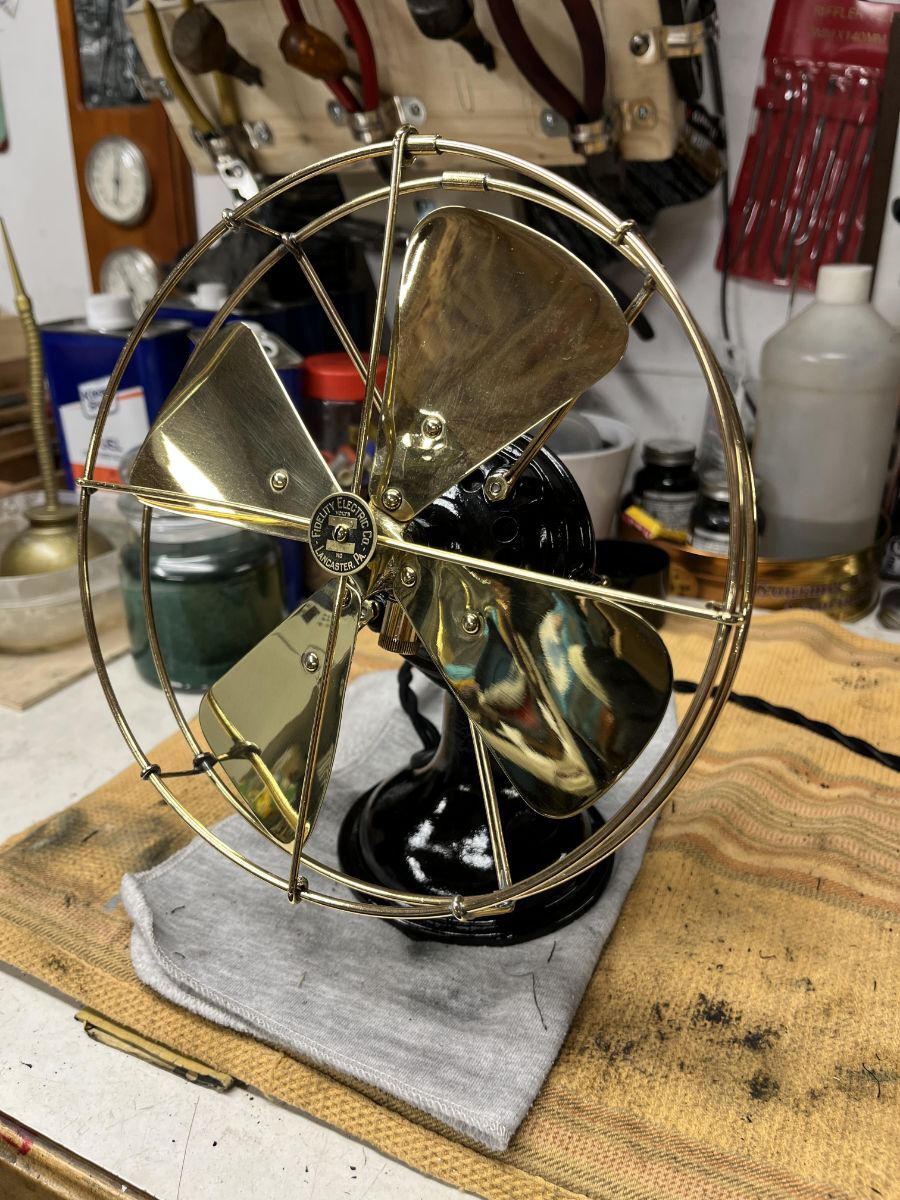
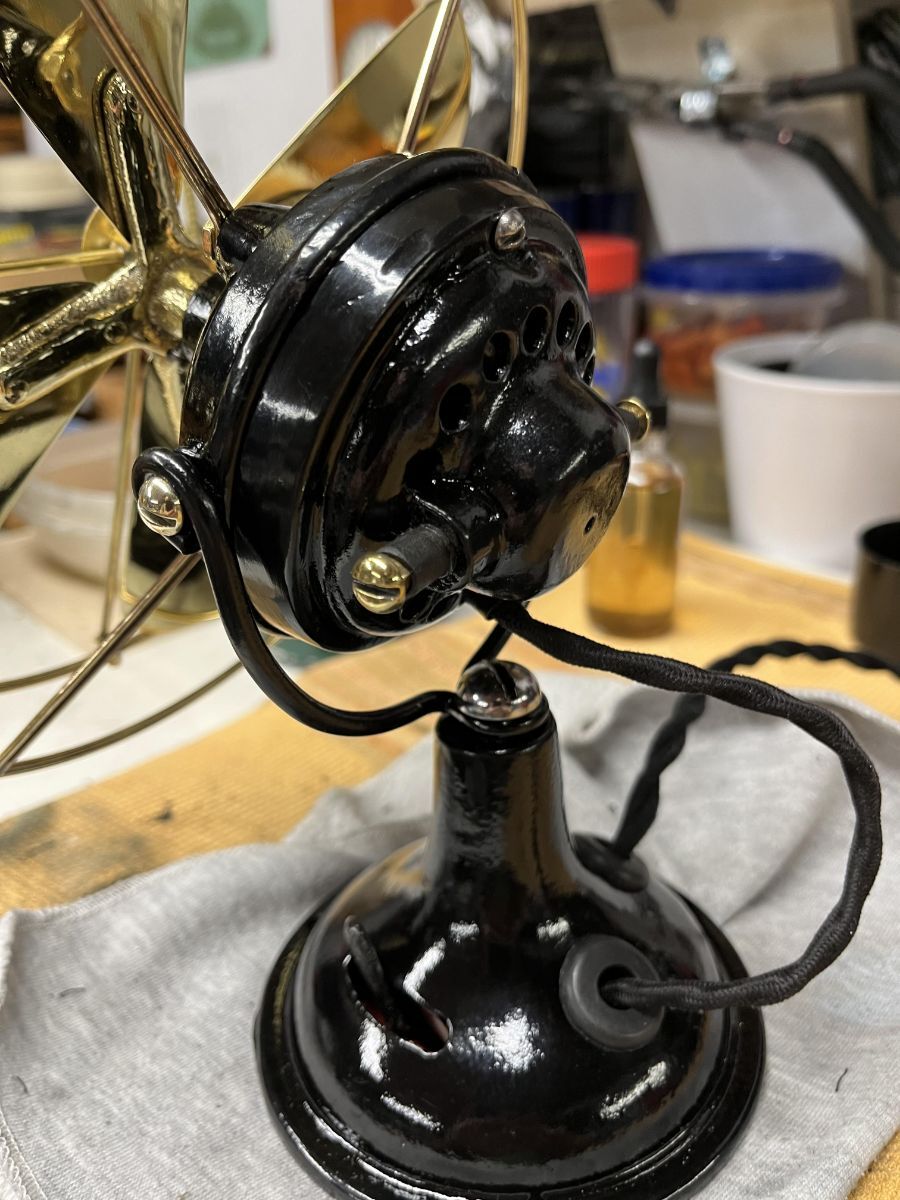
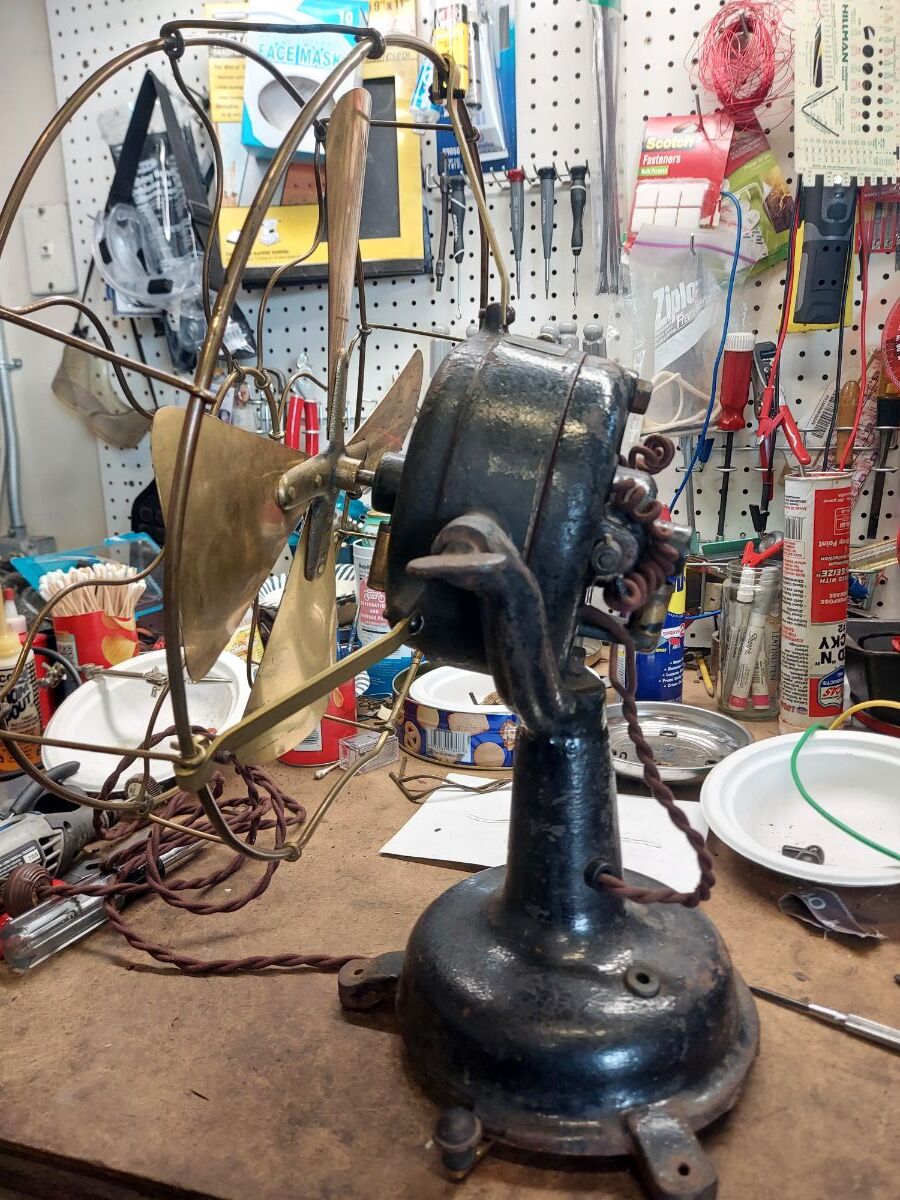
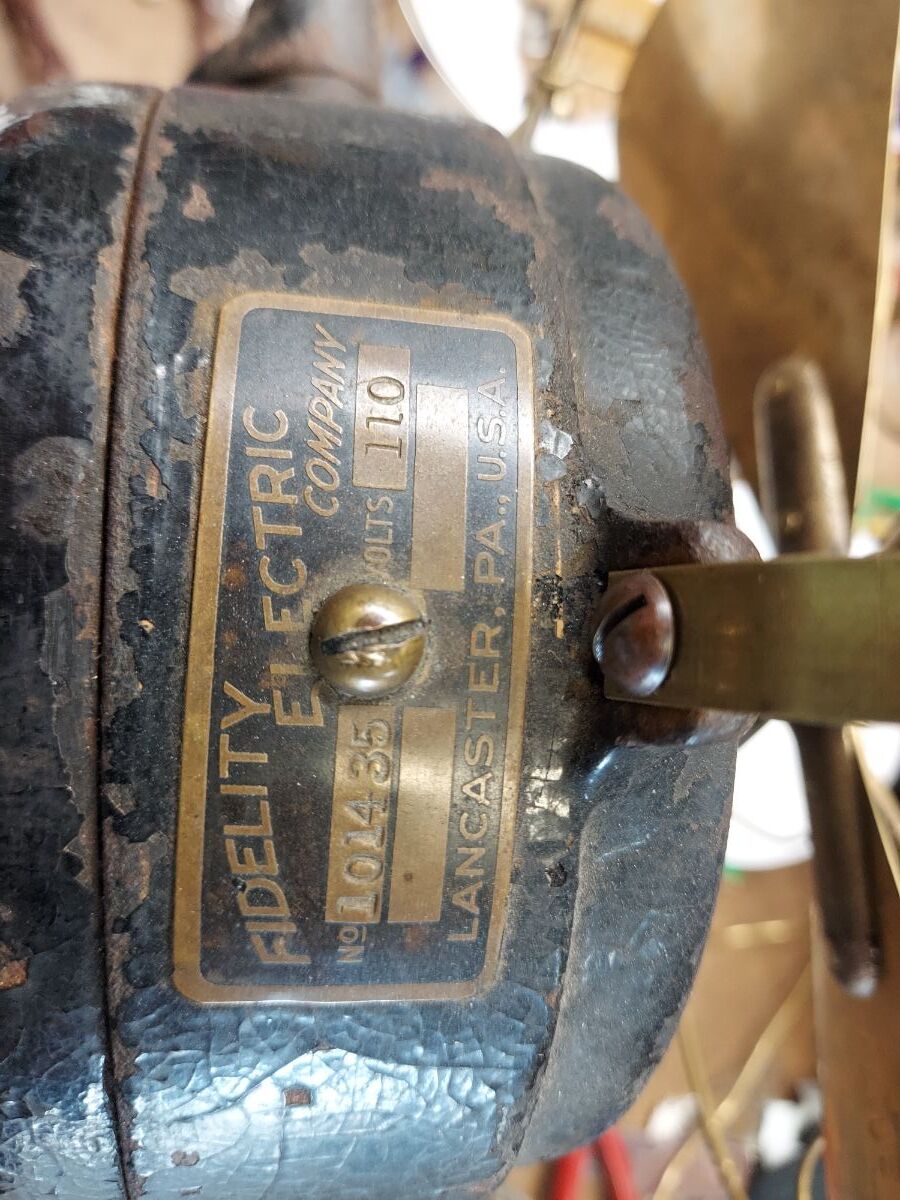
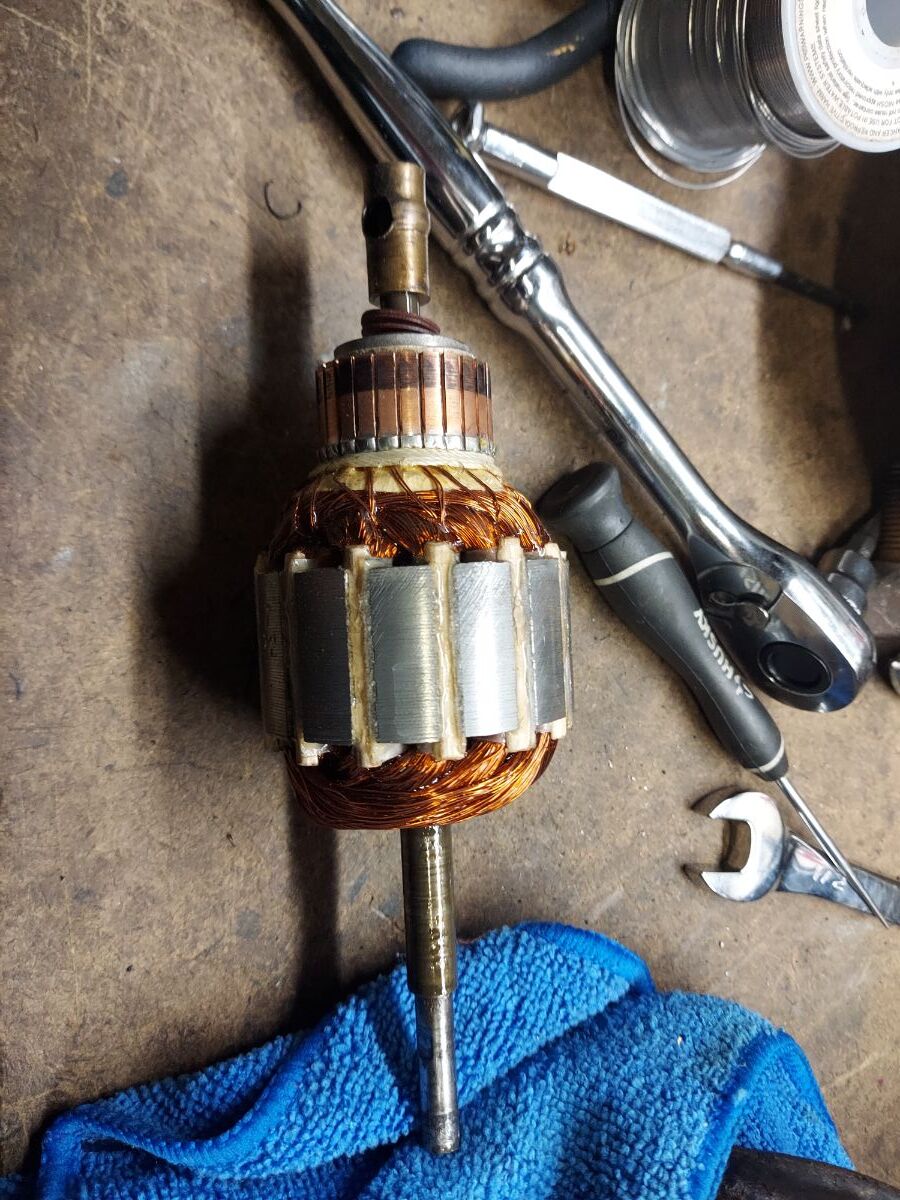
Hello friends. It was challenging (given how small the case is) but I finished the restoration of the 1916 universal motor, single speed Fidelity. This fan was non-operating when I received it due to broken connections on the switch and one missing brush. I corrected those issues. The inside was full of copious amounts of grease, particularly at the back of the case where the commutator was rubbing against the rear of the case. This being a single bearing fan requires that the position of the blade be such that the commutator will not impact the rear of the case. The fan came apart relatively easily. The first order of business was to clean up the commutator and check it for continuity. It checked out fine. I cleaned all the parts. primed and painted it. These little fans are quite challenging to get back together properly due to the extremely small space inside the case. Getting the four wires (two for the brushes and two feeding the stator) to fit without interfering with the rotating commutator is difficult particularly with my poor eyesight but with some patience, I managed. Tony Clayton's exceptionally nice headwire certainly helped (thank you Tony). I have a call into Darryl Hudson as I would like to replace the plastic (or bakelite) brush caps with brass brush caps. In the meantime, I used brass screws. I took this idea from Bobby Gaines' most excellent restoration of his Fidelity. (My works pales in comparison to Bobby's). Below is a link to see it in operation. I might try to run it on DC later today. https://www.youtube.com/shorts/idLcNPLLY1M Thanks to Ron Bethoney and his sons for his usual expert brass work.
7 points
-
Never disappoints. Absolutely stunning.
7 points
-
A huge thanks to the webmaster and those in the organization and management who took the time and cared enough to provide the search feature for old posts from the old website. It took me a while to get used to manipulating it. It is not as user friendly and fast as the old website, but I am impressed with the numbers of old posts you were able to salvage. A very wise choice and move. 🙂7 points
-
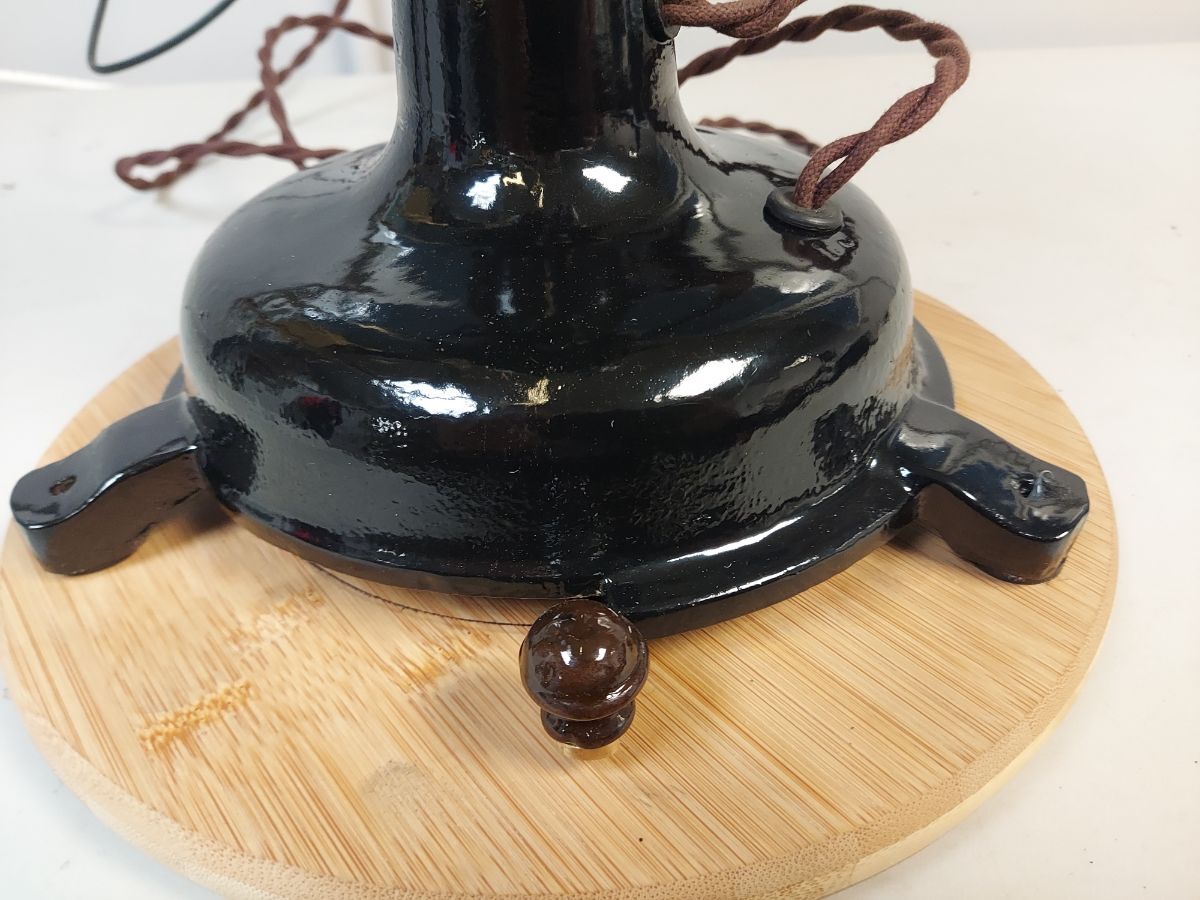
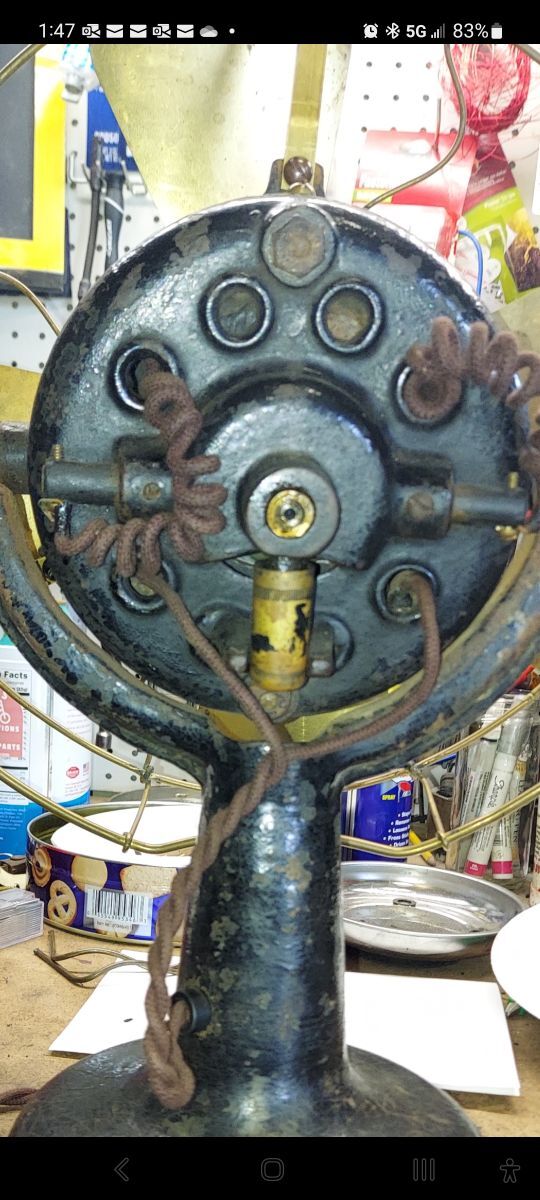
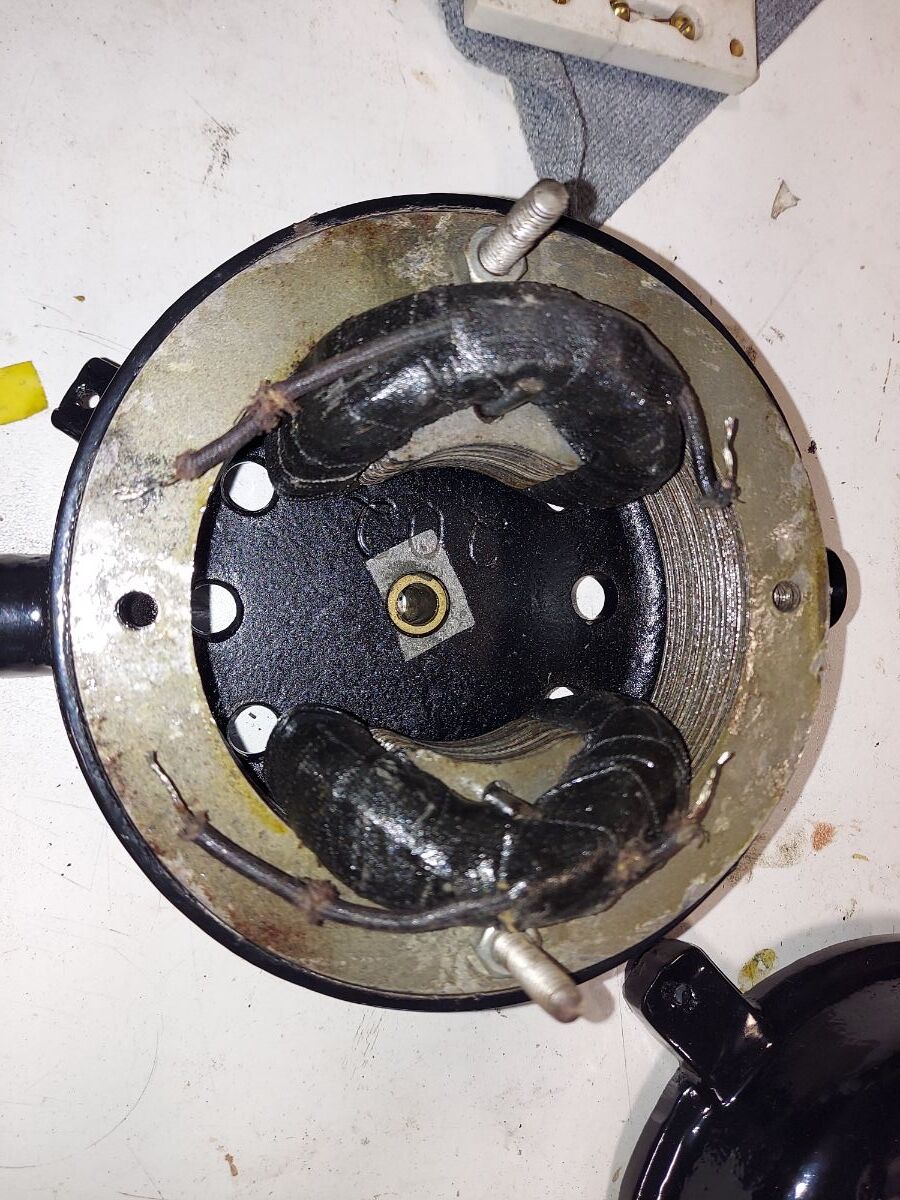
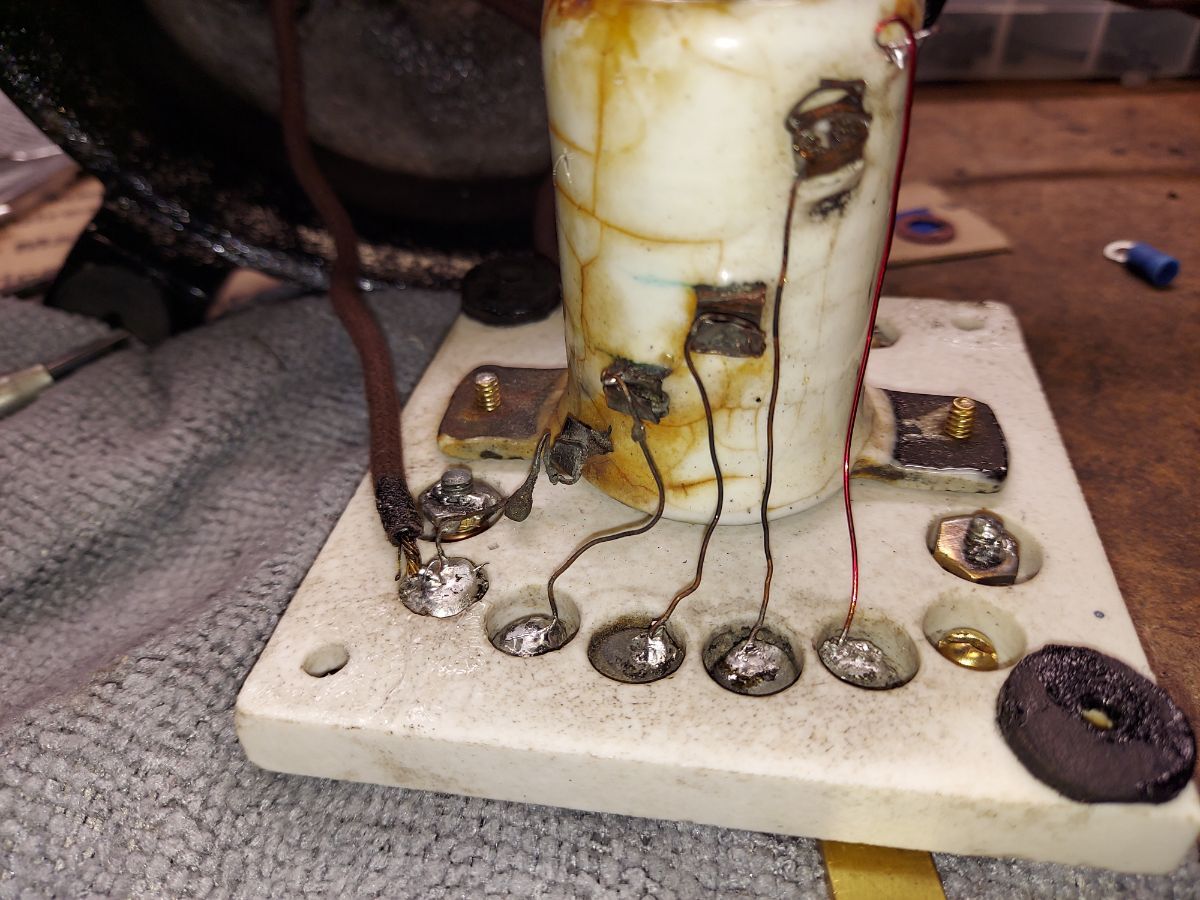
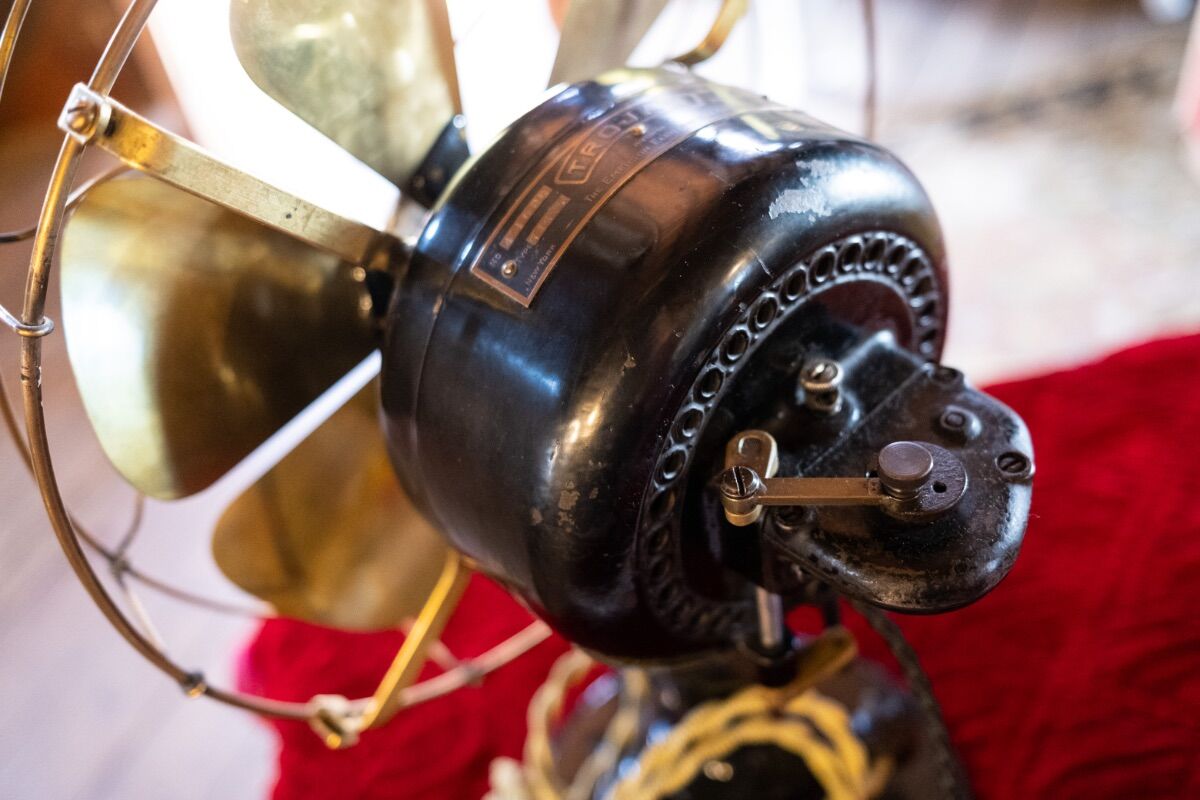
I bought this fan from Geoff at this past fan fair. It's stationary with a trunnion. BB/BC , struts are also brass, cast iron base and motor. Has a brushed motor 110vac. The commutator seems to have been rebuilt which is a plus. The patina was nice but I wanted to give it some bling. I powder coated it a jet black. The wire was in great shape so I reused it. I destroyed the brush holders by trying to remove them so I had Darryl Hudson made me a new pair of brush holders and brushes with springs. The motor starts right up, Runs nice and smooth in 3 distinct speeds. The switch plate has five contacts and all connected to the choke which is covered in ceramic. Seems to me it should be a 5 speed ? It was amazing that the ceramic switch plate was not broken because of no cover plate. Which is the original oiler? Doesn't this look like a five speed rather then a three speed? n
7 points


.thumb.jpg.a0490b4bb4e5a3465d626c5f2485bebe.jpg)